Basic Guide
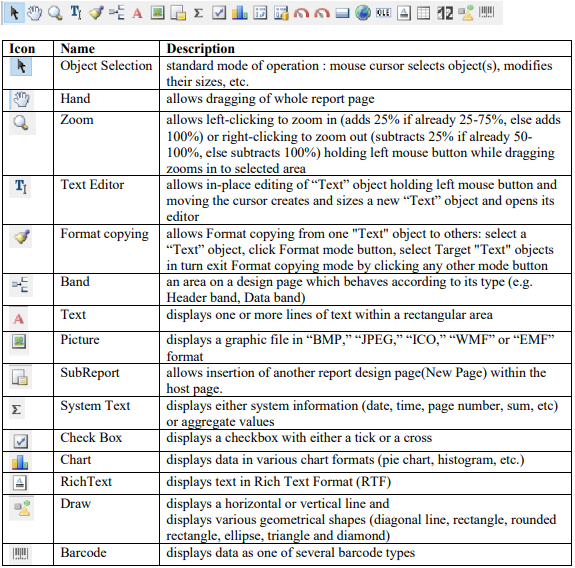
Understand on Toolbar
-
Report Object
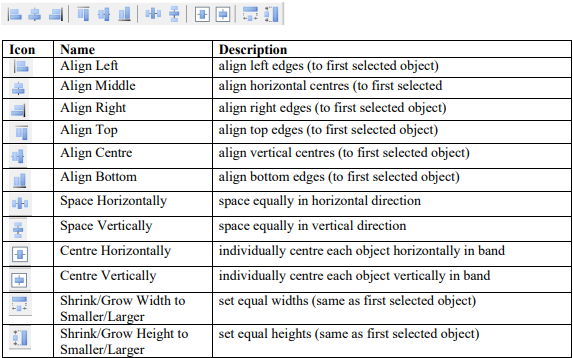
-
Align Toolbar
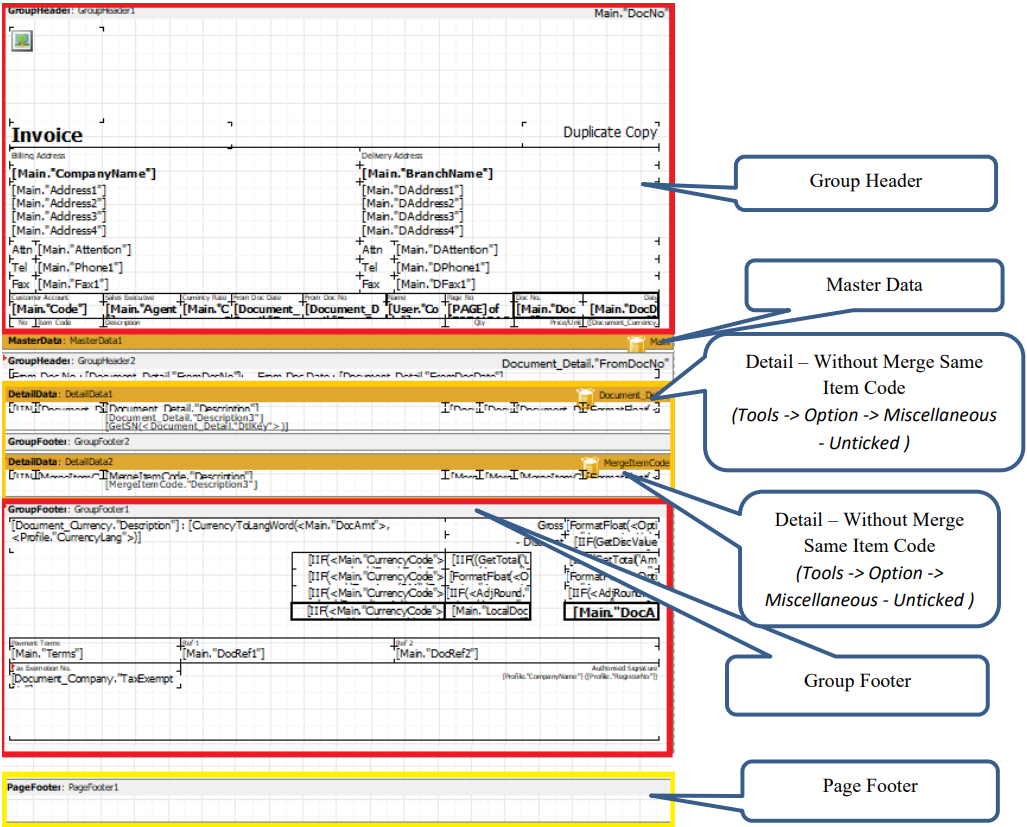
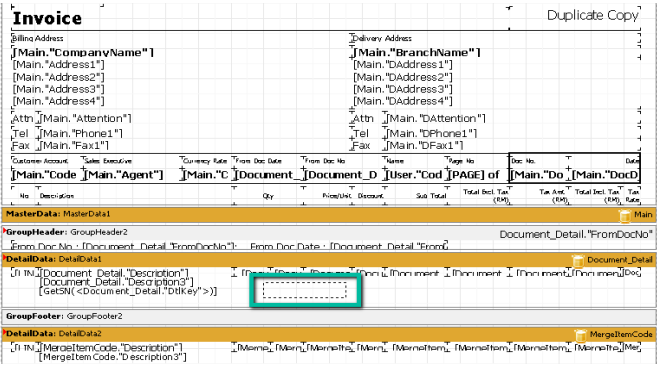
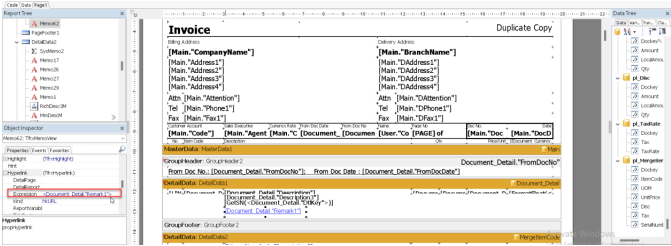
Sales Inovice Bands
-
Understand on Bands
-
Group Header
- Grouping Header
- To Print on every page, right click on Group Header Band, select reprint on new page
-
Master Data
- The Main Dataset of the report
- Normally Bind to Main Dataset
- Each Page allows to have 1 Main Dataset Only
-
Detail Data
- To display all Item Details
-
Group Footer
- Grouping Footer
- Display on Last Page only
-
Page Footer
- Display on Every Pages
-
-
Sample Layout in Design Mode
-
Sample Layout on Preview Mode

-
Print Position
-
Group Footer content will be printed at the pixel value input.
-
Higher Value = Higher Footer
-
without setting with print position, the group footer will be printed after the document detail records.
-
Example Source Code:
if Engine.FreeSpace < (GroupFooter1.Height + PageFooter1.Height + 30) then Engine.NewPage;

Engine.CurY := Engine.PageHeight - GroupFooter1.Height - PageFooter1.Height - **60** ;note60 -> Higher Value = Higher Footer
-
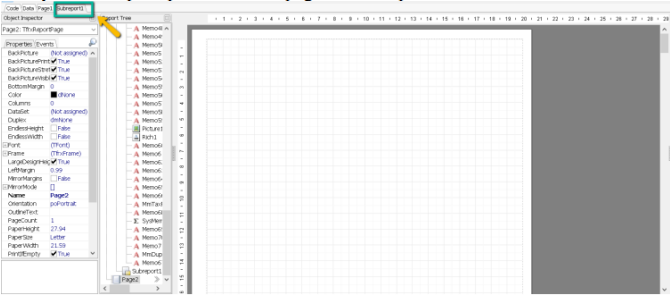
How to do the Print Position setting in Report?
-
Click on Group Footer -> Click on Properties -> Events Tab -> Double Click on OnbeforePrint event name
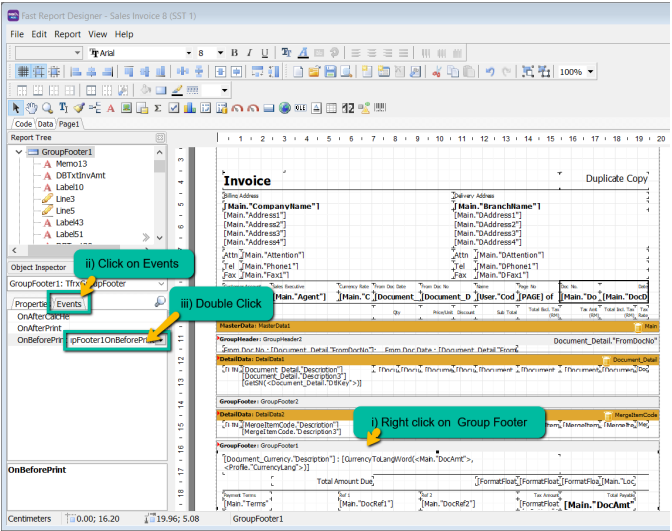
-
Adjust the value

-
-
-
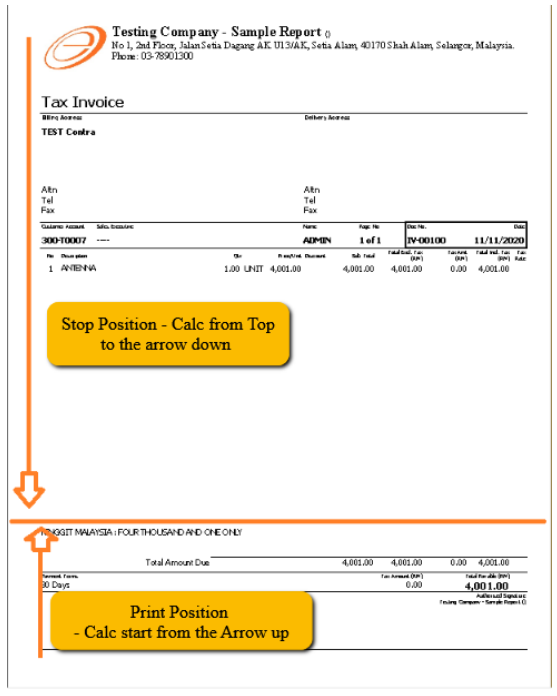
Stop Position vs Print Count
Stop Position Print Count Details will stop at the input value Details will stop by number of records inputs Recommend Not recommend if using More Description Value in Pixel Number of Records -
How to do the Stop Position in Report?
-
Right click DetailData1 -> Click on Events Tab -> Double click onAfterCalcHeight name
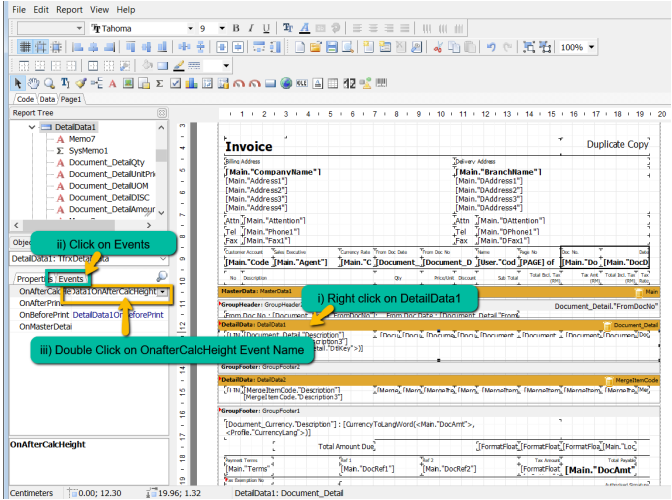
-
Setting the stop position
 SMALL TIPS
- Set Either Print Count or Stop Position
- use // to disable the command
- When you set both Print Count and Stop Position, system will capture Print Count.
-
Sample on Print Position / Stop Position
-
-
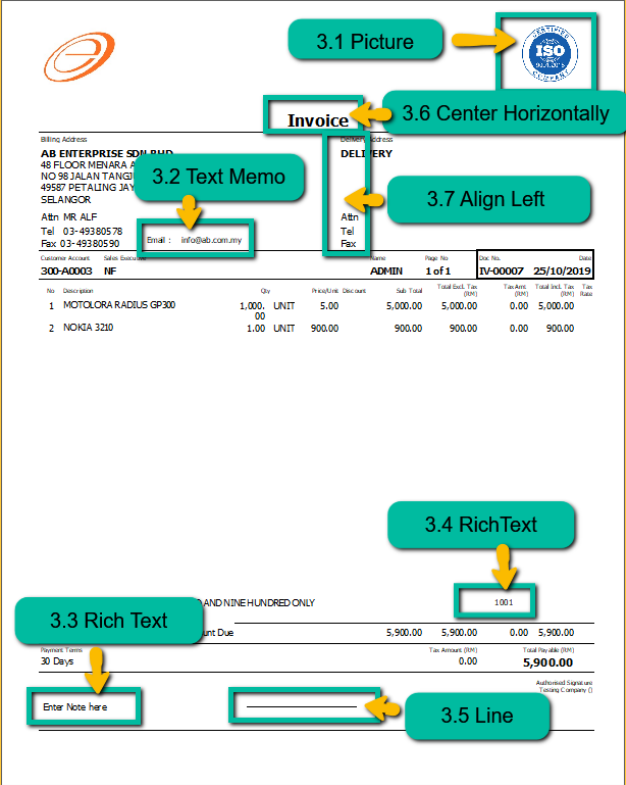
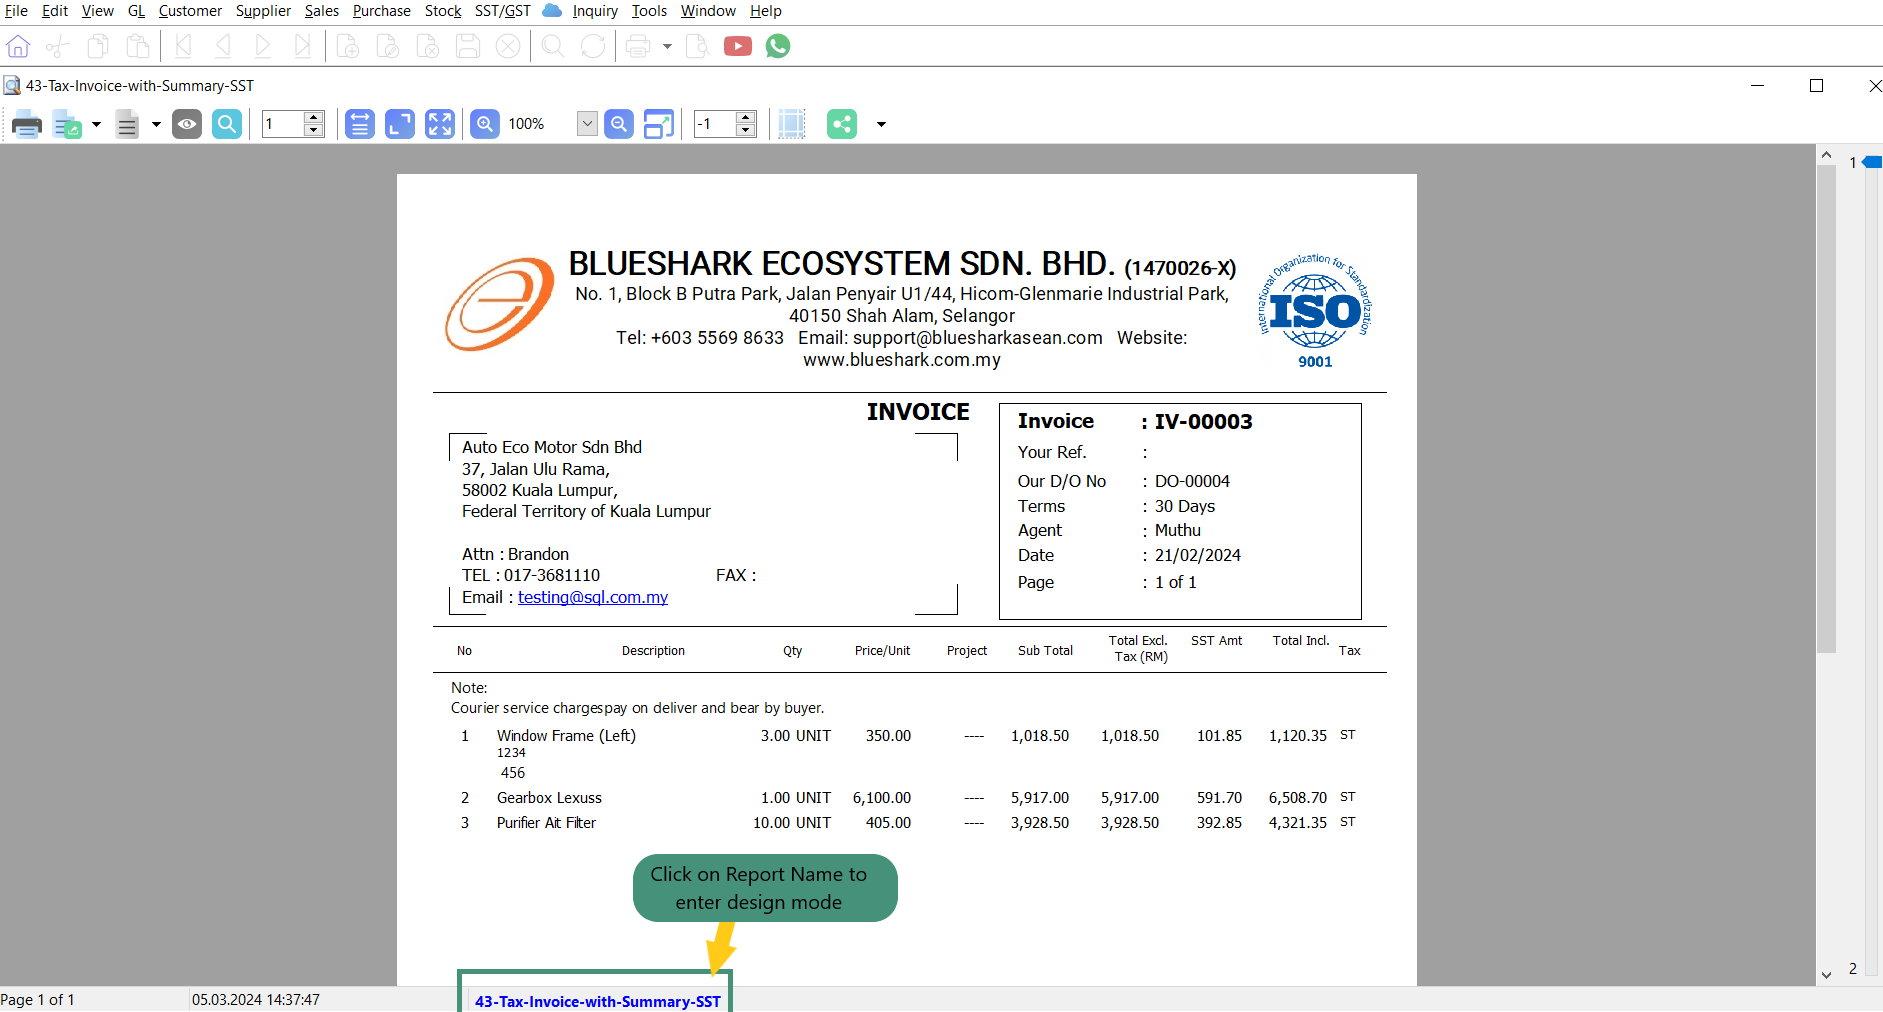
How to design Simple Sales Invoice?
- Preview Invoice
- Click on Report Name to enter to Design Mode
-
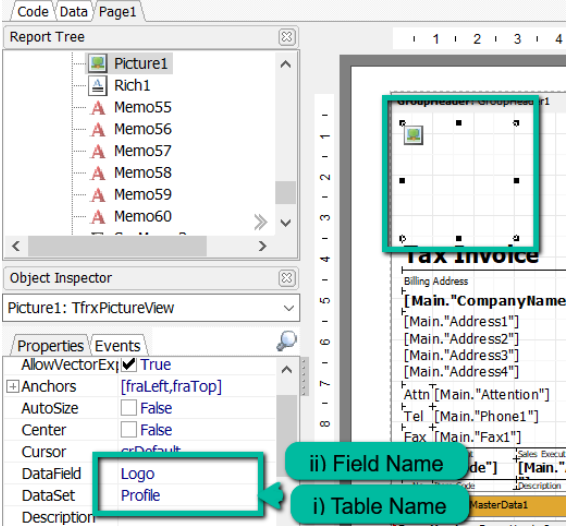
Add PICTURE
-
Click on Picture Object

-
Place on Report Page
-
Fix Picture
-
Click on Load
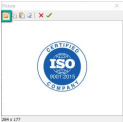
-
Select the Picture on your local drive
-
Click on


-
Adjust to the desire size
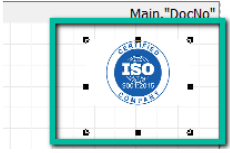
-
-
Capture Picture from Report Dataset
-
-
-
Text Memo
Add Customer Email Address
-
Click on Text Memo

-
Place on Report Page
-
Enter Text : Email
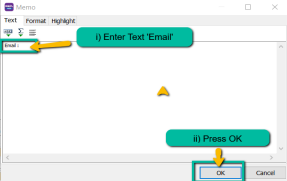
-
Repeat Step i & ii
-
Select Document_CompanyBranch -> Email Expression
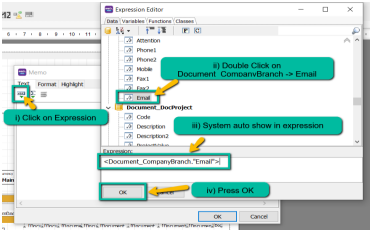
-
-
Rich Text Object
Add Note
-
Click on RichText Object

-
Place on Report Page
-
Select Main -> Note
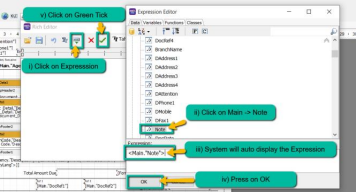
-
-
System Text
-
Add Sum Qty
-
Click on System Text Object

-
Place on the Report Page
-
Select Aggregate value
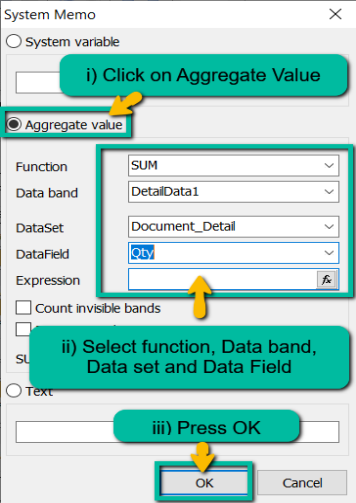
-
-
-
Draw Line
-
Click on Line

-
Place on the Report Page
-
Draw a line

-
-
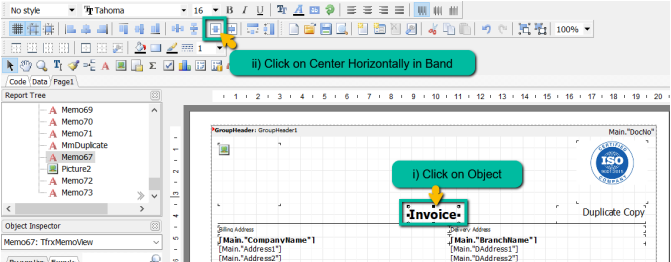
Center Horizontally in Band
-
Display the object in center horizontal
-
Click on Object you want to show in center horizontal
-
Click on Center Horizontally In Band
-
-
-
Align Left / Middle / Right
-
Click on the multiple Object to Align as same alignment. System will follow the first object as alignment

-
-
Save the File
-
File -> Save As -> Enter Report Name -> Save
-
Preview and see the result
Result:
-
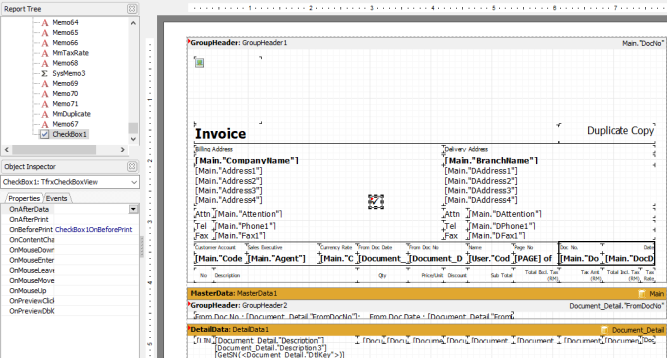
How to create the Subreport in Report?
-
Preview Invoice
-
Click on Report Name to enter to Design Mode
-
Click on Subreport Object

-
Place on Report Page you want to show.
-
-
System will prompt a new blank page for Subreport
-
Click on Insert Band to design the layout or insert the data
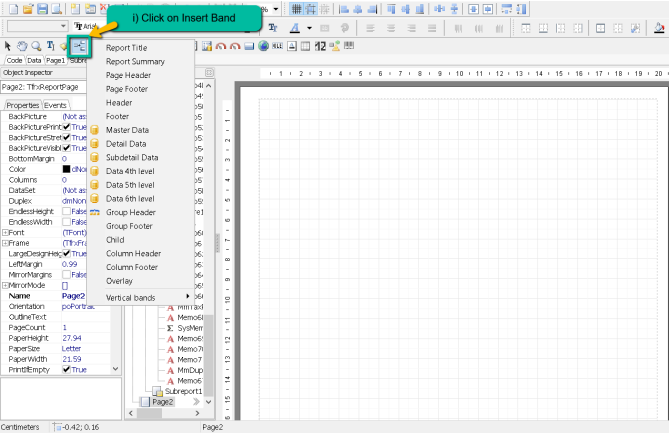
**May refer 2.1 Understand Bands at Page 4 on what band to use
-
Check Box
-
Simple CheckBox
-
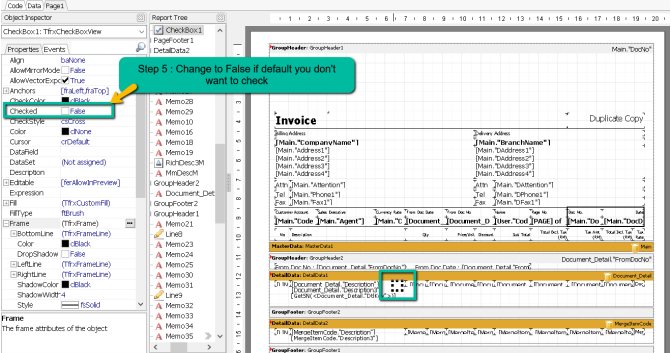
Click on CheckBox object
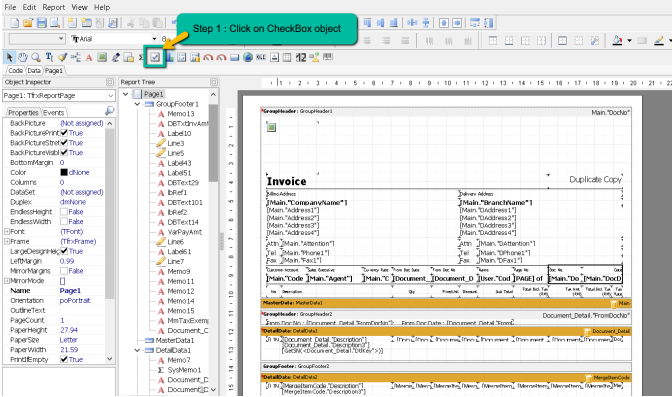
-
Place on the place you want to show.
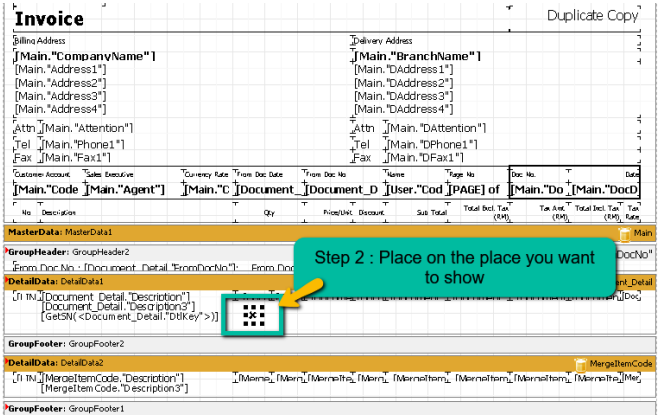
-
Press on the button
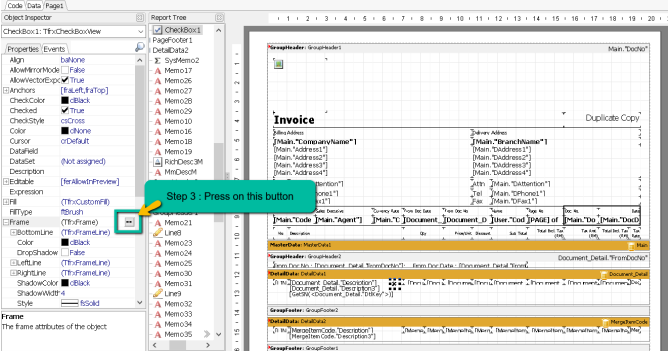
-
Select the frame design
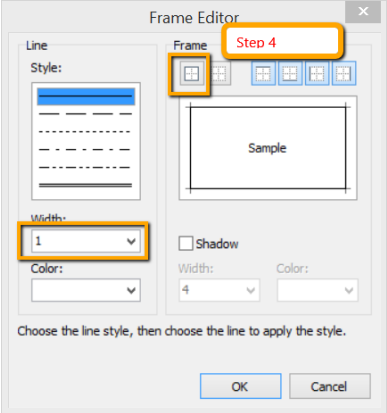
-
Change to False
-
Save the File
- File -> Save As -> Enter Report Name -> Save
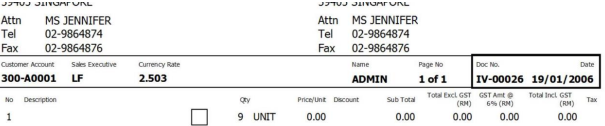
- Preview and see the result
Result :
-
-
Query to show Check Box either True to False
-
Click on CheckBox | Double Click OnBeforePrint
-
Place a Query below
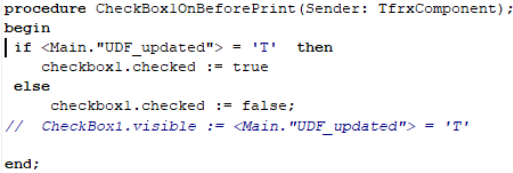
Query:
procedure Check/box1OnBeforePRint(Sender: TfrxComponent);
begin
    if (Main."UDF_updated") = 'T' then
        checkbox1.checked := true
    else
        checkbox1.checked := false;
end;
-
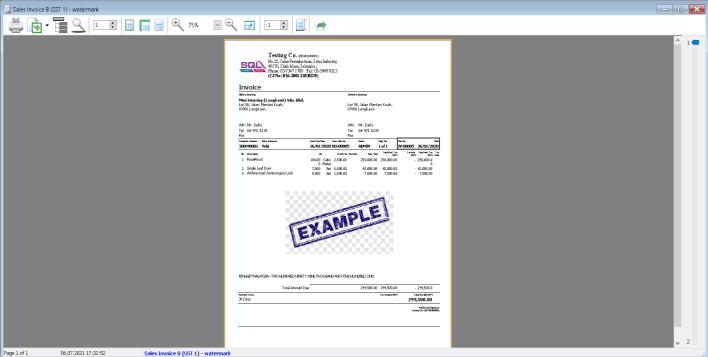
How to do Report Watermark?
-
Insert Band | Select Overlay
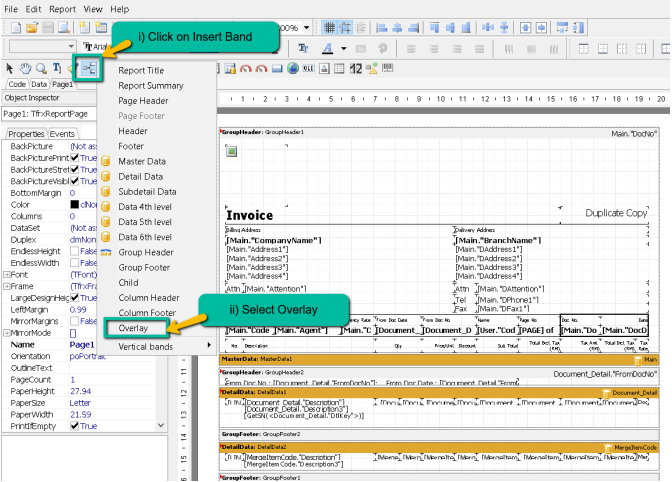
-
Insert Picture / Text to load in the water mark
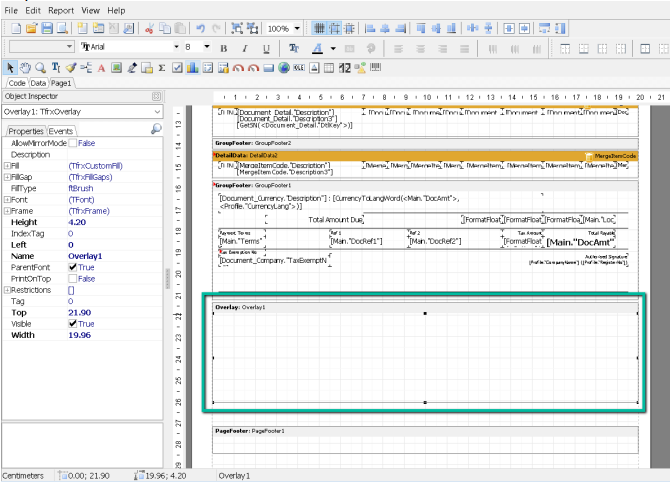
-
Overlay size can drag the same size as A4/Letter, and place the watermark on the position you want to show.

-
File | Save As: Enter report name
-
Preview and see the Result :
Frequently Ask Question (FAQ)
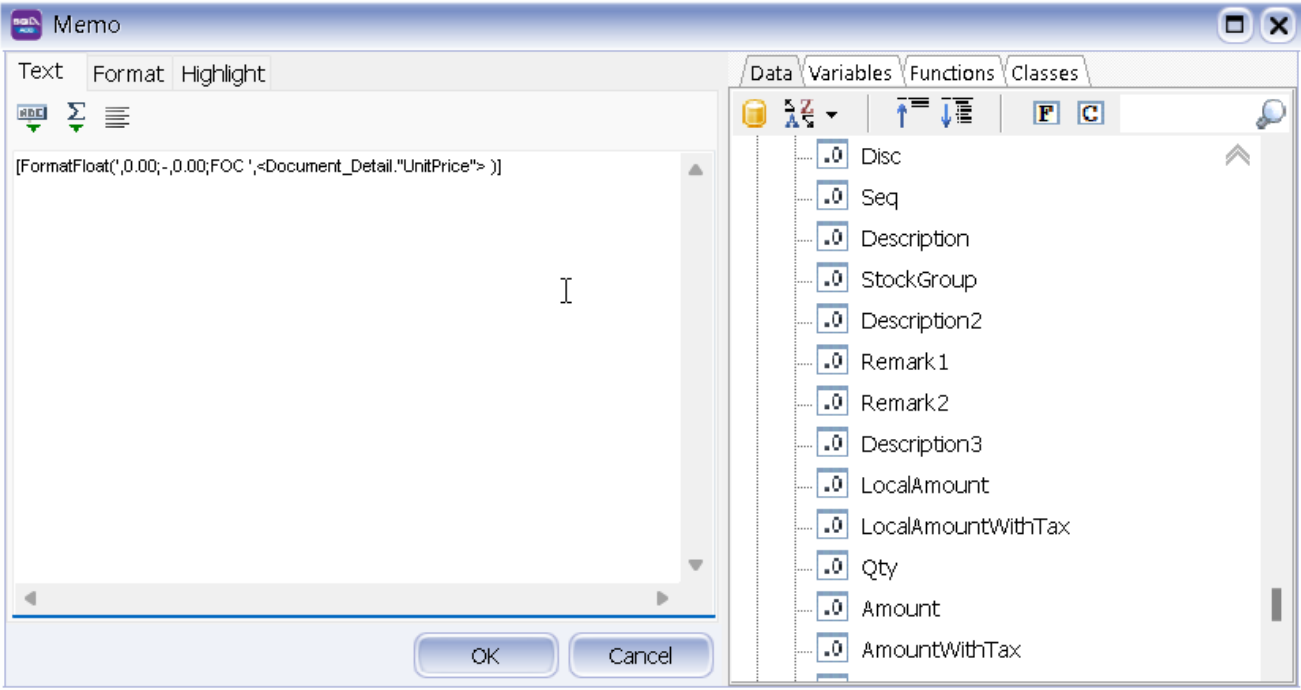
1. Unit price is 0, display as FOC
In Memo, enter following syntax :
[FormatFloat(',0.00;-,0.00;FOC ',<Document_Detail."UnitPrice">)]
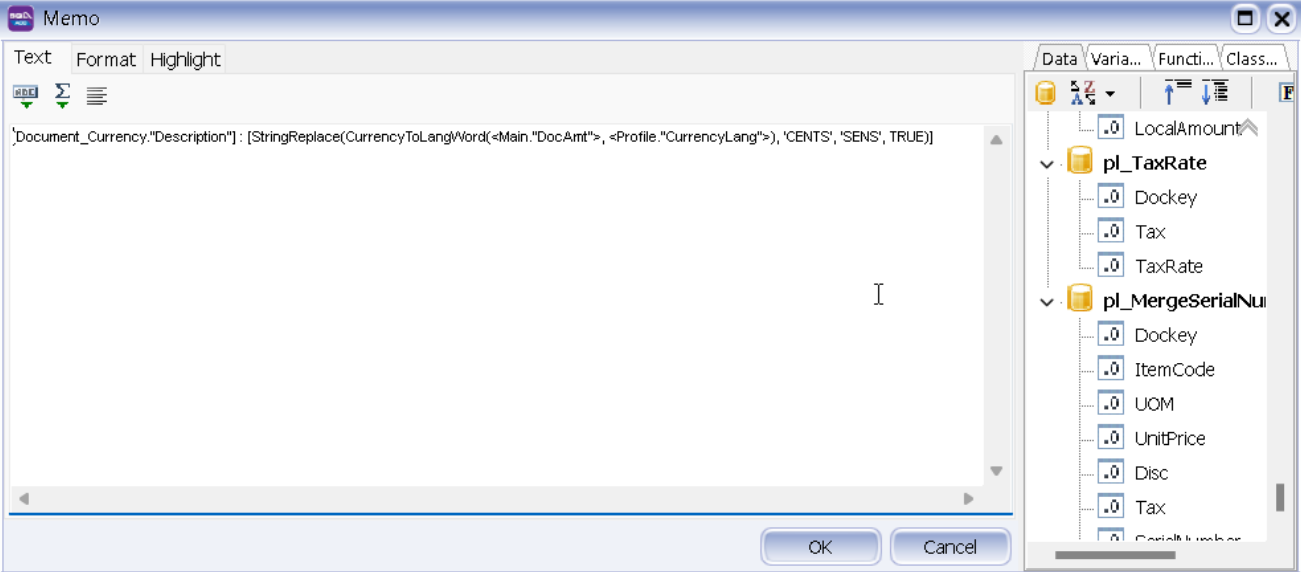
2. Document Currency Description change Cents to Sens
Syntax:
[Document_Currency."Description"] : [StringReplace(CurrencyToLangWord(<Main."DocAmt">,<Profile."CurrencyLang">), 'CENTS', 'SENS', TRUE)]
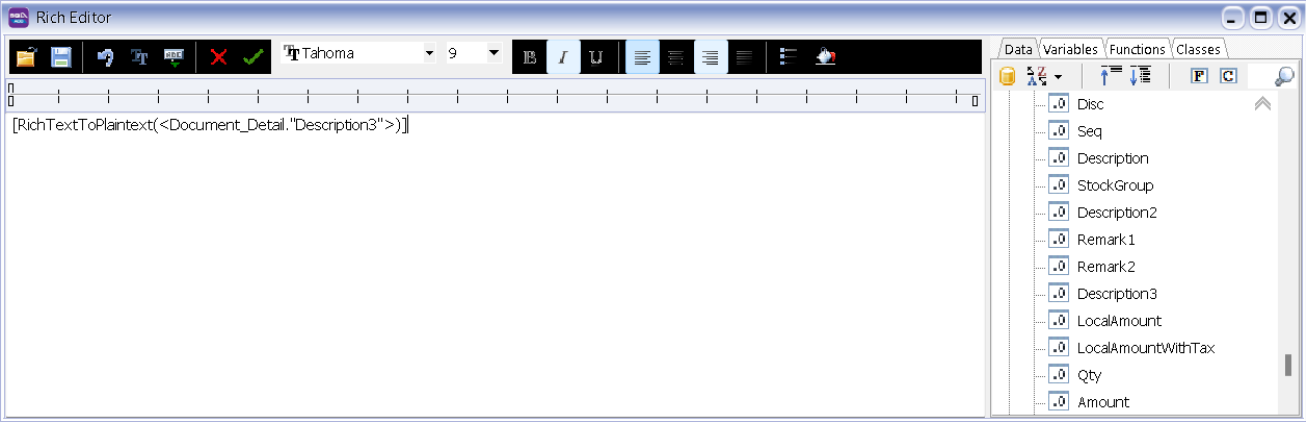
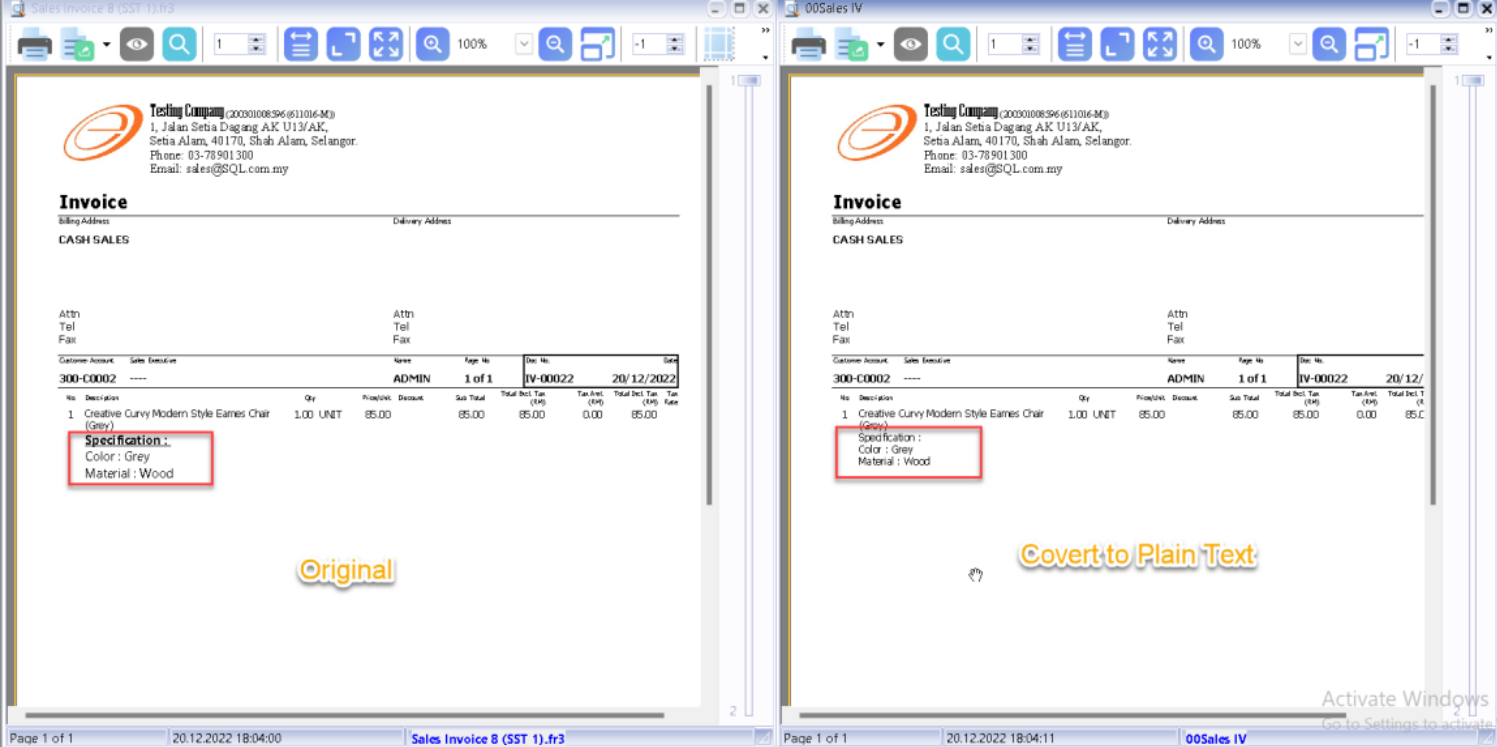
3. More Description convert RichTextToPlainText
Syntax :
[RichTextToPlaintext(<Document_Detail."Description3">)]
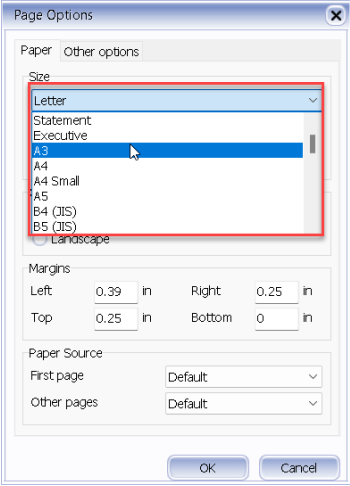
4. How to change report paper size?
File -> Page Setting ->
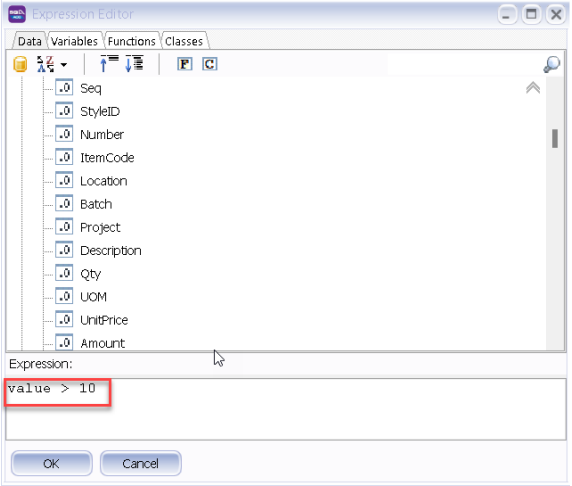
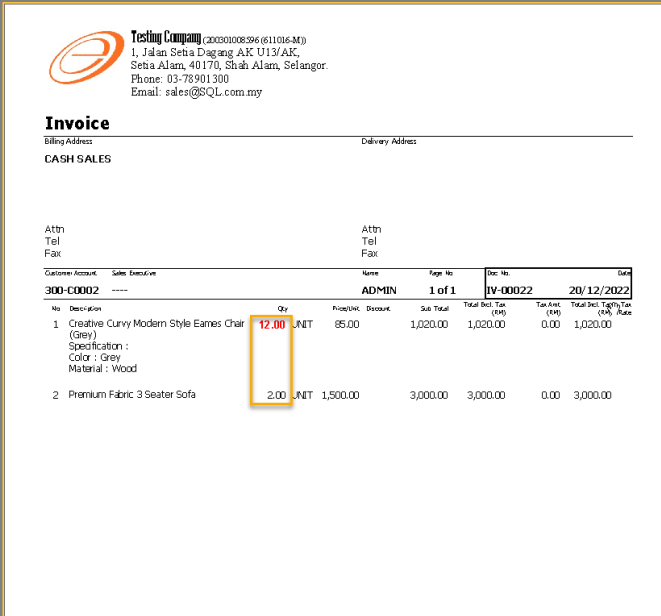
5. if Qty > 10, text color in red and in bold?
-
Double Click on Memo
-
Click on Highlight Tab
-
Click on Add Button
-
Expression value > 10
-
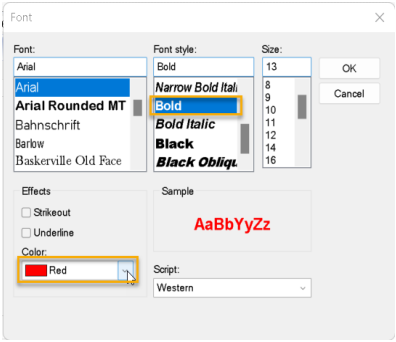
Click on Font
Can set for Font Type, Font Style, Size, Color or Effects
-
Press OK
-
Right Click on Memo, Ticked Allow Expression
Result :
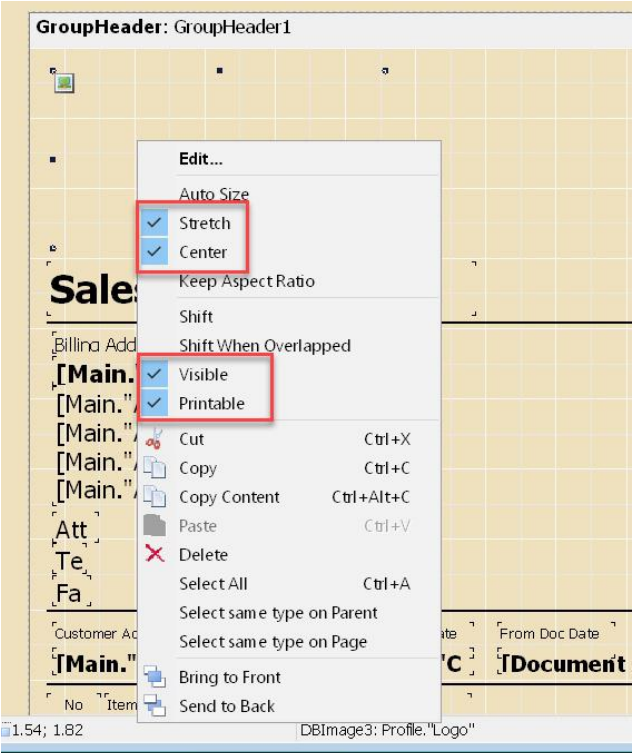
6. Why in Report I have placed at the position I want, but when preview it will show at bottom?
Right click on Memo, unticked Shift and Unticked Shift when Overlapped
7. Export to PDF Logo is blur
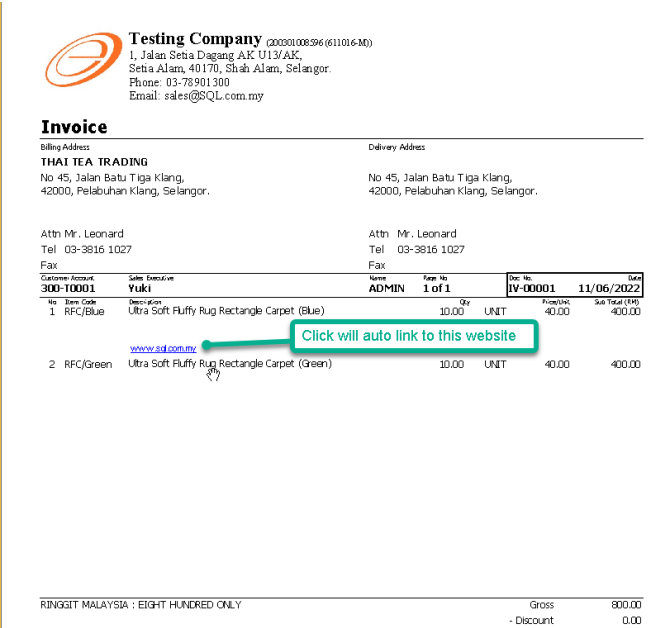
8. How to capture remark1 as url path?
In Memo properties :
Hyperlink Expression added in the Data Field Name
Result :
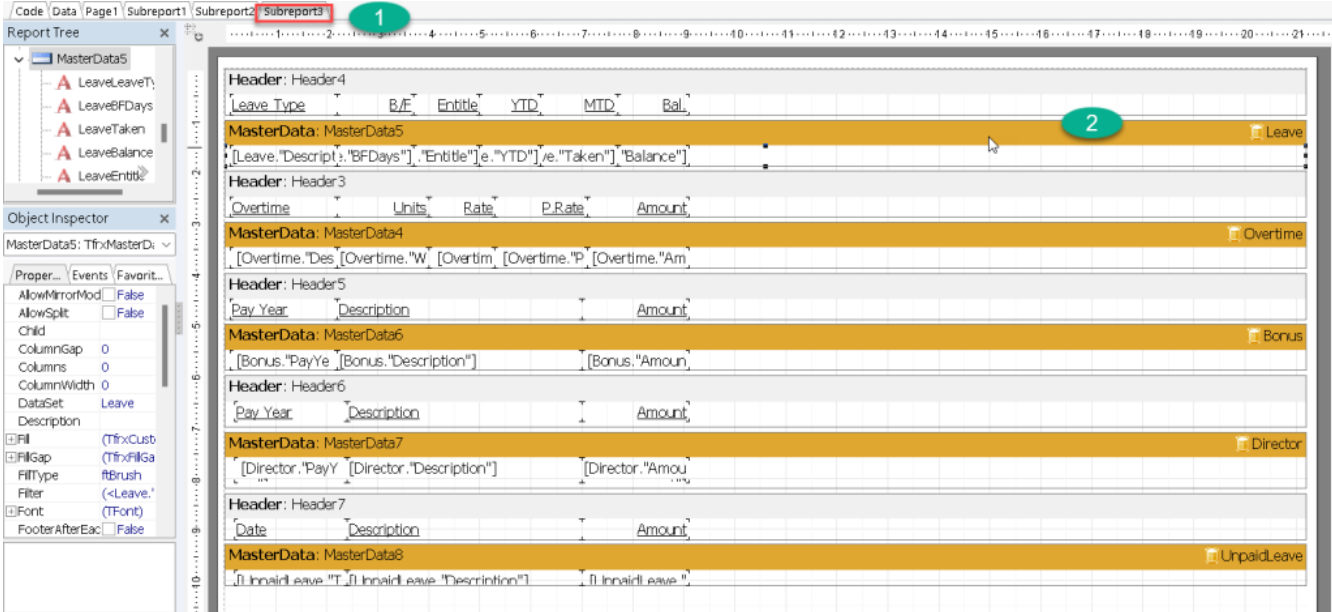
9. Payslip to show AL or MC Only
-
Click on SubReport3
-
Right click on Leave MasterData Band
-
Click on Filter button
-
Enter the expression :
(<Leave."LeaveType"> ='AL') OR (<Leave."LeaveType"> ='MC') -
Press OK
-
Press OK

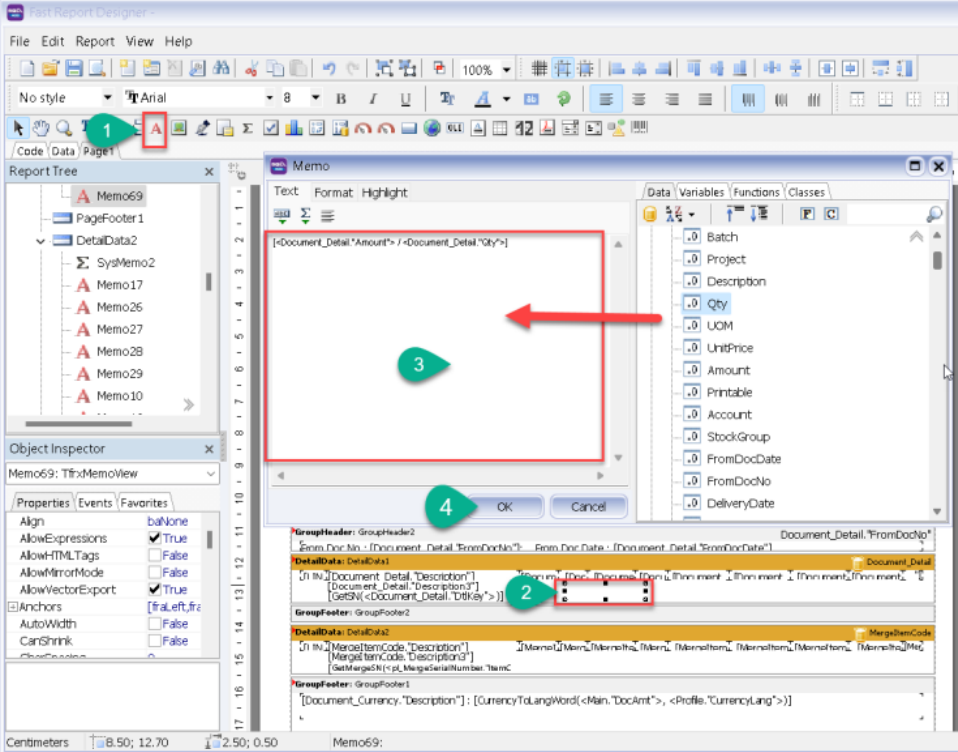
10. How to get Net Unit Price
-
Click on Memo Text
-
Place on Document Detail Band
-
Drag data field from right to left box :
[<Document_Detail."Amount"> / <Document_Detail."Qty">] -
Press OK
-
Adjust the position
-
Preview and see the result
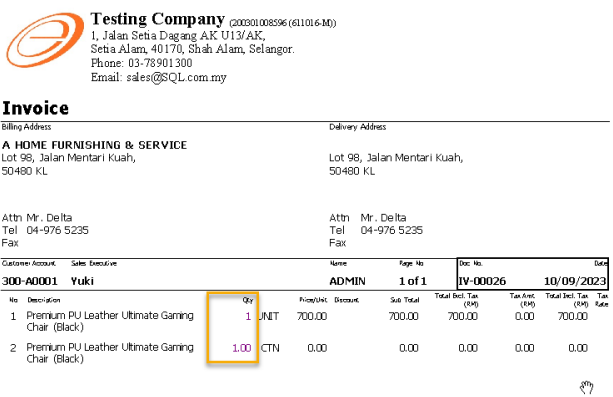
11. UOM = UNIT, Qty display without Decimal Point, else with 2 Decimal Point
-
Click On Memo Text
-
Copy the below syntax and Paste into Memo:
[IIF(<Document_Detail."UOM"> = 'UNIT'>,
FormatFloat('#,0;-#,0 ', <Document_Detail."Qty">) ,
FormatFloat('#,0.00;-#,0.00 ', <Document_Detail."Qty">))]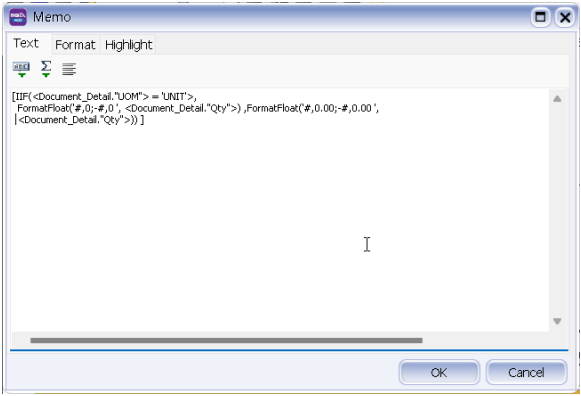
-
Press OK
-
Result After Preview :
12. How to Get Supplier Bank in Payment Voucher?
-
Click on Memo

-
Paste this syntax inside Memo
[<GetbankName(pl_SUPPLIERBANKACC."Bank">)]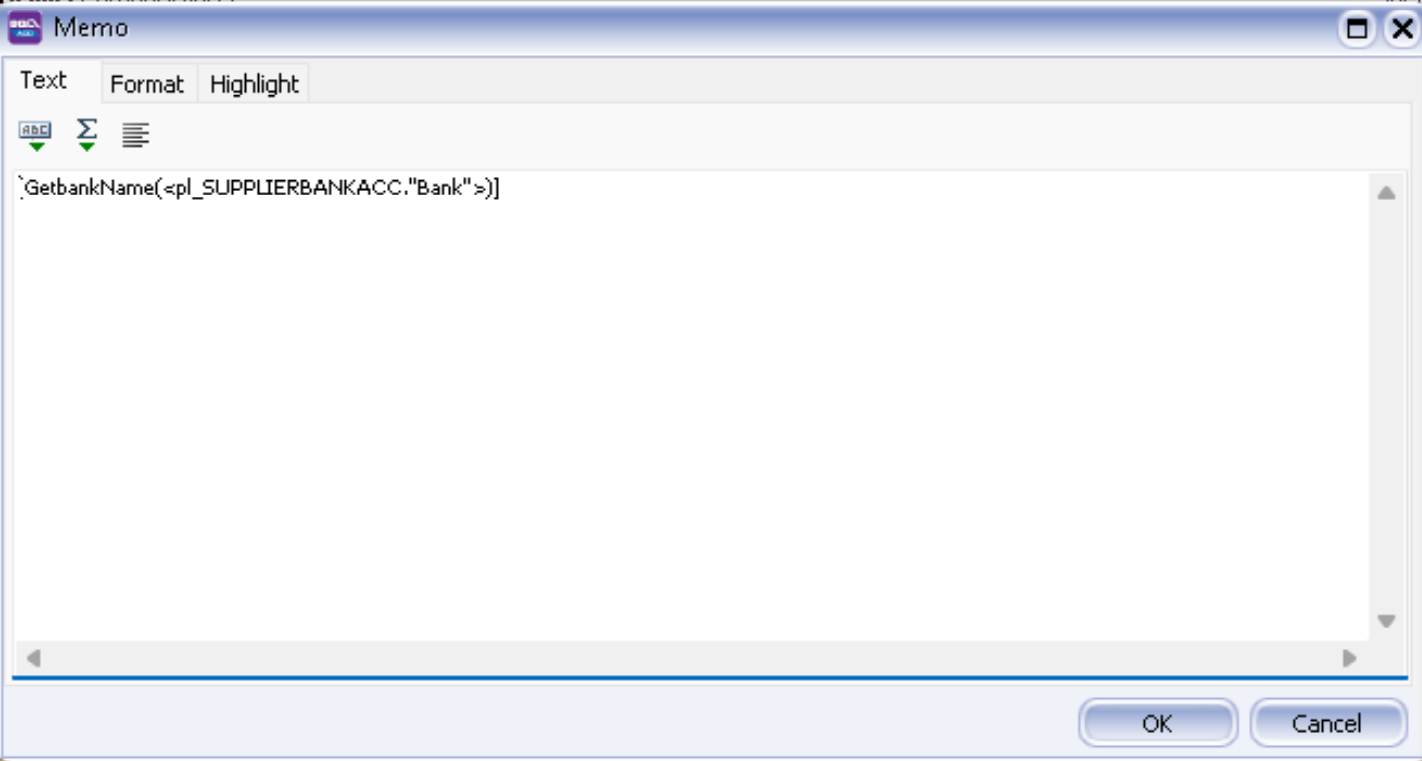
13. How to change the Amount in Word to First Character to Upper Case only?
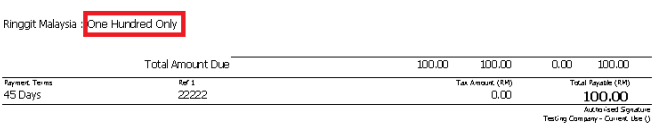
Can use function NameCase
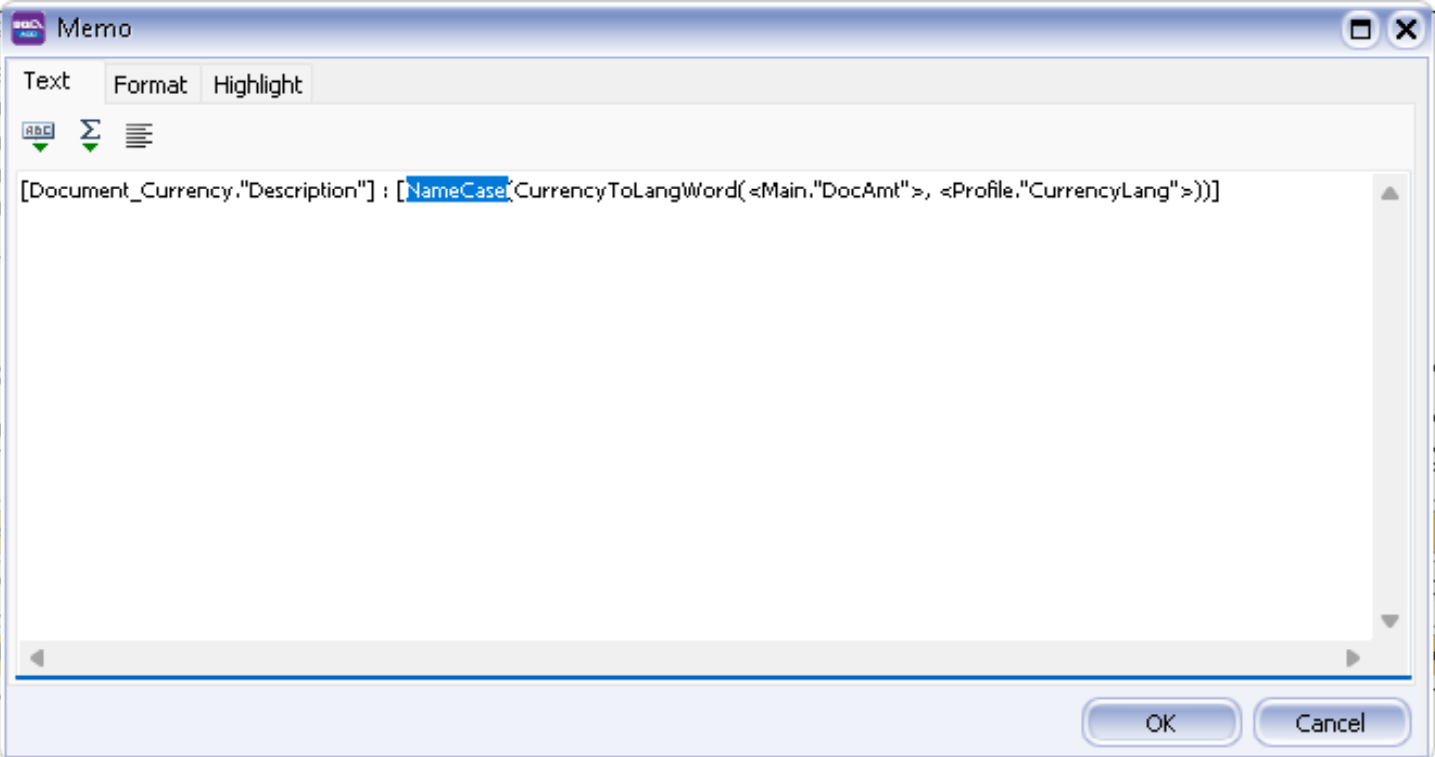
Before :
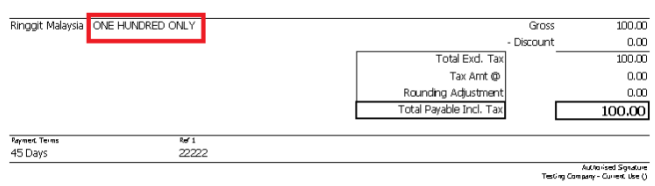
After :