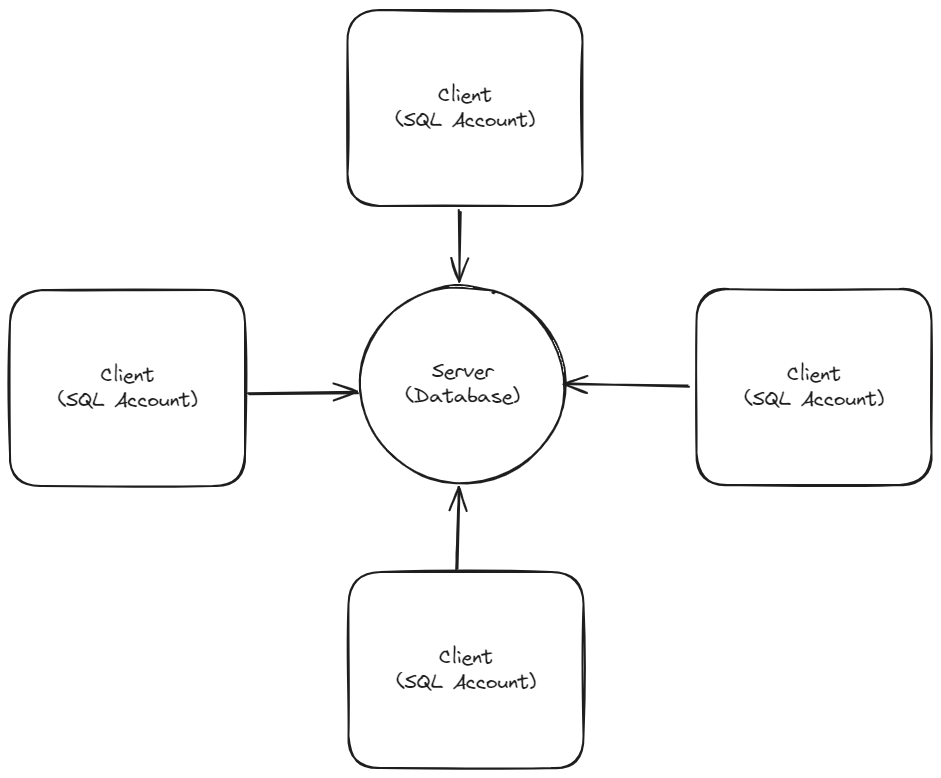
Multi User Setup
For a multi-user scenario, a separated database server is recommended. It will serve as the main database for multiple users to access concurrently.
Database Server Setup
Firebird Installation
-
Visit download page to download
Firebird. -
If Window System Type is 64 Bits, please download
Firebird 3.0.x64 bit (x64)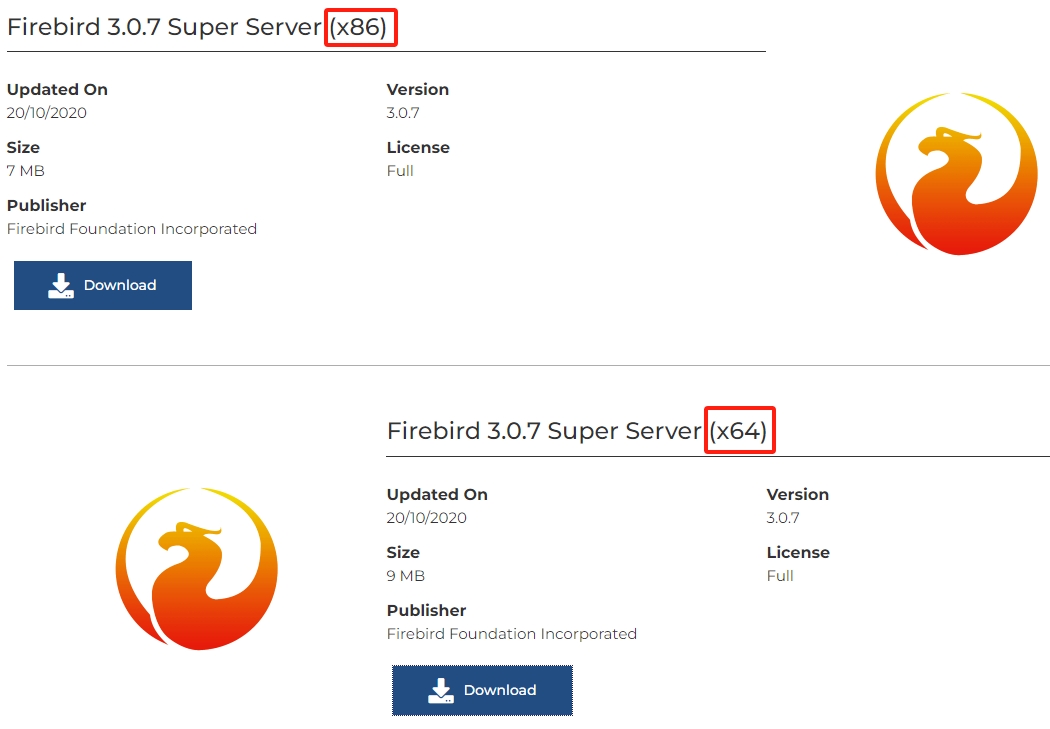
-
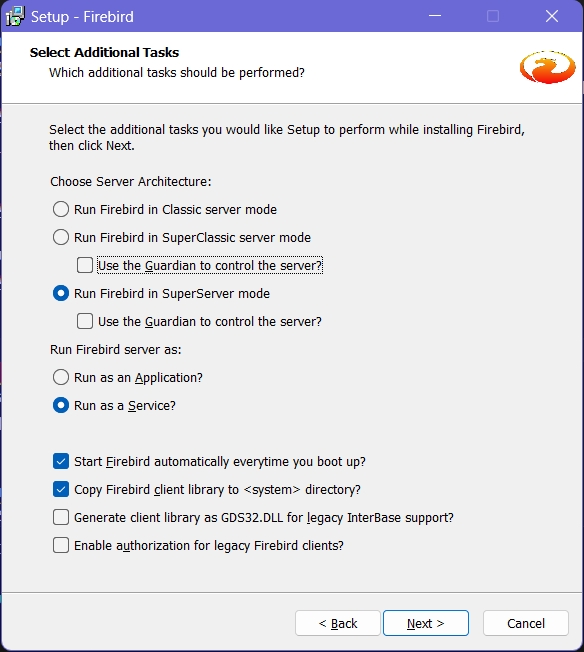
After downloading the Firebird executable, run it. Press OK to open the Terms and Conditions interface, check I accept the agreement, and click Next. Continue clicking Next until you reach the screen shown below. Ensure that the Run Firebird in SuperServer Mode option is selected, and that all other options are deselected.
-
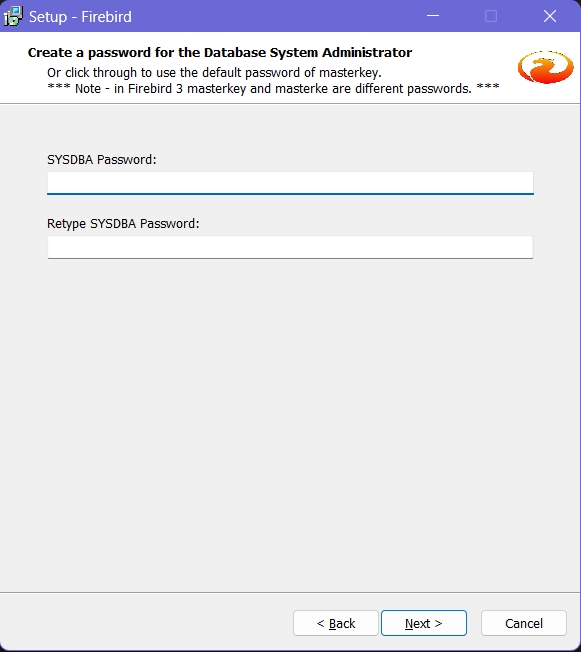
Leave it blank to use default password, and click Next.
-
Continue with the setup until you reach the screen with a button Finish. Click on the button to complete.
Network Setup
-
Window Firewall
- In windows, search for Control Panel, open it. Next, navigate to Window Firewall > Advanced Settings > Inbound Rules, select New Rules.
- Among the options, select Port. Click Next.
- Select TCP, for the Specific Local Port, fill in 3050. Click Next continuosly until you reach the screen to give it a name.
- Name it Firebird and click Finish.
-
Network and Sharing Center
- In windows, search for Control Panel, run it. Navigate to Network and Sharing Center > Change Advanced Sharing Settings.
- Configure each settings as follows:
Settings Action Network Discovery Switch on File and Printer Sharing Switch on to allow others on the network to access shared files and printers on this device Public Folder Sharing Switch on to allow others on the network to read write files in Public folders File Sharing Connection Use 128-bit encryption for devices that support it for enhanced security Password Protected Sharing Switch off -
Share the SQL Account or Payroll Folder
- Search explorer in windows, run it. Go to your share folder (e.g.
C:\eStream\SQLAccounting\ShareorC:\eStream\SQL Payroll\Share), right click on it and select Properties. It has a few tabs, navigate to Sharing > Advanced Sharing. Tick Share this Folder, click on Permissions and select Full Control. Press OK to close the Permission dialog box. - Next, navigate to the Security tab, click on Advanced. In the advanced window, click on Change Permissions follow by the Add Button. In the empty box enter, type Everyone and press OK. Besides, tick Allow Full Control and press OK to close the window.
- Search explorer in windows, run it. Go to your share folder (e.g.
-
Install SQL Account or Payroll
- After downloading the executable, double click on it to run.
- Follow on the dialog, adjust according to your environment.
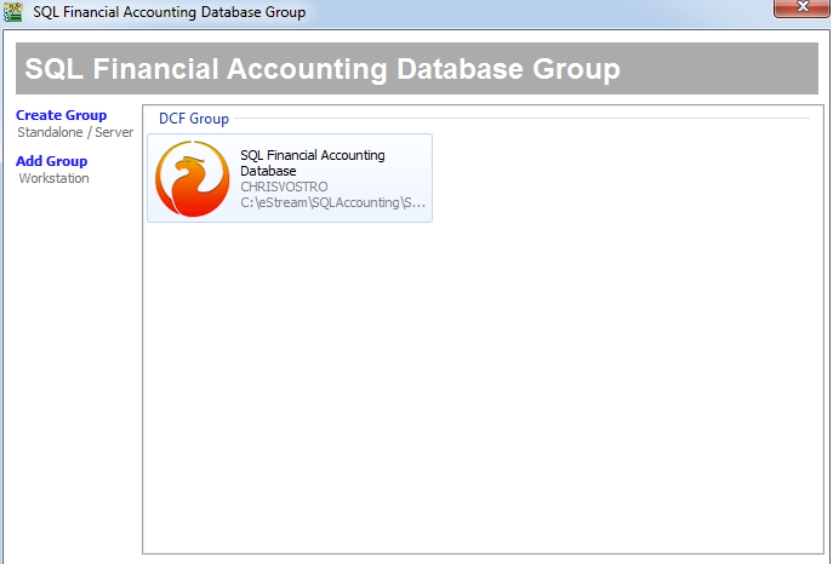
- After finish installed, open the application. Click on Create Group > DCF Group. Give it a name and save.
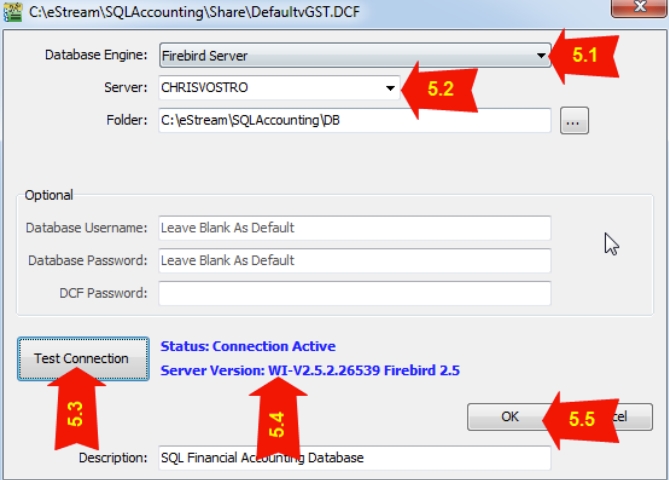
- Next, configure the Database Engine to be Firebird Server and click Test Connection, if you see a blue color message, it means the setup succeed.
- Scan through the rest of settings. After confirmed click OK.
Client PC Setup
-
In client pc, we will also need to install the application. Repeat the installation steps and execute it after installed.
-
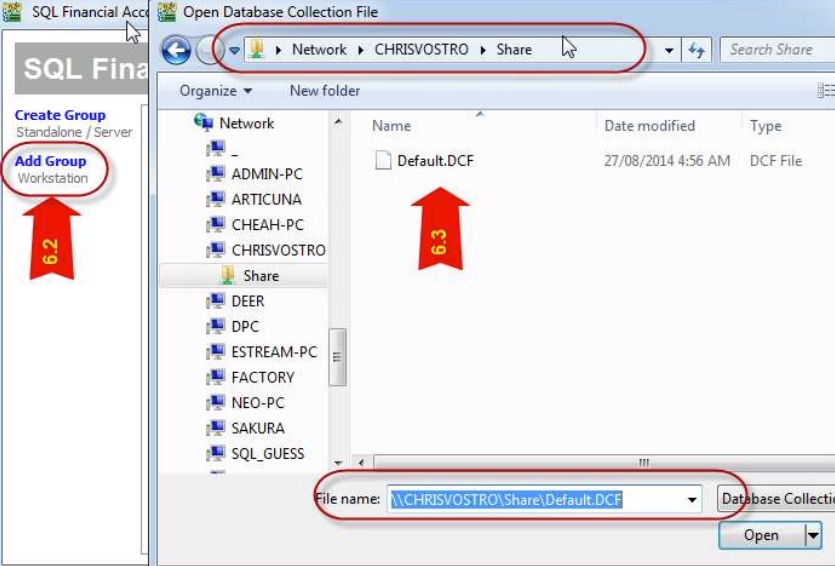
Click on Add Group > DCF File.
-
Select the DCF file from the public share folder created in previous step.
-
Click on firebird icon and login as usual.