E Leave
Introduction
E Leave is a feature in SQL HRMS which greatly simplifies the process of managing employees leave applications
E Leave is utilizing email as the channel for notifying managers/employees. In order to make it work, there are some simple setup need to be done. If you have a custom company email address, you can create additional user for E Leave and configure following the steps below. Whereby for users who doesn't have a custom company email address, you can utilize Google Email (Gmail) or Microsoft Outlook in the setup, they are free. 🤩
Generate App Password
Skip to Setup if you are using custom company email address. This guide is applicable to Google Email (Gmail) and Microsoft Outlook only.
Google Email (Gmail)
-
Visit Google account and login into your gmail
-
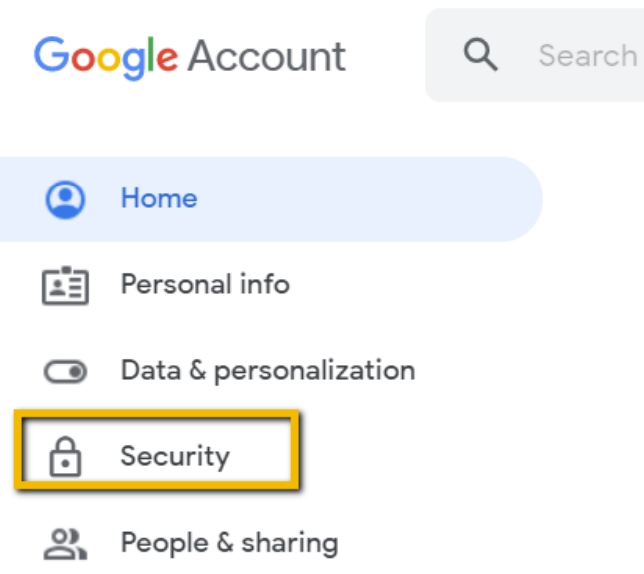
From the sidebar, click on Security tab
-
Turn on 2-Step Verification (Skip this step if you have turned it on)
-
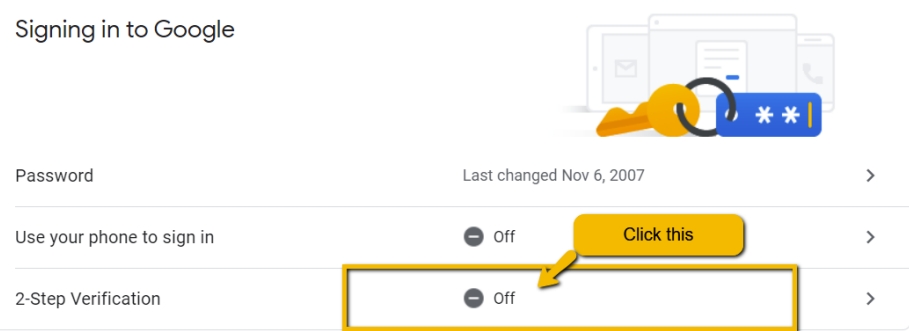
Click on 2-Step verification
-
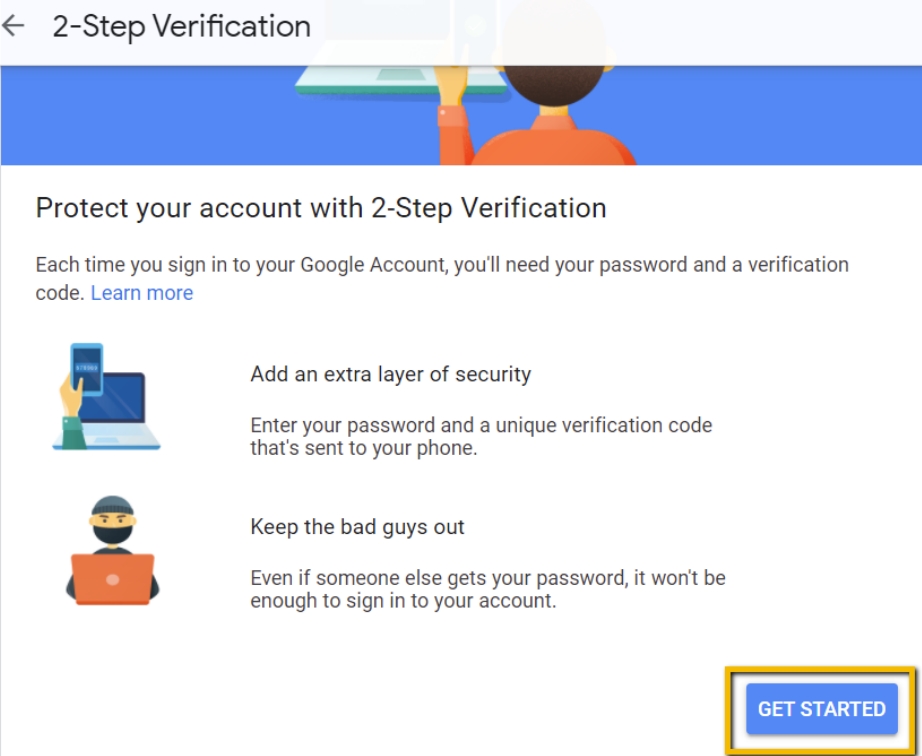
Press on GET STARTED
-
Enter your Gmail Password
-
Press Continue
-
Press Sent
-
Enter Gmail code
-
-
After enabling 2-Step Verification, we will be able to generate the App Password
warningIf you don't see this option, it might be due to the following issues:
- 2-Step Verification is not set up for your account
- 2-Step Verification is only set up for security keys
- Your account is through work, school, or other organization
- You turned on Advanced Protection
-
Click on App Passwords section
-
Enter your gmail password to continue
-
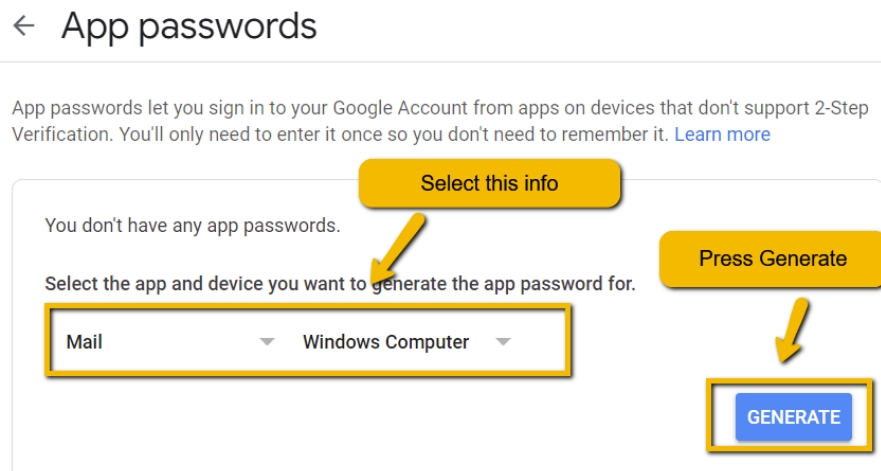
Next, Select Mail as the app and Windows Computer as the device. Click Generate to create an app password
-
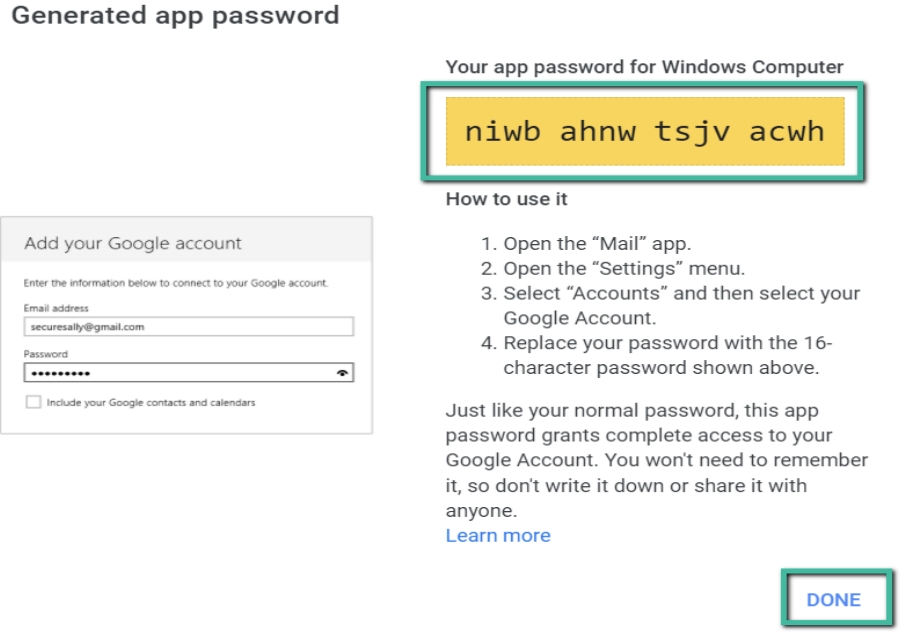
Copy and note down the App password, you will need to fill it in the password field following the Setup guide
Microsoft Outlook
-
Visit Microsoft account and login into your email
-
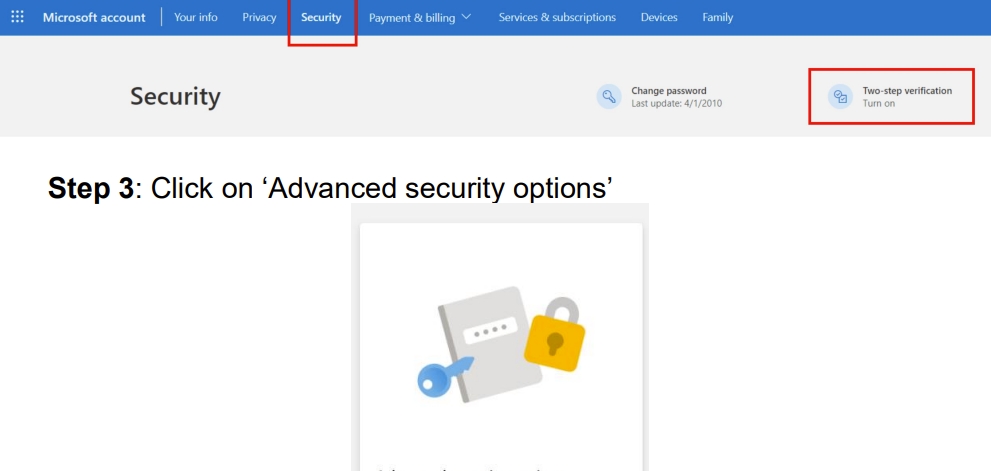
Navigate to Security tab, and enable Two-step verification
-
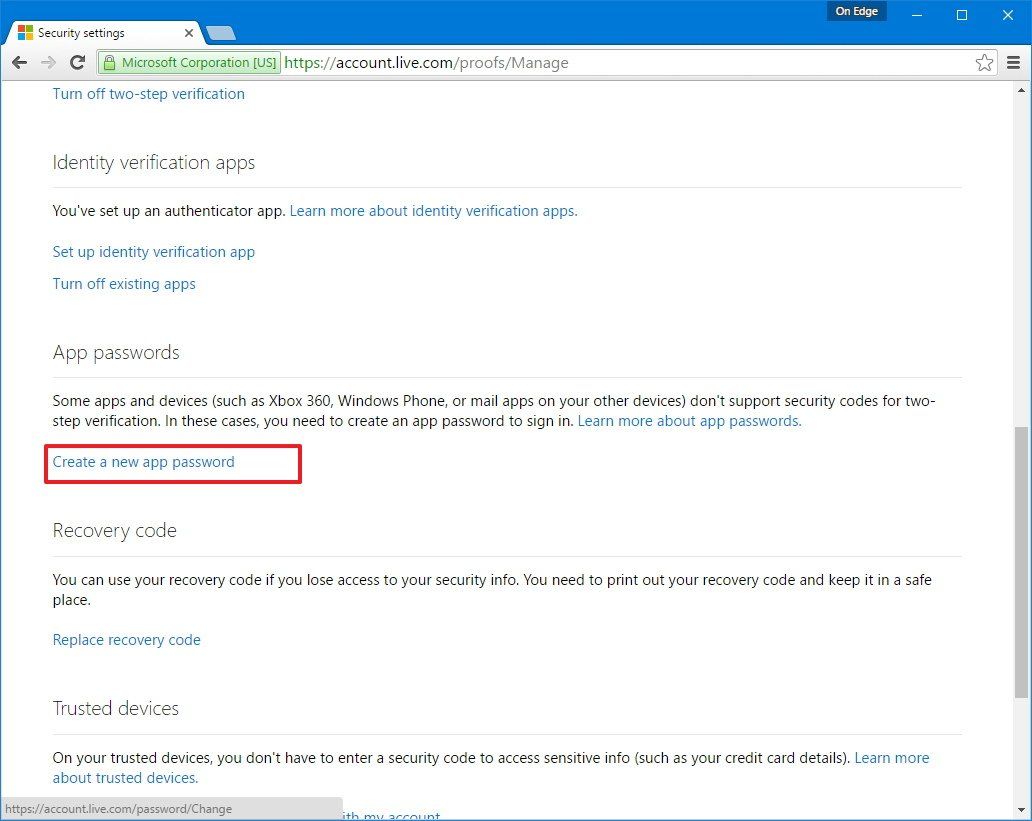
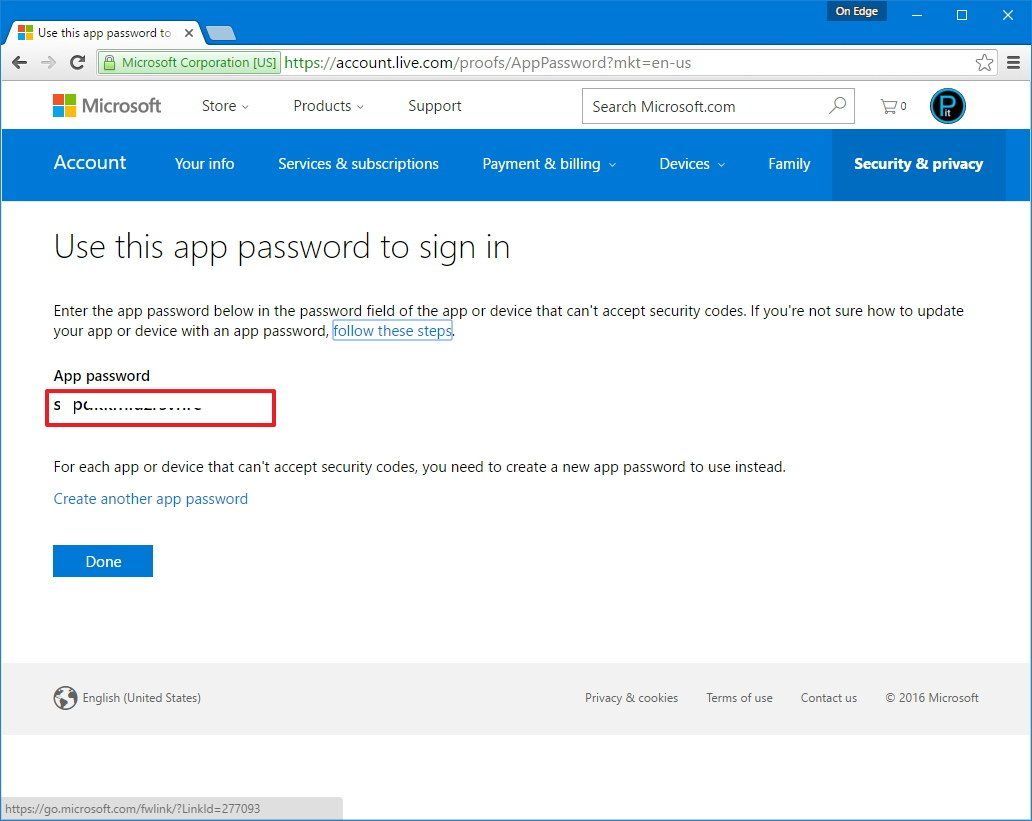
Next, find the App passwords section, and click "Create a new app password"
-
Copy and note down the App password, you will need to fill it in the password field following the Setup guide
Setup
-
In SQL Payroll, go to File > Company Profile
-
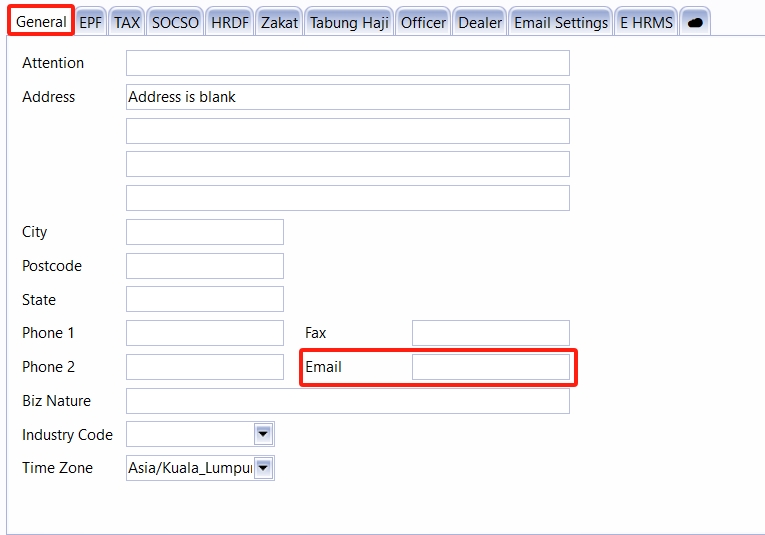
Under the General tab, enter the company email (this will be the recipient email in the E Leave notification)
-
Next, navigate to the Email Settings tab, fill in the details
-
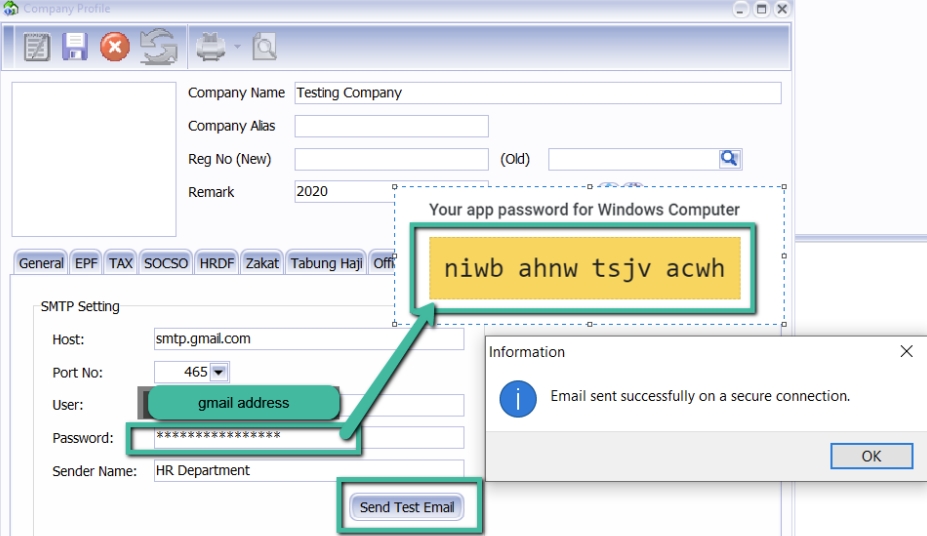
Click Send Test Email to test the functionaliy of the config and save
Fields Description Google Email (Gmail) Microsoft Outlook Custom SMTP Host Email SMTP Host smtp.gmail.comsmtp.office365.comuser defined host Port Email SMTP Port 587 587 user defined port User User email which used in generating the app password OR custom user created gmail microsoft email custom user Password The 16-character app password OR custom user password - - custom user password Sender Name Name of the email sender for notification - - - 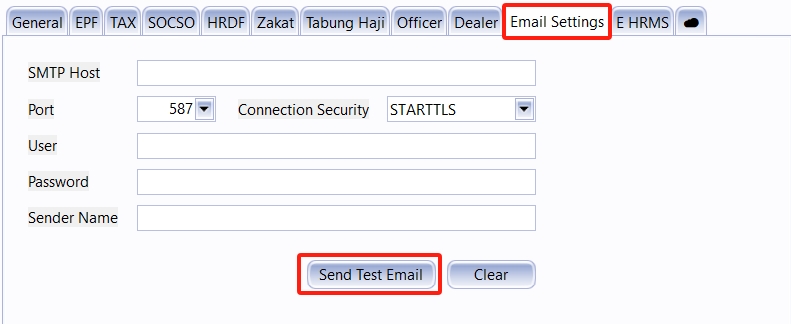 tip
tipUpon successful, the email address configured in the User field should receive an email
-
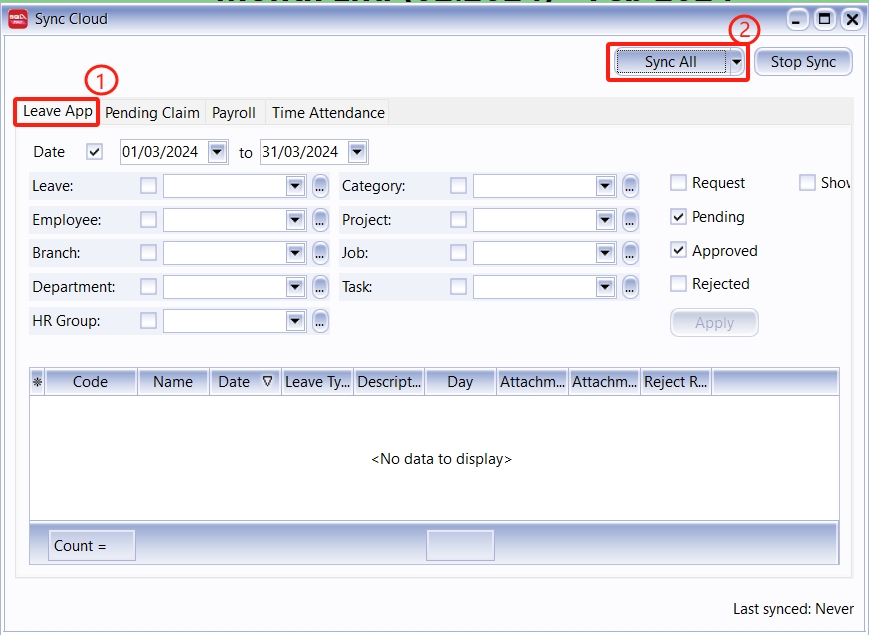
To preserve the settings, navigate to Cloud ☁️ Icon on the menu bar > Sync Cloud...
-
Under the tabview, select the Leave App tab and click on the Sync Now button
 info
infoRepeat step 5 and 6 for every changes to the configuration, this is to ensure configuration are synchronized to cloud
Sync EA or Payslip to E Leave
-
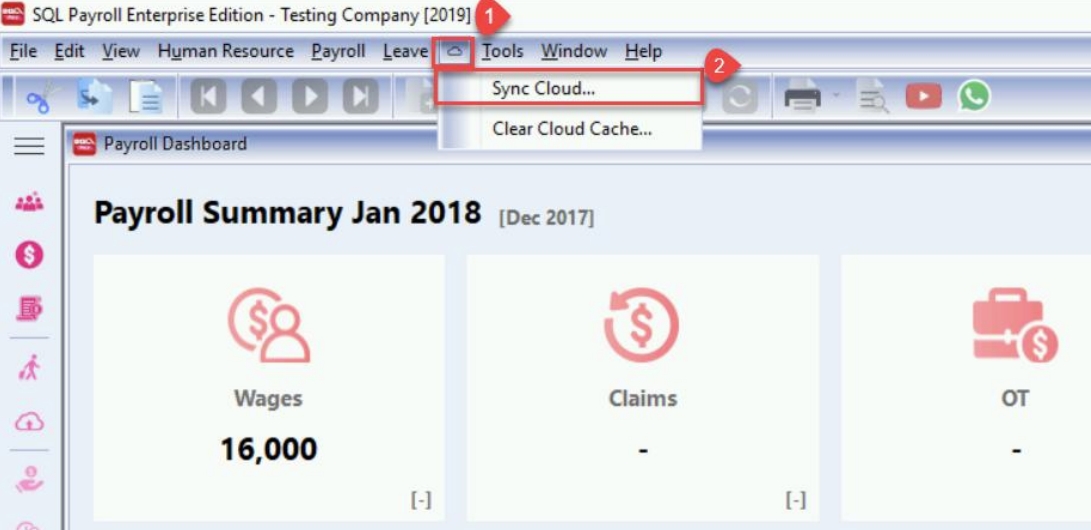
Navigate to Cloud ☁️ Icon > Sync Cloud
-
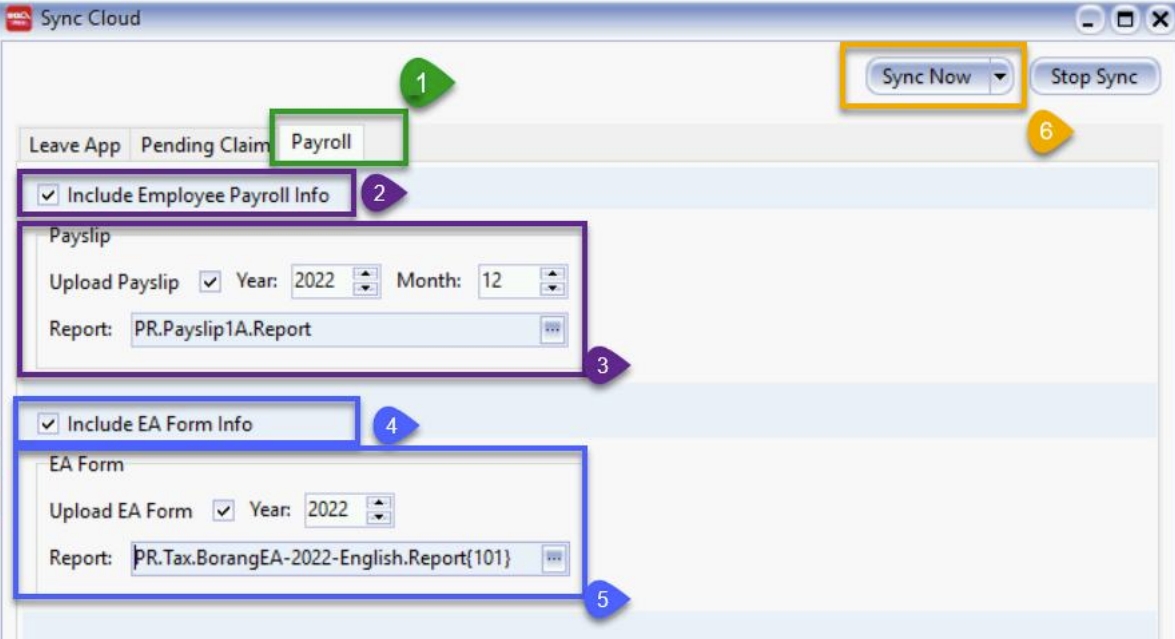
From the tabbed view, select Payroll
-
Tick Include Employee Payroll Info
-
Tick Upload Payslip and specify the year and month of payslip
-
Choose the report format for Payslip
-
Tick Include EA Form Info
-
Tick Upload EA Form and specify the year
-
Choose the report format for EA Form
-
Lastly, click on the Sync Now button
-
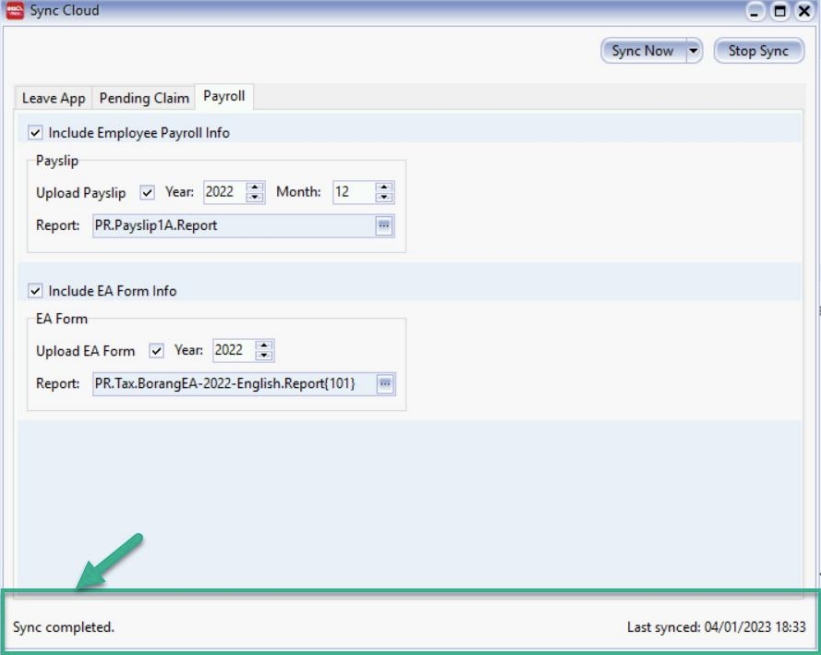
Wait until the status bar (located at the bottom) show as Sync completed.
-
That's all! You can now login into SQL HRMS to see the documents
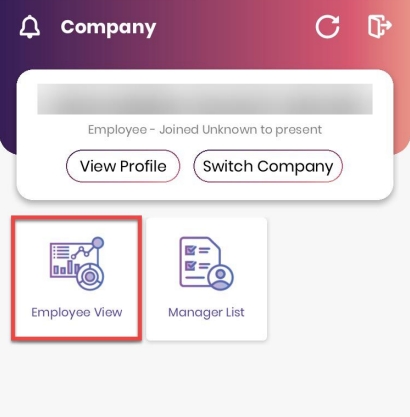
View Payslip from SQL HRMS
-
First, go to Employee View
-
Click View Payslip, you will be able to view your payslip info for the month
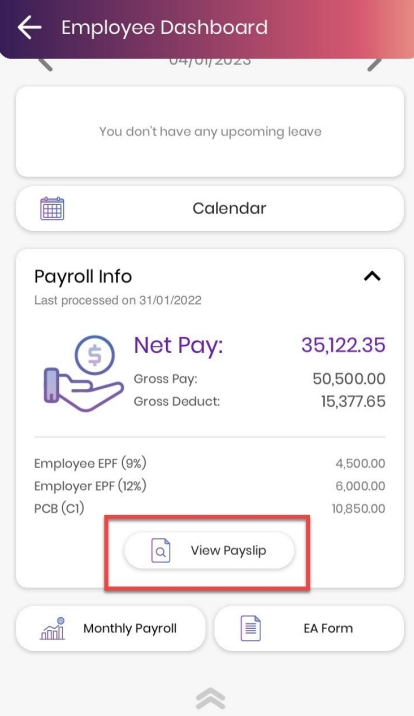
Download Payslip from SQL HRMS
-
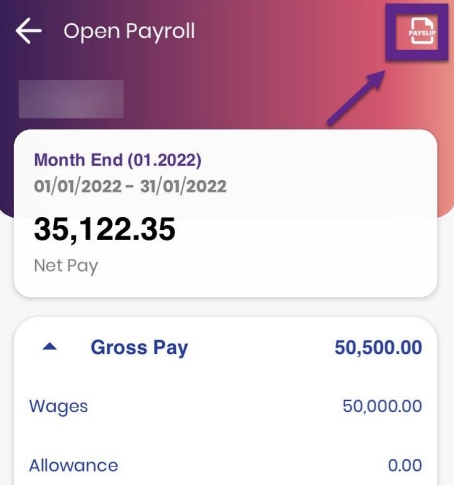
We do provides ability to download the payslip. In the Employee View, click on the Monthly Payroll
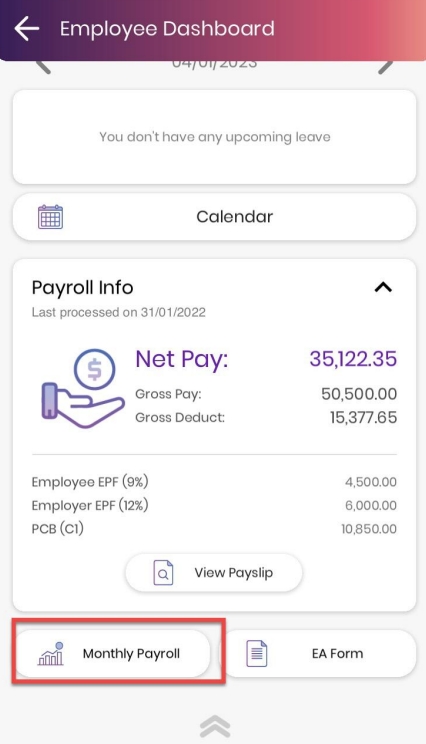
-
Select the month that you wish
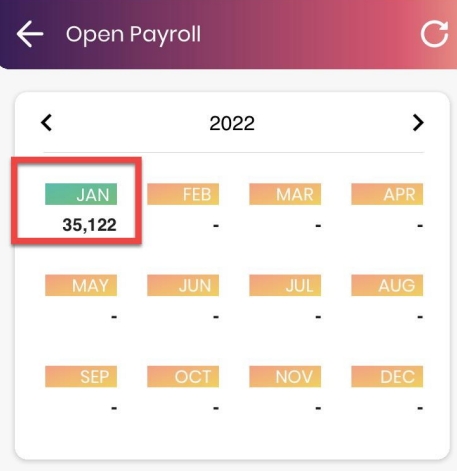
-
There will be a payslip icon on the top right, click on it
Download EA Form from SQL HRMS
-
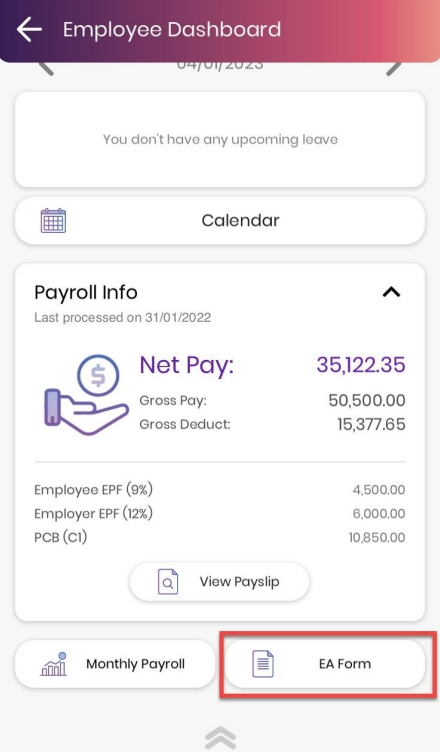
Besides payslip, employee can download EA Form directly from the app too. In the Employee View, clic on the EA Form
-
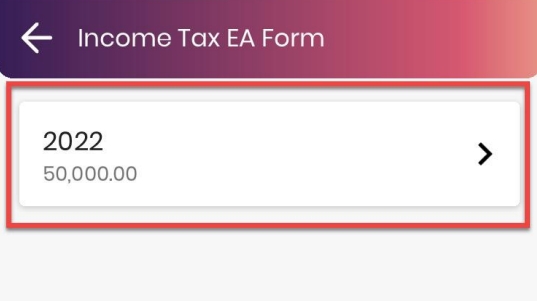
Select the year of EA Form you wish to download
-
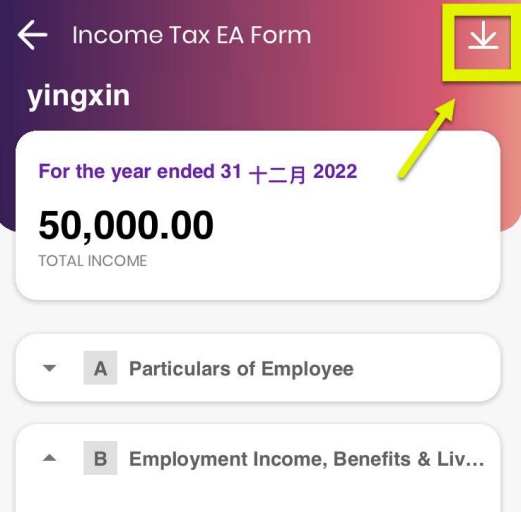
Click on Download icon on the top right, this will initialize a download to your phone 🥳
Multi Level Approval
This feature allows multiple managers in managing the leave application of your employees (e.g. a leave application will require more than 1 manager to approve)
Feature Setup
-
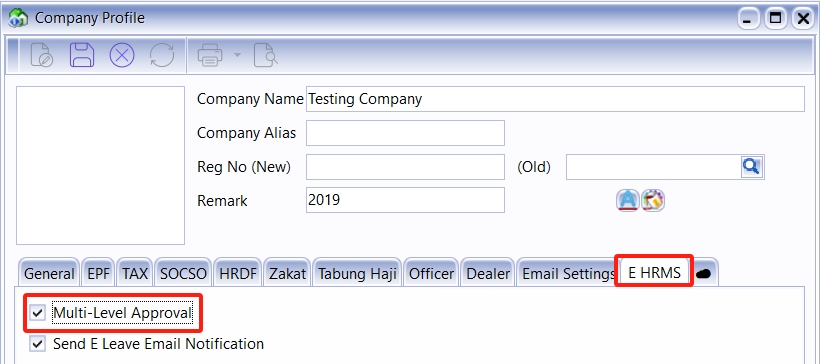
In SQL Payroll, go to File > Company Profile > E Leave
-
In the tabbed view, navigate to E HRMS, tick Multi-Level Approval
-
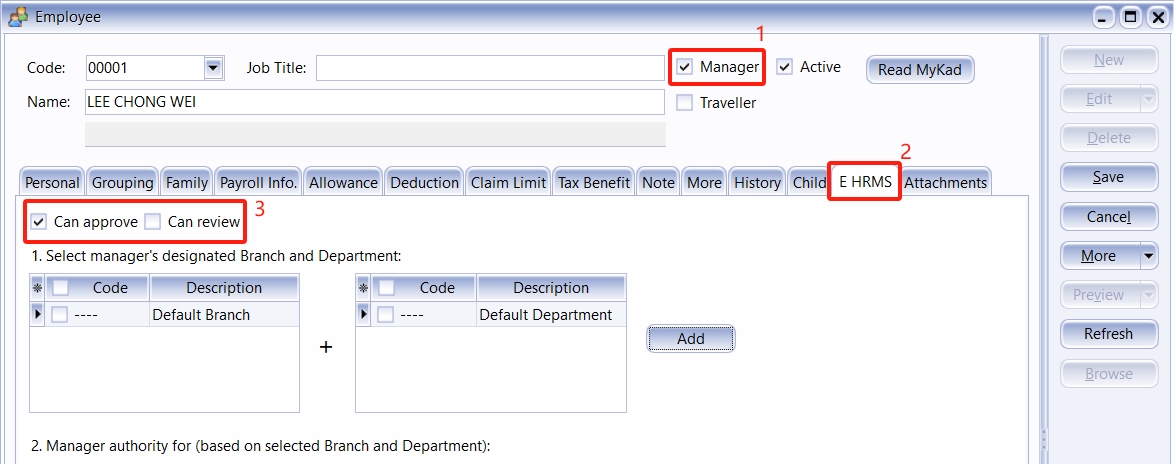
Next, go to Maintain Employee, assign the manager role to the employee. This employee will act as a manager for the leave application
-
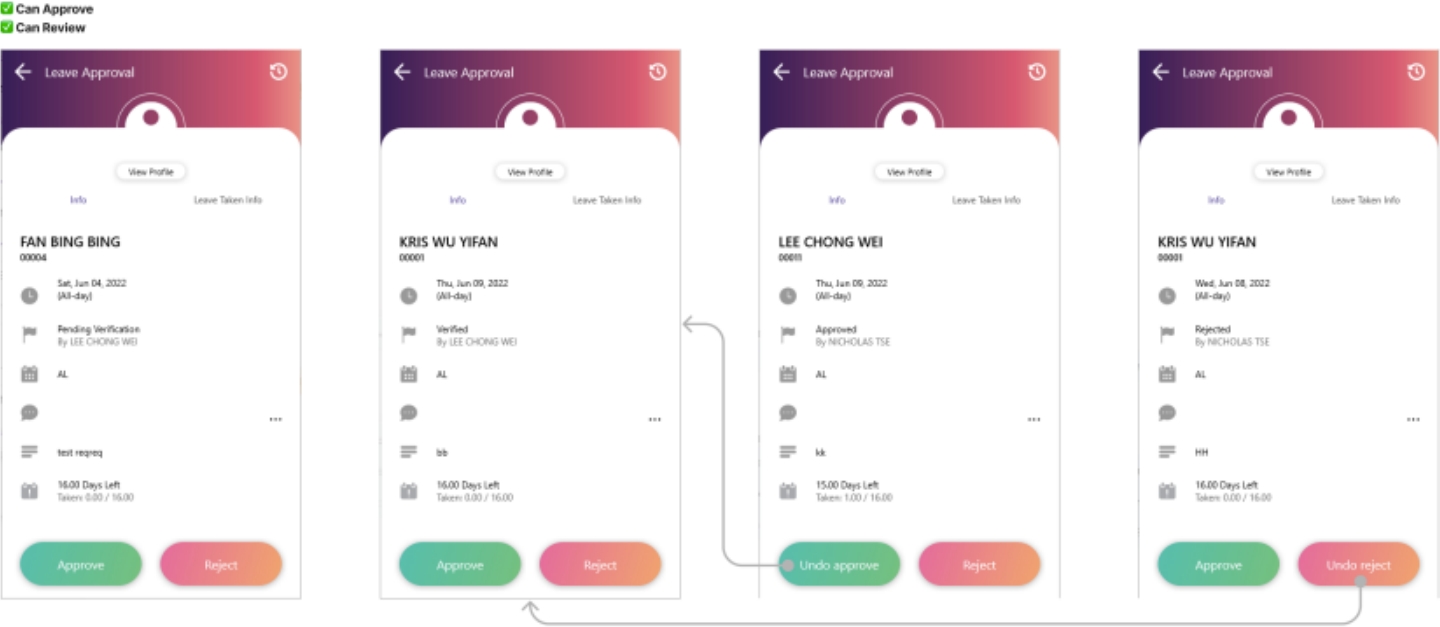
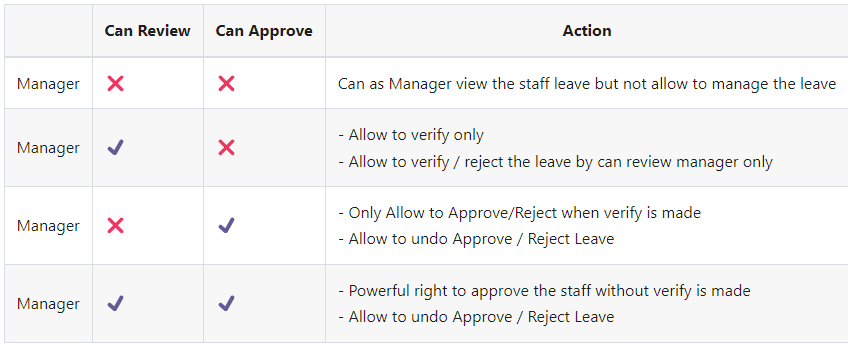
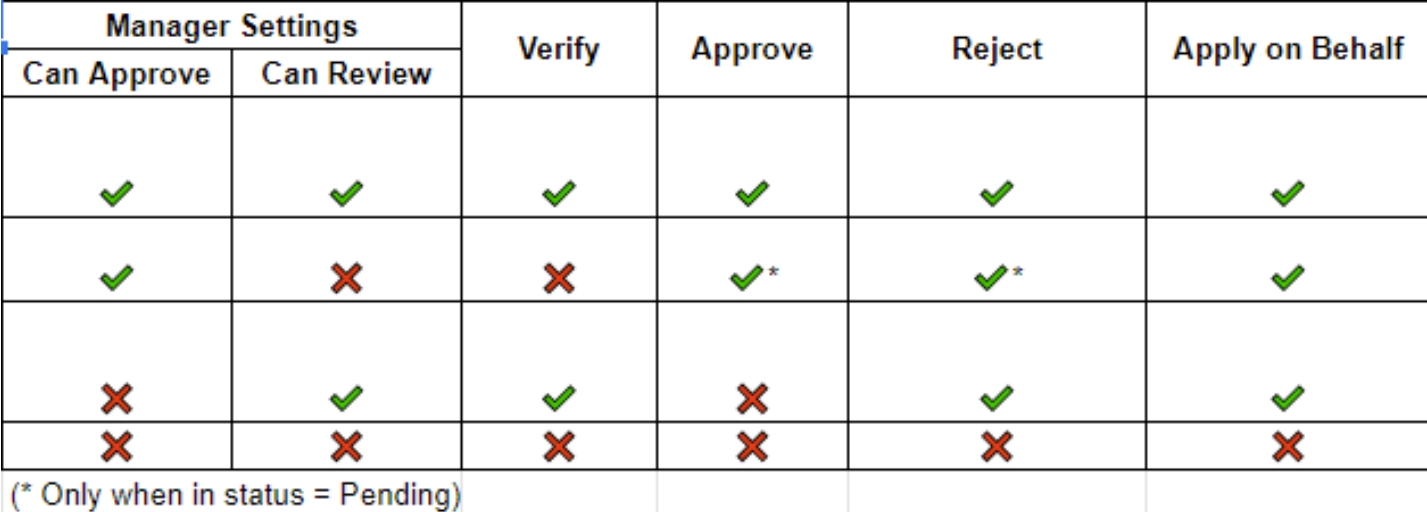
The table below illustrates the action one manager can do given different privileges:
Example of SQL HRMS behaviors
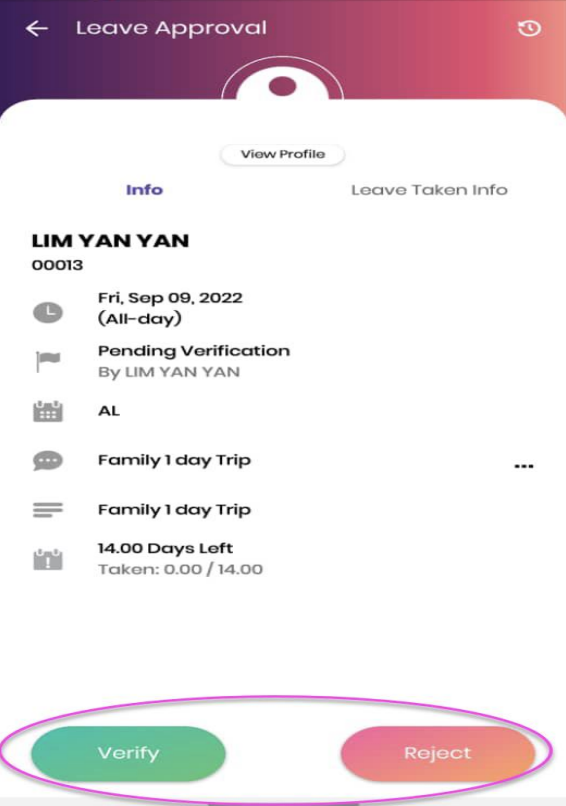
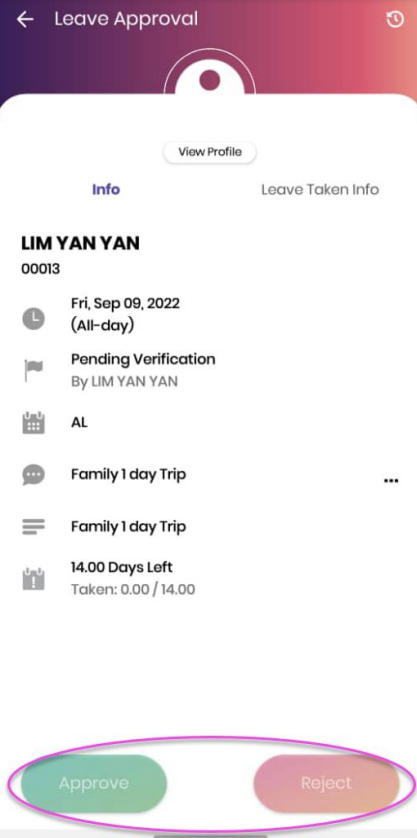
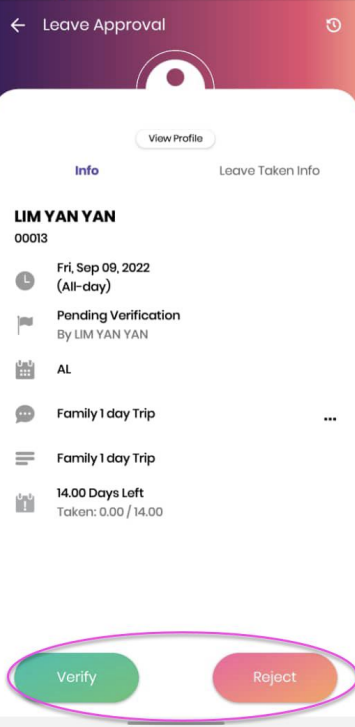
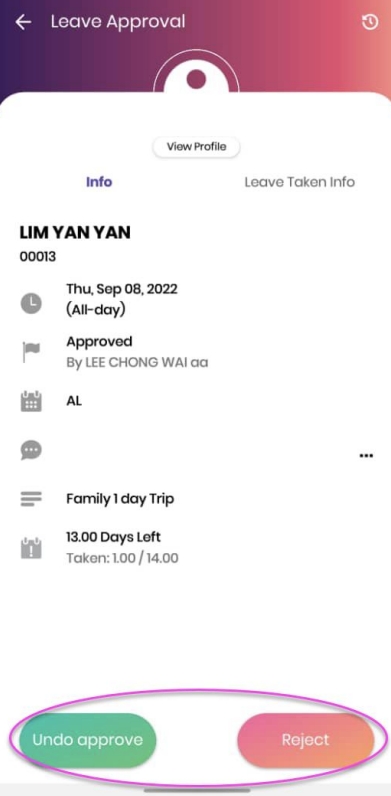
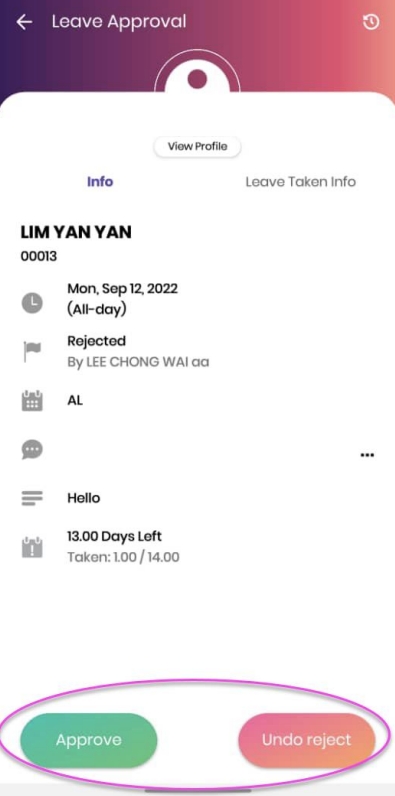
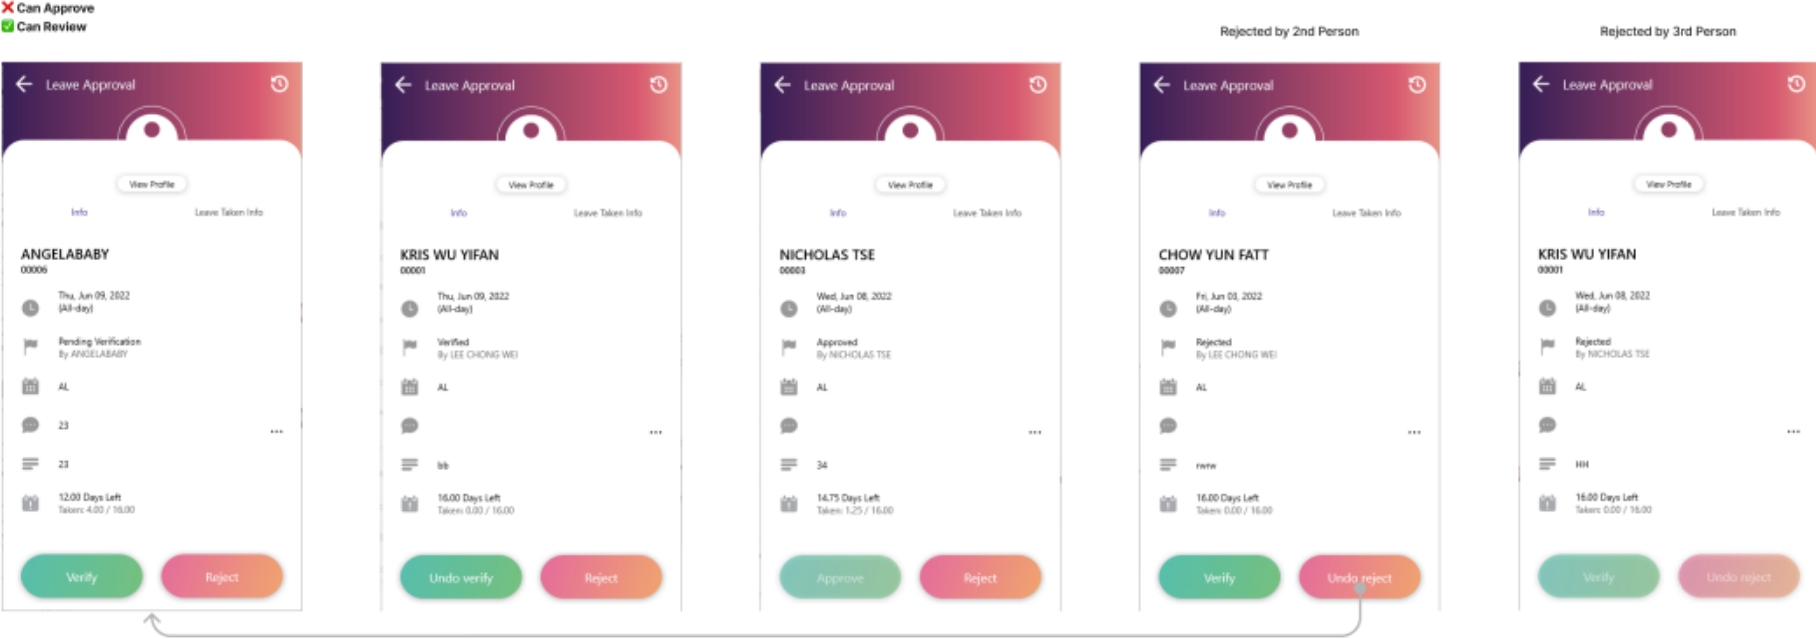
The table below show some example of screens given different privileges & circumstances (observe the button options circled):
| Can Review only | Can Approve only | Review + Approve |
|---|---|---|
| only allow to Verify (Example) | If not yet verified, unable to approve (Example) | Allow to approve directly (without review)(Example) |
| - | Once verified, can approve / reject (Example) | Allow to undo approve leave application (Example) |
| - | - | Allow to undo rejected leave application (Example) |
Leave Status in SQL Payroll
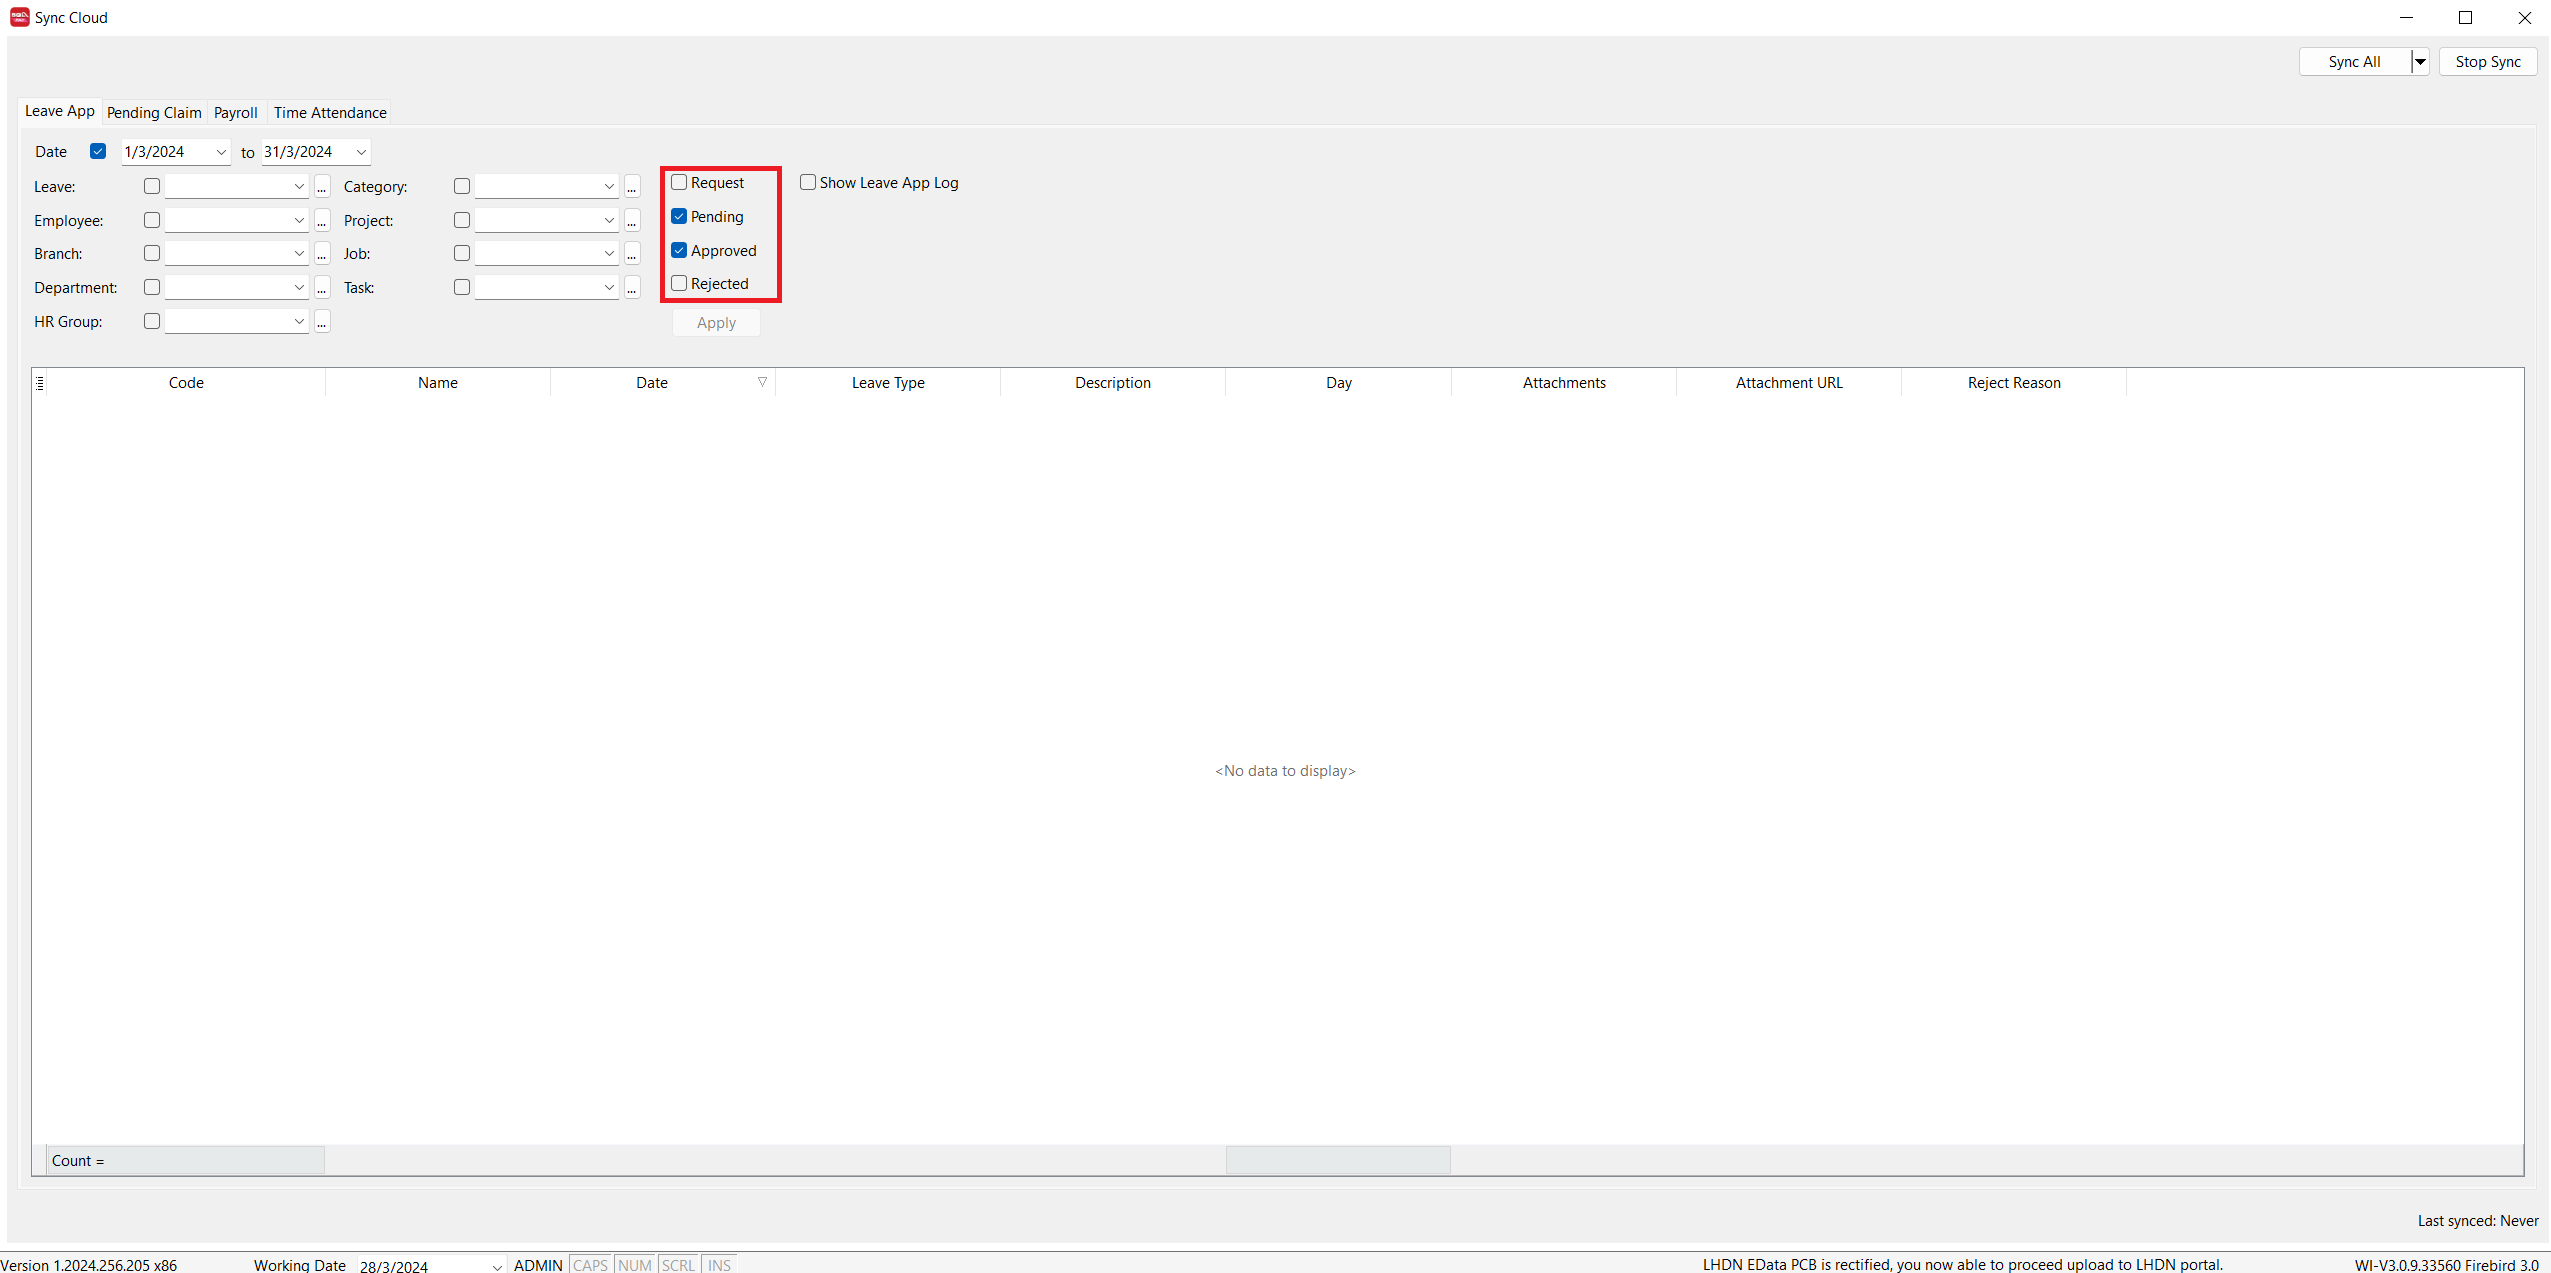
In the Sync Cloud window, there total of 4 types of status:
Request: pending for verificationPending: verified, pending review by ManagerApproved: approved leave applicationsRejected: rejeted leave applications
Appendix
Can Review only
Can Approve directly
Verified, can Approve / Reject
Unapproved
Unrejected
Permission Table
The flow of Can Review only permission
The flow of Can Approve only permission
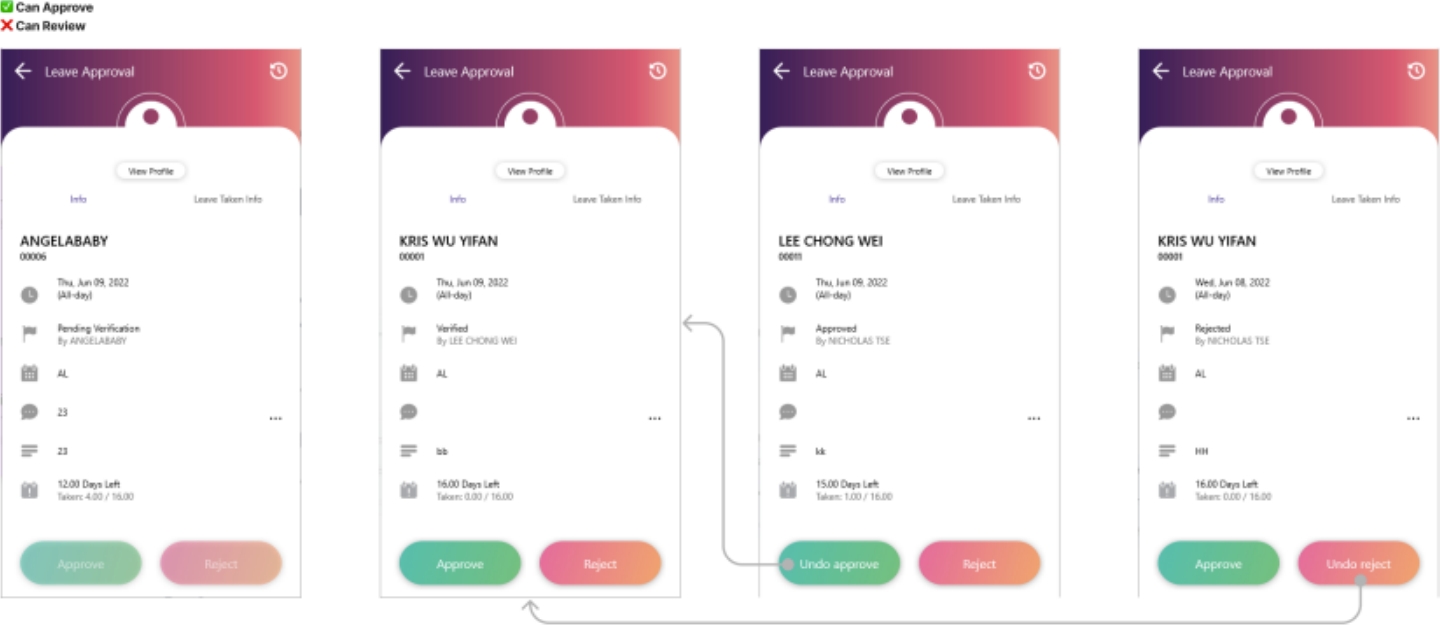
The flow of Review + Approve
