ETMS
Introduction
Time Management System (ETMS) is a feature which allows employers to monitor employees performance and greatly reducing hazzle in employees reward such as overtime (OT).
Prerequisites
Before proceed with the guide below, you will need to have SQL Drive setup. Find out how to setup in the enable SQL Drive guide
1 General Setup
1.1 Maintain Location
-
In SQL Payroll, navigate to Human Resource > Maintain Branch
-
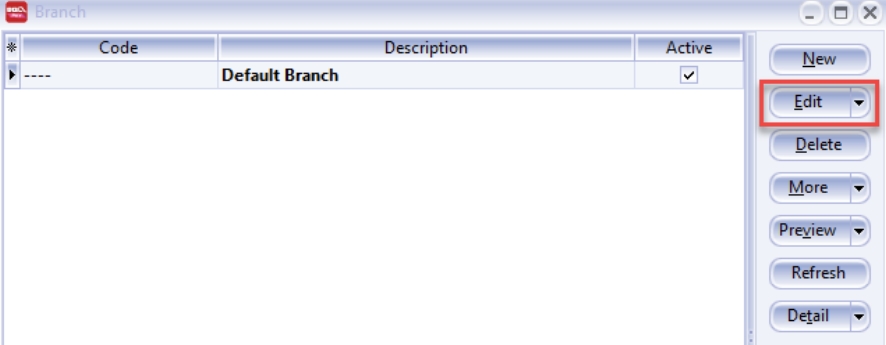
Click on Edit
-
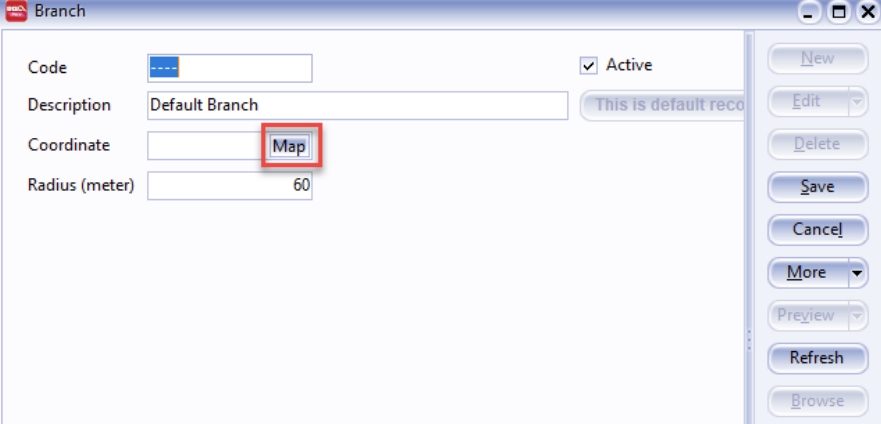
Click on Map
-
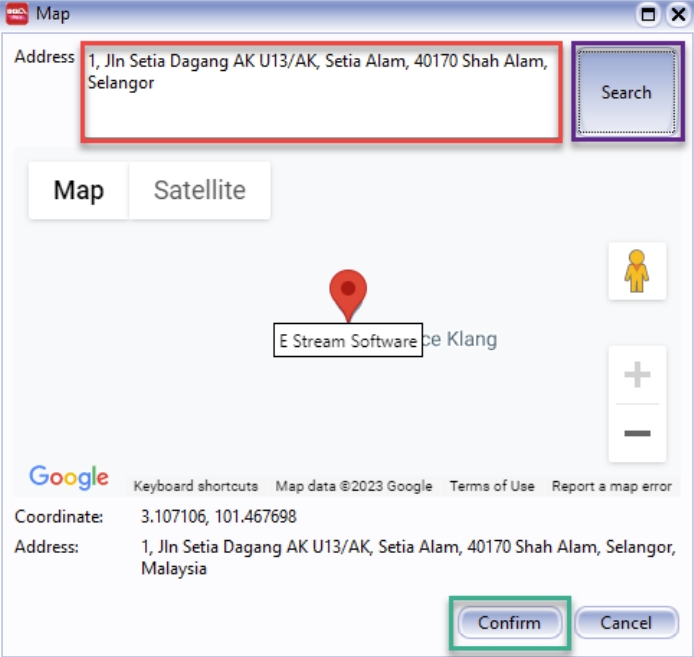
Key in the Company Address, click Search and lastly click Confirm
-
Fill in the Radius you wish to control (in meter), and click Save
infoif you leave the field empty, default value of 60m will be used
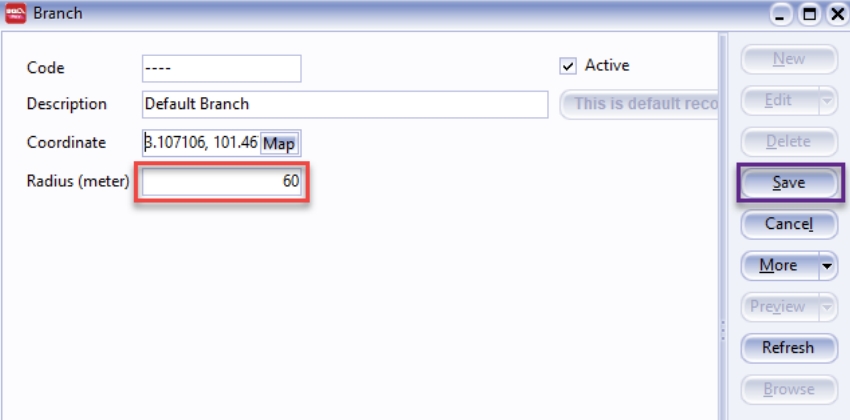
You can also create new branch if more than one branch
1.2 Maintain Public Holiday
-
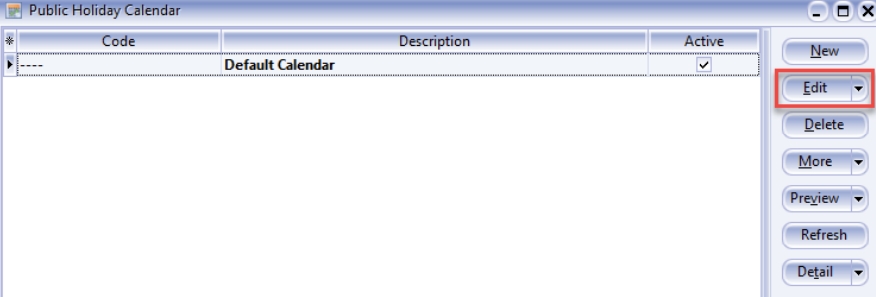
Navigate to Leave > Maintain Public Holiday to configure the public holiday of the year
-
Click on Edit
-
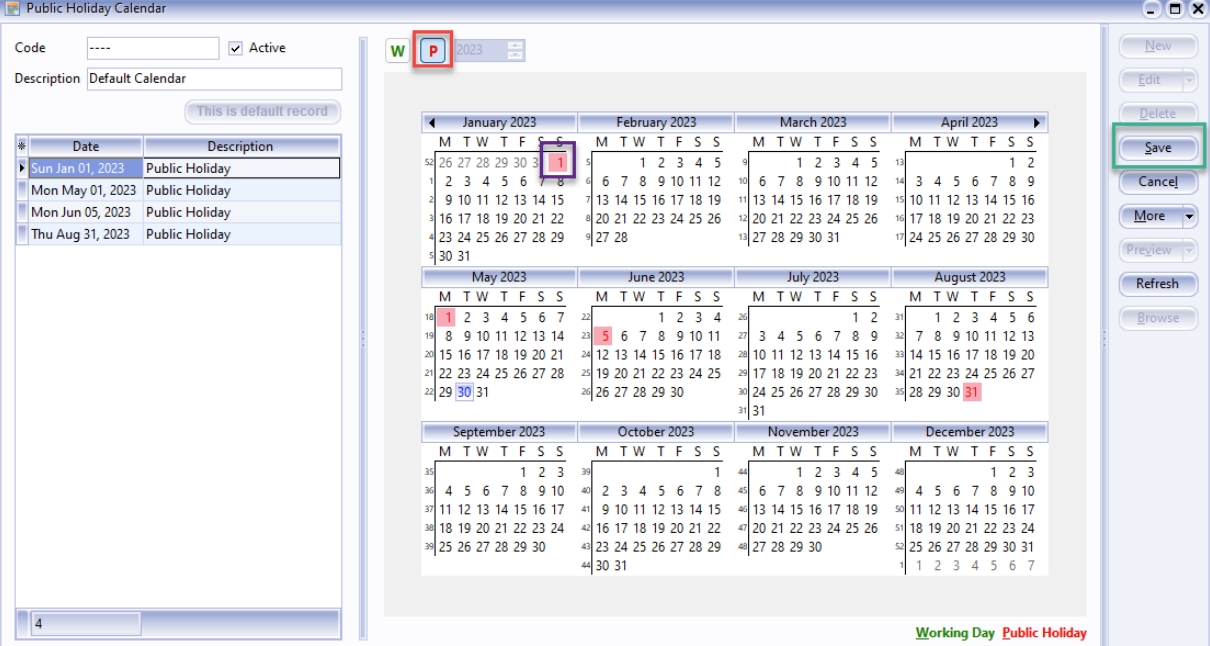
In the tabbed view, click on P, select the date of public holiday and click Save
1.3 Maintain Employee
-
Navigate to Human Resource > Maintain Employee
-
Click to highlight the employee you wish to change it's settings, and click Edit

-
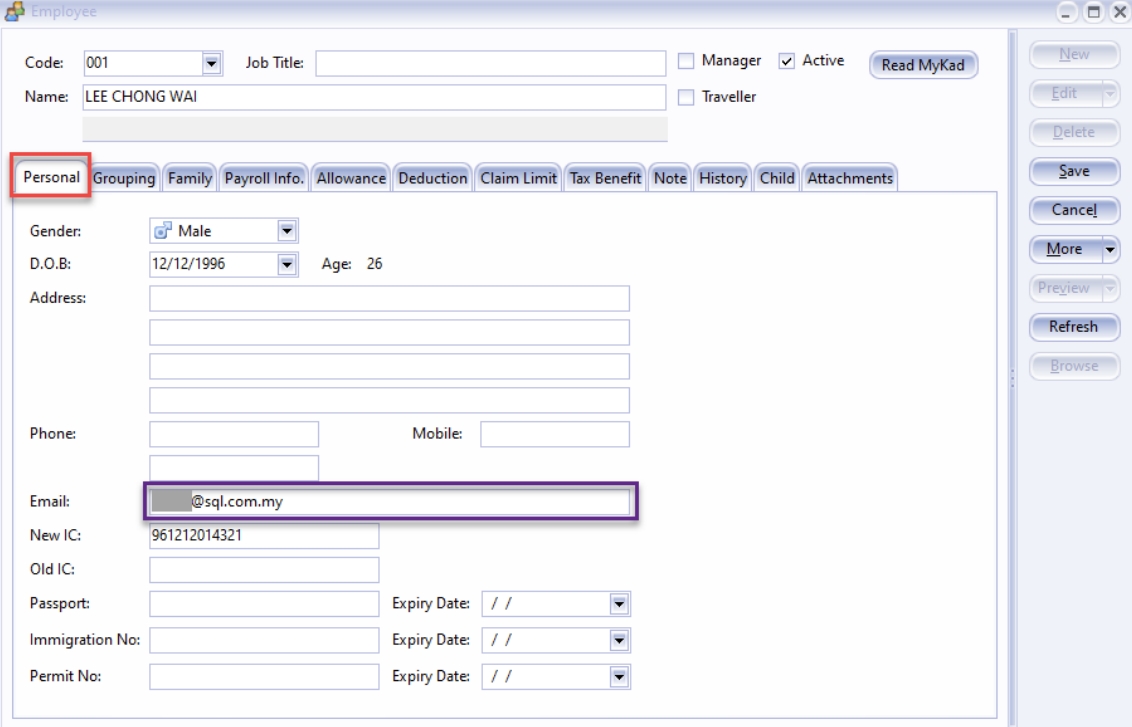
Go to Personal tab, key in employee email address
-
Next, go to the Grouping tab and select Branch
-
Select Public Holiday Calendar
-
Select Work OT
-
Click Save
noteTick on Traveller if the employee is Traveller (Eg. Sales Person / Delivery Person / Doctor)
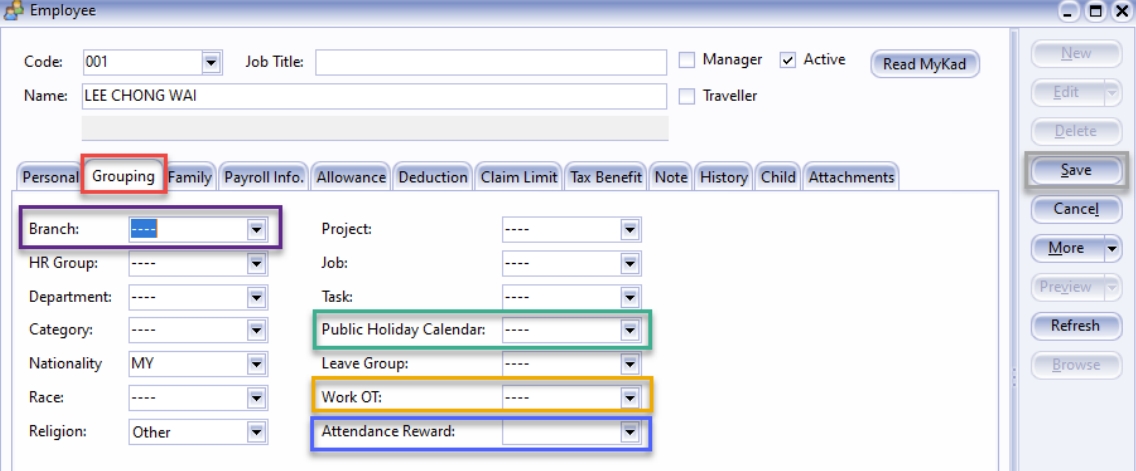
In ETMS, we have the Attendance Reward feature. If the worker works for more than 2 hours of OT per day (OT >= 2 hours), default meal allowance is provided. (This default settings apply to employees who have attendance allowance only)
2 Time Attendance
2.1 Maintain Work Session
-
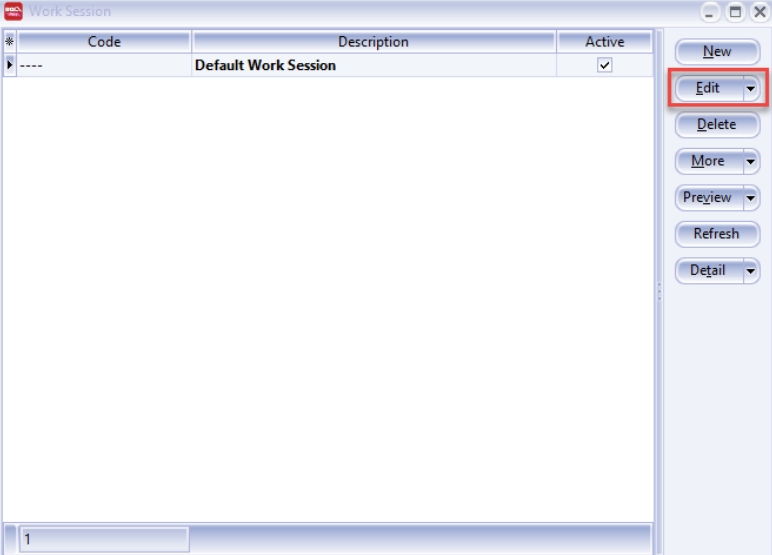
Navigate to Time Attendance > Maintain Work Session
-
Click on Edit
-
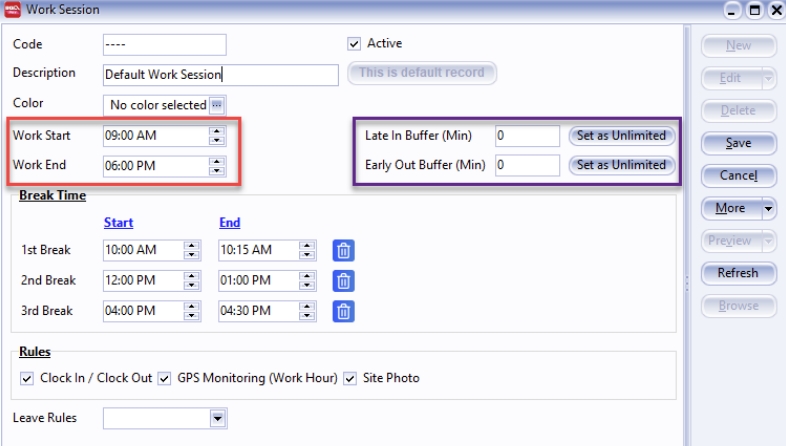
Key in time for Work Start (09:00 AM) and time for Work End (06:00 PM)
infoLate In Buffer (min): How many minute(s) allow can be late
Early Out Buffer (min): How many minute(s) allow can be leave early
-
Key in Break Time
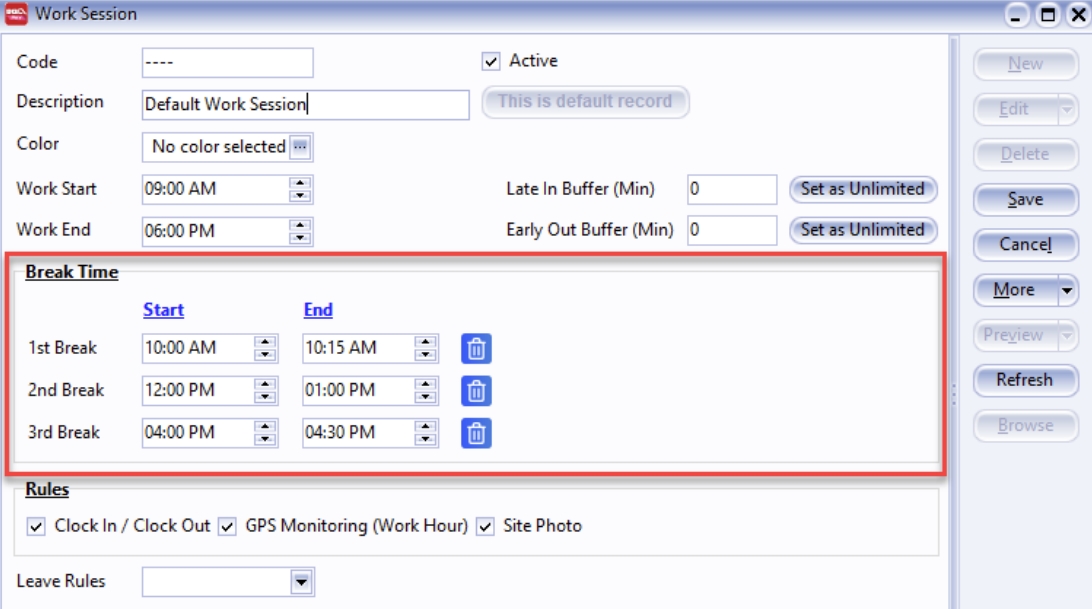
Start End Description 1st Break 10:00 AM 10:15 AM Coffee Break 2nd Break 12:00 PM 01:00 PM Lunch Break 3rd Break 04:00 PM 04:30 PM Tea Break -
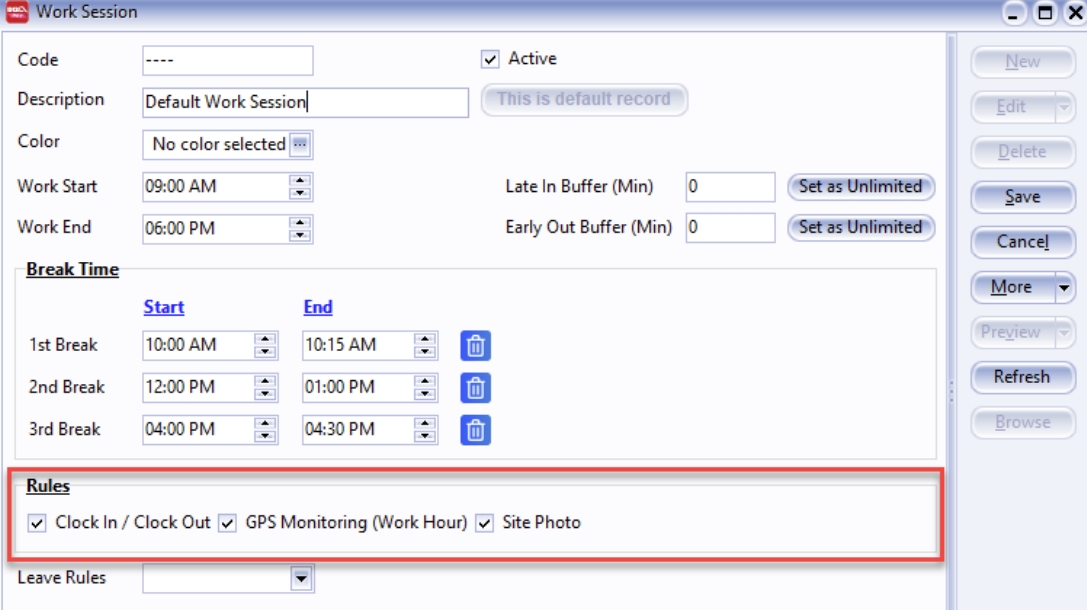
Select Rules
 info
infoClock In / Clock Out: whether user need to clock in / clock out
GPS Monitoring (Work Hour): User need to turn on location every time they Clock In / Clock Out
Site Photo: User must take photo during Clock In / Clock Out (Doesn't allow photo from album)
-
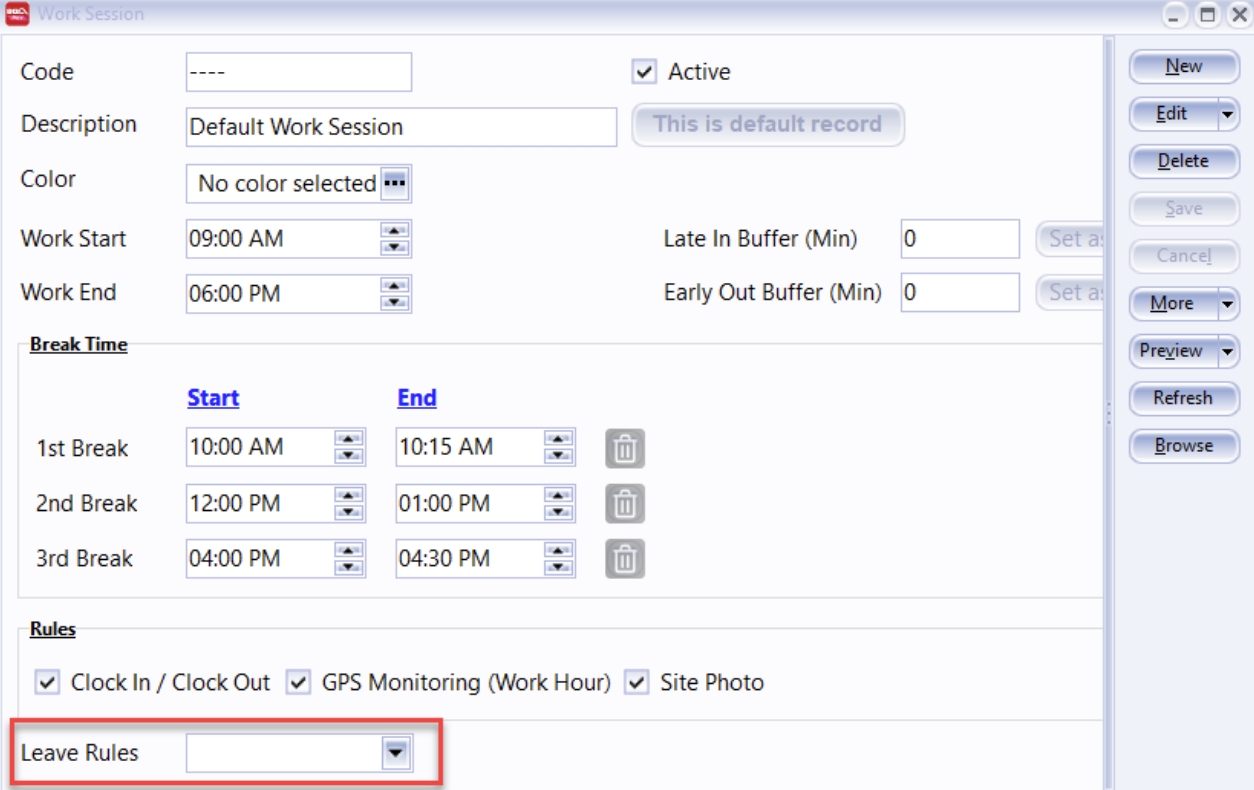
Leave Rules
 tip
tipFor Traveller employee, once apply the Leave Rule, NO NEED fill in the Break Time
-
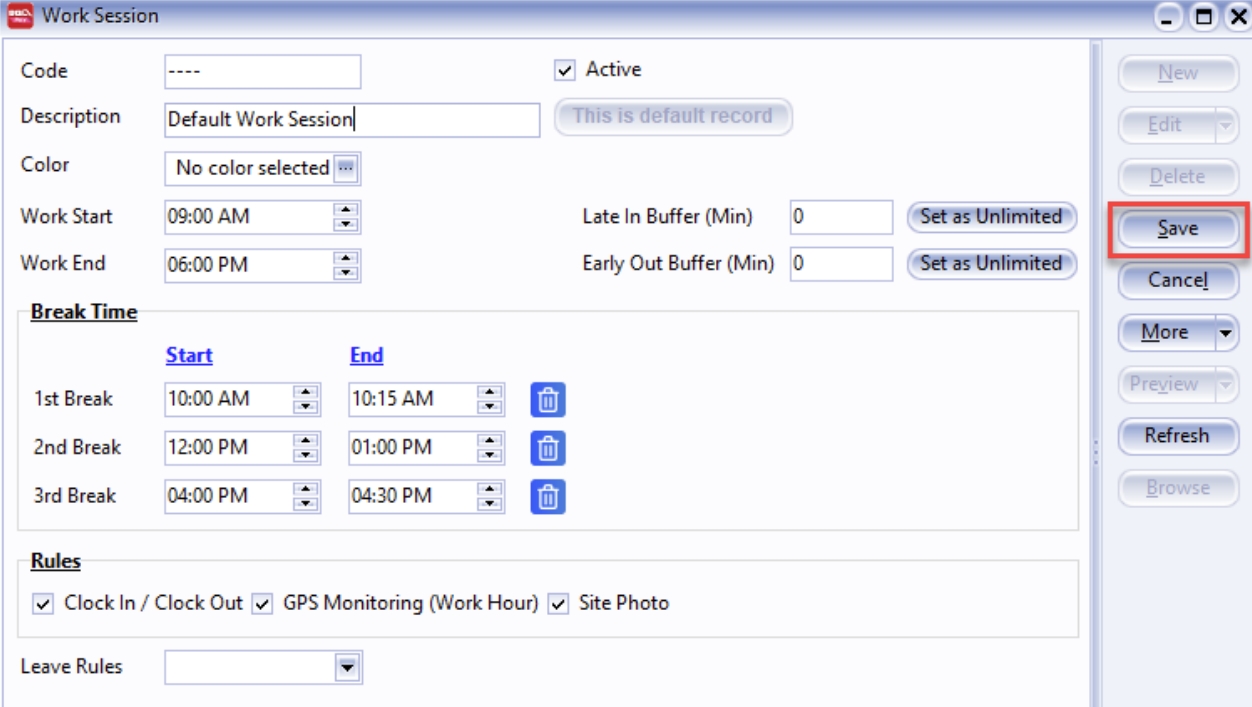
Click on Save once you have done with all settings
2.2 Maintain Work OT
-
Navigate to Time Attendance > Maintain Work OT
-
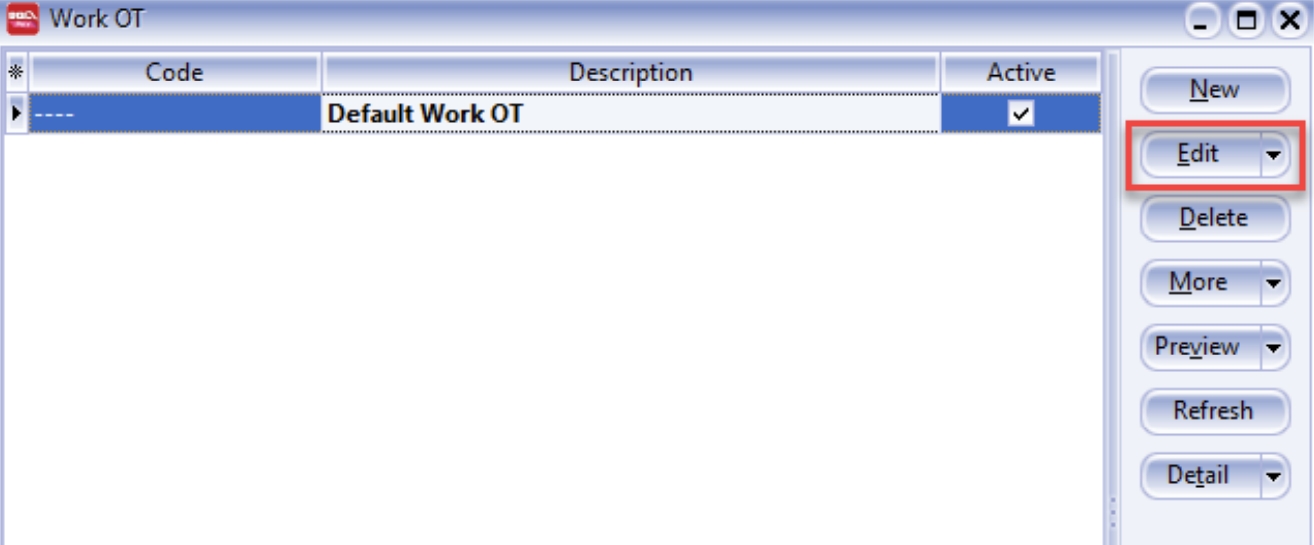
Select a Work OT rule, and click Edit
-
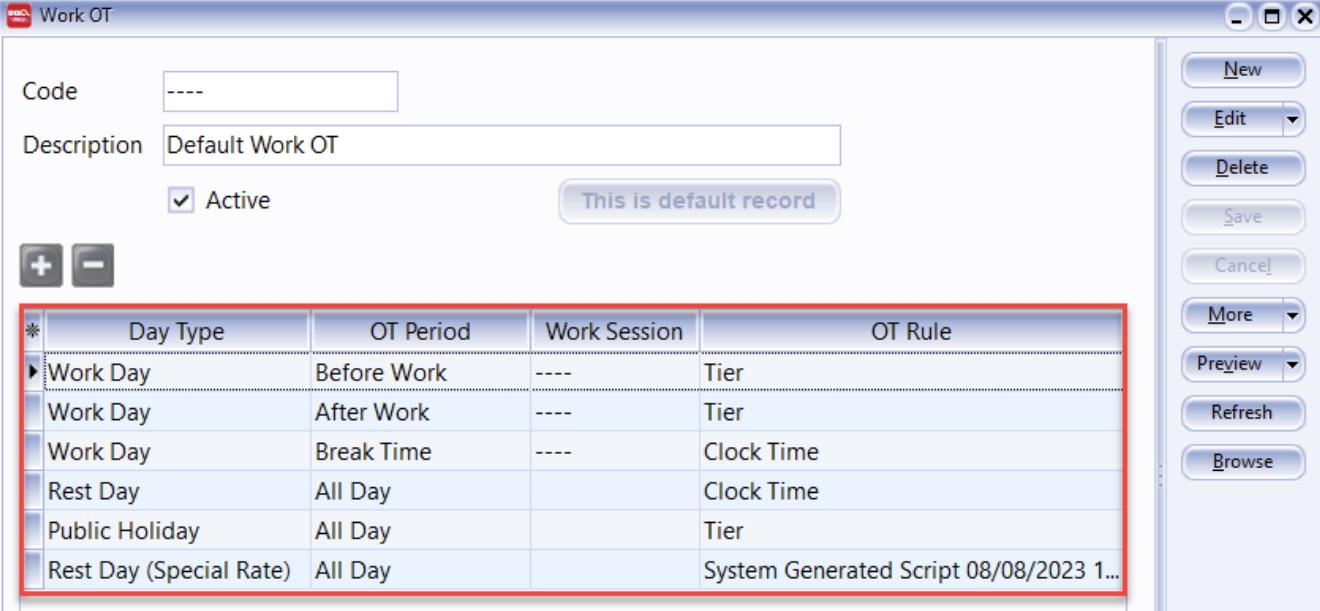
Key in Day Type, OT Period, Work Session, OT Rule
-
Select OT Rule (Refer to OT rules for more details)
-
Click on OK once done setting
-
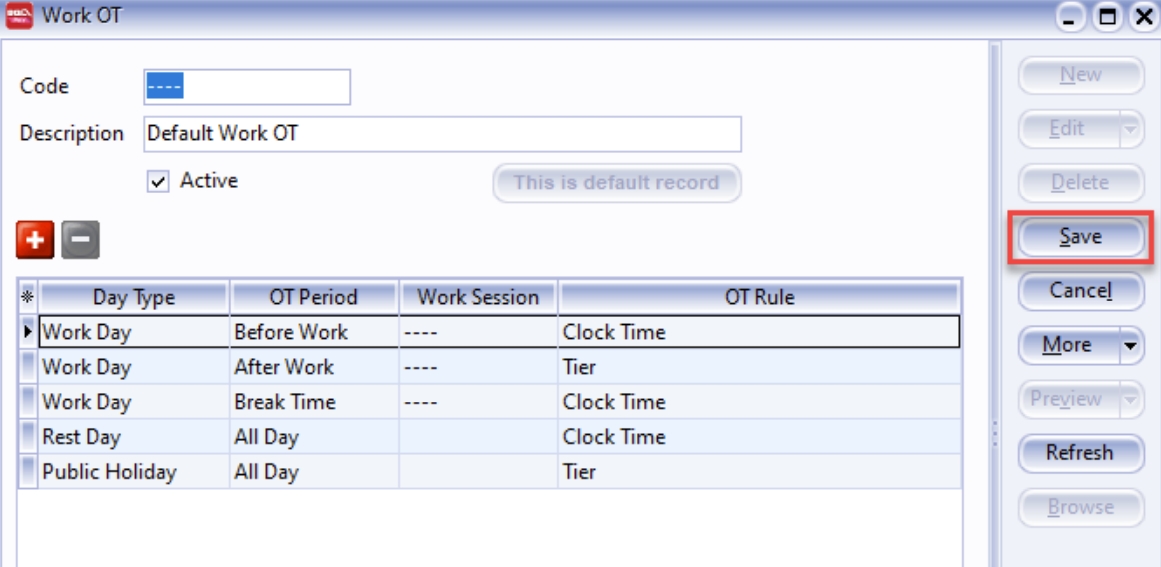
Click on Save once done all setting
2.2.1 OT Rules
Rest day = Saturday with rate 1.5
Rest day (Special Rate) = Sunday with rate 2.0
-
Table below explains the OT rules
Day Type OT Period Description Work Day Before Work Before 9:00 AM Work Day After Work After 6:00 PM Work Day Break Time 12:00 PM – 01:00 PM Rest Day All Day Entire day for Rest Day Public Holiday All Day Entire day for Public Holiday Rest Day (Special Rate) All Day Entire day for Rest Day with Special Rate -
There are two types of OT rules:
- Clock Time
- Tier
-
Example of Clock Time
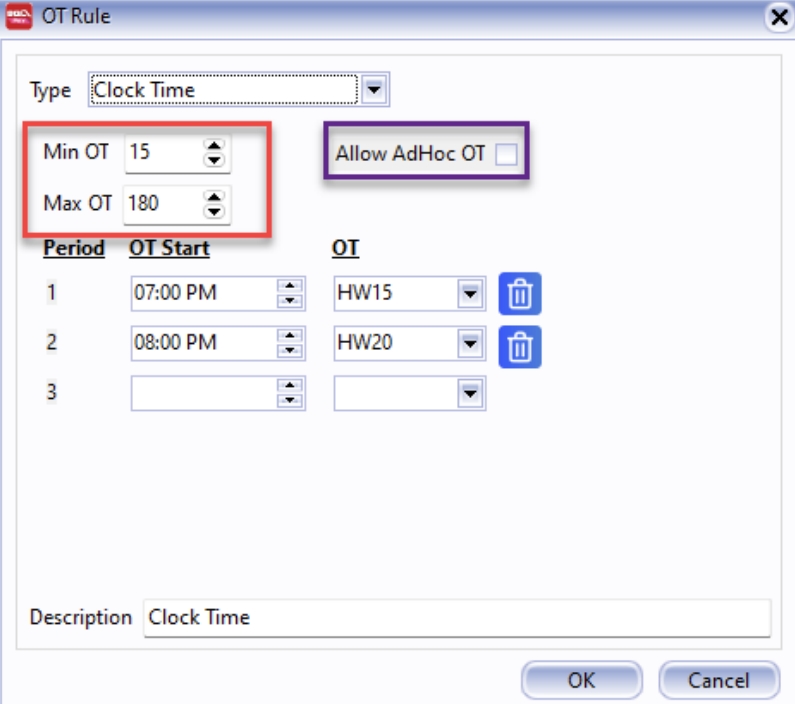
Field Description Min OT Allow to claim OT at least 15 minutes Max OT Allow to OT up to 180 minutes (3 Hours) Allow AdHoc OT Between 6:00 PM – 7:00 PM (Allow to start OT immediately) 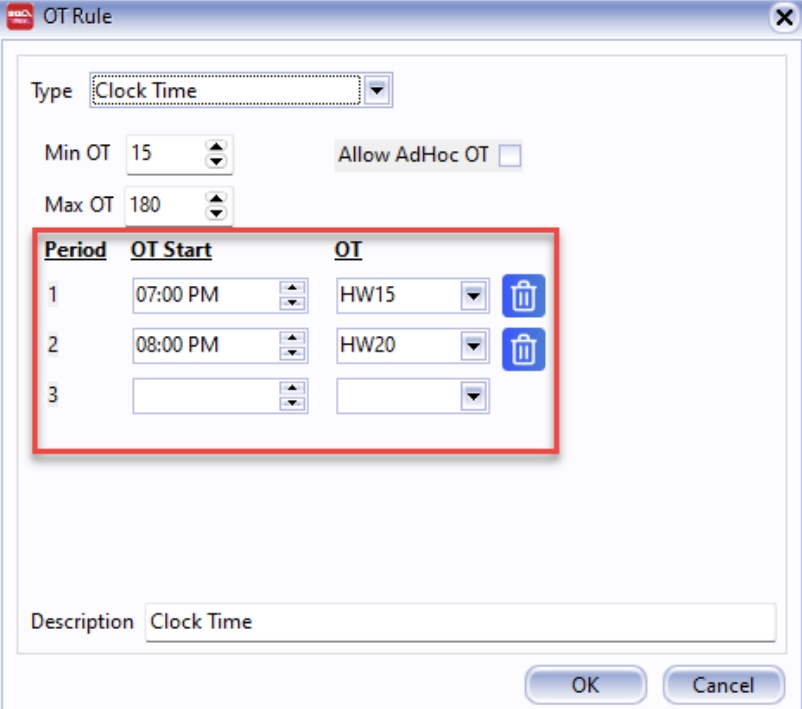
Period OT Start OT Description 1 07:00 PM HW15 07:00 PM - 08:00 PM, OT rate is 1.5 2 08:00 PM HW20 Starting at 08:00 PM onwards, OT rate is 2.0 ExampleIf OT start after 08:30PM, OT rate is 2.0 and can claim OT up to 3 Hours (until 11:30 PM)
-
Example of Tier
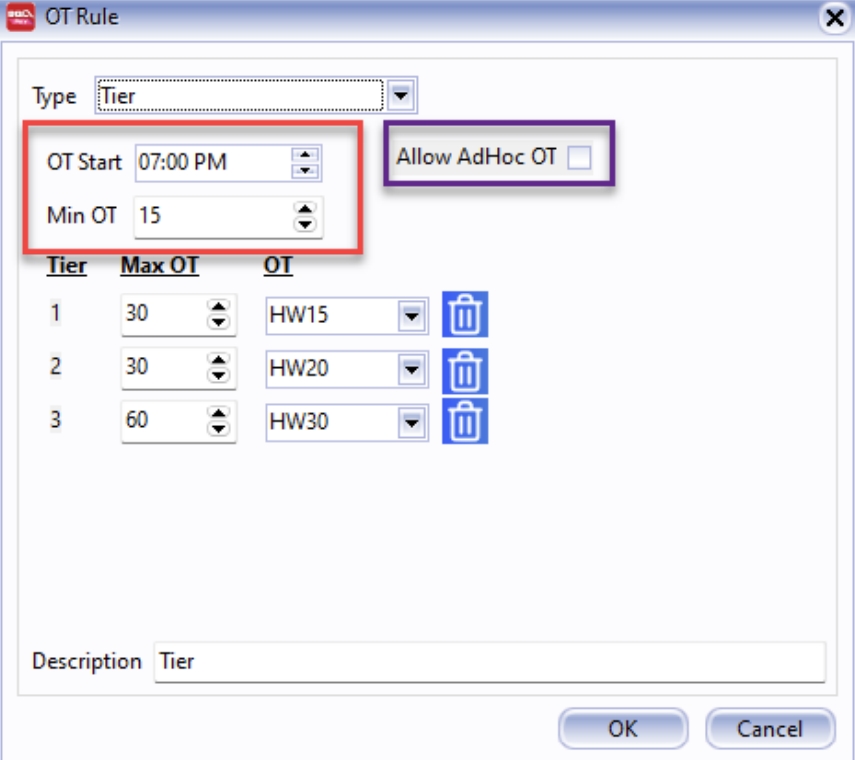
Field Description OT Start Time allow to start OT Min OT Allow to claim OT at least 15 minutes Allow AdHoc OT Between 6:00 PM – 7:00 PM (Allow to start OT immediately) 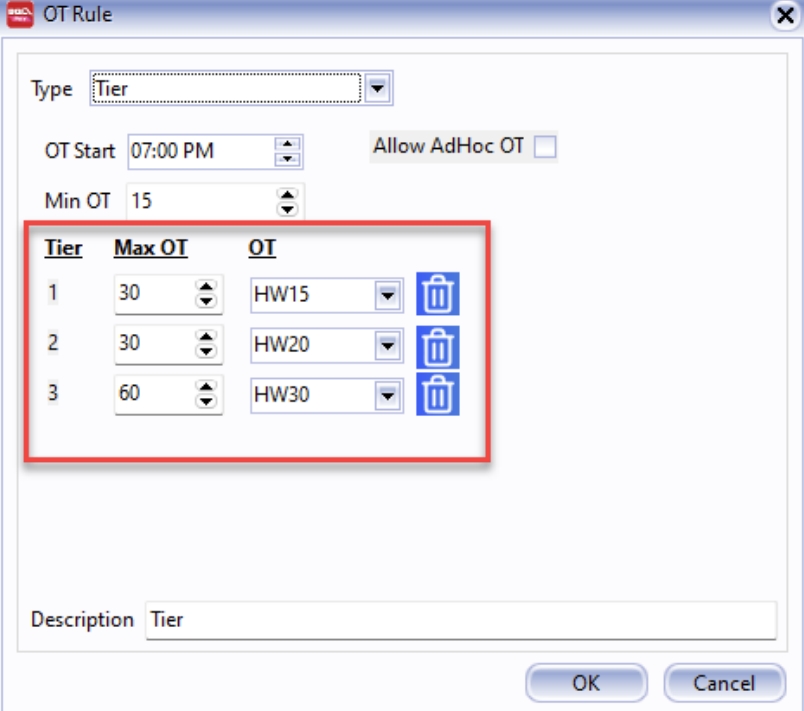
Tier Max OT OT Description 1 30 HW15 OT up to 30 minutes, OT rate is 1.5 (Eg. 07:00 PM – 07:30 PM) 2 30 HW20 The next OT up to 30 minutes, OT rate is 2.0 (Eg. 07:30 PM – 08:00 PM) 3 60 HW30 Finish Tier 1 & Tier 2, OT rate is 3.0 (Eg. 08:00 PM – 09:00 PM)
2.3 Maintain Calendar
-
Wizard Calendar
-
Navigate to Time Attendance > Maintain Calendar
-
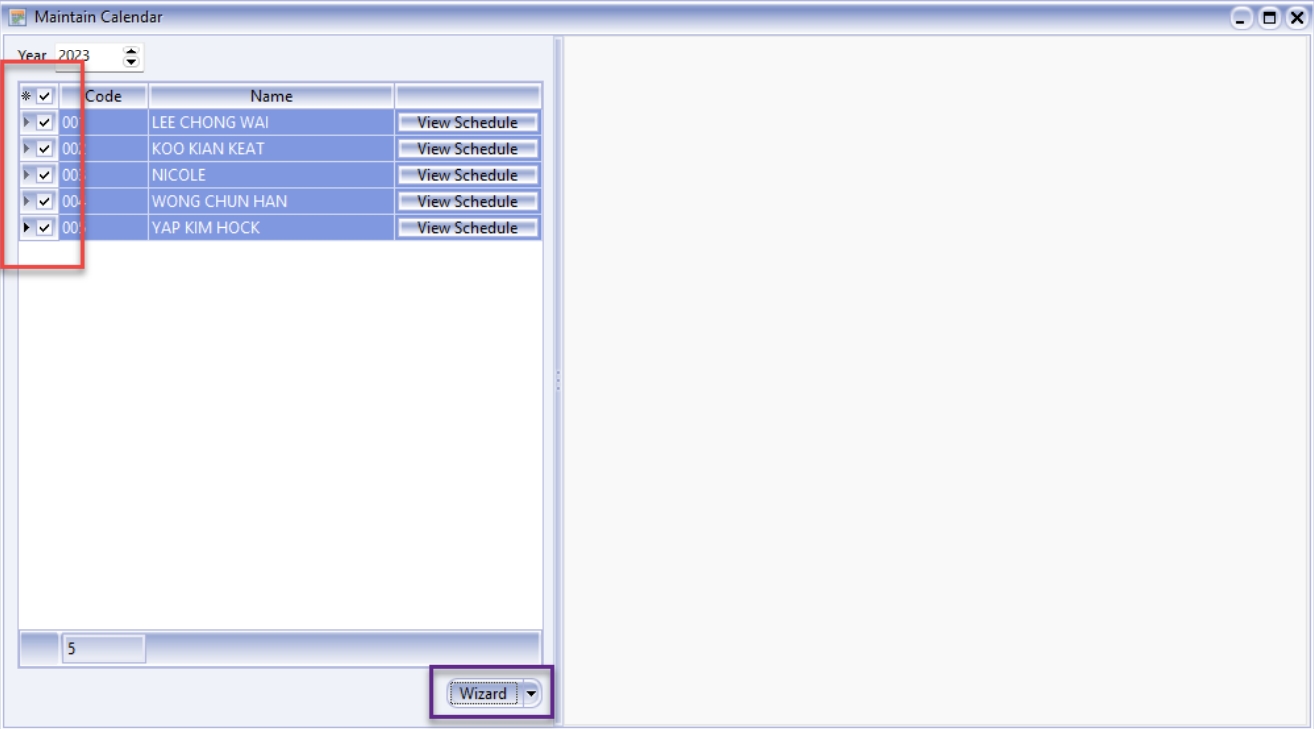
Select the employees you wish to apply the wizard calendar and click on the Wizard button
-
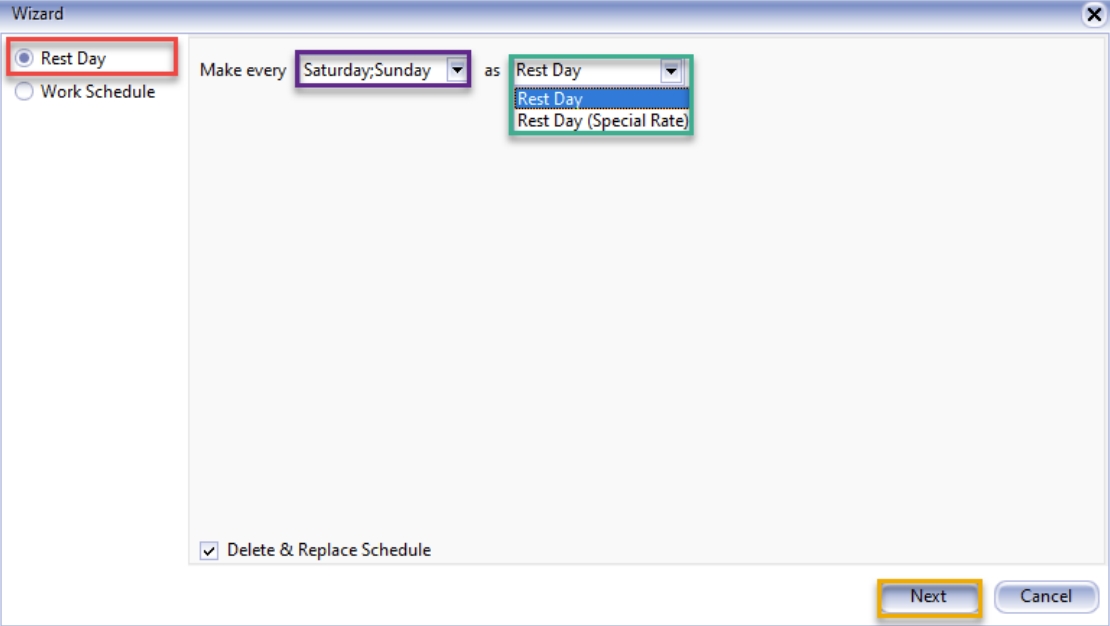
Click on Rest Day. In the Make every dropdown, select every day you wish to specify as Rest Day or Rest Day (Special Rate)
-
Click on Next
-
Select Session and select Schedule
warningYou will not be able to set a past date
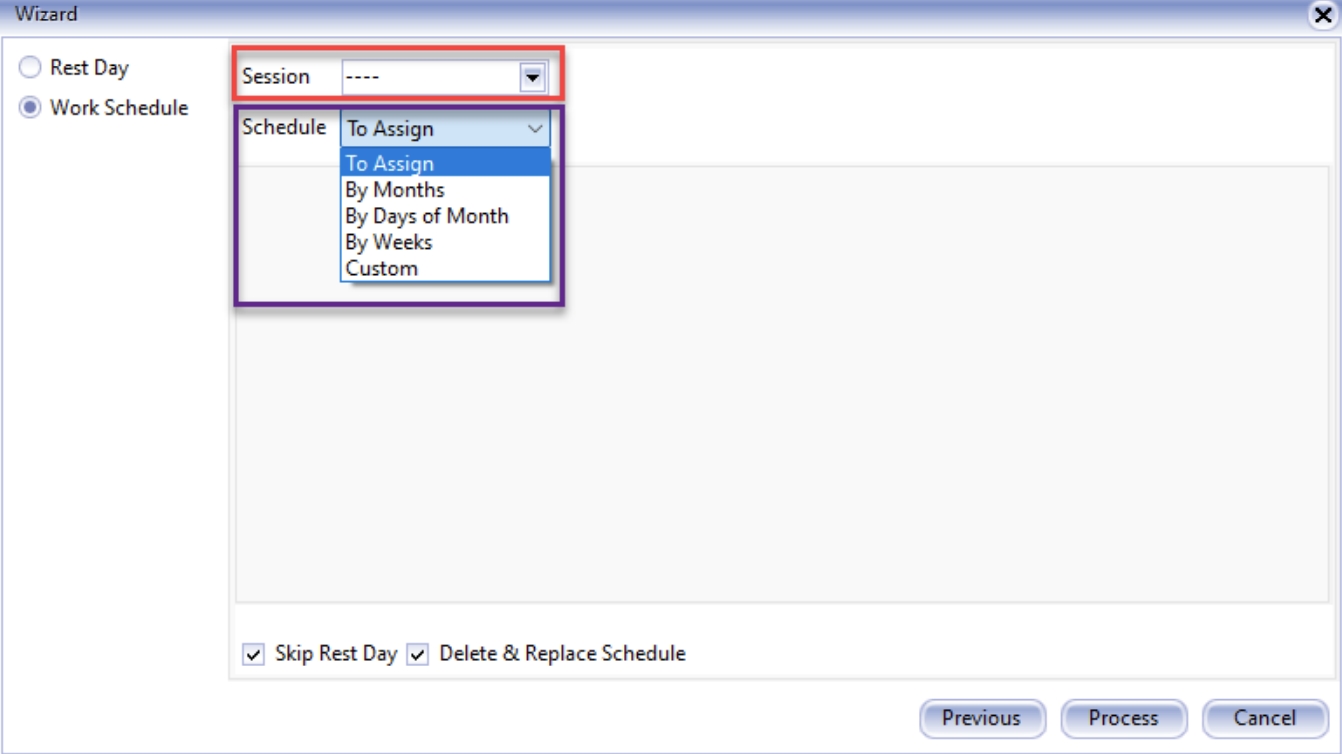
Schedule Description By Months Assign on every month, in every week and each day By Days of Month Assign on every month and each days of month By Weeks Assign on week of year and each days of month Custom Assign date by date -
-
View Calendar
-
Navigate to Time Attendance > Maintain Calendar
-
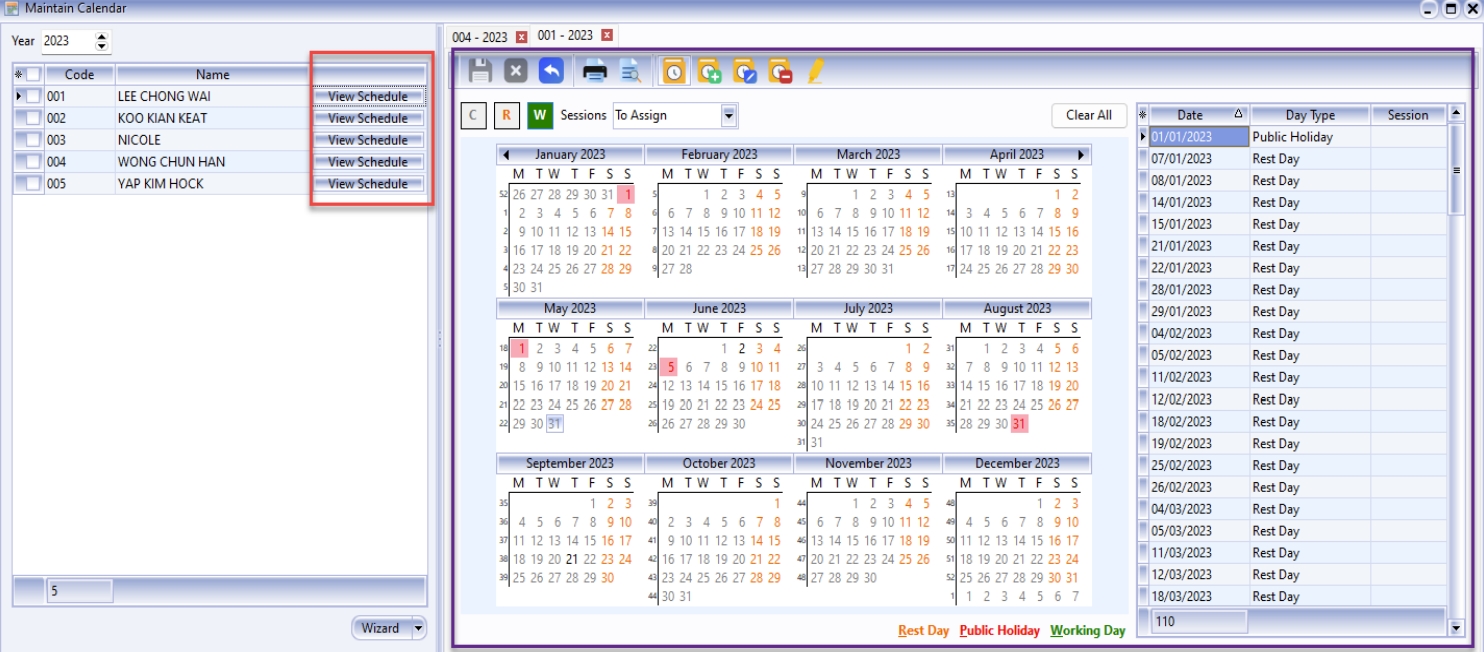
Click on View Schedule, it should show all the calendar and day type
-
-
Copy Calendar from Employee
-
Navigate to Time Attendance > Maintain Calendar
-
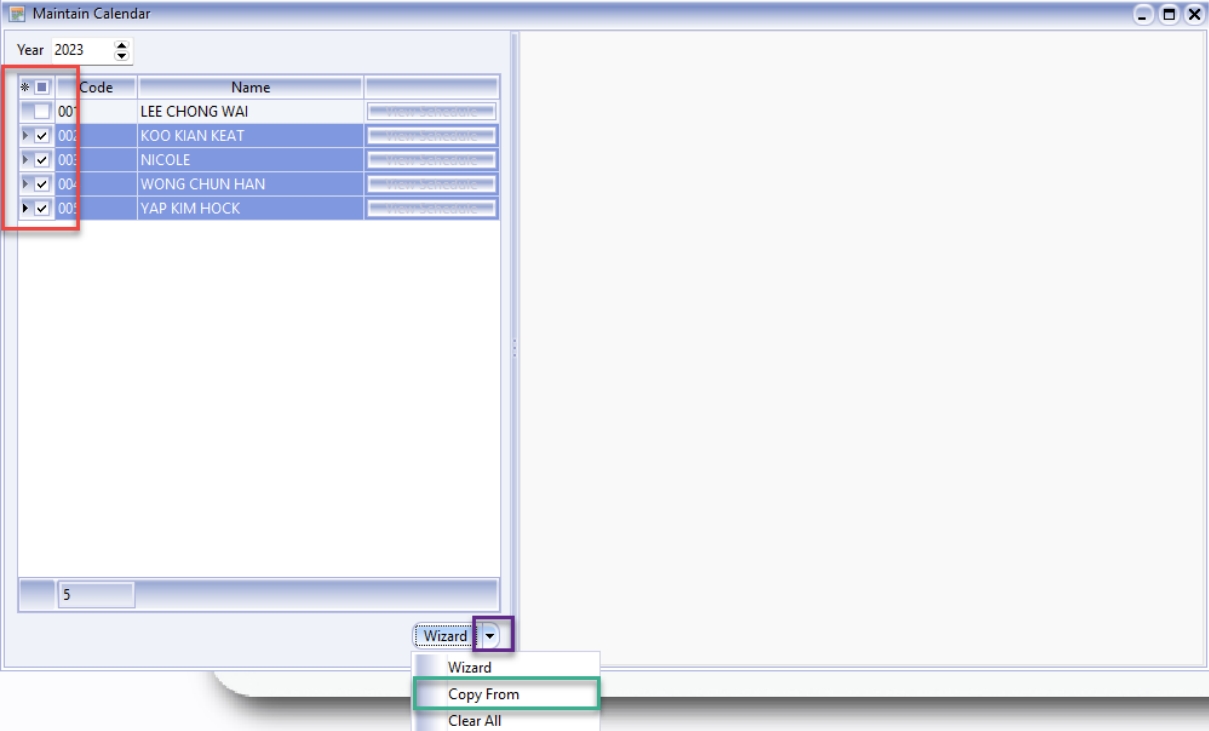
Tick employee you wish to replicate calendar, and click on the dropdown 🔽 besides the Wizard button, select Copy From
-
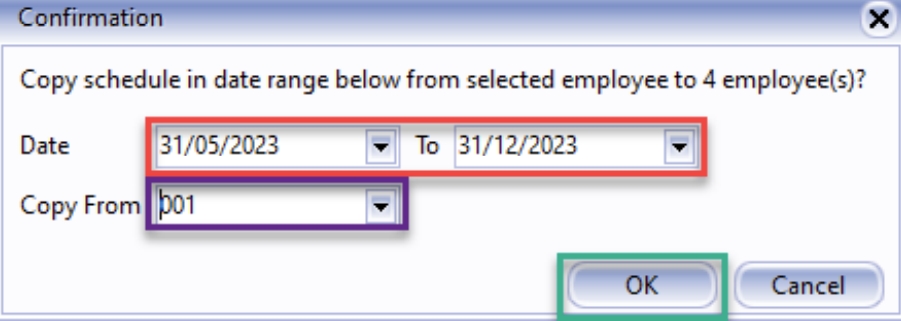
Specify the Date Range, select Copy From which employee and finally press OK
-
-
Clear Calendar
noteNot able to clear past date with work session (Rest day will still clear)
-
Navigate to Time Attendance > Maintain Calendar
-
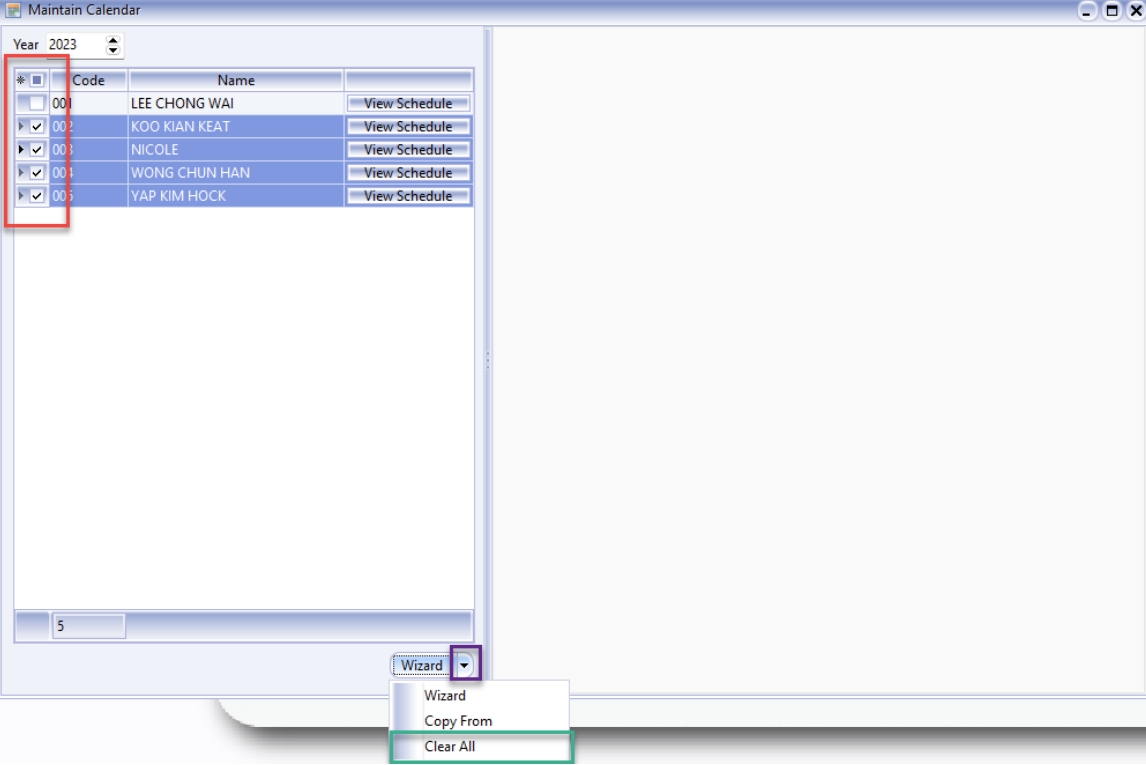
Select the employees you wish to clear all calendar and click on the dropdown 🔽 besides the Wizard button, select Clear All
-
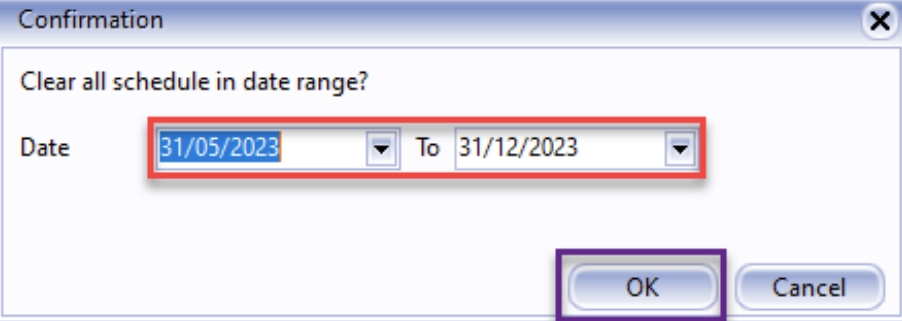
Select the date range to clear all calendar and press OK
-
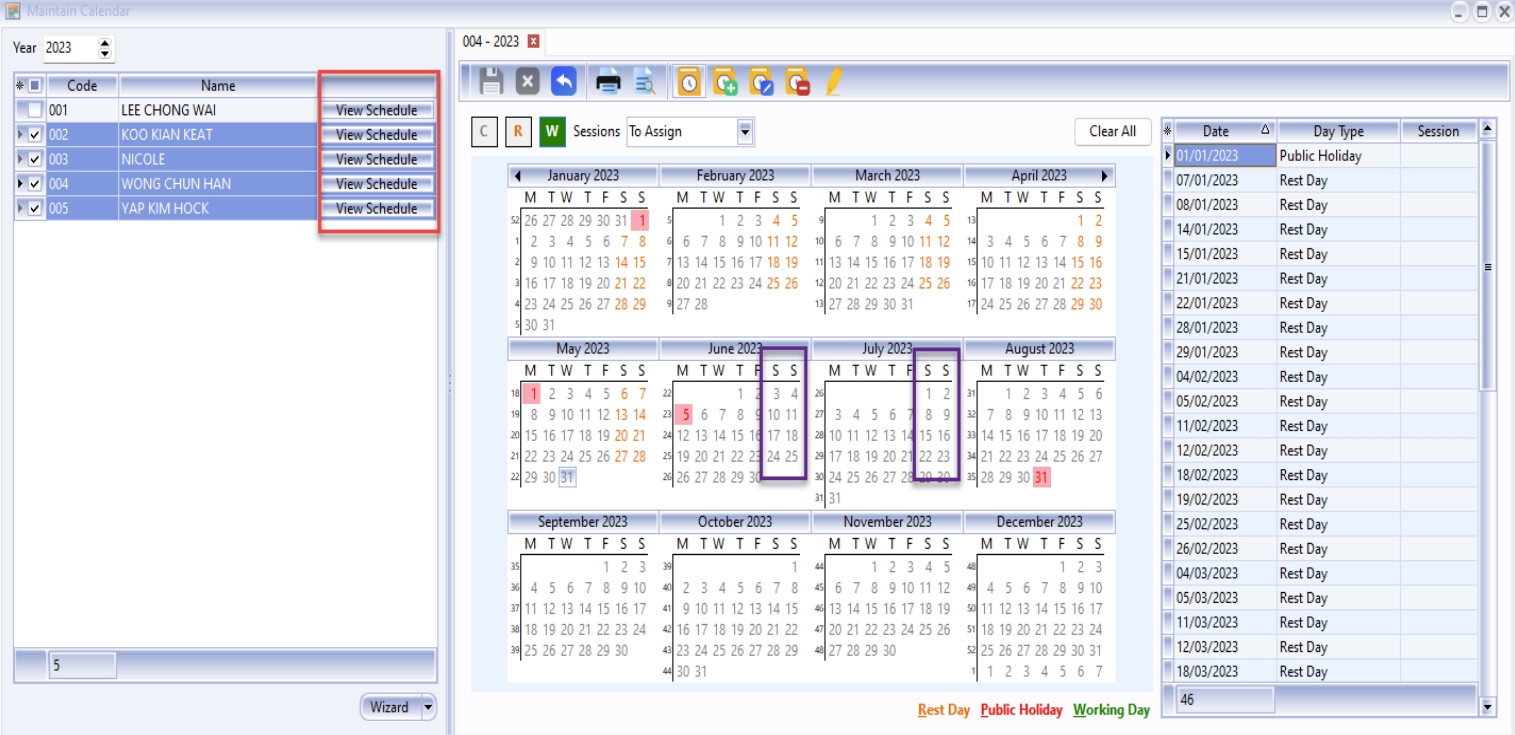
Click on View Schedule to view the changes, all the Rest Day will be cleared
-
2.4 Maintain Traveller Location
-
Wizard Traveller Location
infoRepeat the guide if Traveller Clock In / Clock Out in more than one location on different day
-
Navigate to Time Attendance > Maintain Traveller Location
-
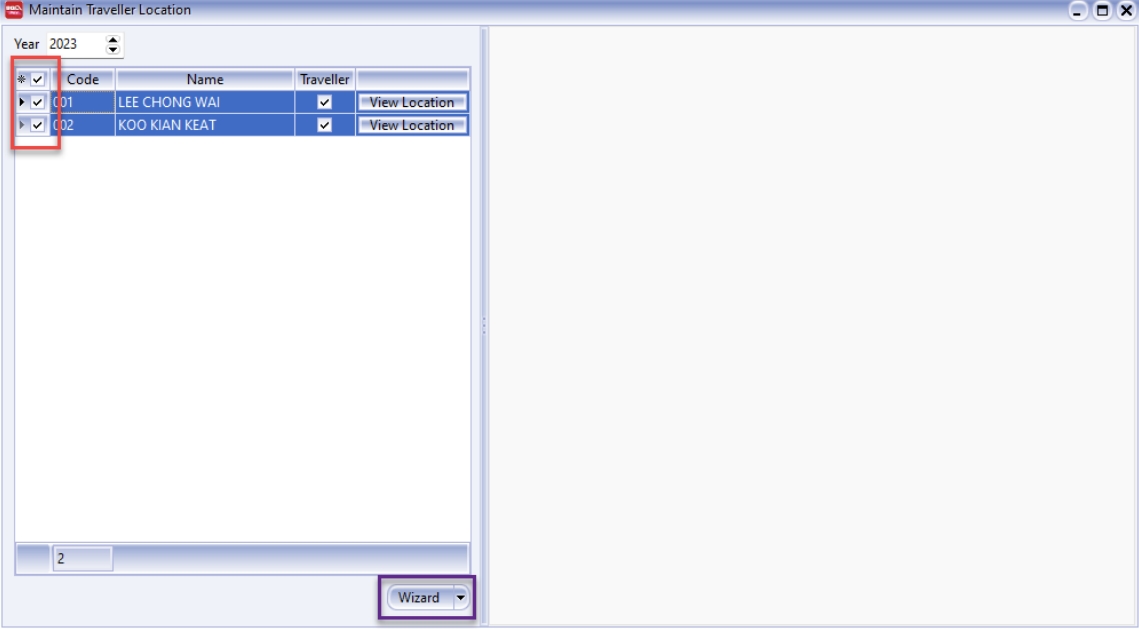
Select employee you want to do wizard location and click on the Wizard button
-
Select the option
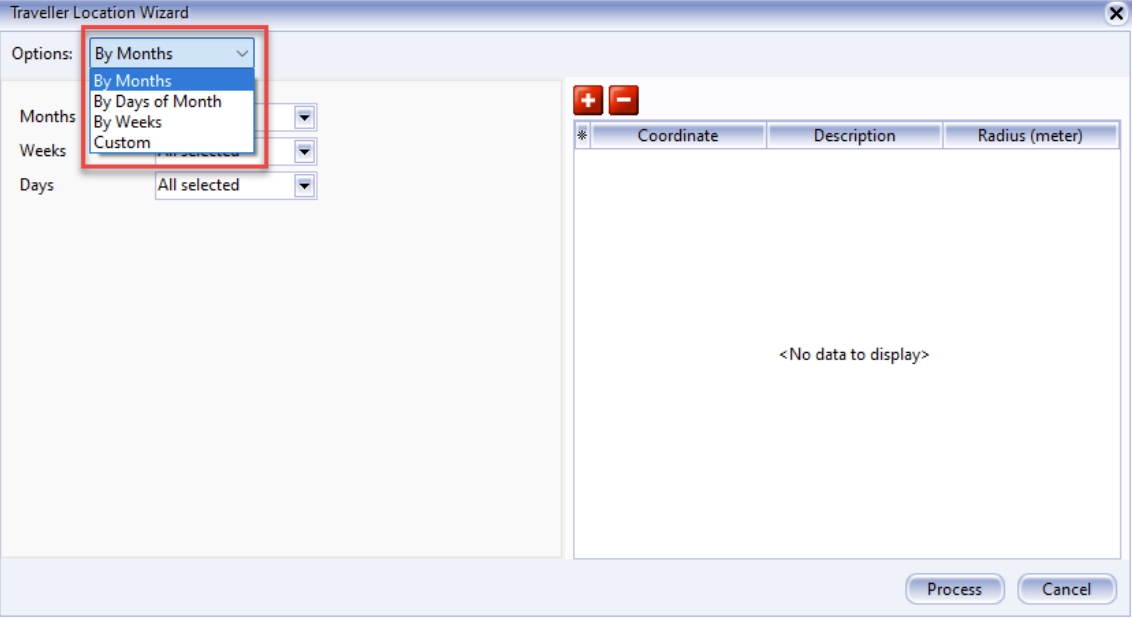
Schedule Description By Months Assign on every month, in every week and each day By Days of Month Assign on every month and each days of month By Weeks Assign on week of year and each days of month Custom Assign date by date -
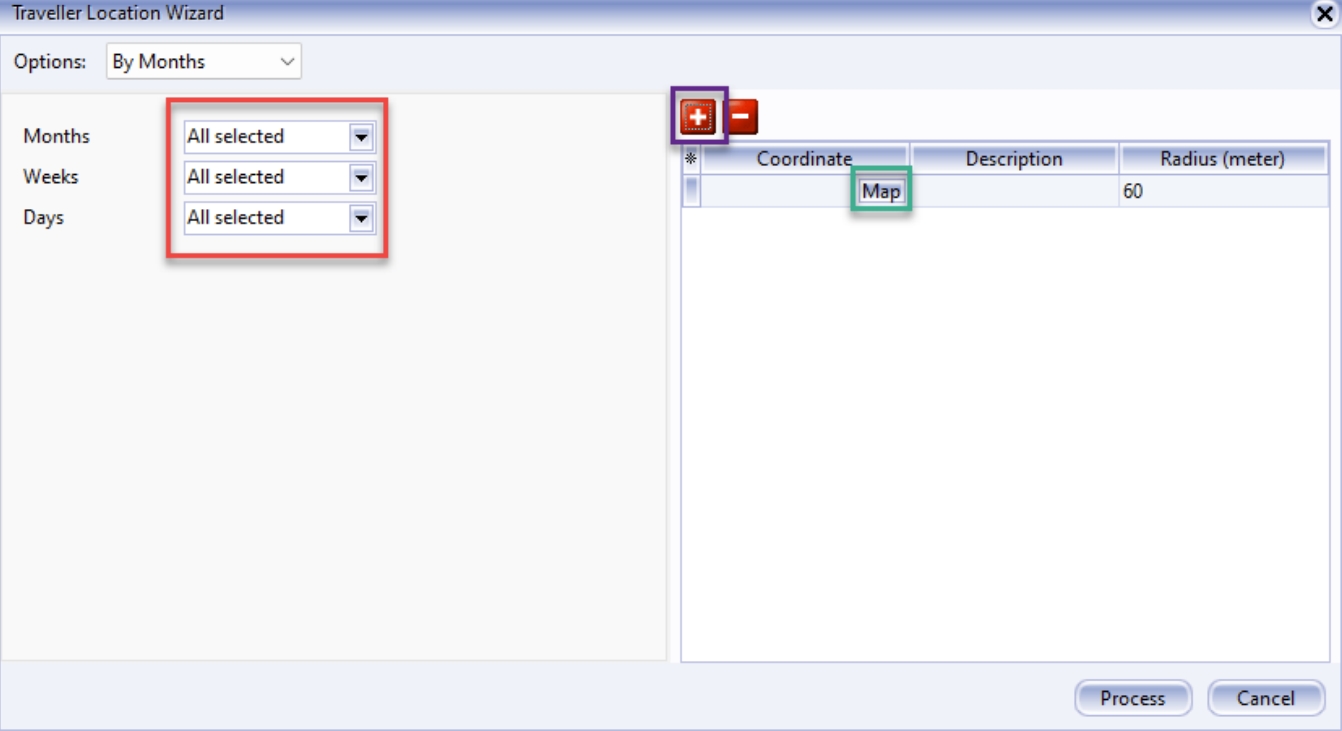
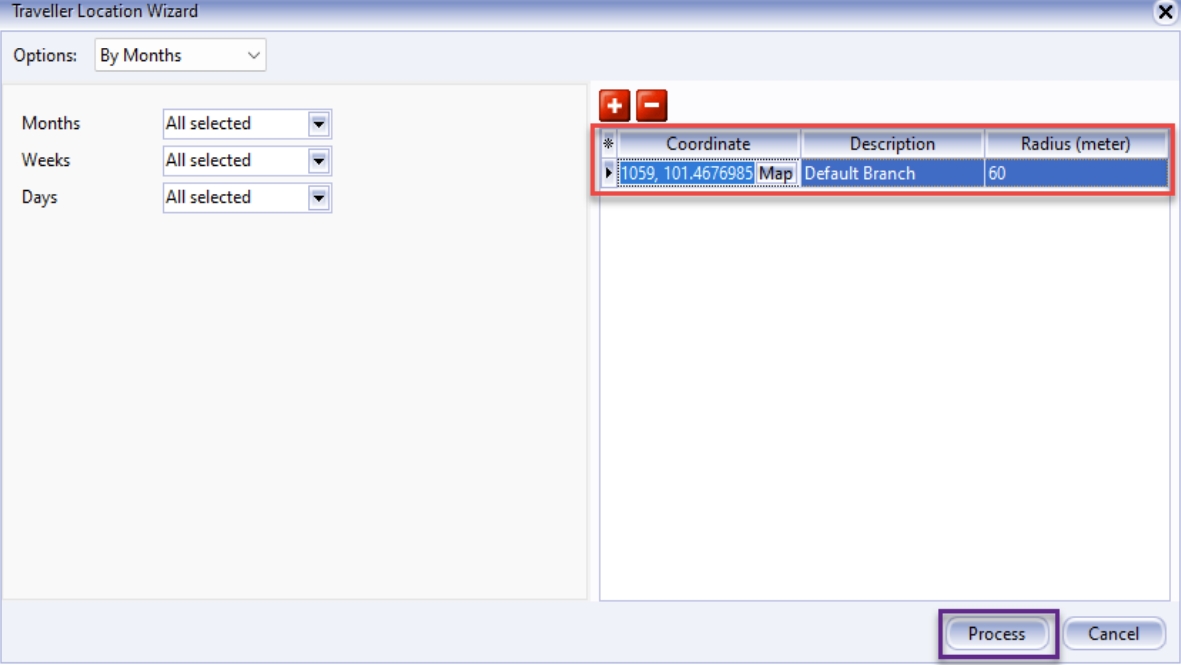
Select Months, Weeks, and Days, click on the ➕ button and select Map
-
Select your desired GPS Type. There are two GPS Type:
- Branch: This type is specifically for enabling Clock In / Clock out for travellers
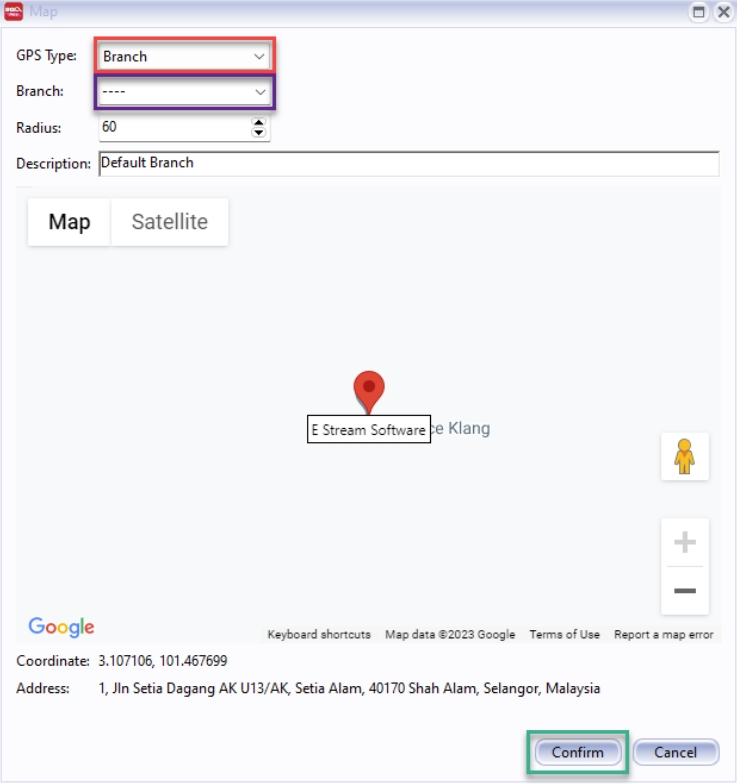
- Custom: For custom, key in the Address, click Search to look for the location and lastly press the Confirm button
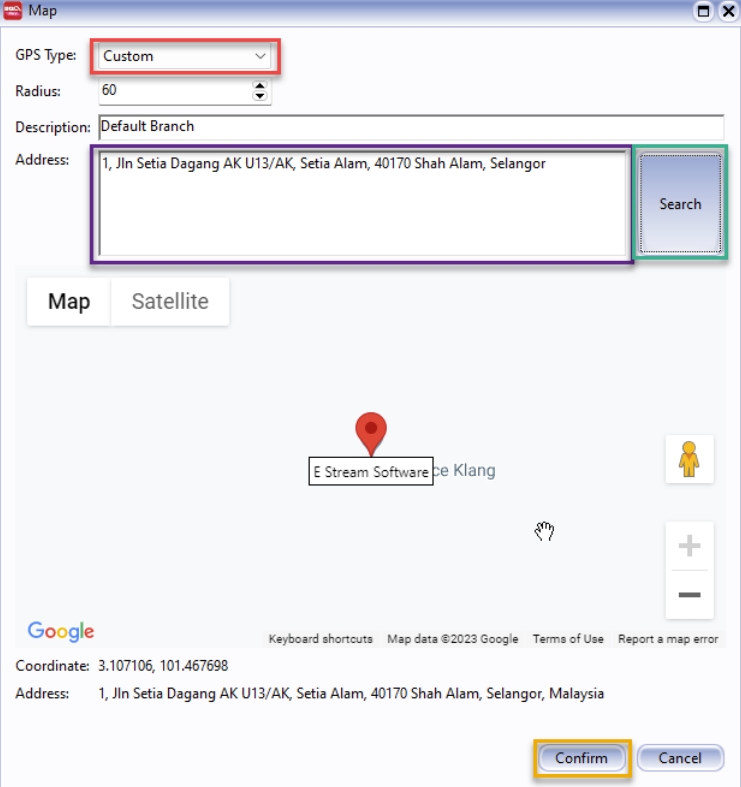
-
After that, click Process to set the rule
-
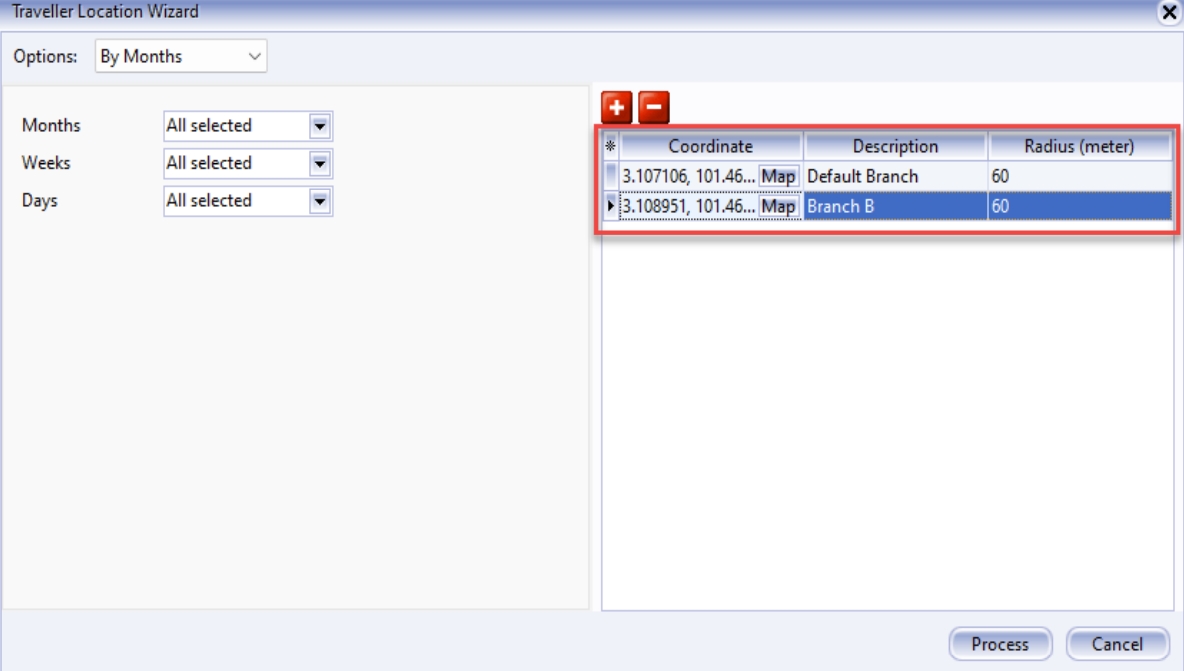
You can add multiple locations if your employee is allowed to Clock In / Clock out in different places
-
-
View Traveller Location
-
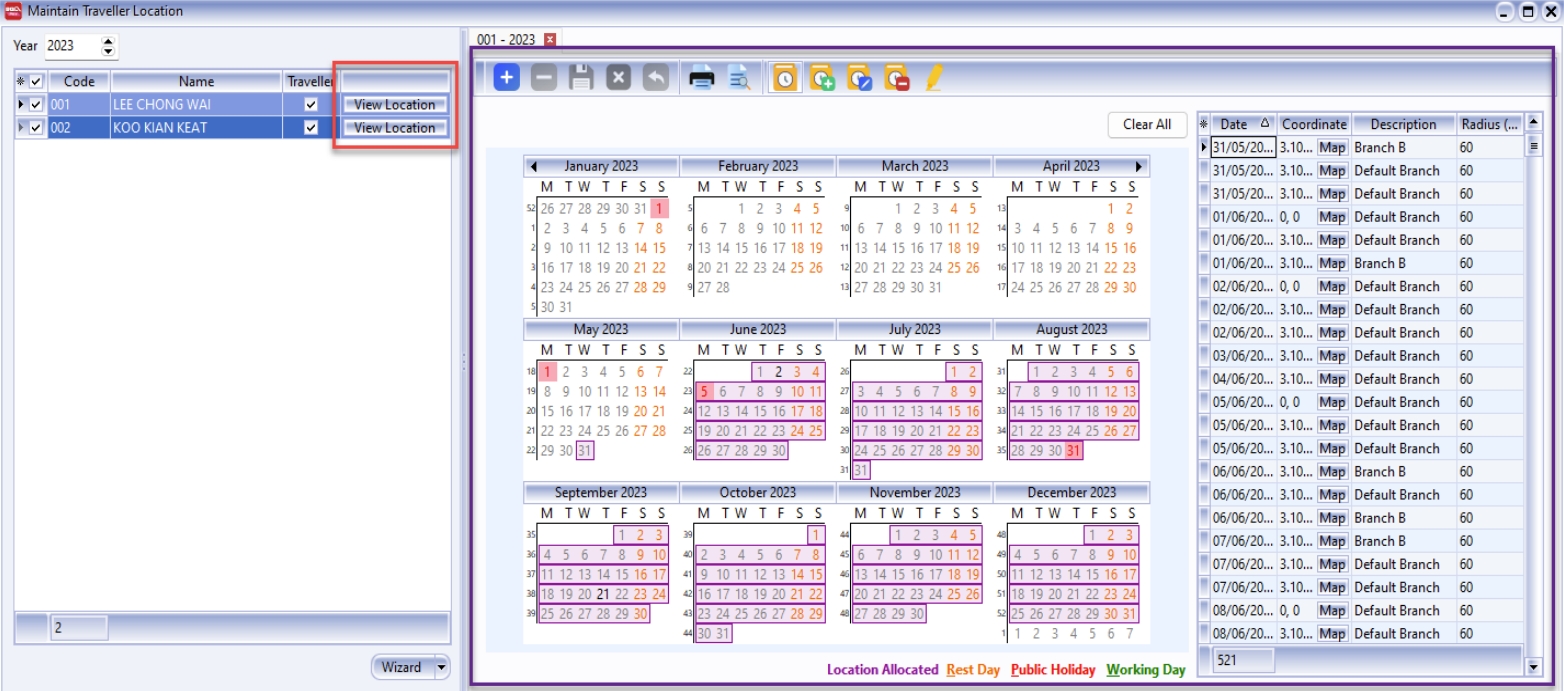
Navigate to Time Attendance > Maintain Traveller Location
-
Click on View Location to show all the Location to Clock In / Clock Out
-
-
Copy Location from Traveller Employee
-
Navigate to Time Attendance > Maintain Traveller Employee
-
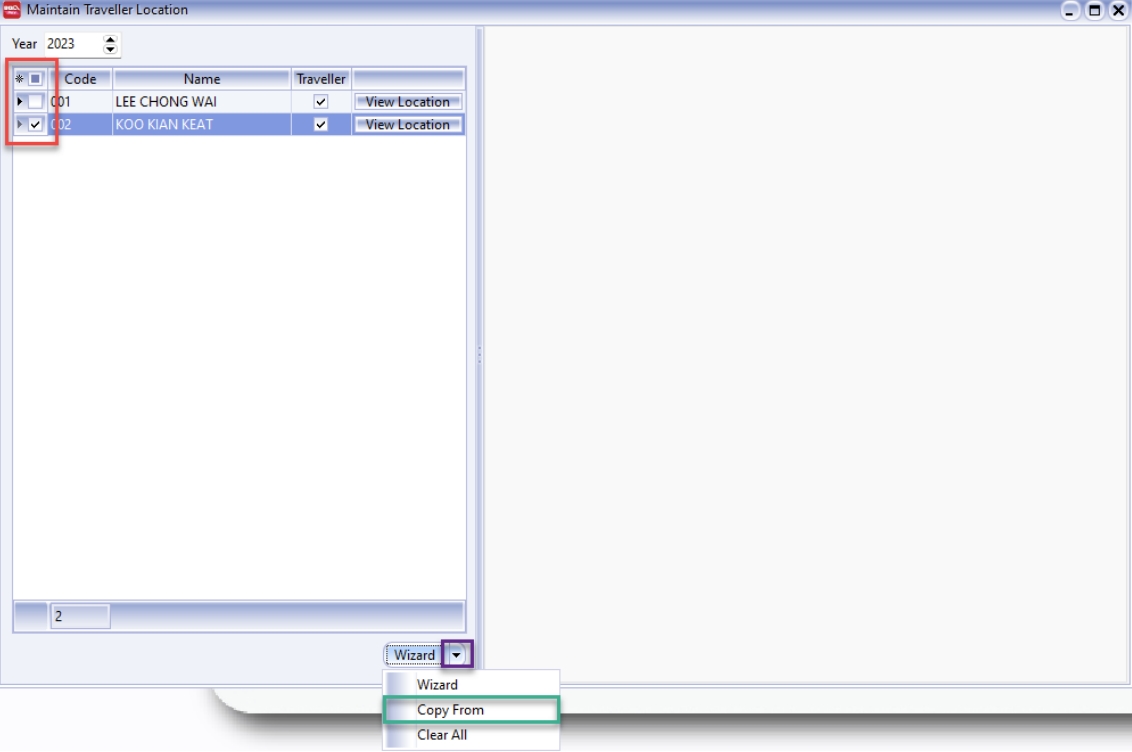
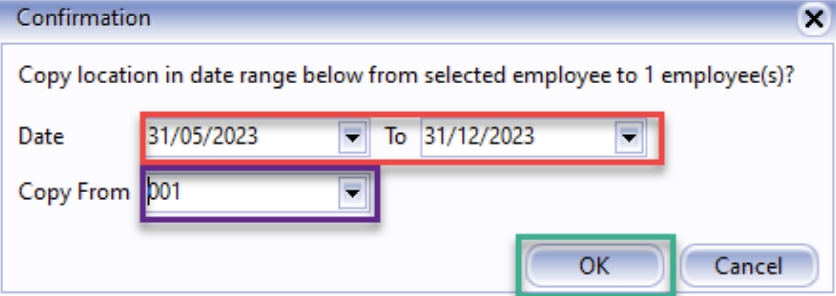
Select the employees you wish to replicate the location and click on the dropdown 🔽 besides the Wizard button, select Copy From
-
Specify the Date Range and select which employee to copy from, and press OK
-
-
Clear Location
infoTake note you will not be able to clear location past date
-
Navigate to Time Attendance > Maintain Calendar
-
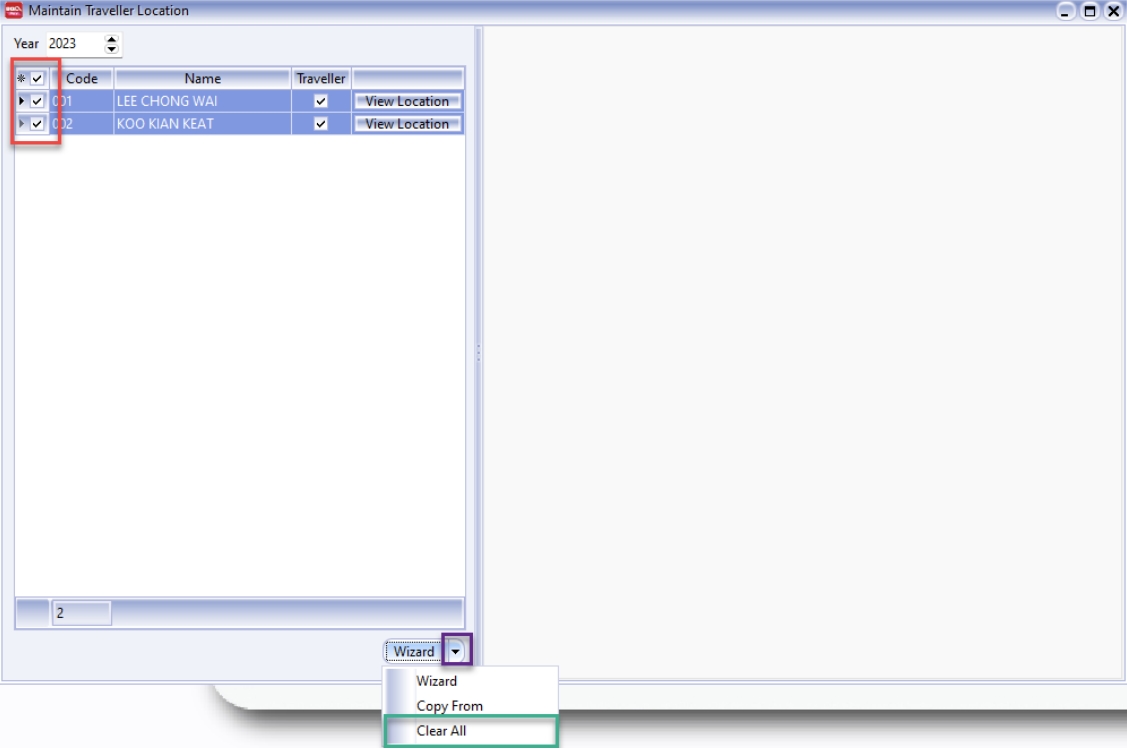
Select the employees you wish to clear all the location and click on the dropdown 🔽 besides the Wizard button, select Clear All
-
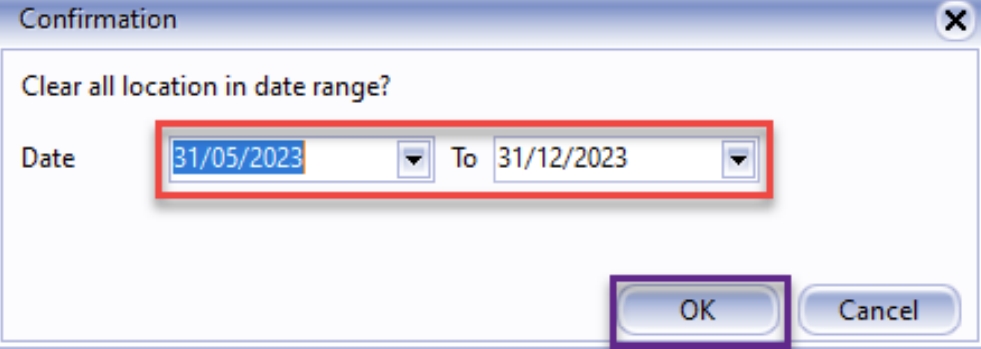
Specify the date range to clear all calendar and press OK
-
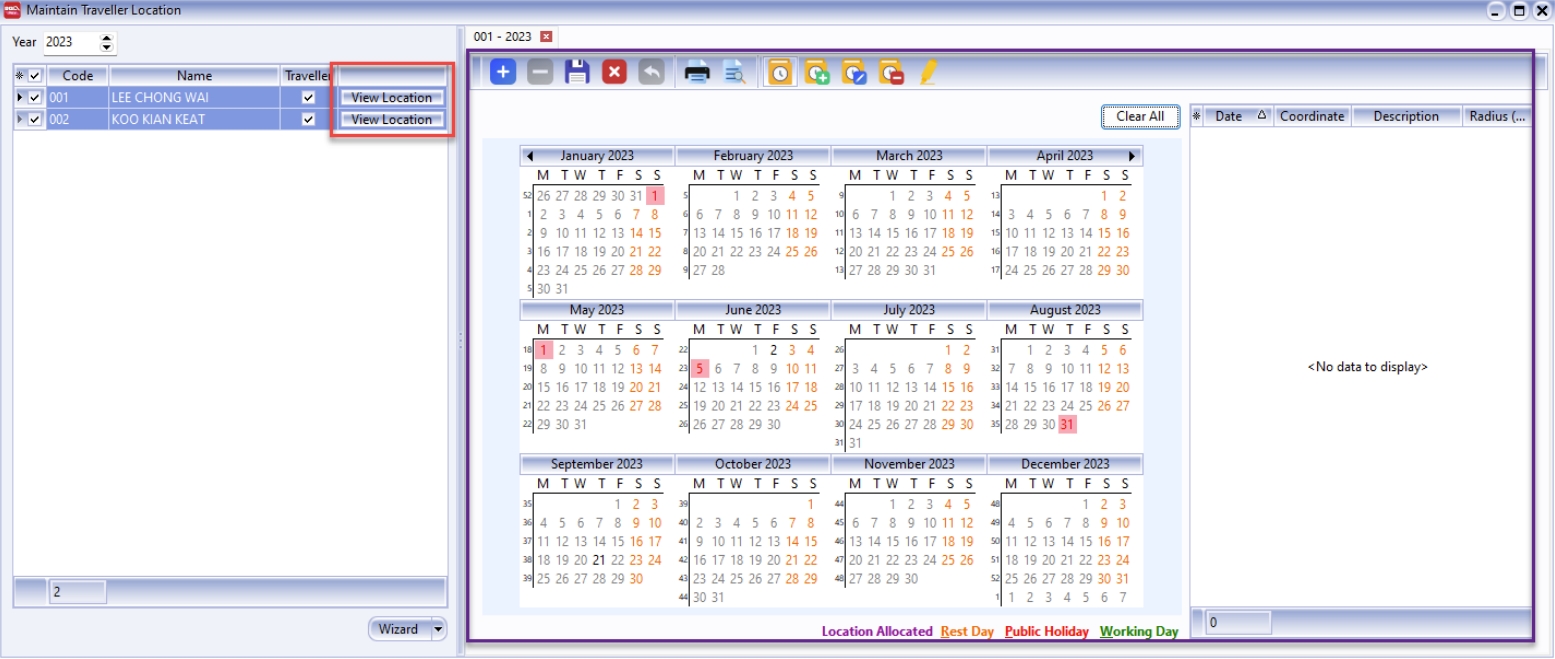
To see the updates, click on View Location and you will be able to see all the Location records have been clear
-
3 Cloud (Time Attendance)
3.1 Sync Cloud
-
Sync
-
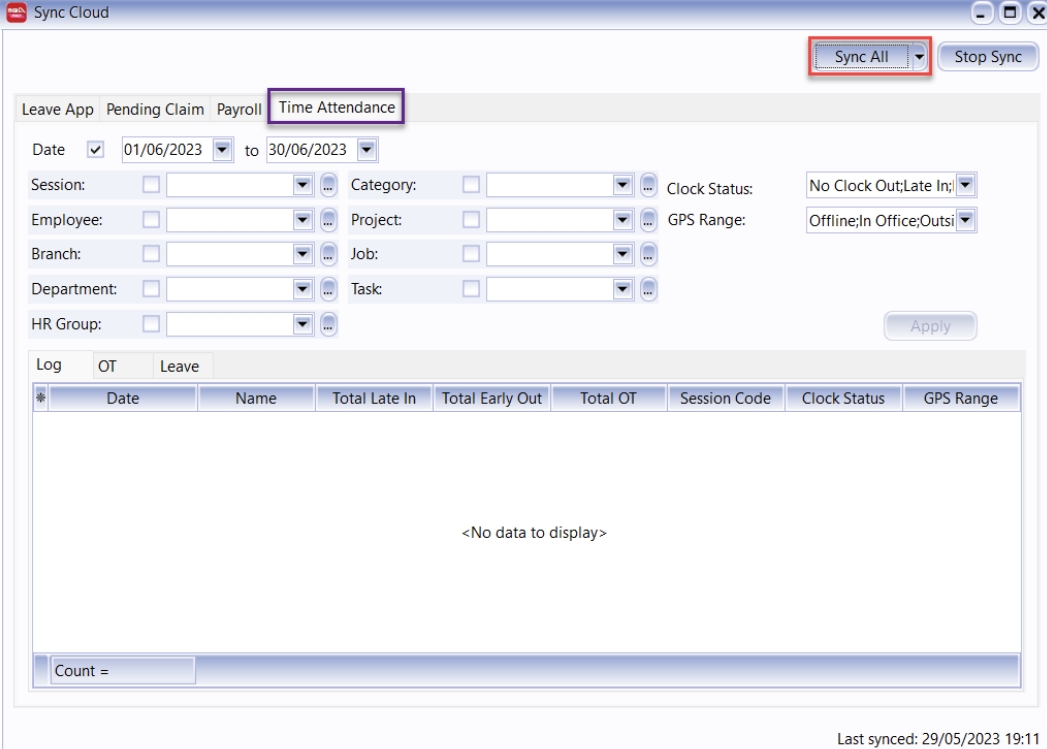
Navigate to Cloud ☁️ > Sync Cloud
-
Press Sync All
-
Next, go to Time Attendance tabbed view
-
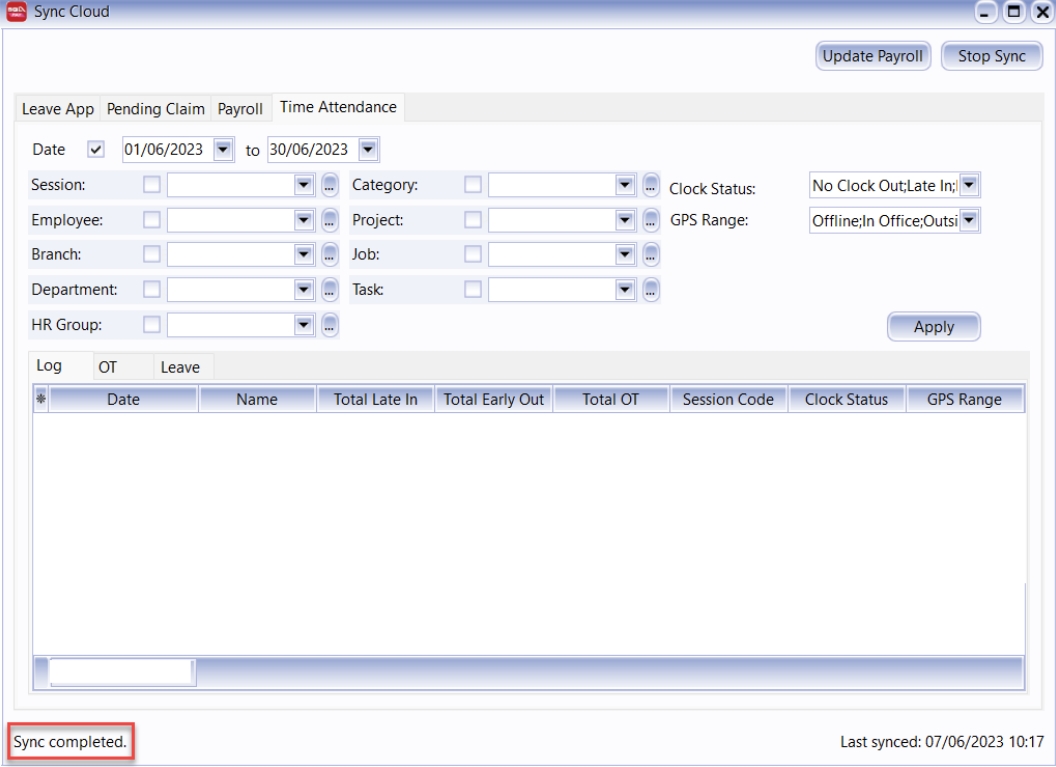
Check the bottom left tray, the status should shows Sync Complete
-
-
Log
-
Navigate to Cloud > Sync Cloud
-
Next, go to Time Attendance in the tabbed view
-
In the Log tab, you will see history of employee clock in / clock out status

-
-
OT
-
Navigate to Cloud > Sync Cloud
-
Next, go to Time Attendance, the OT tab, and click on the Action dropdown

-
The table below explains different action you can modify for the employee OT:
Actions Description Unassigned Not yet allocated any action Overtime This working period is assign to OT Cancelled Cancelled for this working session -
When set the action to Overtime, it might be highlighted as Green 🟢 or Red 🔴
-
If it appears as Green 🟢, it will be posted to Pending OT

-
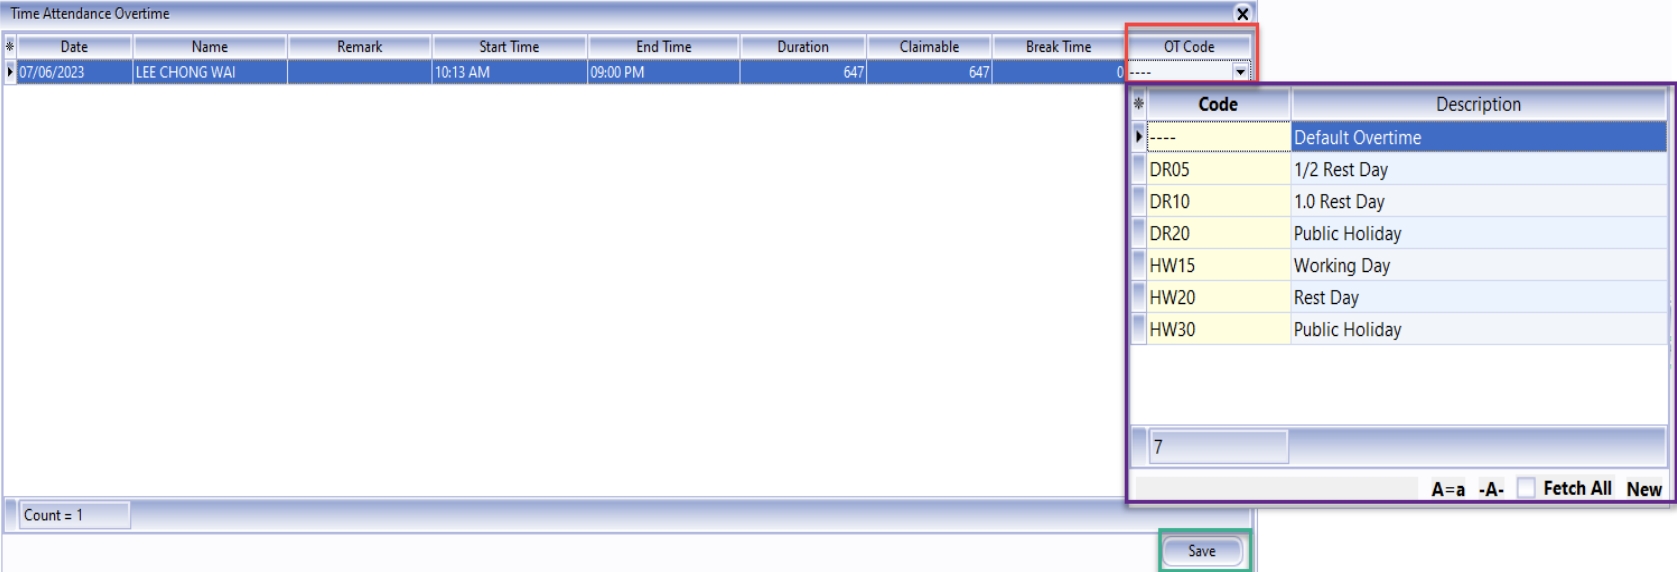
If it appears as Red 🔴, it WILL NOT be posted to pending OT, and action will be automatically switched to "Unassigned" due to missing OT code

-
To resolve the Red 🔴 case, choose OT Code by right clicking on the record, and select Edit
-
Choose the OT Code for the employee and click Save
-
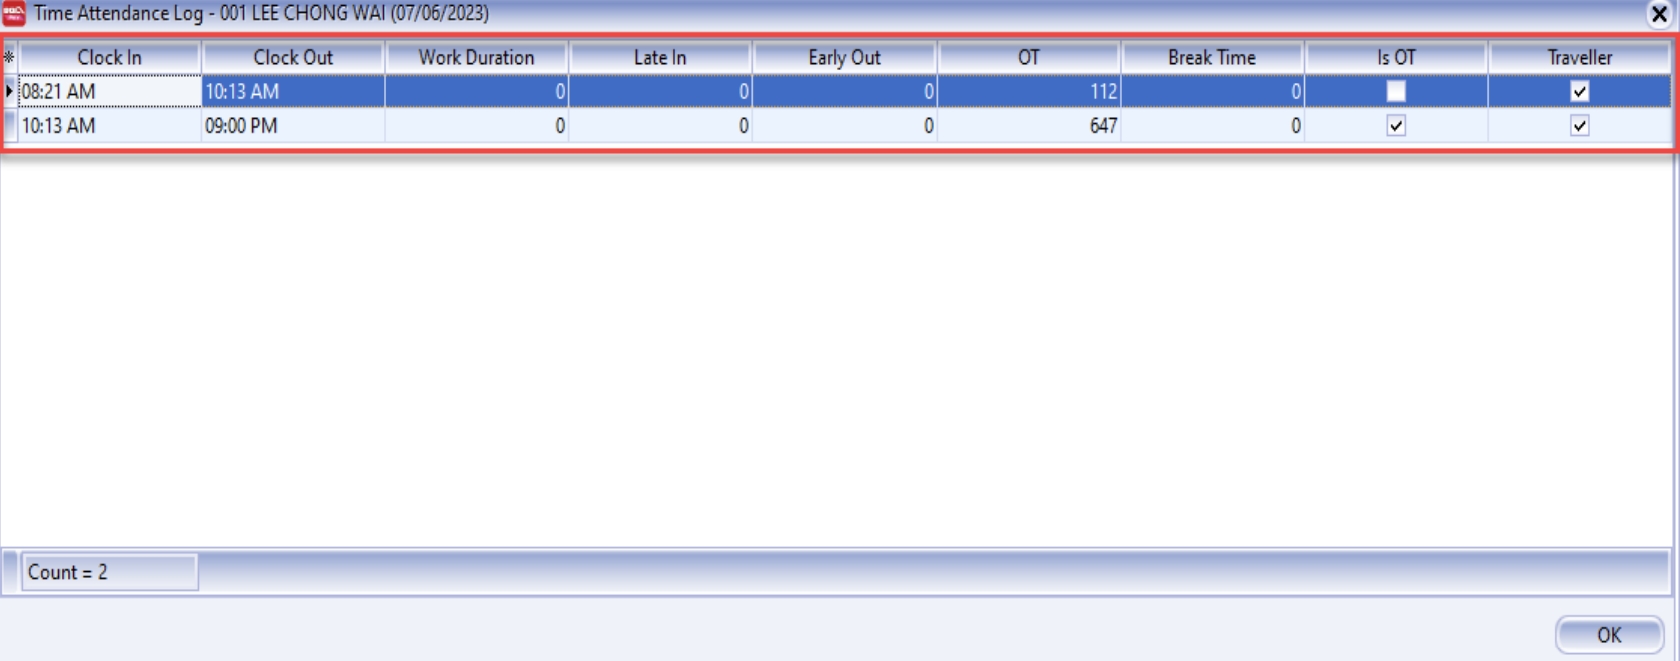
Besides, you can also see logs of employee who had OT by clicking on Show Log

-
-
Leave
-
Navigate to Cloud > Sync Cloud
-
Select Leave in the tabbed view
-
In the Leave tab, you can configure the Action and Leave Type. There are a variety of actions + leave combinations to control the leave, refer to table below:

Actions Leave Type Description Unassigned - Not yet allocated any actions Leave AL, MC Will be deducted as Annual Leave or Medical Leave Unpaid Leave UL Will be deducted as Unpaid Leave Cancelled - Cancelled for this Leave
-
3.2 Time Attendance Log
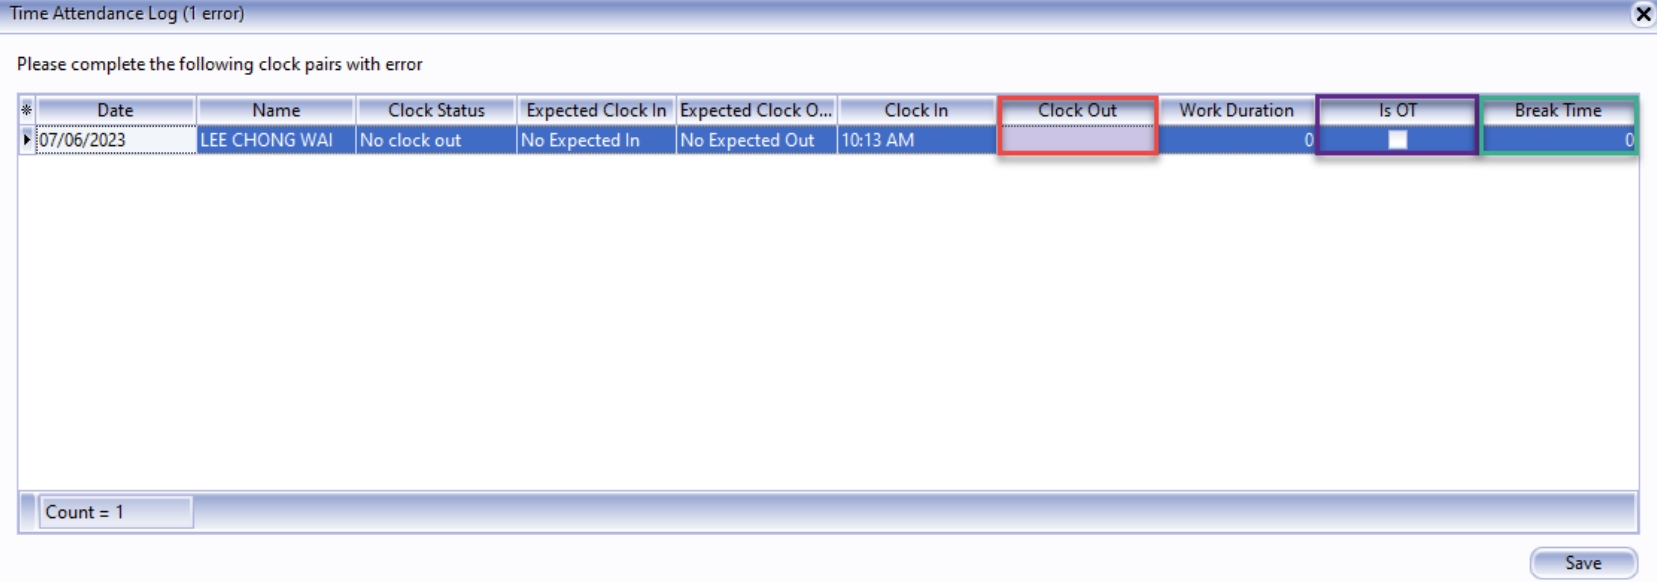
Only will prompt out for employee who did not Clock Out, HR need assign Clock Out Time manually.
-
Enter Clock Out time
-
Tick if IsOT (optional)
-
Enter Break Time (optional)
-
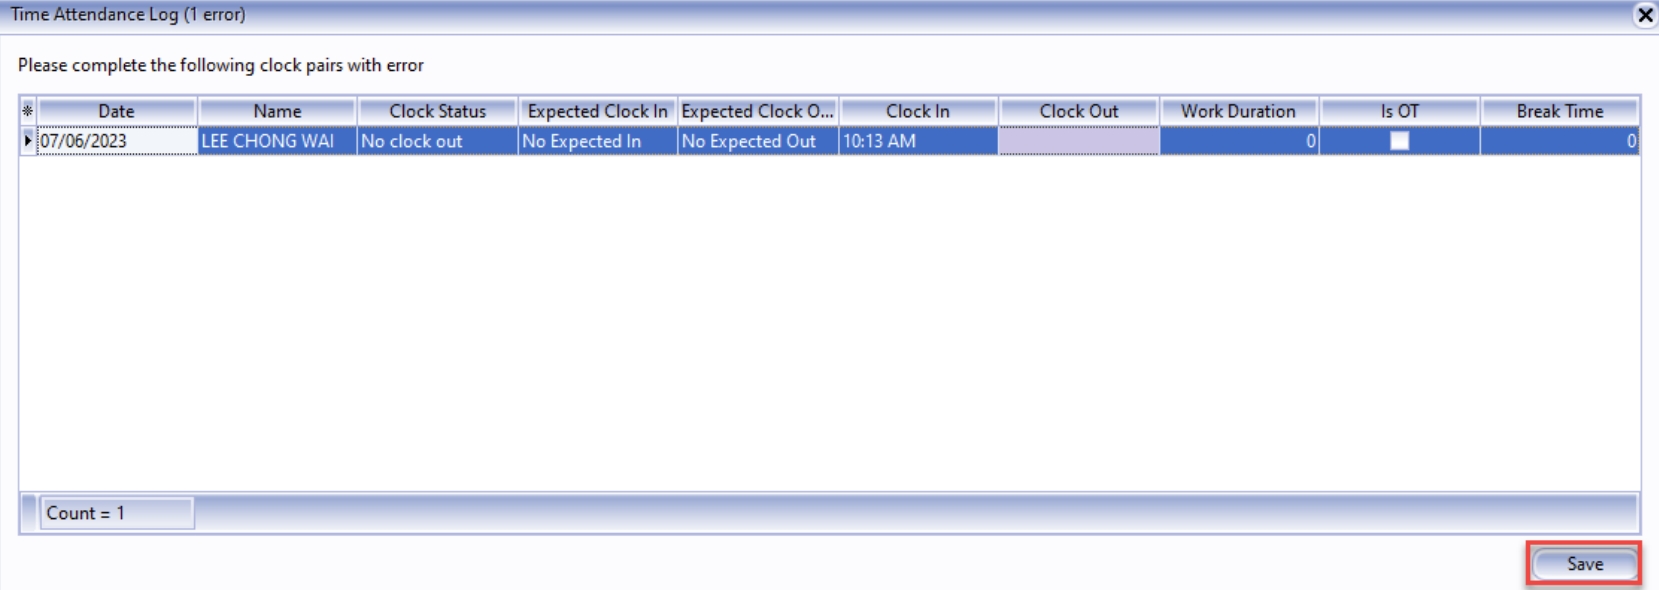
Save
3.3 Attendance Reward
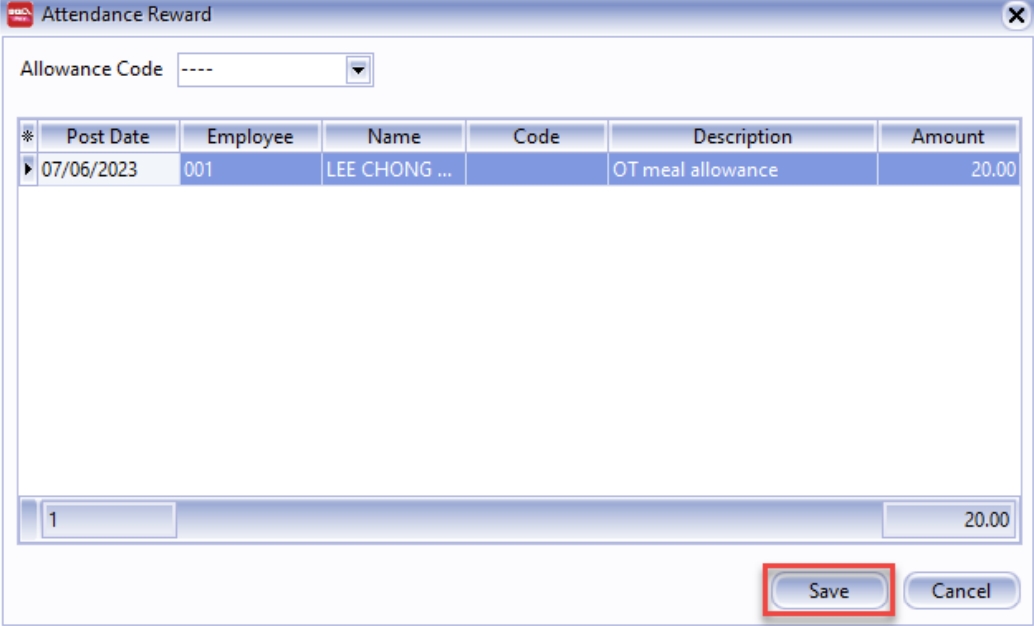
By default, meal allowance is set to RM20, you can refer service consultant to change the settings
-
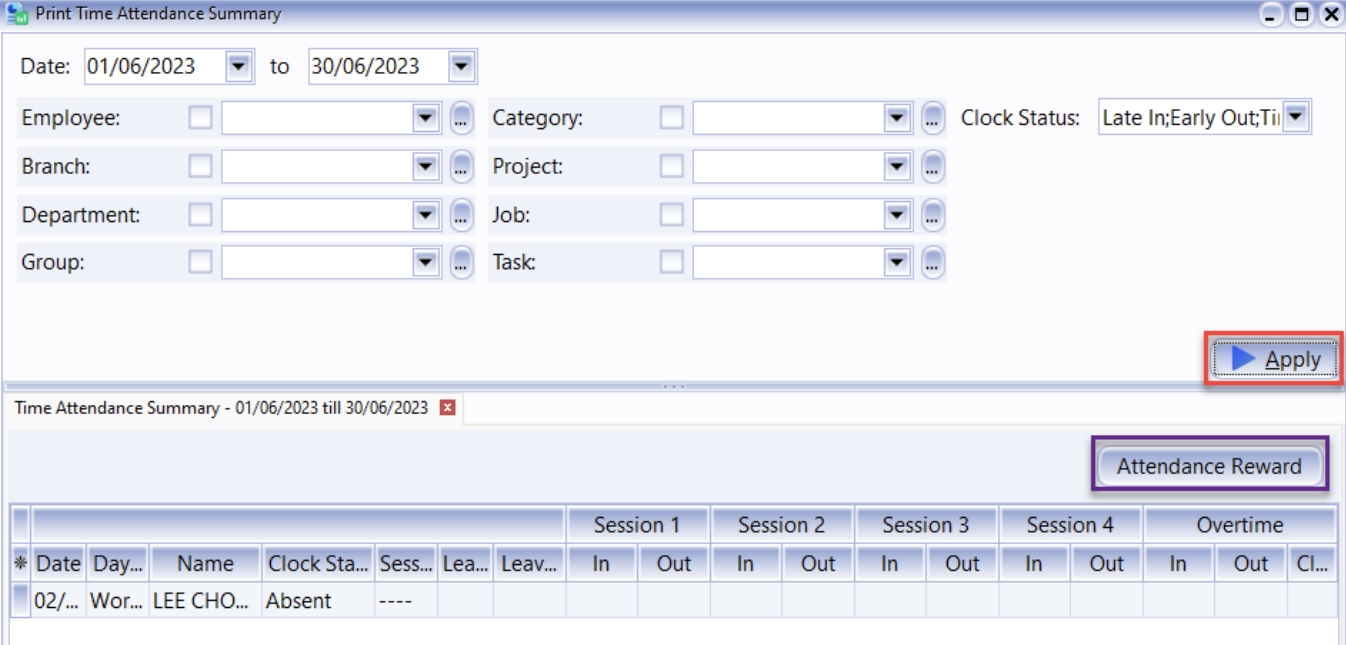
Navigate to Time Attendance > Print Time Attendance Summary
-
Make sure to TICK ALL under Clock Status

-
Apply and click on Attendance Reward
-
Press on Save
-
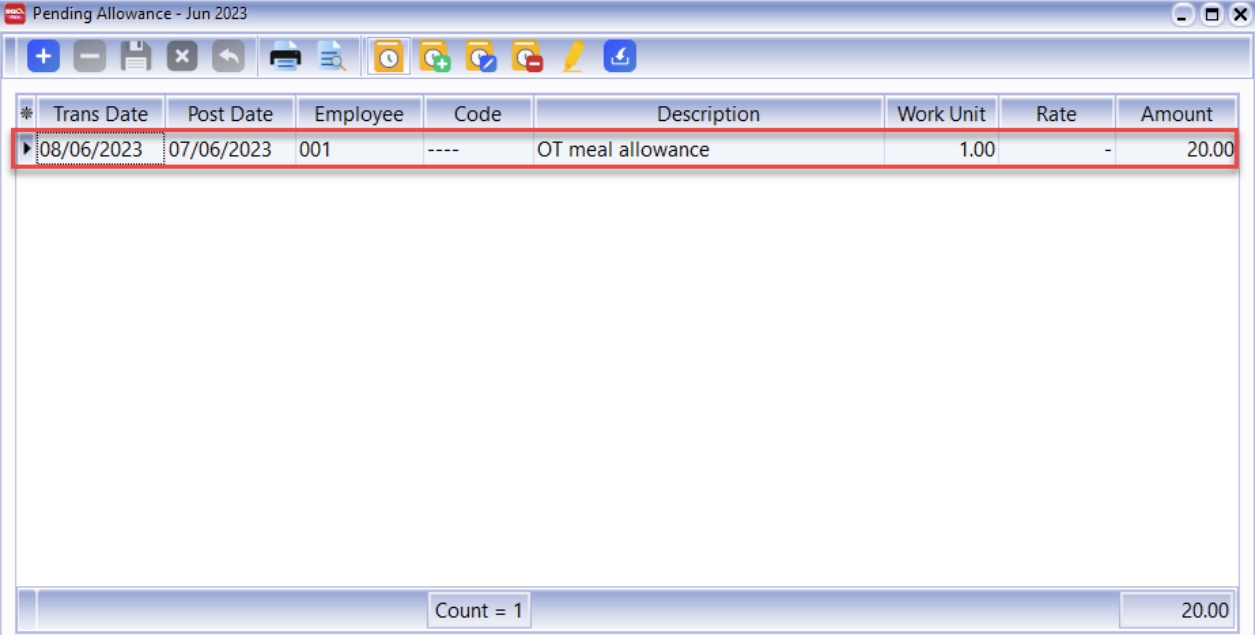
After save, the reward will appear under open pending payroll (you can navigate to Payroll > Open Pending Payroll > Allowance to view it)
4 Application SQL HRMS
4.1 Installation For iPhone User
Minimum IOS version: IOS 14 and above
-
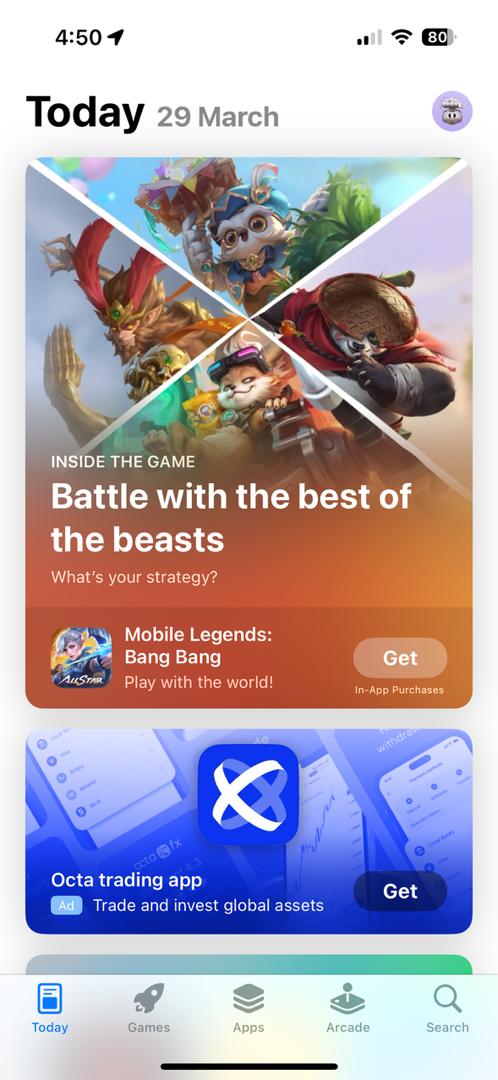
Click on App Store

-
Click on Search (bottom right hand side)
-
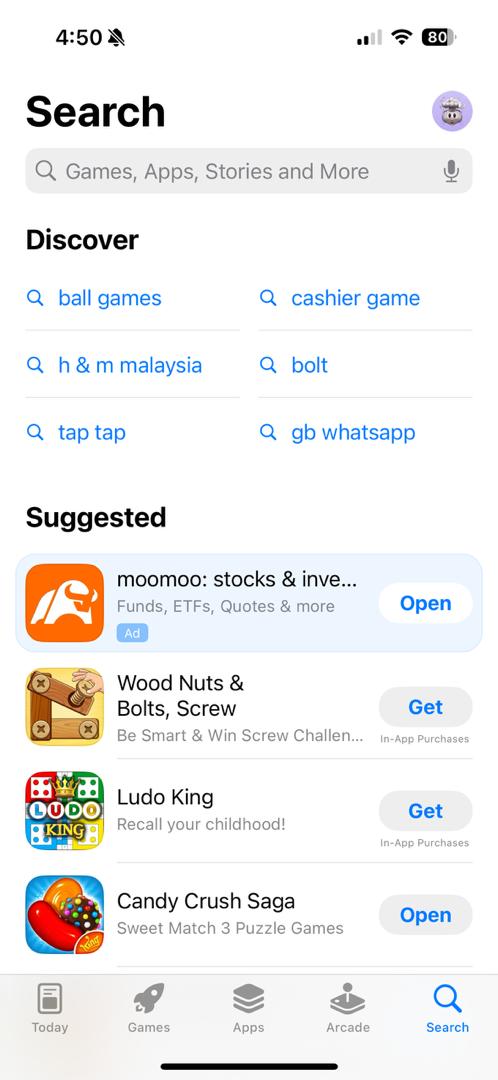
Key in “SQL HRMS” in search bar
-
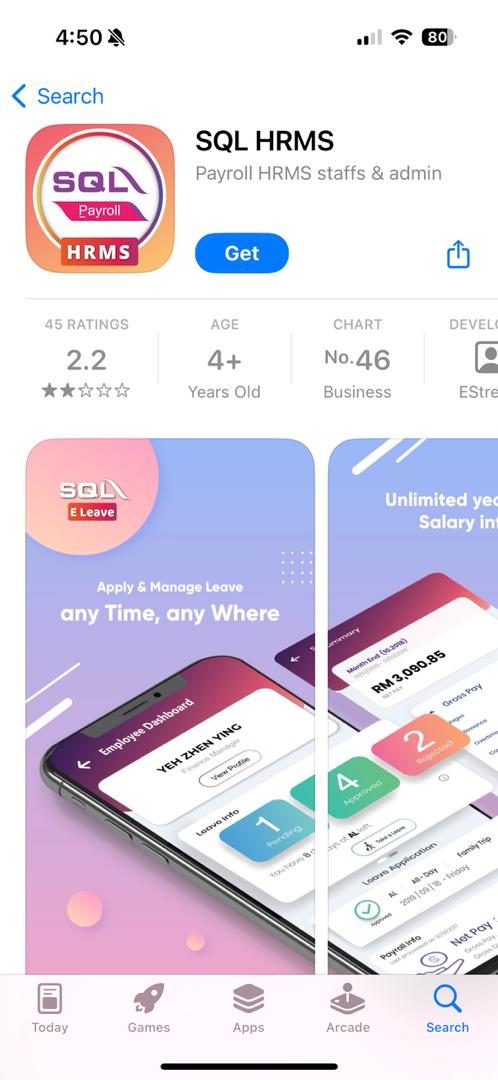
Click on GET
-
Done
4.2 Installation for Android User
-
Minimum android version: Android 8.1 and above
-
Huawei phones were banned from using Google services in 2019. Therefore, since SQL HRMS utilizes Google technology, certain models of Huawei phones may not be able to enjoy our app
-
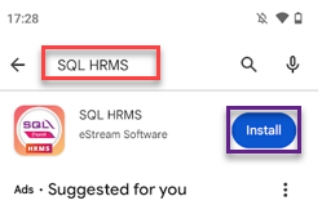
Click on App Store
-
Key in “SQL HRMS” in search bar | Enter
-
Click on Install
4.3 Login to the Application
-
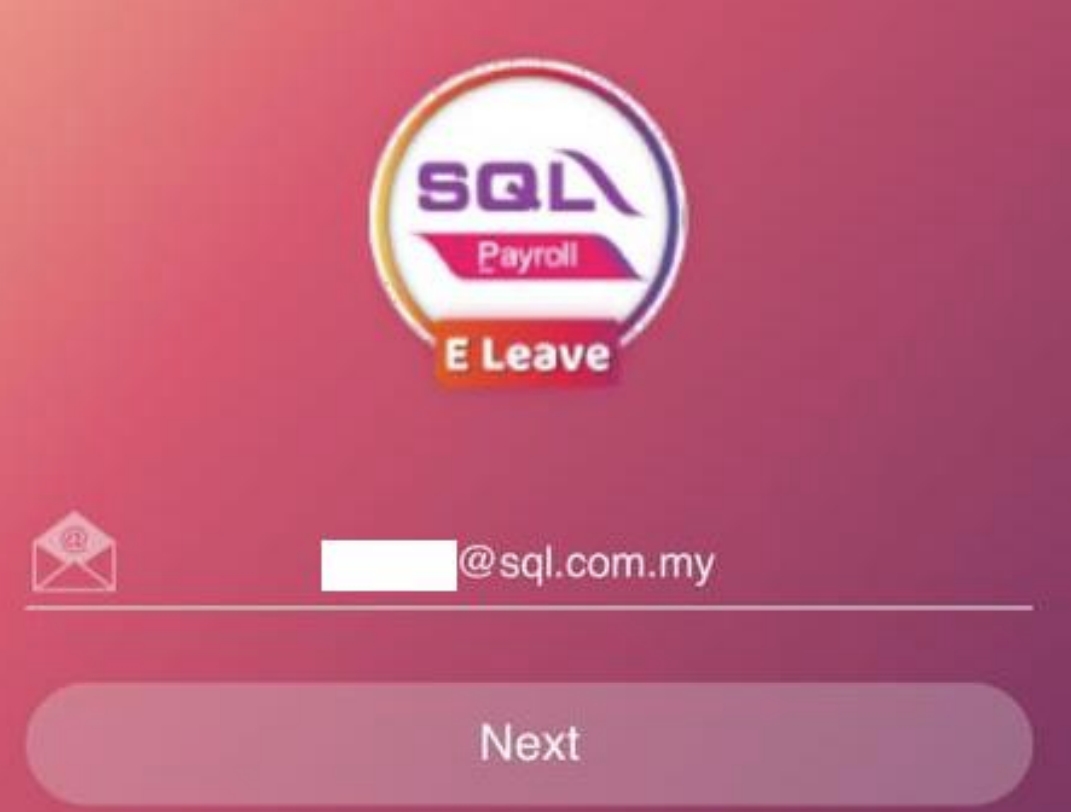
Open the mobile application, key in your registered email and click Next
-
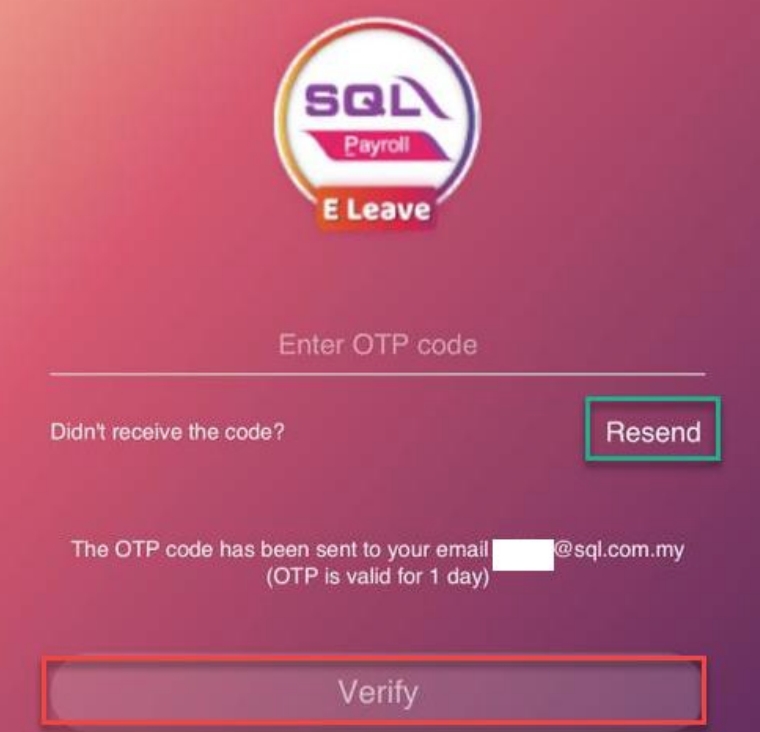
You will receive OTP in your email, go to your mailbox to grab the code
infoIf you didn't receive the mail, kindly check the spam box. The OTP email might have been falsely classfied as spam by mail classifier. If not in spam box, click Resend to receive a new OTP mail
-
Enter the OTP Code and click Verify
4.4 Location Setup For iPhone User
-
Turn on Location Services
-
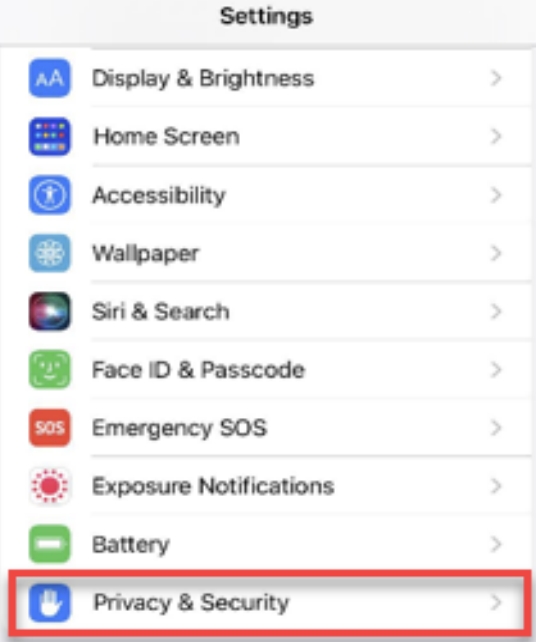
Click on Setting
-
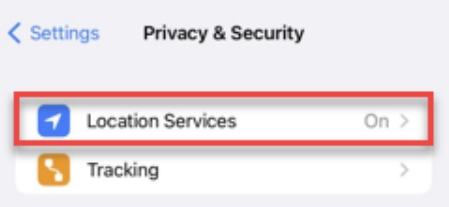
Click on Privacy & Security
-
Click on Location Services
-
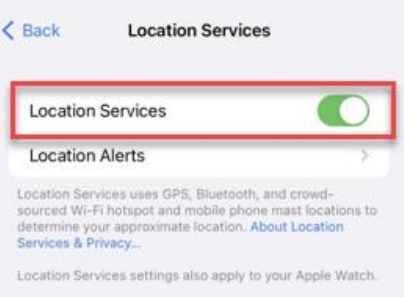
Turn on Location Services (Make sure is green color)
-
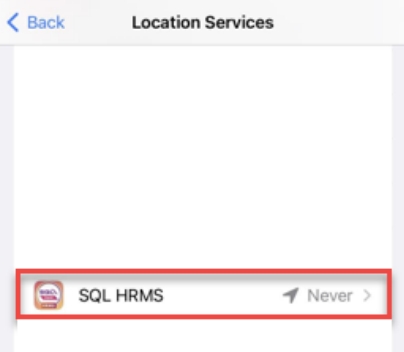
Scroll down and choose SQL HRMS
-
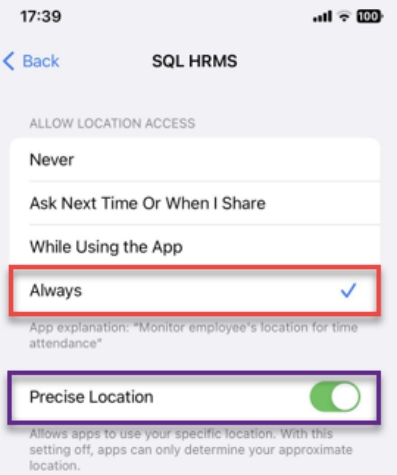
Choose Always & Precise Location make sure is ON
-
4.5 Location Setup for Android User
-
Turn on Location Services
-
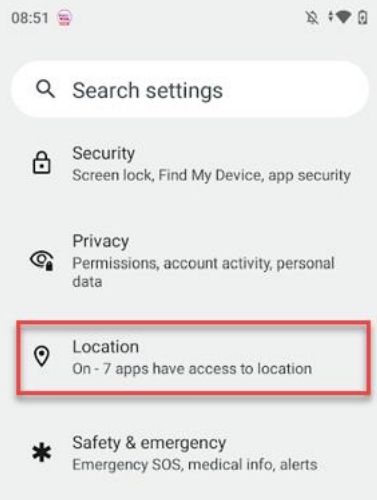
Click on Setting
-
Click on Location
-
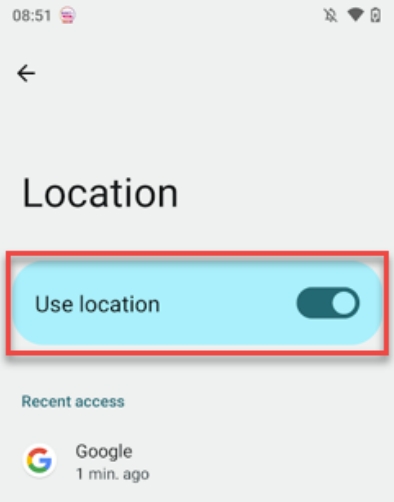
Turn on Use Location
-
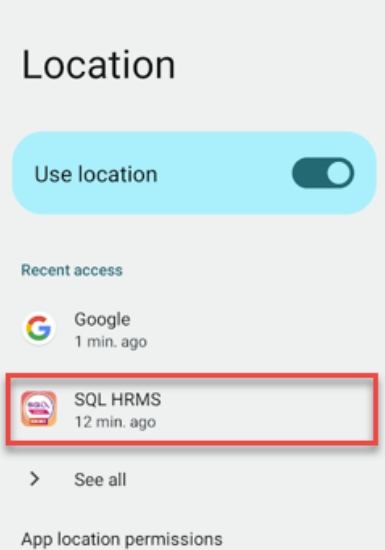
Click on SQL HRMS
-
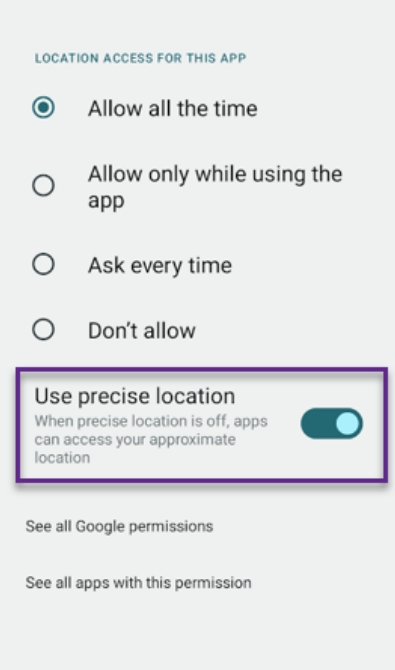
Choose Allow all the time & Precise Location make sure is ON
1. Allow all the time 2. On the Precise Location 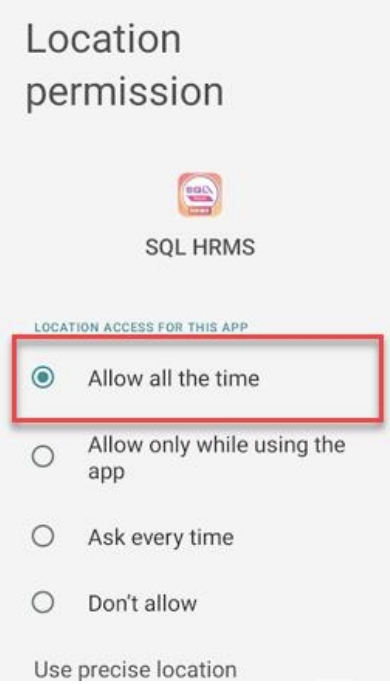
-
4.6 Clock In
-
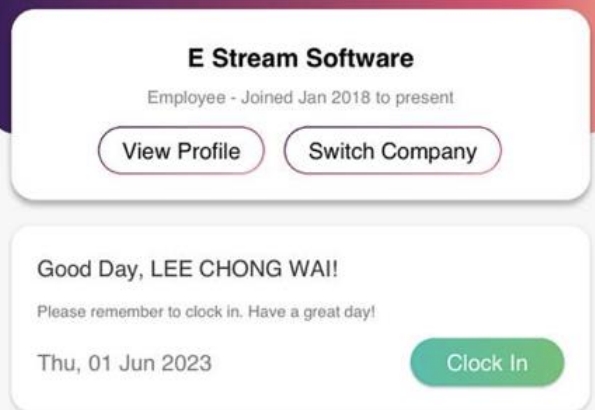
Click Clock In
-
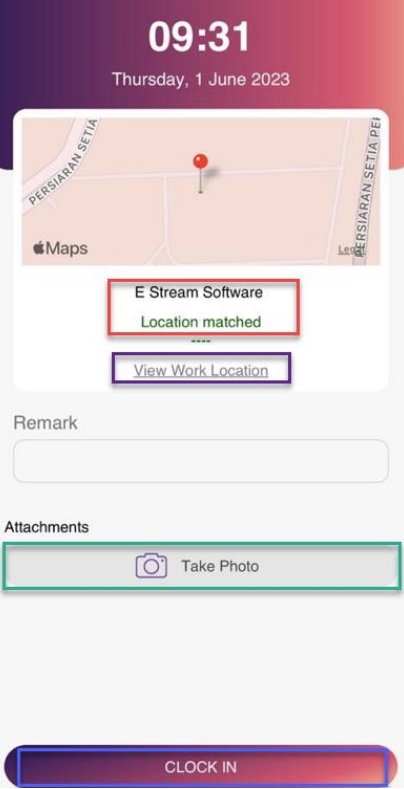
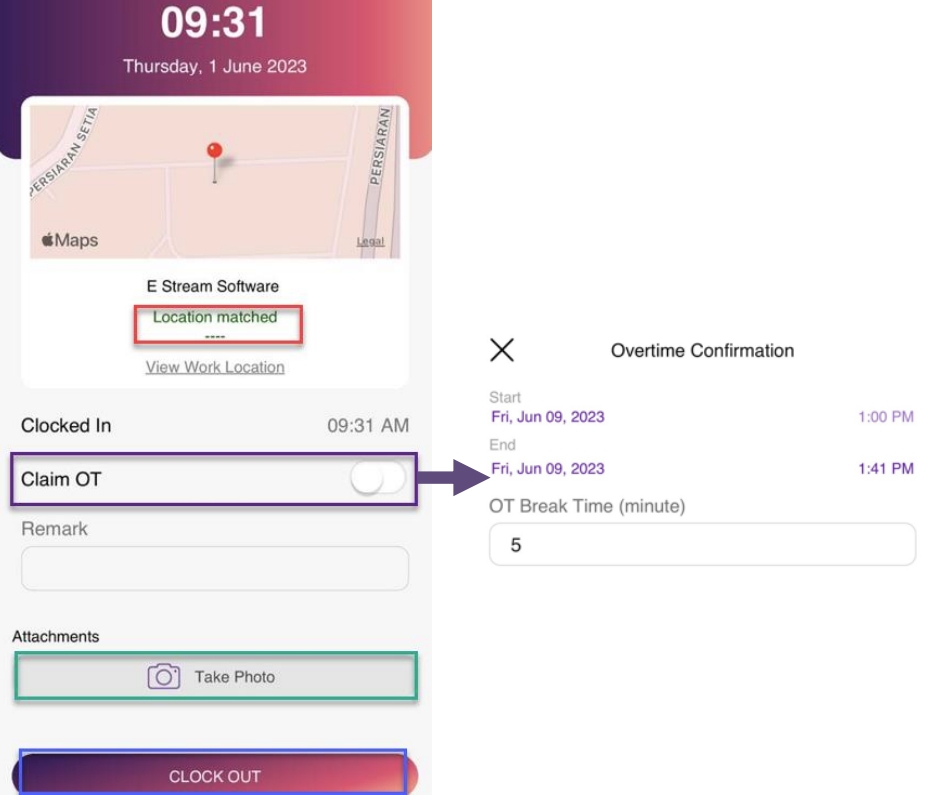
When you have reach your work location, you should see the status changed to Location matched. Take a photo by clicking on Take Photo and press Clock In
-
From the screen, you can check your current location by clicking on View Work Location
-
If the location does not match, the app will show a message Please Clock In At XXX (Location set)
4.7 Clock Out
-
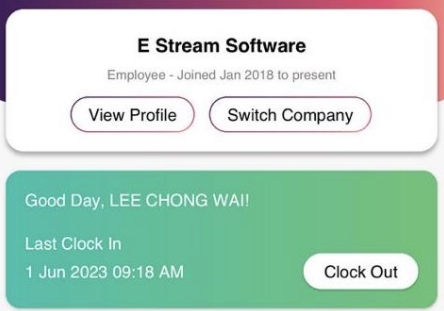
Click Clock Out
-
Whe you are in your work location, you shoul see the status is Location Matched. Take a photo by clicking on Take Photo and press Clock Out
-
Click Claim OT when you did OT. Key In Total OT Break Time when you OT, system will deduct the break time when calculate OT
4.8 Attendance Log
-
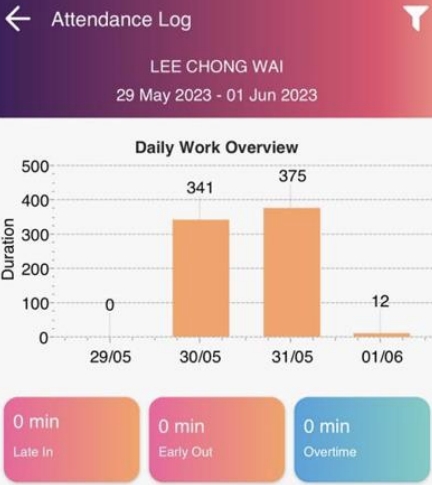
View the duration of work for this period working days
-
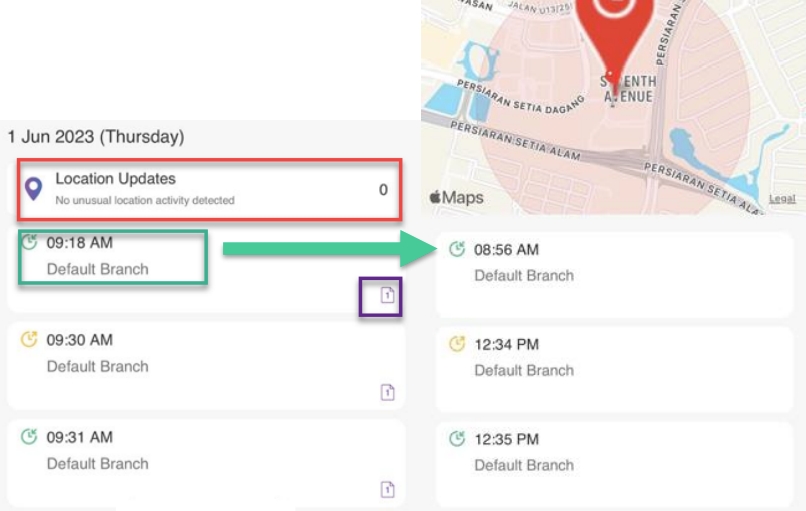
Click Location Updates to view time and location of clock in & clock out
4.9 Team Attendance
-
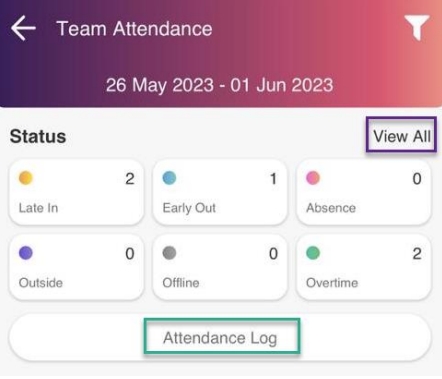
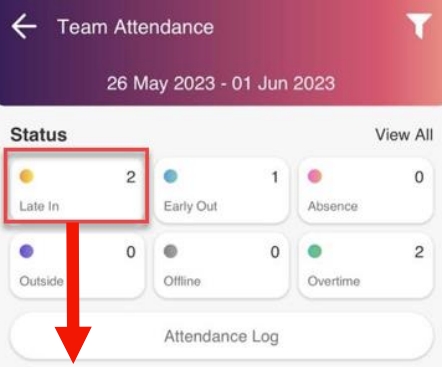
Status will show all staff attendance status
-
View All to view status in detail
-
Attendance Log to view employee clock in & clock out status
-
-
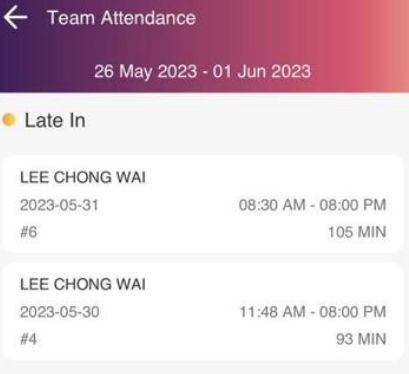
Click each Status can view details of that status
-
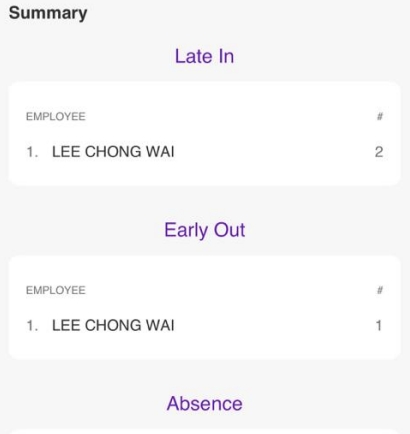
Summary of all status (Employee name will be show)
4.10 OT Entitlement
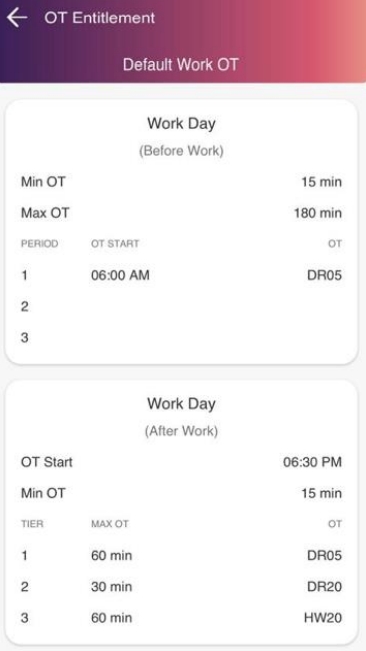
Can view the OT Entitlement set by company
4.11 My Calendar
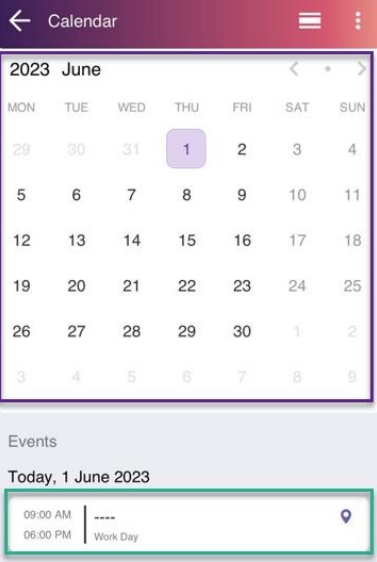
- View Work Session using Calendar
- View Working Location for each day
