Migrate from MYOB
Setup
-
Place the MYOB Backup file to Desktop. For example: C:\Users\SQL\Desktop\MYOB.
-
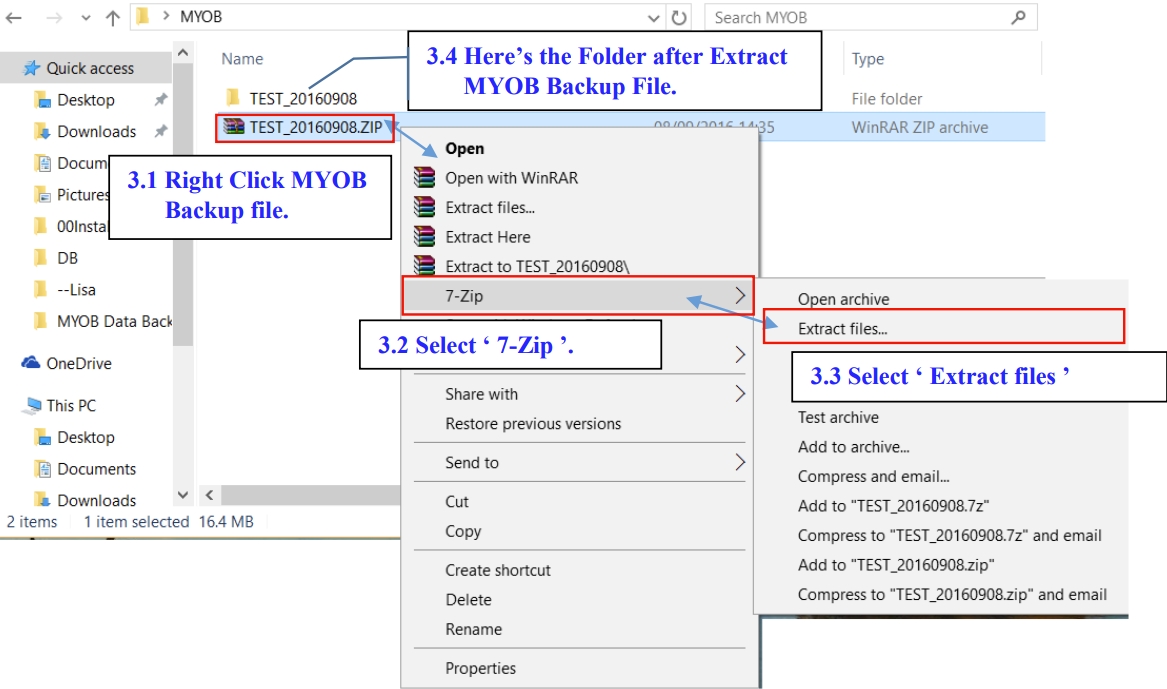
Extract MYOB Backup file.
-
Refer Image below on How to Extract MYOB Backup file.
-
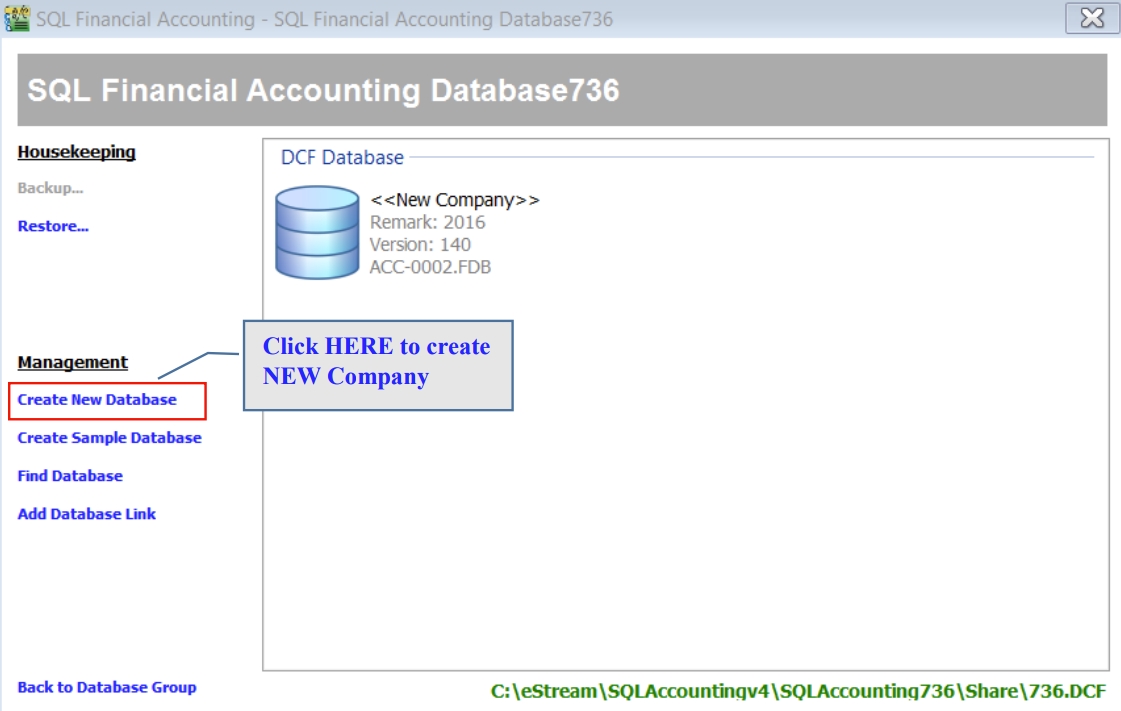
Create New Database then Log On New Company with ADMIN User
-
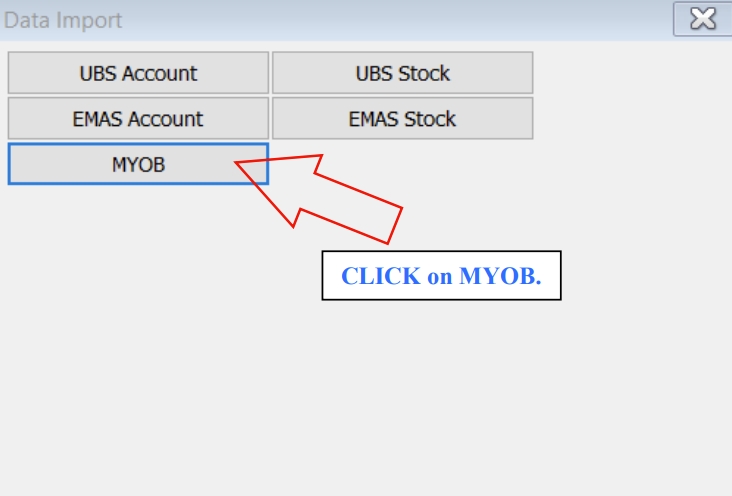
Once Log On, Go to File | Data Import | Select MYOB.
-
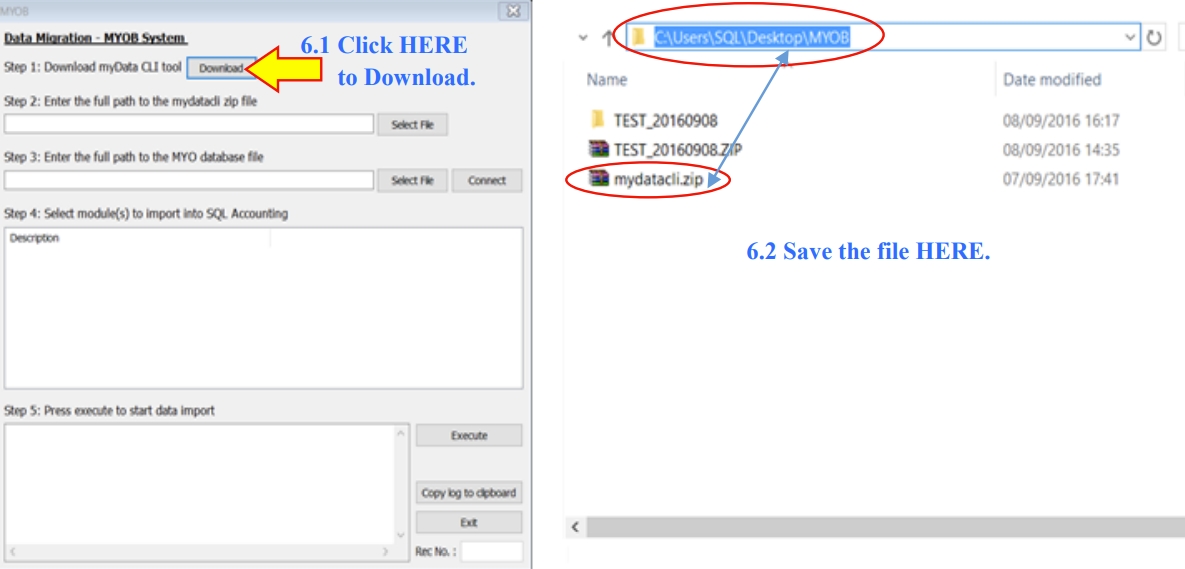
Follow Step 1 in image below : Click the ‘Download’ button to download the needed tool for MYOB migrate.
Then place the ‘myData CLI’ to C:\Users\SQL\Desktop\MYOB.
-
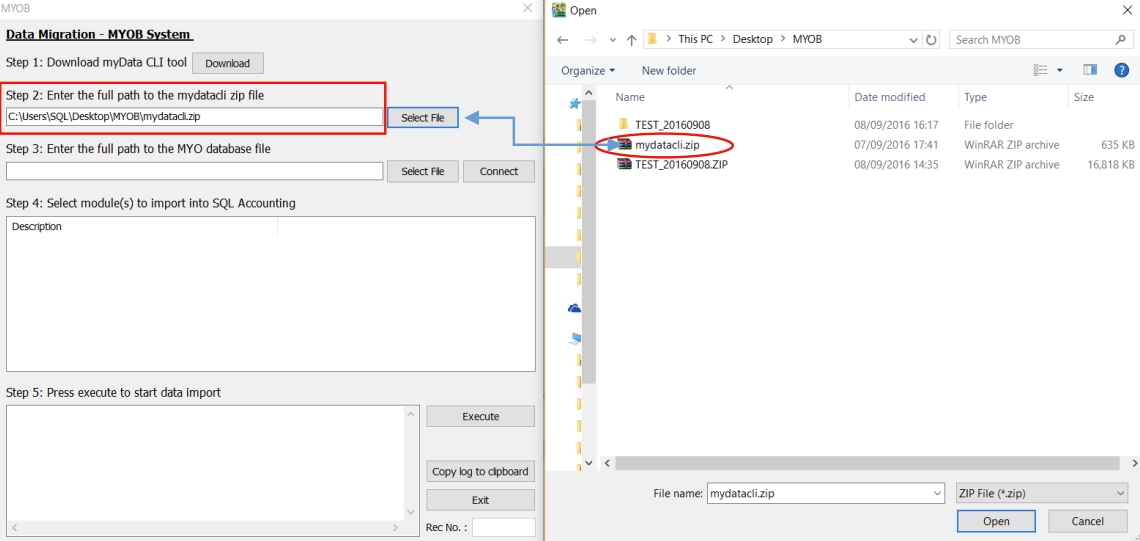
Follow Step 2 of the Image below, Click ‘Select File’ button then look into
C:\Users\SQL\Desktop\MYOB to select ‘mydatacli.zip’.
-
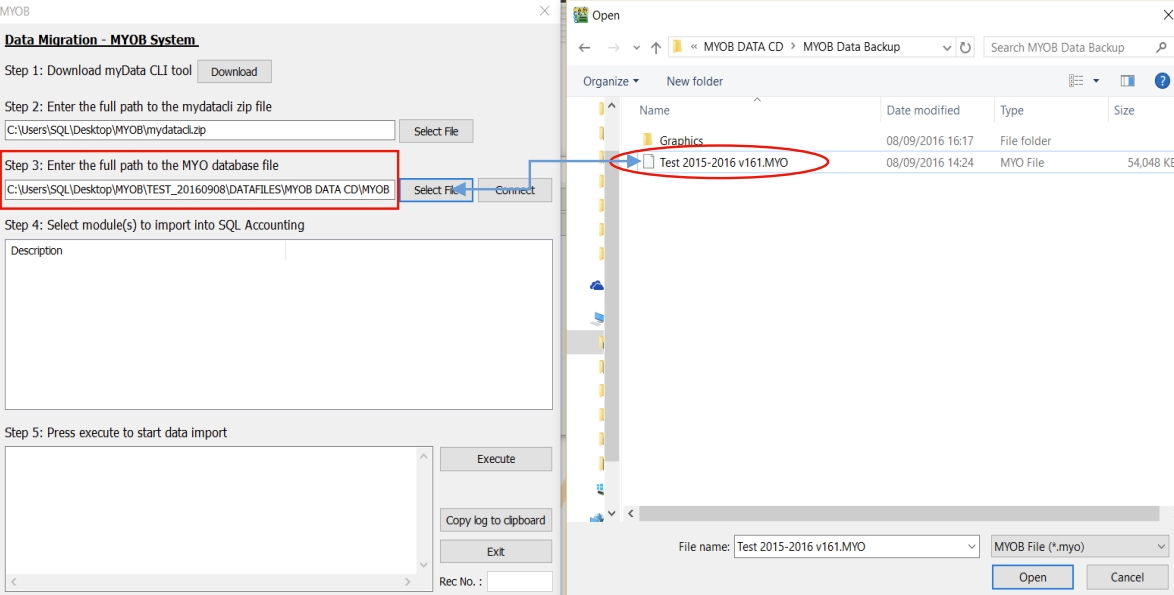
Follow Step 3 of the Image below, Click ‘Select File’ button then look into
C:\Users\SQL\Desktop\MYOB\ TEST_20160908\DATAFILES\MYOB DATA CD\MYOB Data Backup to select ‘Test 2015-2016v161.MYO’ a MYO File Type.
noteThose highlighted in BOLD is based on own Company Name of MYOB Backup.
-
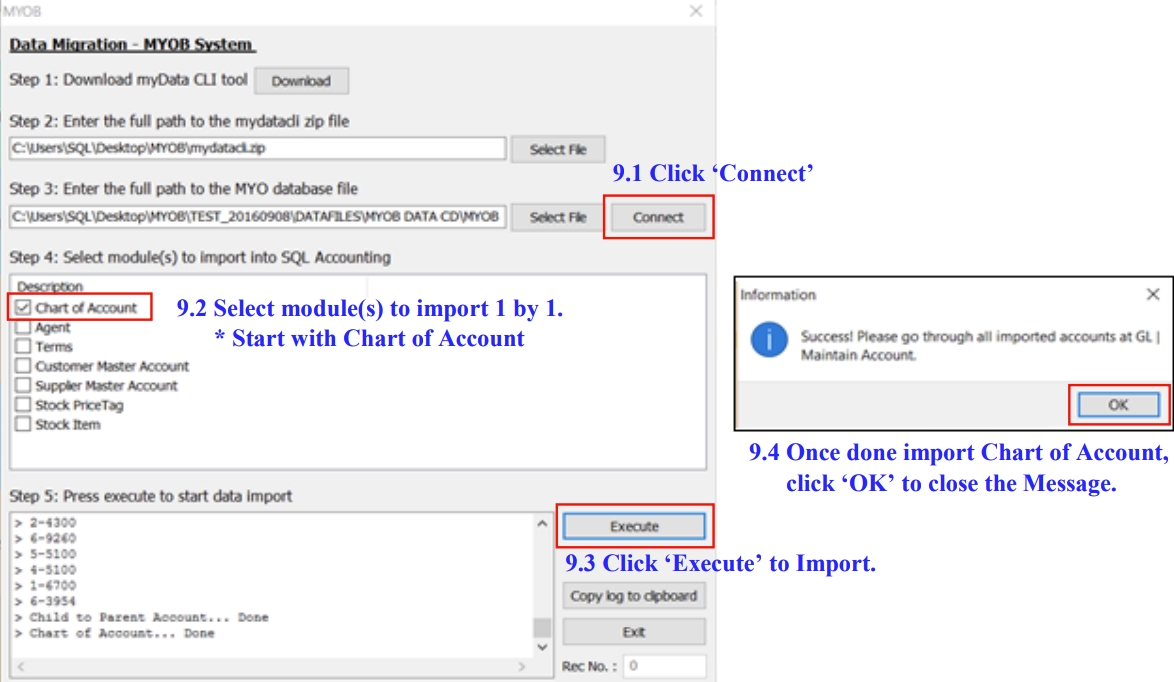
Follow step below to start Import.
-
Few Important settings MUST do before continue Import.
-
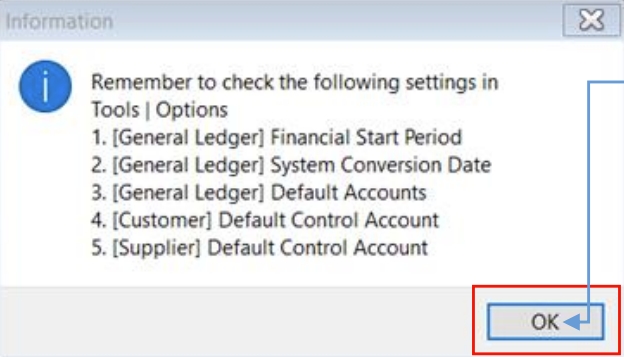
In this window
-
Read the Information then click ‘OK’ to close it.
-
Close the Data Import.
-
-
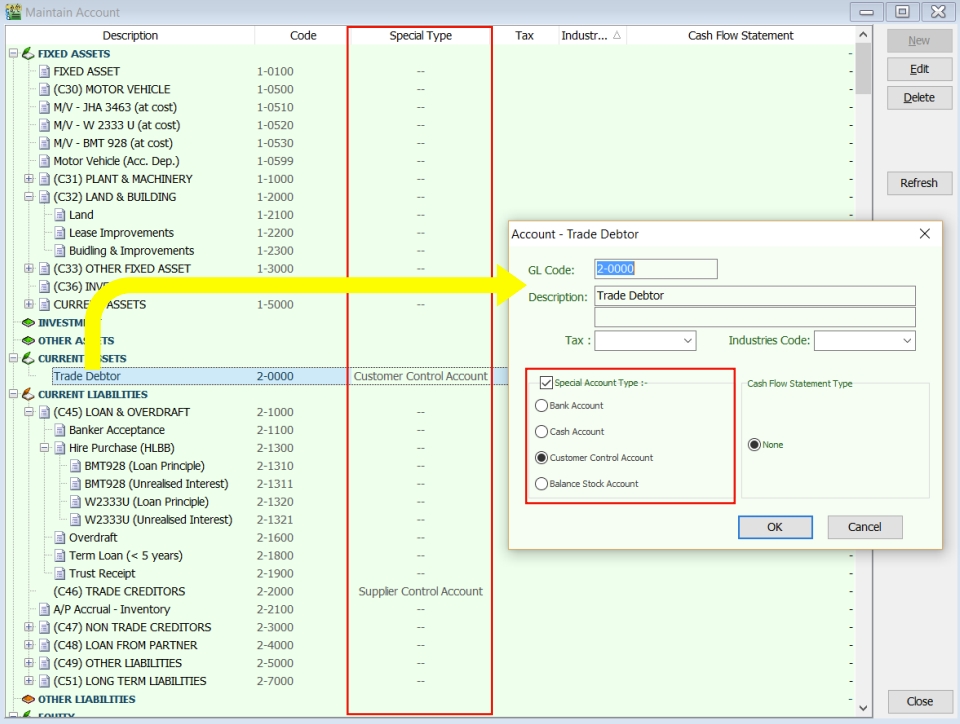
Go to GL /Maintain Account, verify the Imported Chart of Account & set the necessary Special Type.
Especially for Trade Debtor, Trade Creditor, Bank/Cash Account, Stock & etc.
-
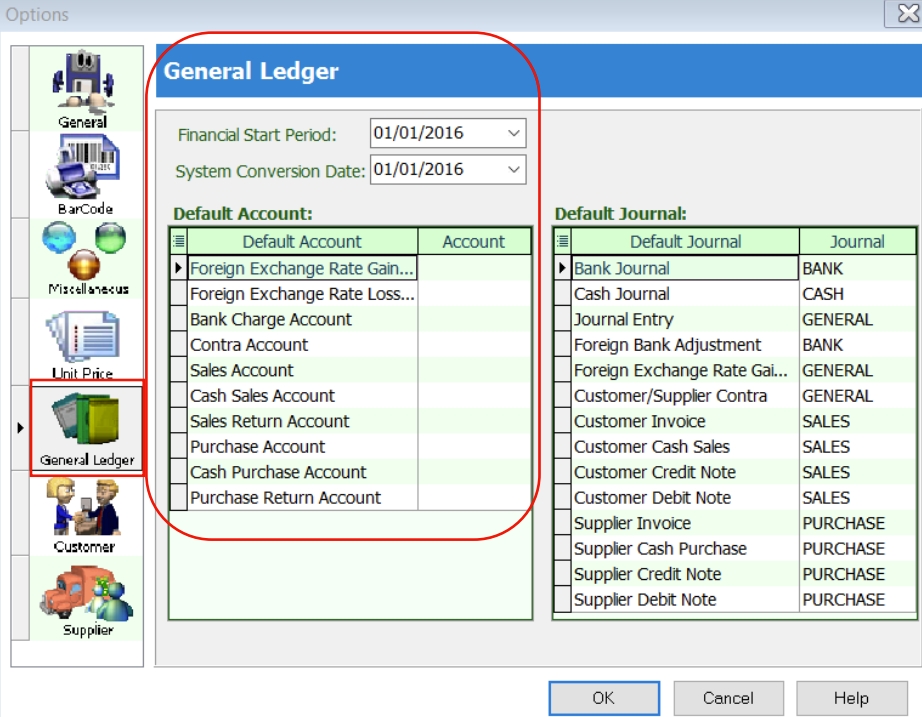
Go to Tools /Options /General Ledger, to setup for :
-Financial Start Period
-System Conversion Date
-Default Account
-
Next
-
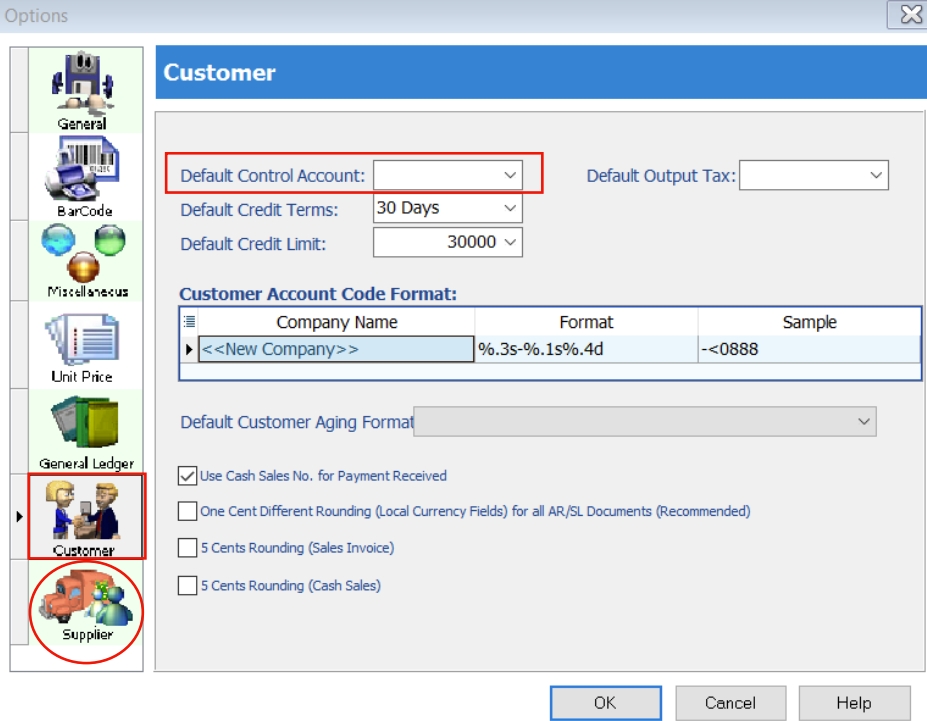
Still in ‘Options’ tab select ‘Customer’ then fill in the Customer Control Account.
-
Vice Versa for Supplier Control Account setting.
-
-
-
Once DONE settings, Repeat Step 5, 7 & 8 to continue import.
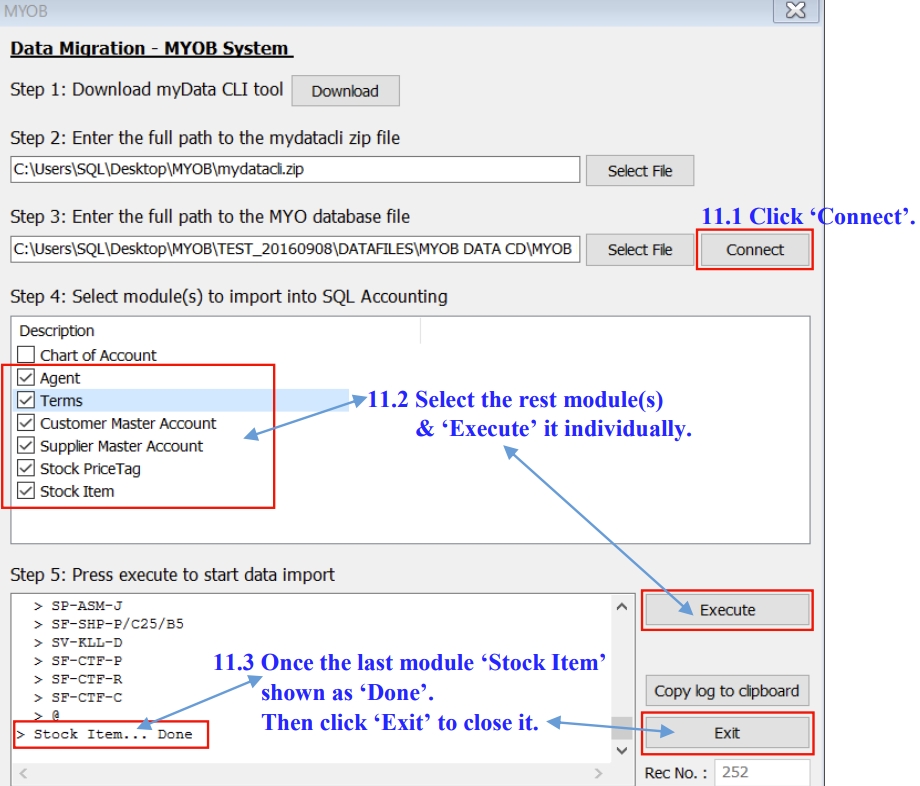
Kindly check ALL the Imported Master File from MYOB to SQL system before proceed to use it.