Reports
Print Ledger Report
-
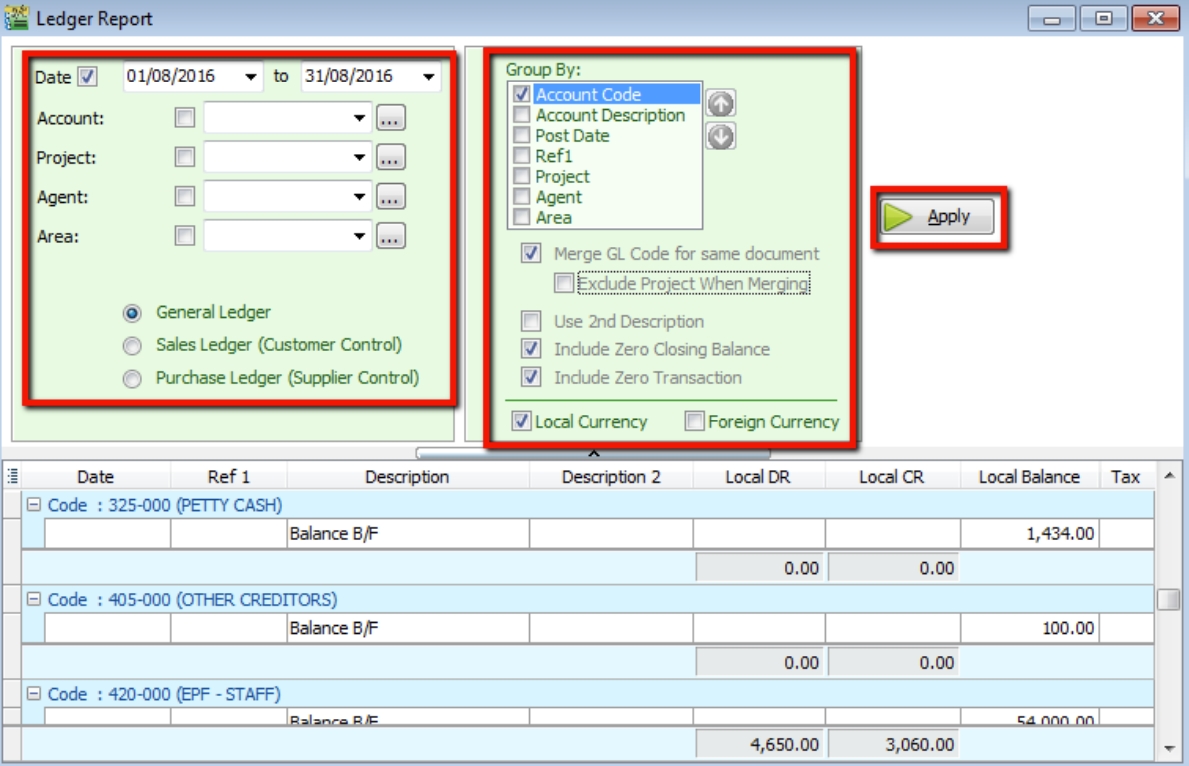
Go to GL → Print Ledger Report → Select the date range.
-
Filter by account, project, area, or agent (optional).
-
Select whether to view the General Ledger, Sales Ledger (Customer), or Purchase Ledger (Supplier).
-
The system can generate reports by group and provide a summary for each group (Group/Sort by).
-
Upper Level Options:
- Merge GL Code for same document – If the same account appears in a single transaction, the system automatically merges them. Uncheck this to separate account codes for the same document.
- Exclude Project when merging – Excludes the project when merging GL accounts.
- Use second description – Uses the second description maintained under GL → Maintain Chart of Account.
- Include Zero Closing Balance – Shows accounts in the report even if their balance is zero.
- Include Zero Transaction – Shows accounts in the report even if there are no transactions.
- Local Currency & Foreign Currency – For foreign currency transactions, check this to display figures in both foreign and local currencies for comparison.
- Click Apply.
Print Balance Sheet Statement
-
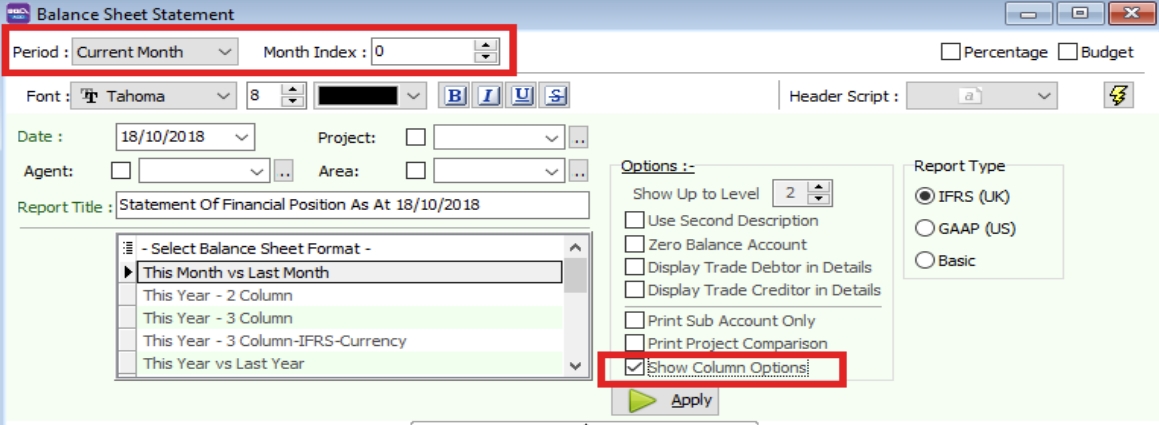
Go to GL → Print Balance Sheet Statement → Select the date.
-
Choose your preferred format.
-
Show Up to Level (under Options) refers to the depth of sub-accounts in your Maintain Chart of Account. A higher value displays more levels of detail.
-
Upper Level Options:
- Use second description – Uses the second description managed in GL → Maintain Chart of Account.
- Zero Balance Account – Shows accounts in the report even if their balance is zero.
- Display Trade Debtor/Creditor in Details – Displays detailed information for each customer account.
-
Bottom Level Options:
- Print Sub Account Only – Select specific accounts to view.
- Print Project Comparison – Allows you to view the report by project (requires the Project module).
- Show Column Options – Configure column settings as needed.
-
Click Apply.
Print Profit & Loss Statement
-
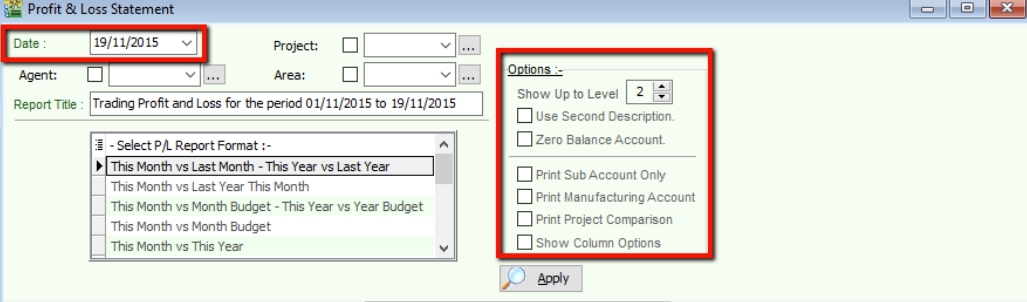
Go to GL → Print Profit & Loss Statement → Select the date.
-
Choose your preferred format.
-
Upper Level Options:
- Use second description – Uses the second description maintained under GL → Maintain Chart of Account.
- Zero Balance Account – Shows accounts in the report even if their balance is zero.
-
Bottom Level Options:
- Print Sub Account Only – Select specific accounts to view.
- Print Manufacturing Account – Only available if a manufacturing account is set up in Maintain Chart of Account.
- Print Project Comparison – Allows you to view the report by project (requires the Project module).
- Show Column Options – Refer to the Balance Sheet section.
-
Click Apply.
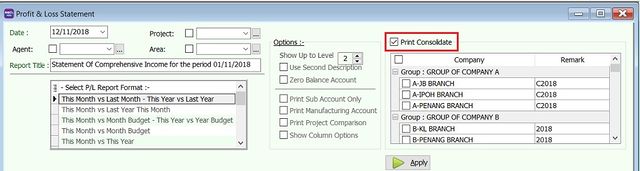
Print Profit & Loss Statement (Consolidation)
-
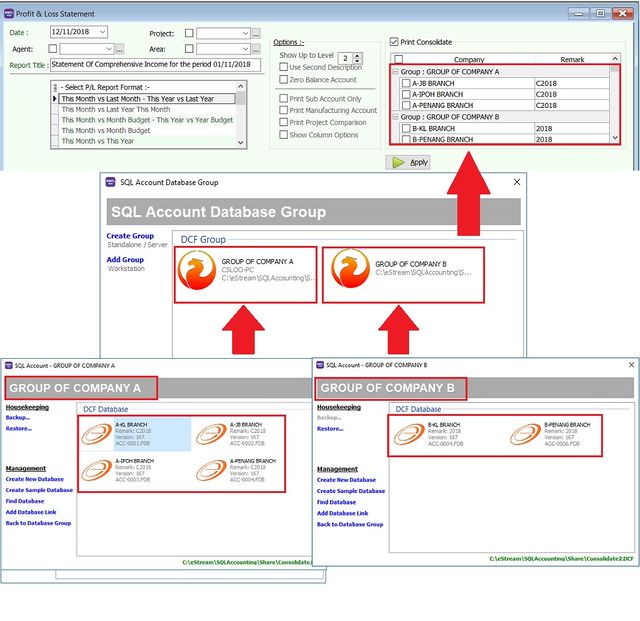
This requires the Financial Consolidation add-on module.
-
Consolidation refers to the aggregation of financial statements from a group of companies into a single consolidated financial statement.
-
Below is a quick summary of how to set up the group company database list for display in the Profit & Loss Statement.
-
Check Print Consolidate.
-
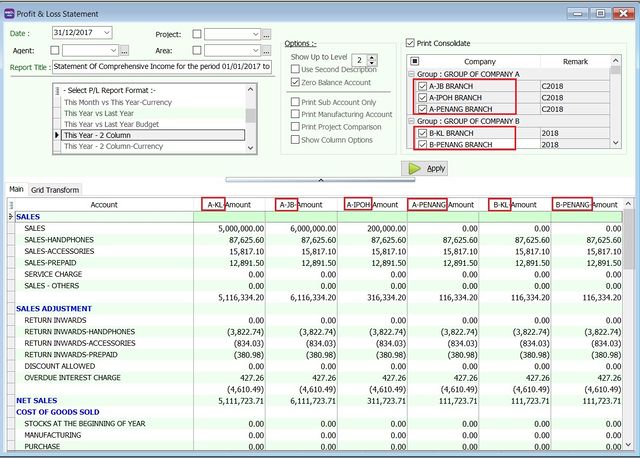
Select the company names from the different groups.
-
Click Apply.
-
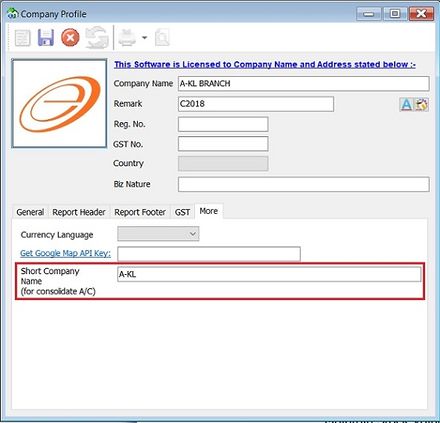
The system will merge the financial data from the selected companies, using a Short Company Name for each.
-
The Short Company Name is displayed in the grid column when you apply Financial Consolidation.
-
This can be defined in File → Company Profile... (More tab).
Print Trial Balance
-
Go to GL → Print Trial Balance → Select the date.
-
Filter by project, area, or agent (optional).
-
Select whether to view the General Ledger, Sales Ledger (Customer), or Purchase Ledger (Supplier).
-
Upper Level Options:
- Use second description – Uses the second description maintained under GL → Maintain Chart of Account.
- Zero Balance Account – Shows accounts in the report even if their balance is zero.
-
Click Apply.
