FAQ
How to set up Cash Drawer Kick Out?
Setup
-
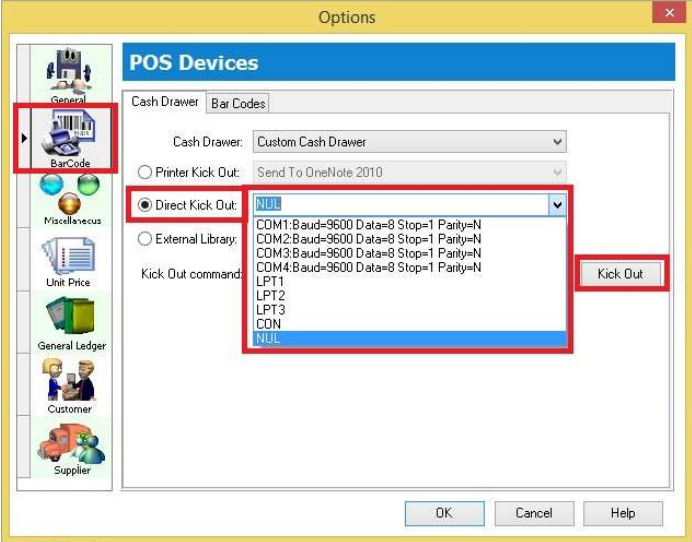
Go to Tools → Options → Barcode.
-
Option 1: Direct Kick Out → The cash drawer connects directly to your PC.
 tip
tipSelect the correct Port No and click the Kick Out button to test if the cash drawer opens. If the port number does not appear in the list, you can enter it manually.
-
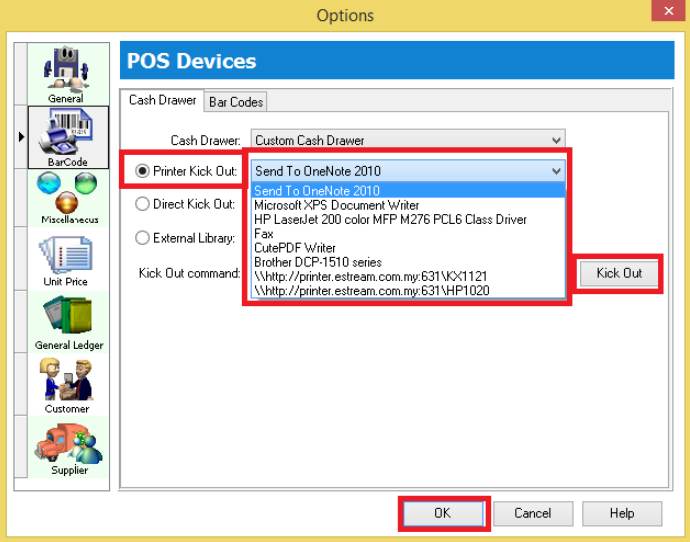
Option 2: Printer Kick Out → The cash drawer connects directly to the printer.
 tip
tipSelect your printer and click the Kick Out button to test if the cash drawer opens.
infoIf you encounter issues with RJ11 or RJ14 cash drawers, consider switching to a COM port (USB cash drawer required).
-
If you encounter issues with direct kick out, please check the following before contacting support:
- Check the Windows OS version.
- Check the SQL Account version.
- Try previewing and printing to see if the output prints correctly.
- Run a Windows "Test Print" on the receipt printer.
- Go to Tools → Options → Kick Out to see if it responds.
- Check the receipt printer model.
- Check which receipt printer driver is installed.
- Check the cash drawer model. RJ11 is not supported; use a USB/COM cash drawer connected directly to the PC.
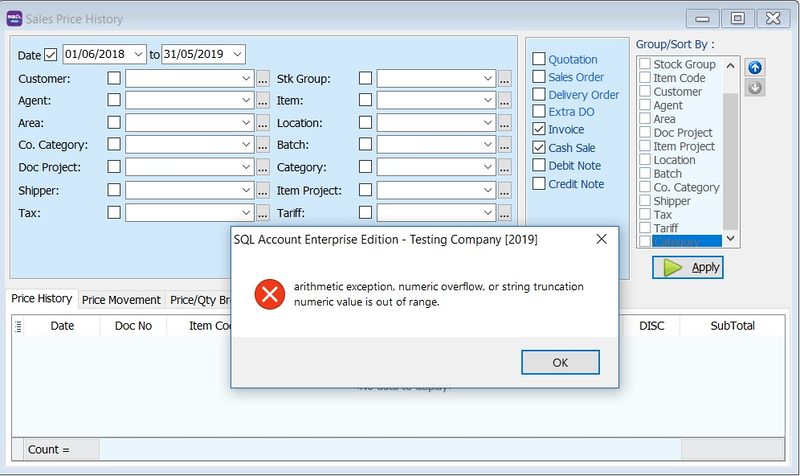
Why does an error message appear when applying Sales Price History?
Issue
Error message: arithmetic exception, numeric overflow or string truncation numeric value is out of range
This typically occurs if:
-
The Multi-Currency module is not installed.
-
The currency values are large (e.g., Indonesian Rupiah).
Solution
-
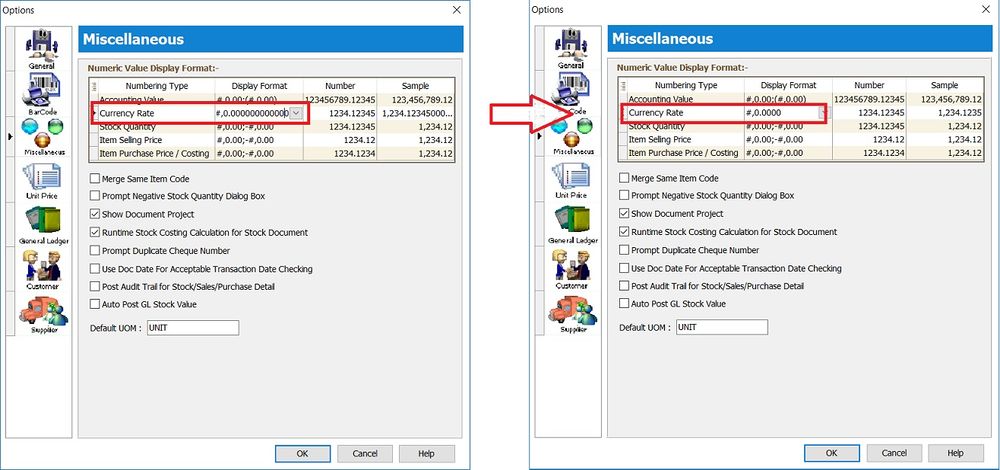
Go to Tools → Options...
-
Click on Miscellaneous.
-
Change the Currency Rate display format to #,0.0000 (4 decimal places).