Payroll Setup
Time Zone
-
Navigate to Company Profile > General > Time Zone and select your country time zone

-
Save
Maintain Branch
-
Navigate to Human Resource > Maintain Branch…, select a Branch/Create a new one

-
Go to Map, enter the branch address, search and confirm
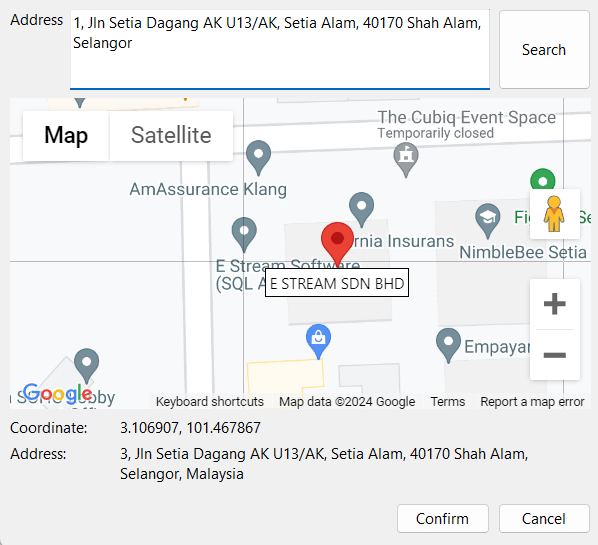 tip
tipUser may click on the map to get a more accurate position
-
Enter the restriction radius and click save
by default min: 5m, max: 60m

Maintain Public Holiday
-
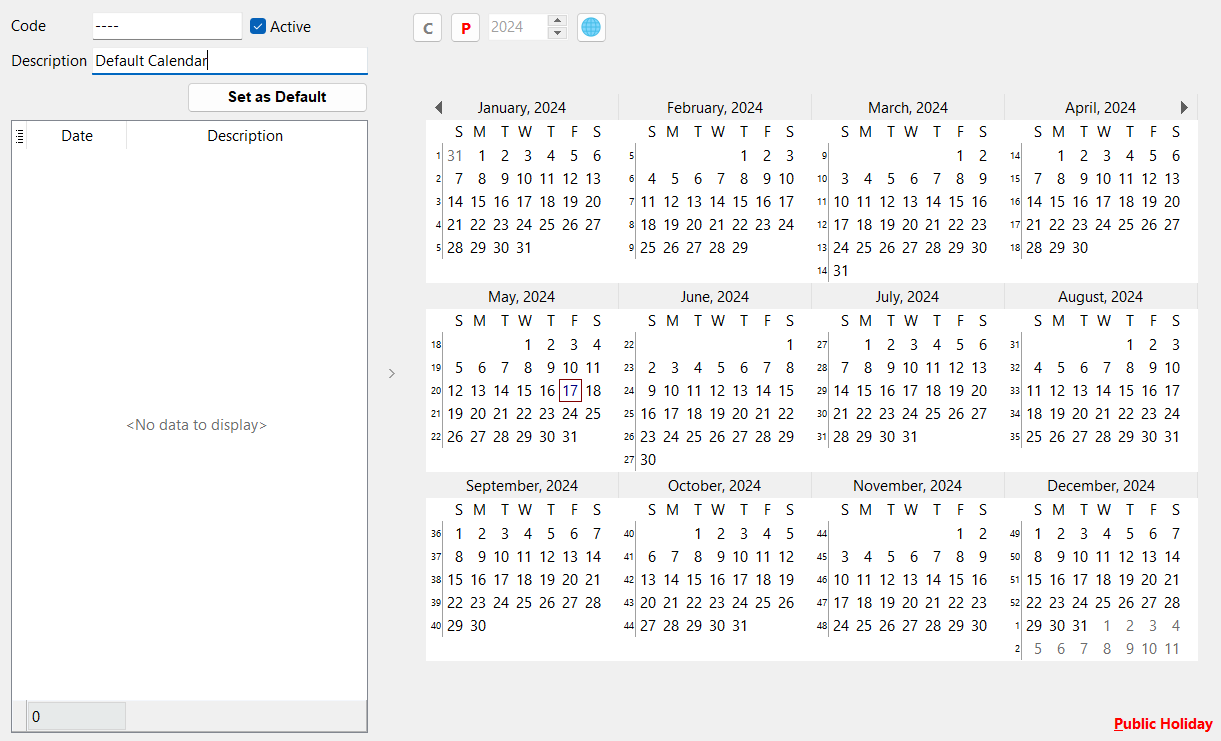
Navigate to Leave > Maintain Public Holiday Calendar… and select a Public Holiday Calendar/Create New
-
Set public holidays
User may import default Malaysia public holiday calendar or set manually
Option 1: Global Icon | Select a State | OK
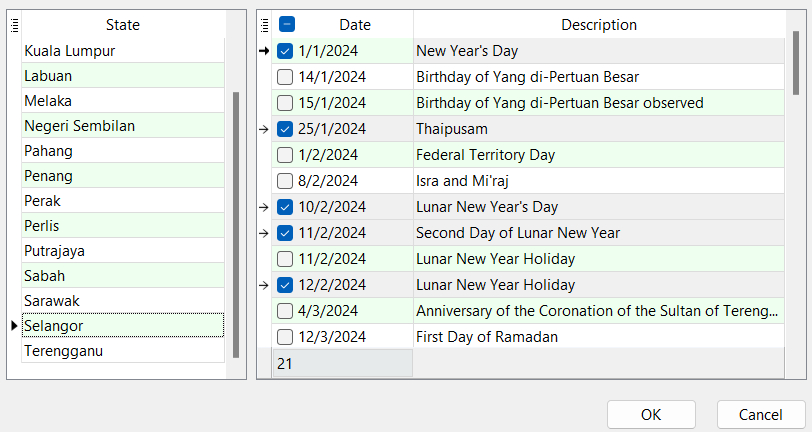 info
infoUser may check or uncheck the dates
Option 2: Click on 'P' button | Select date
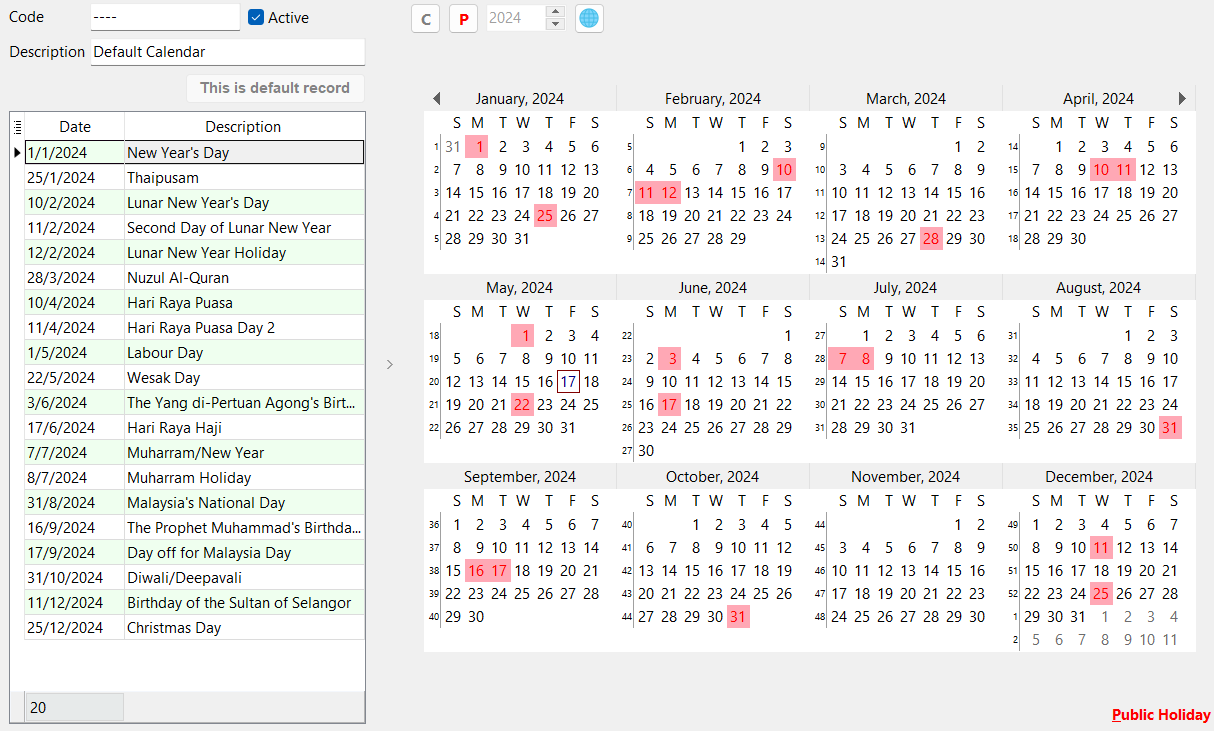
-
Save
For more Public Holiday options, user may click on the '≣' on the grid to reveal the 'Day Type' column
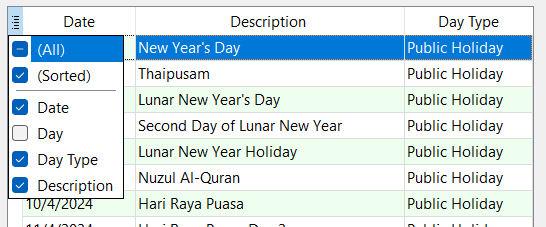
- Public Holiday options:
- Special Rate 1
- Special Rate 2
Maintain Work Session
-
Navigate to Time Attendance > Maintain Work Session…, select a Work Session/Create New
-
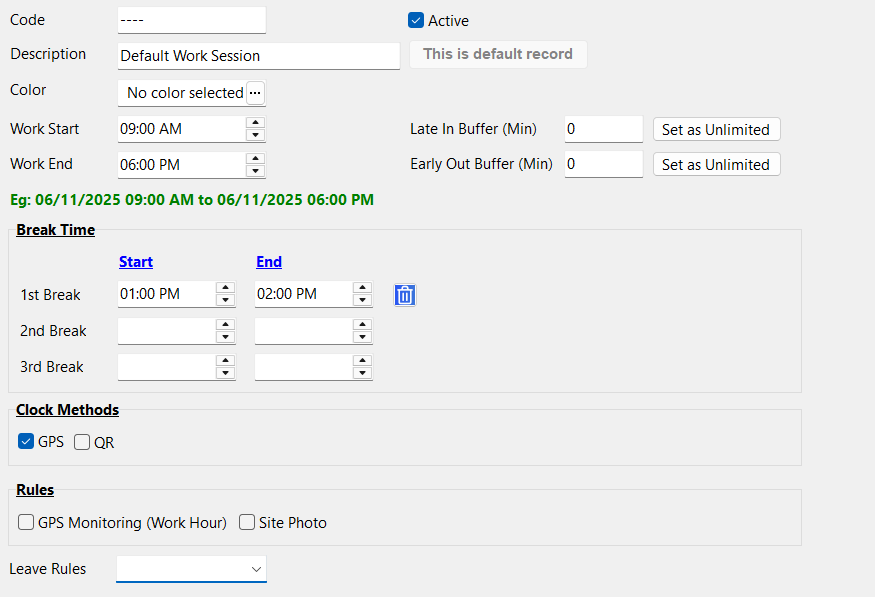
Enter Work Start, Work End and Buffer
by default is 0 min
- 'Late In Buffer': Can be late by how many minutes
- 'Early Out Buffer': Can leave early by how many minutes
-
Enter Break Time
- May add up to 3 break times
-
Select a Clock Method
info- Only one clock method can be selected. However, if none of the clock method is selected, then the clock in / out button in SQL HRMS app will be disabled and employee does not require to clock in / out.
- Clock Method on days without work session, public holiday and rest day is by default GPS. User may update to their desire clock method in Maintain Calendar.
- 'GPS' checkbox: Clock in / out using employee's location in SQL HRMS app
- 'QR' checkbox: Clock in / out using QR Code generated from SQL HRMS app and scan it on SQL Clock In app
-
Select Rules
info'GPS Monitoring' and 'Site Photo' will be disabled if 'QR' or no clock method is selected
- 'GPS Monitoring' checkbox: Post status update if employee left work location
- 'Site Photo' checkbox: Requires to take photo before clock in / out (User cannot upload picture from album)
-
Save
Optional
- User may select 'Leave Rules' if applicable
Make sure that the work session is set based on the time zone maintained in Company Profile (refer to timezone)
Maintain Work OT
-
Navigate to Time Attendance > Maintain Work OT…, select a Work OT/Create New
-
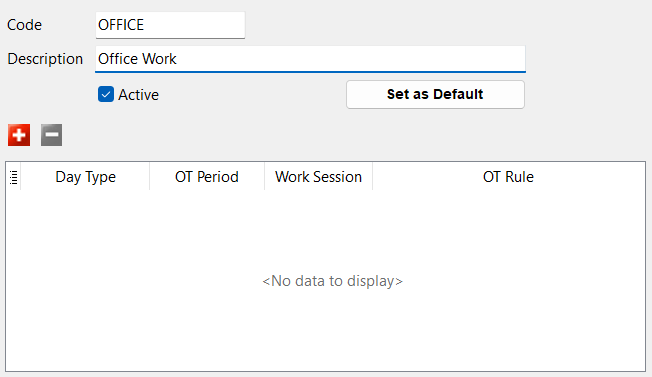
Click on '+' button | Select Day Type
-
Select OT Period
-
Select Work Session
Day Type OT Period Work Session Rest Day
Rest Day (Special Rate 1 / 2 / 3)
Public Holiday
Public Holiday (Special Rate 1 / 2)All Day Work Day Before Work
Break Time
After WorkSelect a Work Session -
Set OT Rule by clicking on the '…' button
Standard Rule - Clock Time:
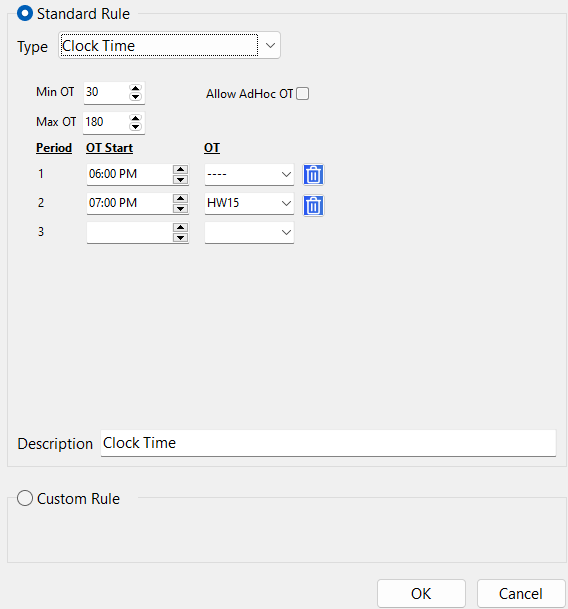
- 'Min OT': Require to have at least 30 minutes of OT to be eligible for this rule
- 'Max OT': Maximum claimable OT minutes is 180 minutes (3 hours)
- 'Allow AdHoc OT': Any OT before 6:00pm will also be calculated
Period OT Start OT Explanation 1 6:00pm ---- 6:00pm - 7:00pm, Entitled to OT Code ---- 2 7:00pm HW15 From 7:00pm onwards, Entitled to OT Code HW15 Explanation: If employee start OT at 7:00pm, employee is entitled to OT Code HW15 and can claim up to 180 minutes
Standard Rule - Tier:
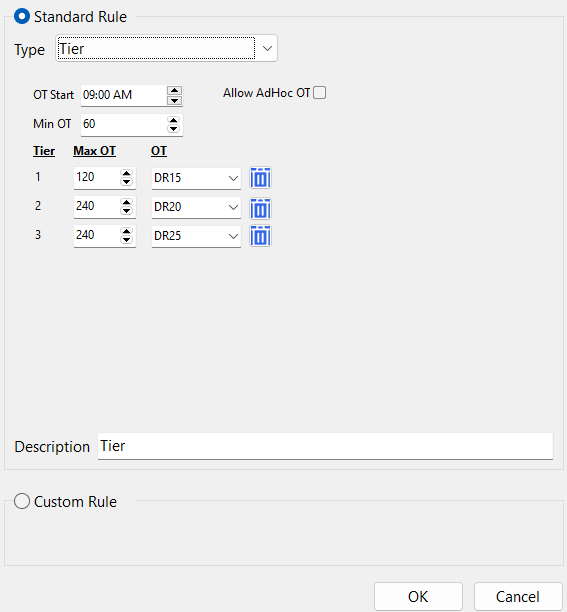
- 'OT Start': Allow to start OT at 9:00am
- 'Min OT': Require to have at least 60 minutes of OT to be eligible for rule
- 'Allow AdHoc OT': Any OT before 9:00am will also be calculated
Tier Max OT OT Explanation Example 1 120 DR15 First 120 minutes, Eligible to OT Code DR15 9:00am - 11:00am 2 240 DR20 Next 240 minutes, Eligible to OT Code DR20 11:00am - 3:00pm 3 240 DR25 Last 240 minutes, Eligible to OT Code DR25 3:00pm - 7:00pm infoFor Custom Rule, may contact SQL Support for customization
-
Save
Maintain Calendar
-
Navigate to Time Attendance > Maintain Calendar…
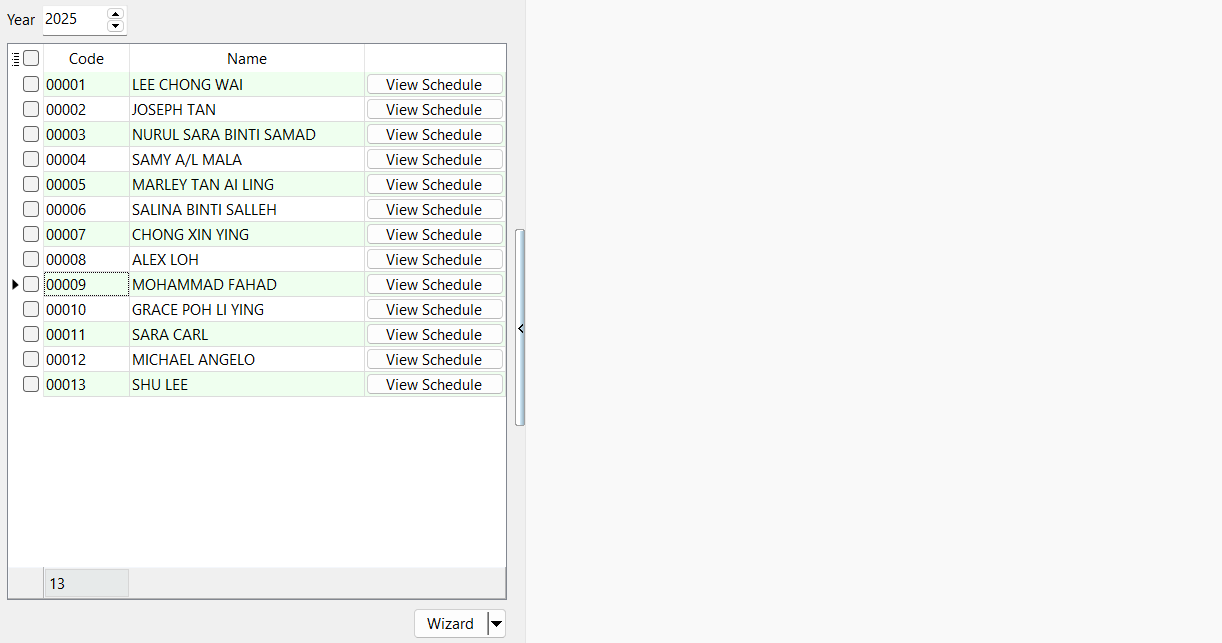
View Schedule
-
Click 'View Schedule' button
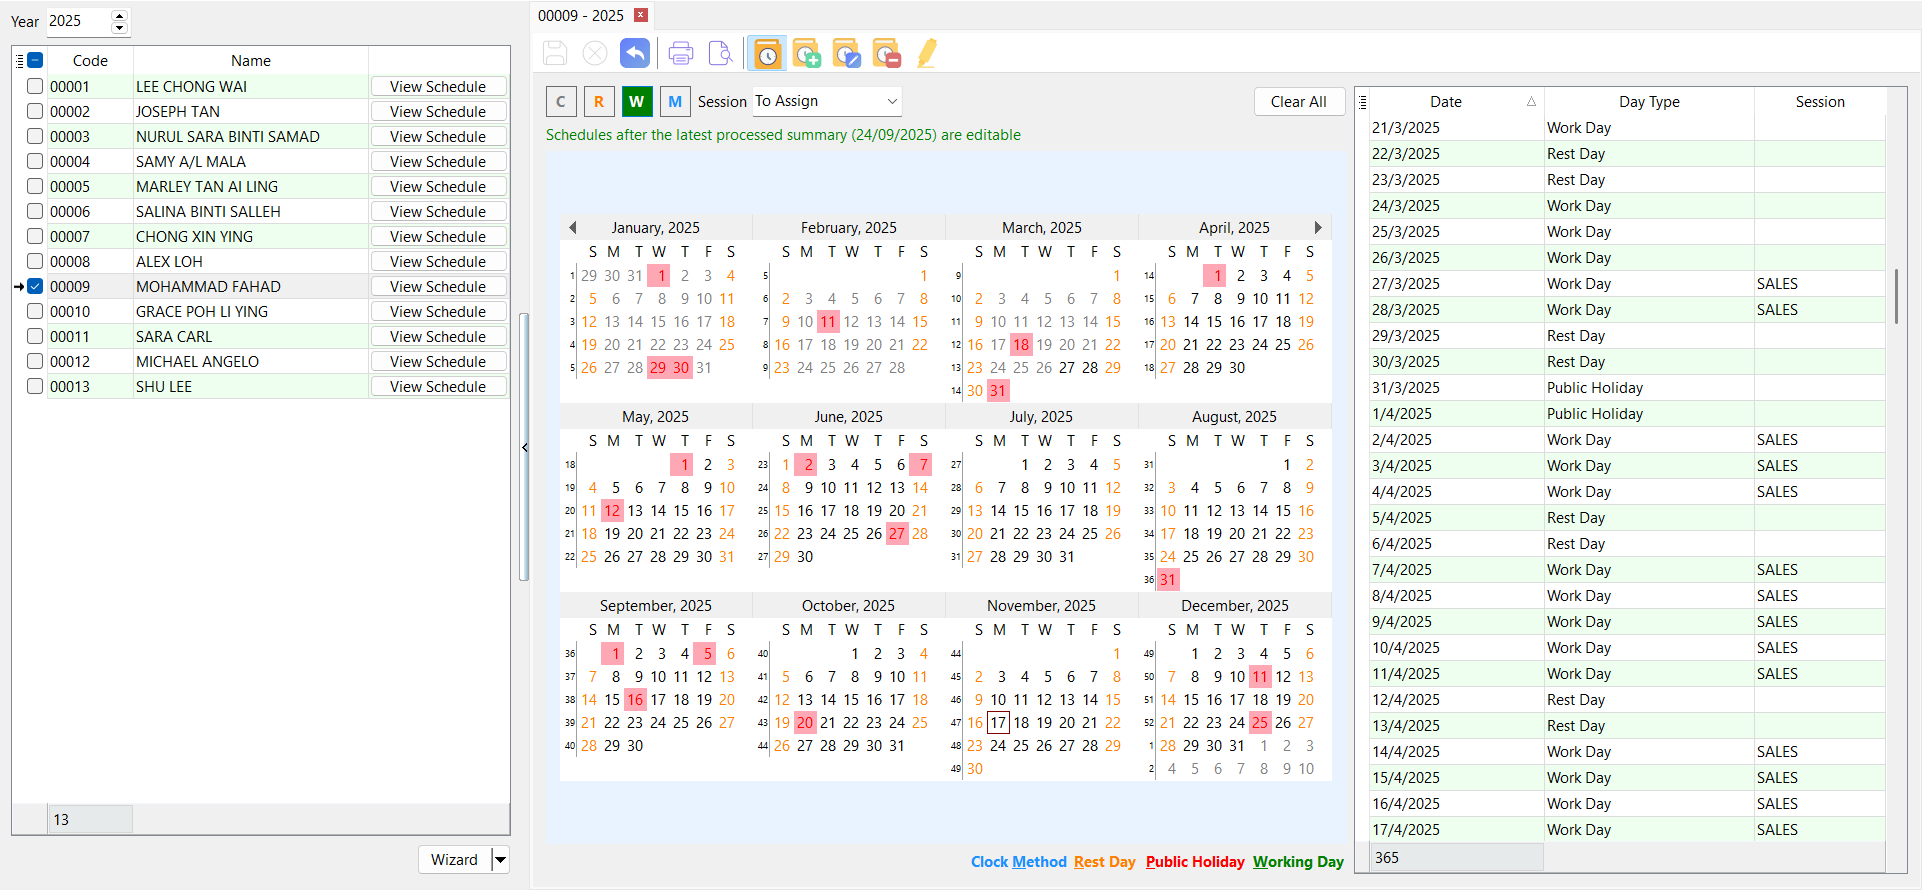
Work Session Calendar:
- Red box: Public Holiday assigned from Maintain Public Holiday Calendar
- Orange font: Rest Day
- Black font: Work Day with Session
- Grey font: No schedule is assigned
Set Work Session / Clock Method:
- User may click on 'R' button, 'W' button or 'M' button and select date from calendar
- Use 'C' button to clear Work Session/Rest Day
- Alternatively, user may use 'Clear All' button to clear all Rest Day and Work Session within the date range
- Note that clock method will also be reset back to 'GPS'
- User cannot assign work sessions, change work sessions or change clock method on dates before summary last processed date
- On days without work session assigned, no summary will be processed unless there are clock in/clock out logs on that day
Wizard
-
Select Employee(s) and go to Wizard
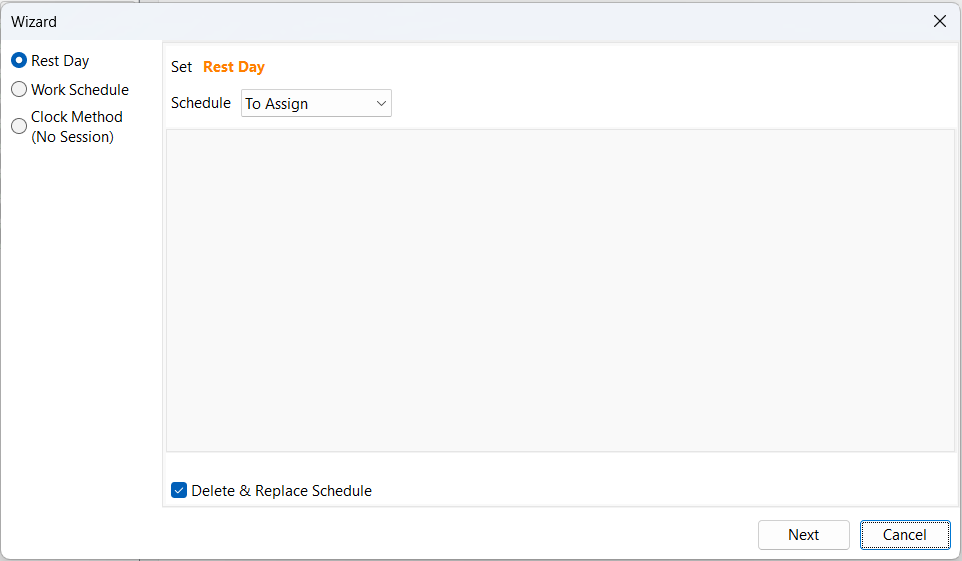
- 'Delete & Replace Schedule' checkbox: Any previously assigned Work Session will be deleted and replace
- Only apply to assigned work session on future dates
- Hover 'Rest Day' for more rest day options:
- Special Rate 1
- Special Rate 2
- Special Rate 3
- 'Delete & Replace Schedule' checkbox: Any previously assigned Work Session will be deleted and replace
-
Select a schedule
Schedule Explanation By Months Assign to every selected day of every selected week of every selected month Custom Assign to selected dates -
Next, select a Session
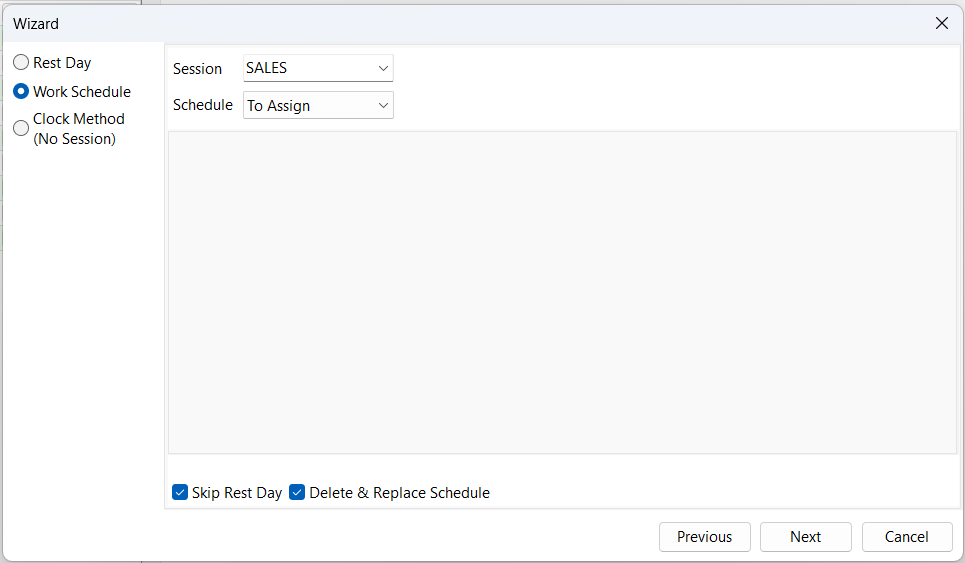
- 'Skip Rest Day' checkbox: Previously assigned Rest Day will not be replaced with Work Session
- Only apply to assigned work session on future dates
- 'Delete & Replace Schedule' checkbox: Any previously assigned schedule will be deleted and replace
- Only apply to assigned work session on future dates
- 'Skip Rest Day' checkbox: Previously assigned Rest Day will not be replaced with Work Session
-
Select schedule type
Schedule Explanation By Months Assign to every selected day of every selected week of every selected month By Days of Month Assign to every selected day of every selected month By Weeks Assign to every selected day of every selected weeks of the year Custom Assign to selected dates -
Next, select a Clock Method
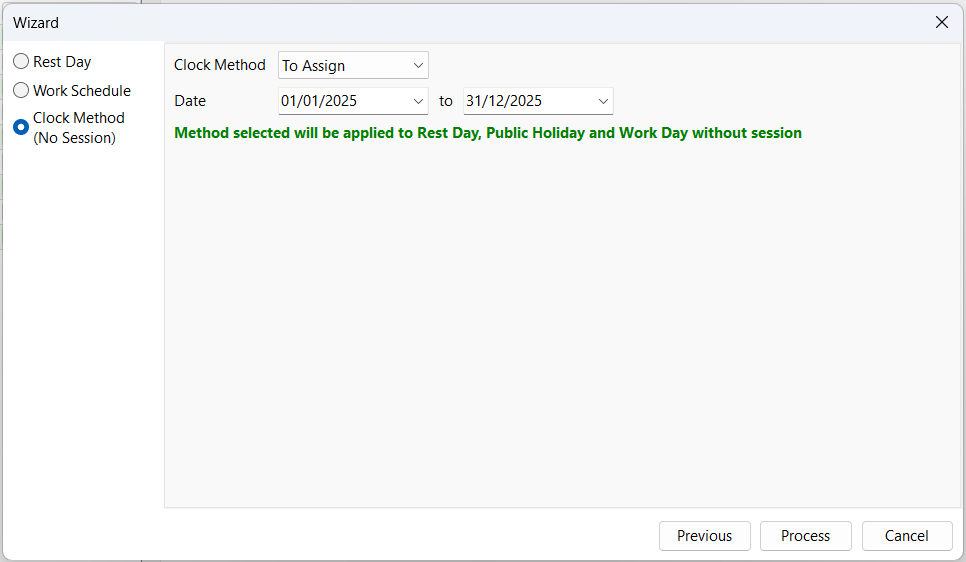
- Selected clock method will only be assigned to Rest Day, Public Holiday and Work Day without session on allowable dates within the selected date range
-
Select a date range
-
Process
User cannot assign work sessions or change work sessions on dates before summary last processed date
Copy Calendar from Employee
-
Select employee(s), click on the "Wizard" dropdown ▼, click "Copy From"
-
Select date range and employee to copy from and press "OK"
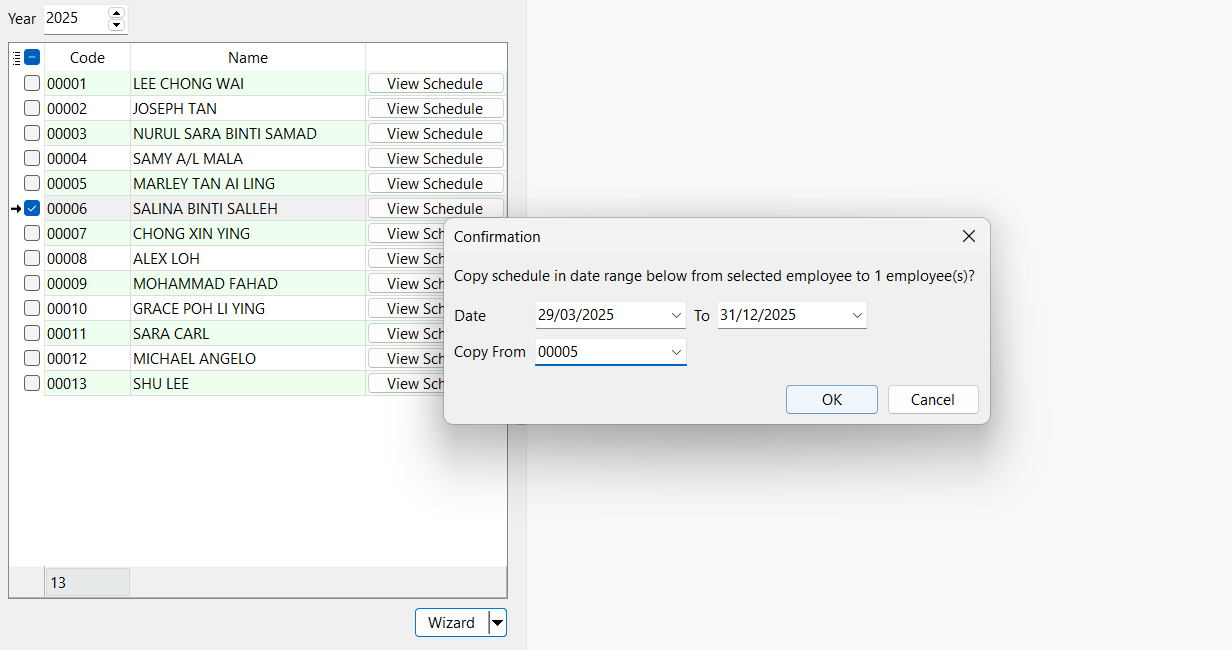
Explanation: Copy Employee 00005 schedule (Work Session and Rest Day) from 20/5/2024 to 31/12/2024 to Employee 00006
Date From need to be after summary last processed date to future dates (dates before summary last processed date are not allowed to copy)
Clear All Schedule
-
Select employee(s) click on the "Wizard" dropdown ▼, click "Clear All"
-
Select date range to delete and press "OK"
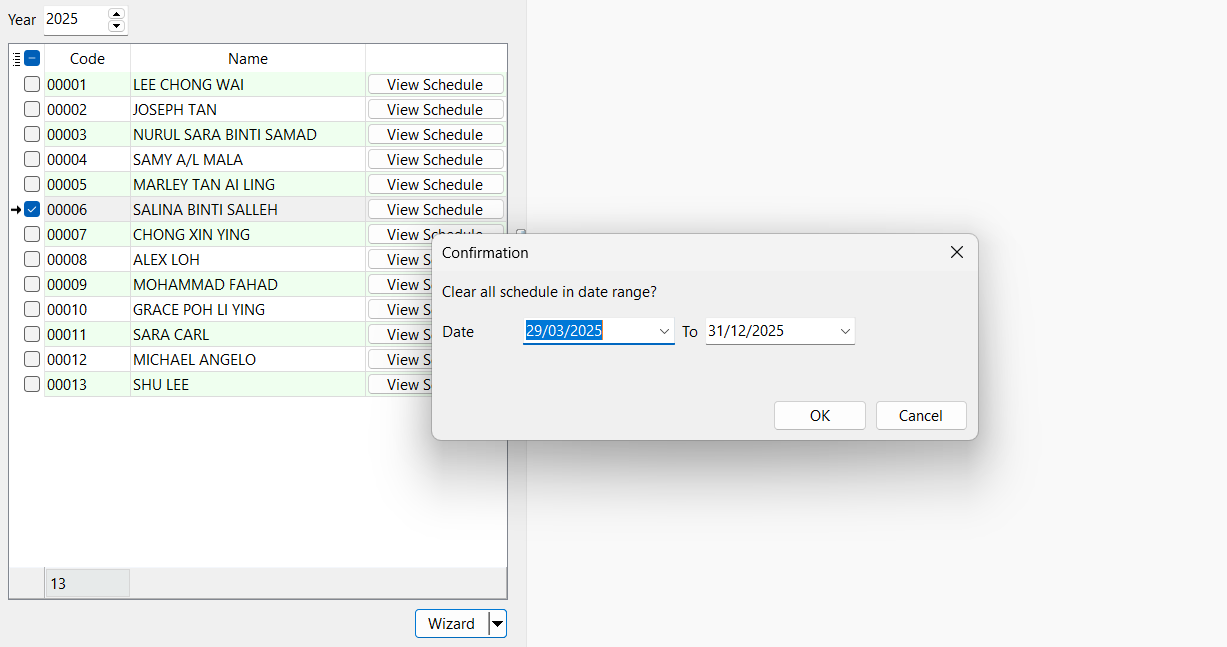
Explanation: Delete all schedule (Work Session and Rest Day) of Employee 00006 from 20/5/2024 to 31/12/2024
- Date From need to be after summary last processed date to future dates (dates before summary last processed date are not allowed to delete)
- When schedule is cleared, clock method will be reset back to 'GPS'
Maintain Traveller Location
-
Navigate to Time Attendance > Maintain Traveller Location…
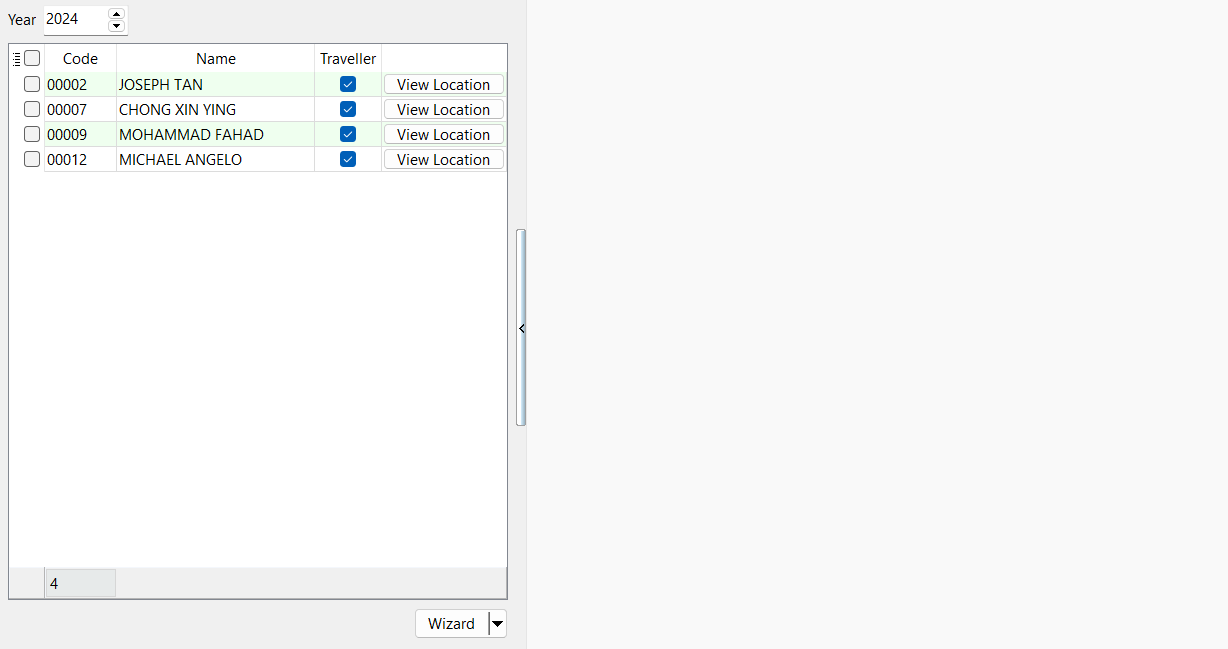
Only employees who is a 'Traveller' will be listed (refer Maintain Employee)
View Location
-
Click View Location
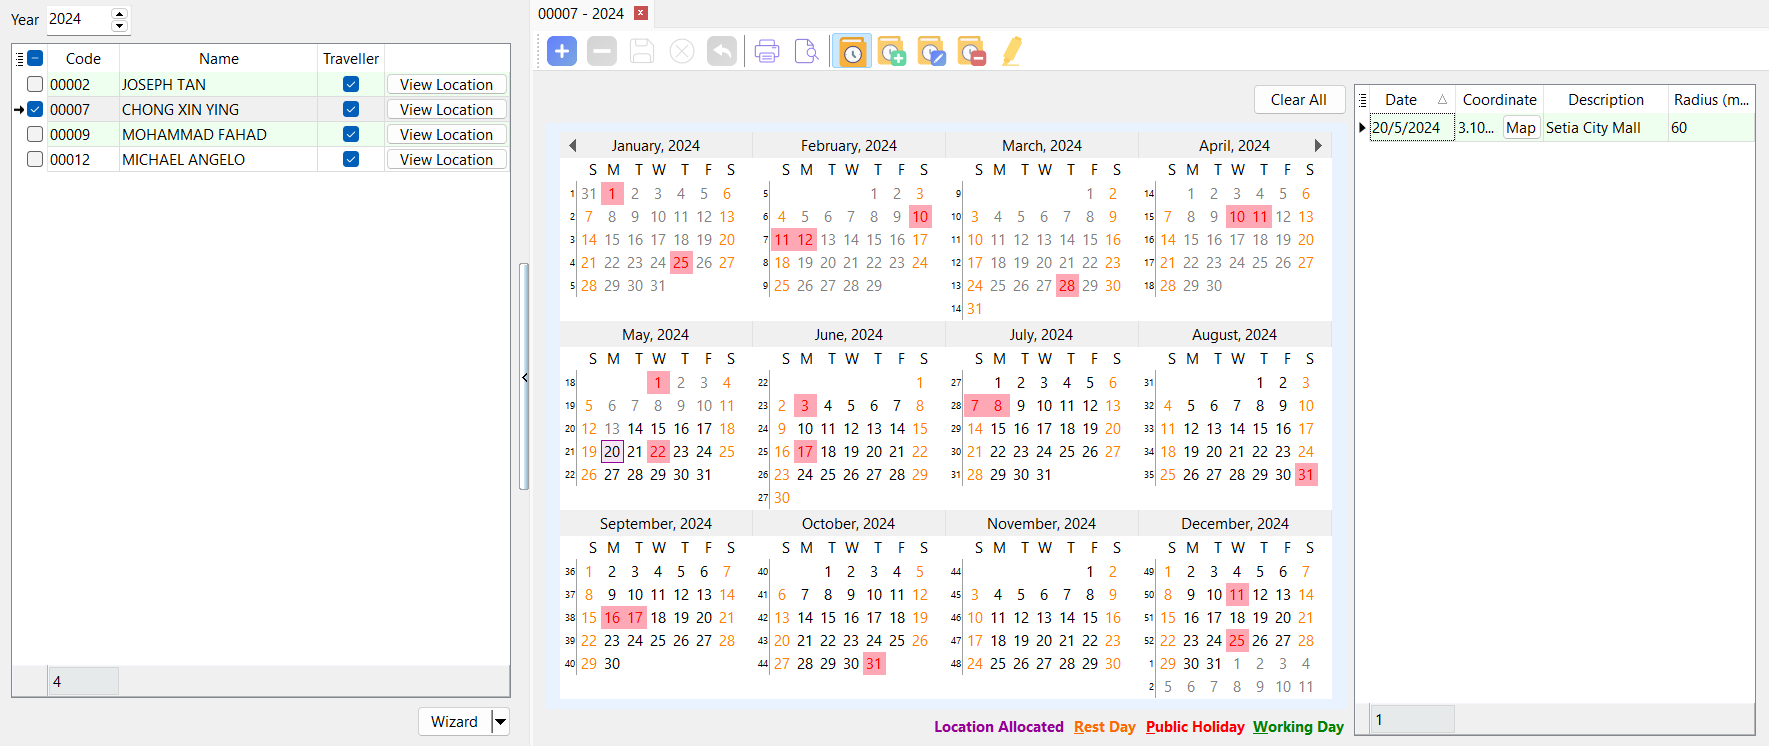
- Red box: Public Holiday assigned from Maintain Public Holiday Calendar
- Orange font: Rest Day
- Black font: Work Day with session
- Grey font: No schedule is assigned
- Purple box: Work locations allocated
- To clear a work location, focus a record on the grid and click '-' button
- User may click on 'Clear All' button to clear all work locations within the date range
Wizard
-
Select Employee(s), and go to Wizard

-
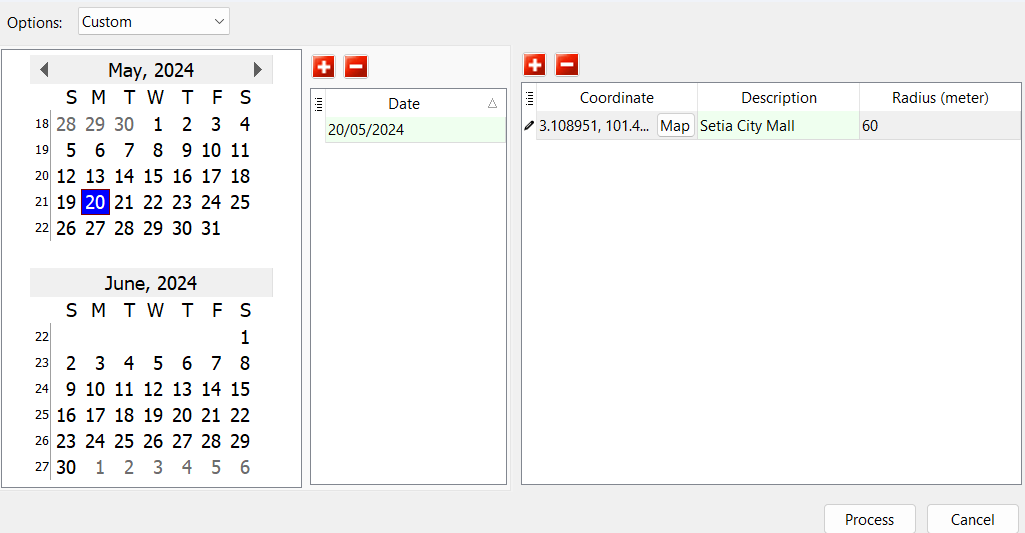
Select a Schedule
Schedule Explanation By Months Assign to every selected day of every selected week of every selected month By Days of Month Assign to every selected day of every selected month By Weeks Assign to every selected day of every selected week of the year Custom Assign to selected dates -
Click on '+' button Map
-
Select a GPS Type | Enter radius (by default is 60m and min is 5m) and description | Confirm
GPS Type Explanation Branch Select from a list of branches created in Maintain Branch Custom Search by address  tip
tipUser may pin on the map to get a more accurate position
-
Process
Copy Work Location from Employee
-
Select Employee(s), go to "Wizard" dropdown ▼, press "Copy From"
-
Select date range and employee to copy from and press "OK"
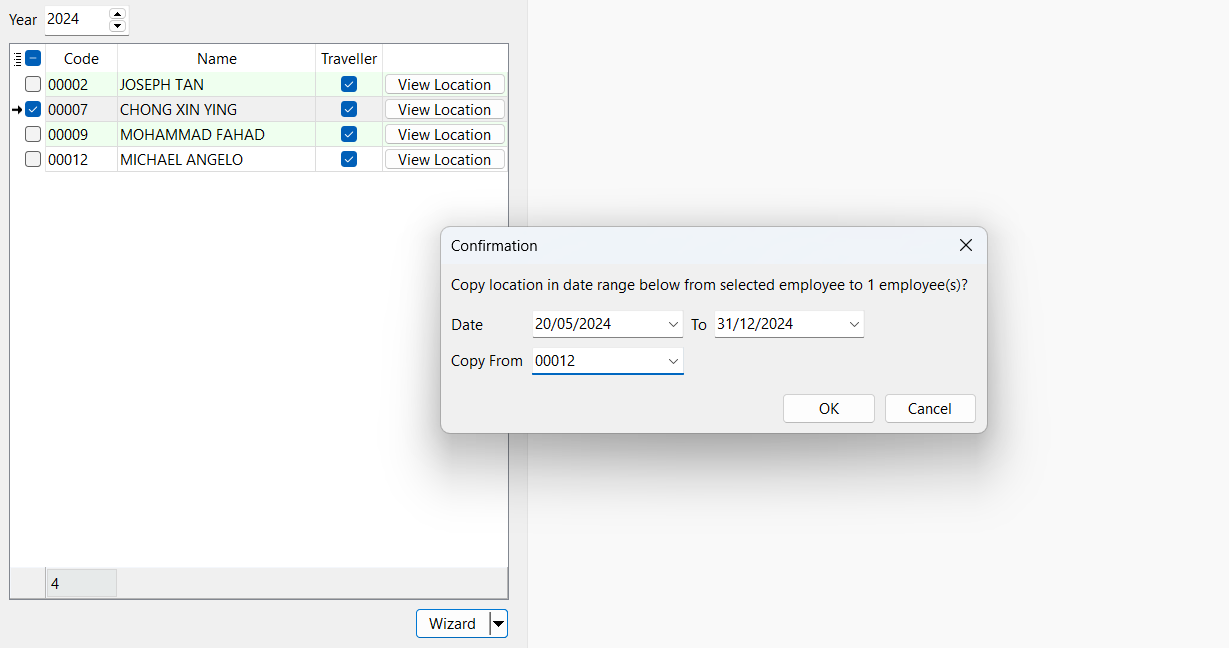
Explanation: Copy Employee 00012 locations from 20/5/2024 to 31/12/2024 to Employee 00007
Date From need to be current date to future dates (past dates are not allowed to copy)
Clear All Work Locations
-
Select Employee(s), go to "Wizard" dropdown ▼, press "Clear All"
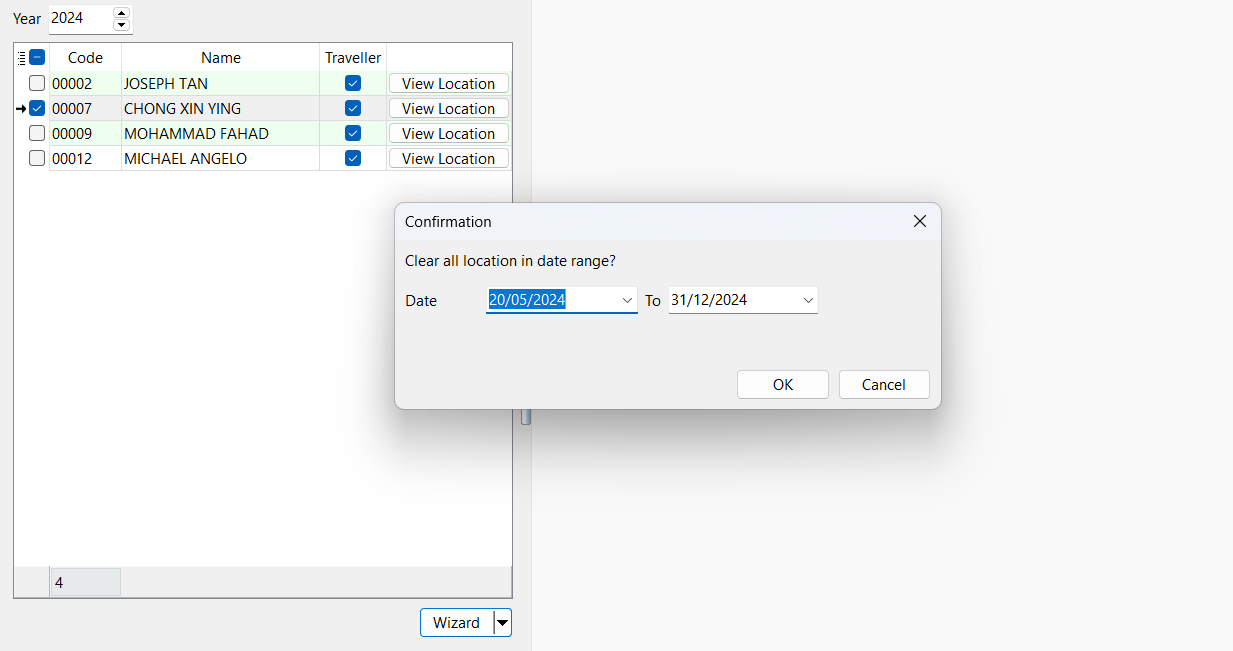
-
Select Date Range and press "OK" Explanation: Delete all locations of Employee 00007 from 20/5/2024 to 31/12/2024
Date From need to be current date to future dates (past dates are not allowed to delete)
Maintain Employee
-
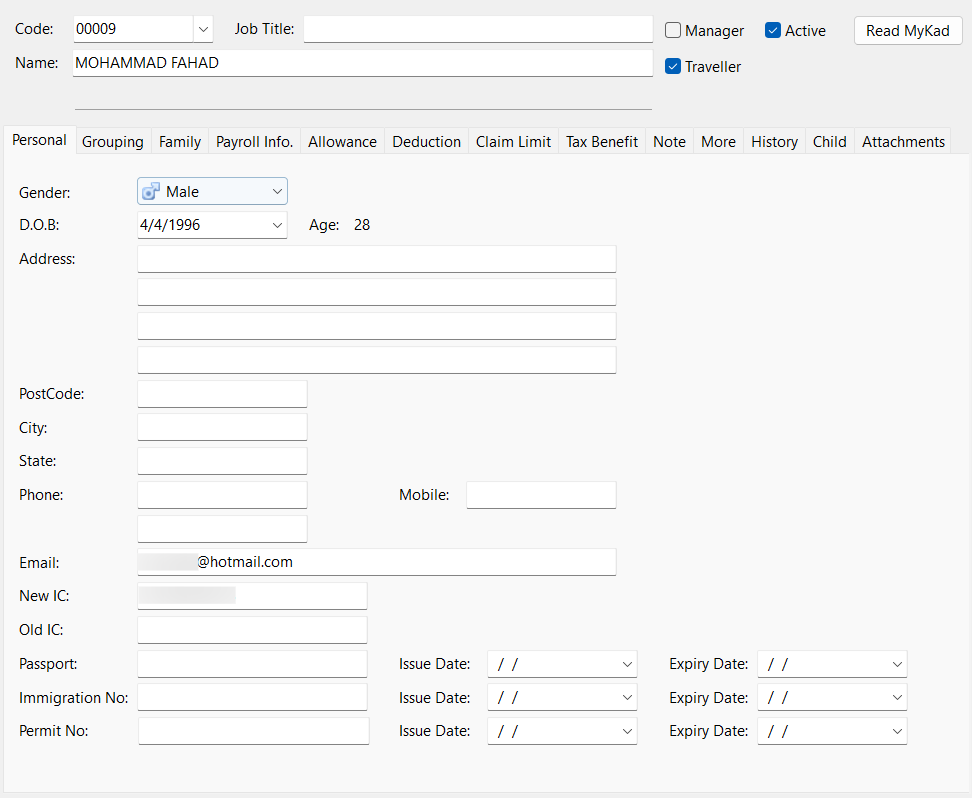
Navigate to Human Resource > Maintain Employee…, select an Employee/Create New, next go to Personal tab and enter the email
-
In the Grouping, select a Branch
-
Select a Public Holiday Calendar
-
Select a Work OT
-
Save
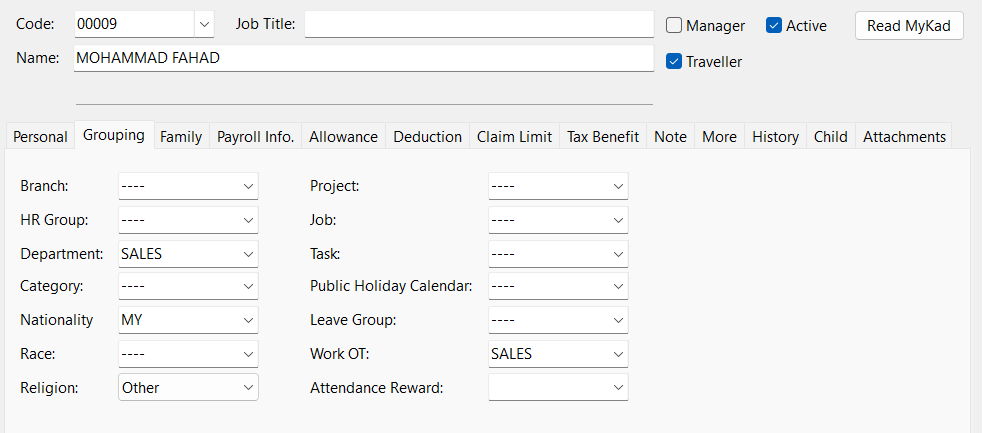
- Employees who are entitled to Attendance Reward, may select an 'Attendance Reward'
- Employees who are travellers (Eg. Salesperson / Delivery Person / Doctor), may check the 'Traveller' checkbox
Sync Cloud
- Navigate to ☁️, go to "Sync Cloud…", click on "Sync All"
Make sure to always 'Sync Cloud' after all maintenance are done or if there are any changes to the Time Attendance Setup to ensure settings on both Payroll and SQL HRMS app are in sync with one another