Online Mobile Approval
Use cases
These ALL can use Online Approval for user :
| Module | Access Right |
|---|---|
| Logon Screen | - No access right to change password |
| ALL module | - ALL Module with execute but have no access right for pront / preview or export |
| - Unable to Grid Export | |
| Payroll | - Process/ Delete Month End Outside Acceptable Transaction Date |
| - Have right for Open Pending Payroll but without access right for execute or process right for pending Allowance, Overtime etc | |
| - Payroll Report -Payroll | print report | have execute right without process report | |
| View | - Not allowed to view Payroll or Leave Dashboard |
Sample Scenario
For example : If we set Maintain Acceptable Transaction Date date from 01/03/2023
-
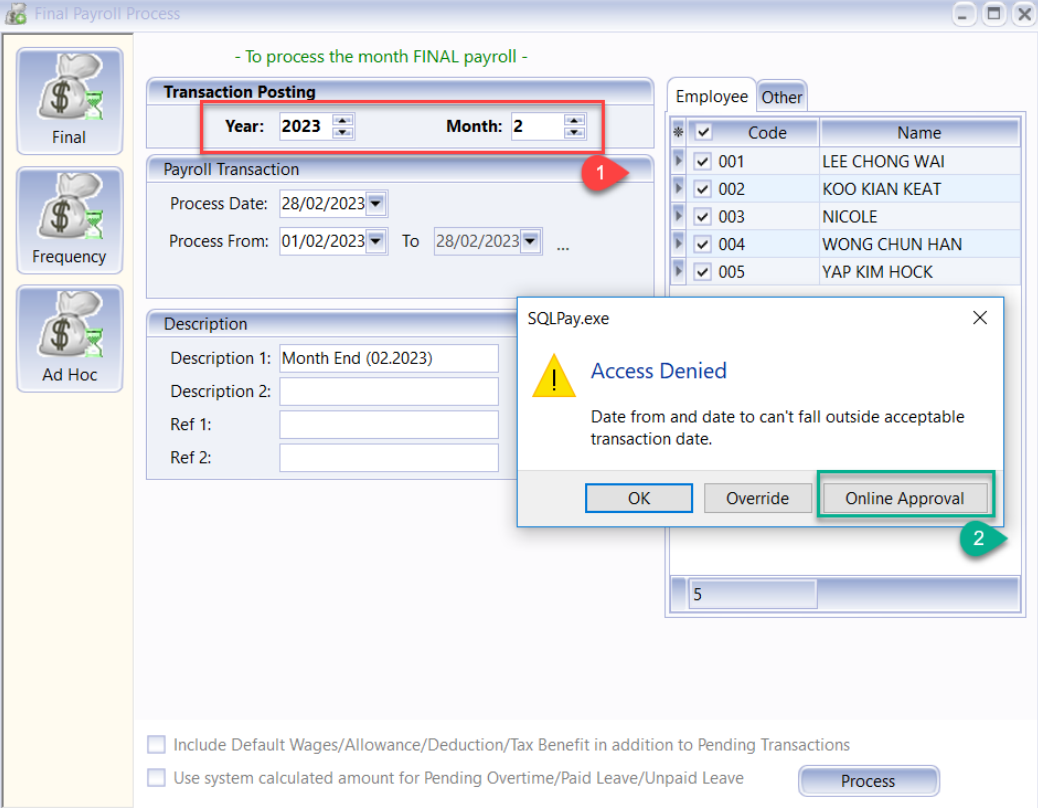
Process Year 2023 February month end
-
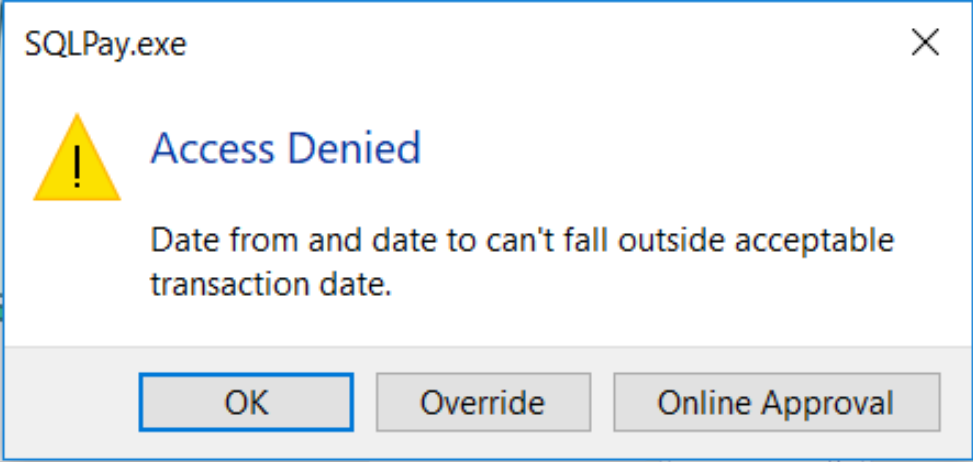
Click process > prompt a dialog box to override > click Online Approval
-
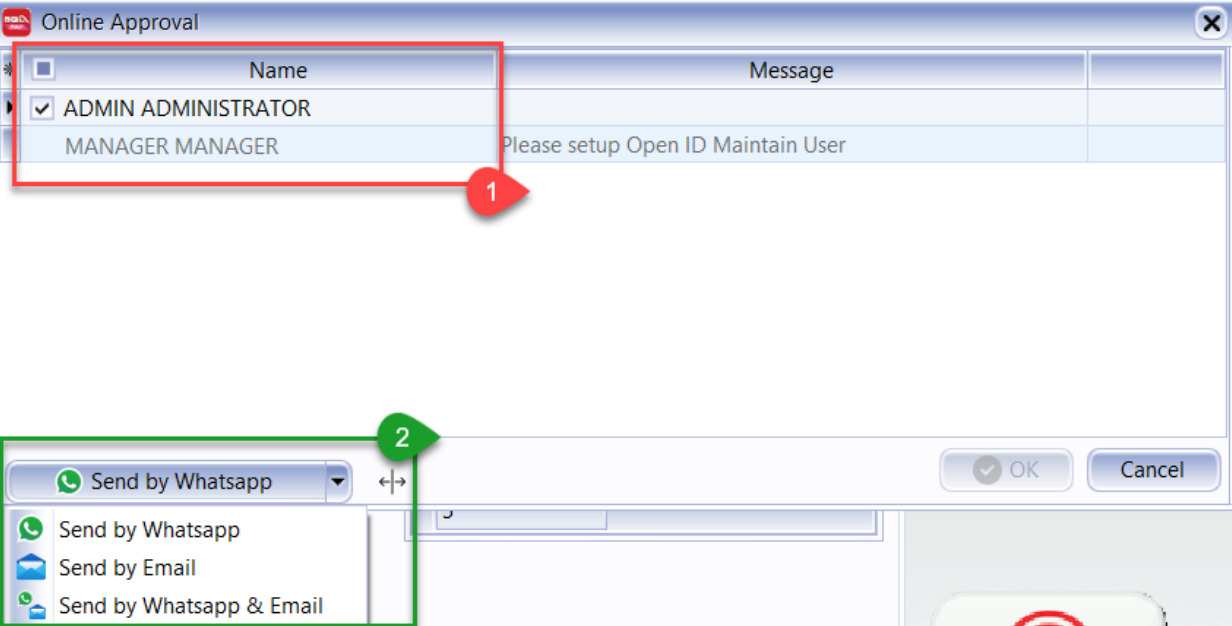
Tick the ID that you choose to get approval
-
You can choose to send by Whatsapp, Send by Email or Send by Whatsapp & Email
-
-
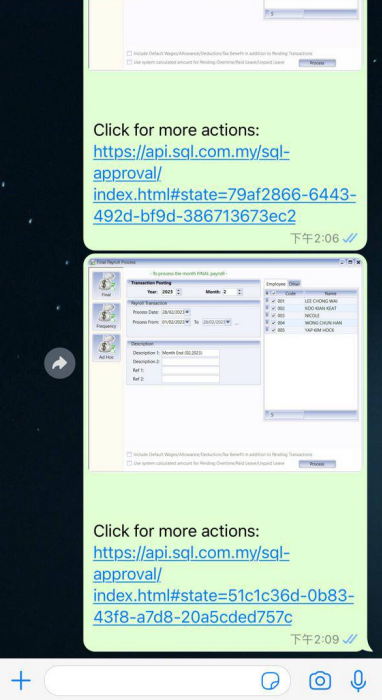
You will received a message at whatsapp or email send by system
-
Senario 1 : Send By Whatsapp
You will received a message > Click that link
-
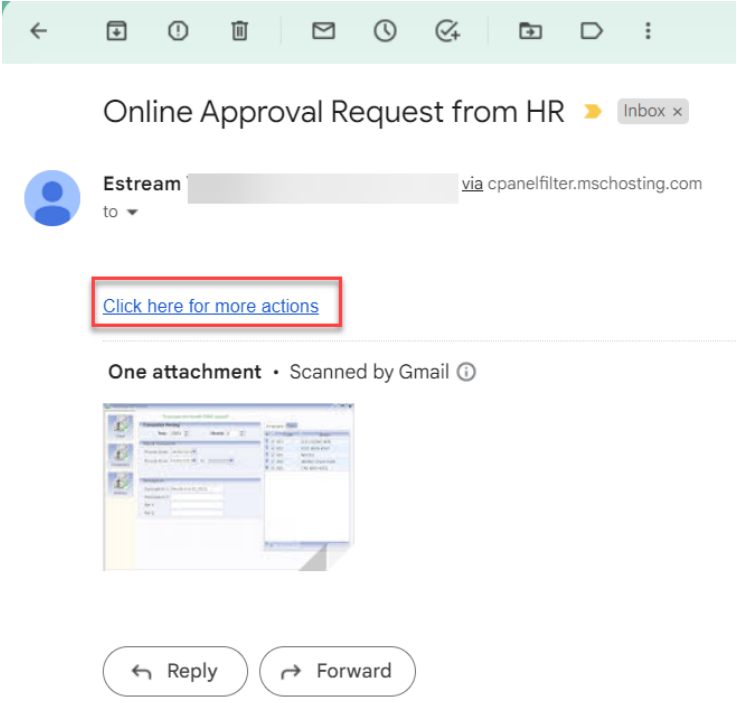
Senario 2 : Send By Email
You will received an email > Click ‘CLICK HERE FOR MORE ACTIONS’
-
-
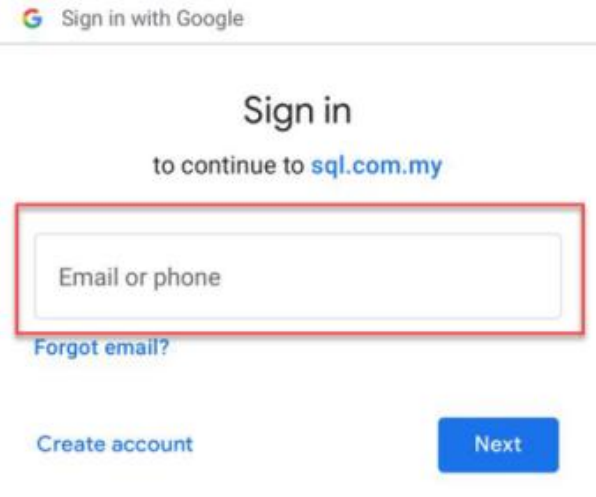
Login Gmail Address that you setting in maintain user Open ID (Google)
note- This step is for those send by whatsapp and not use Gmail to received notification
- Those use Gmail Address to received notification and approve can jump to Step 6
-
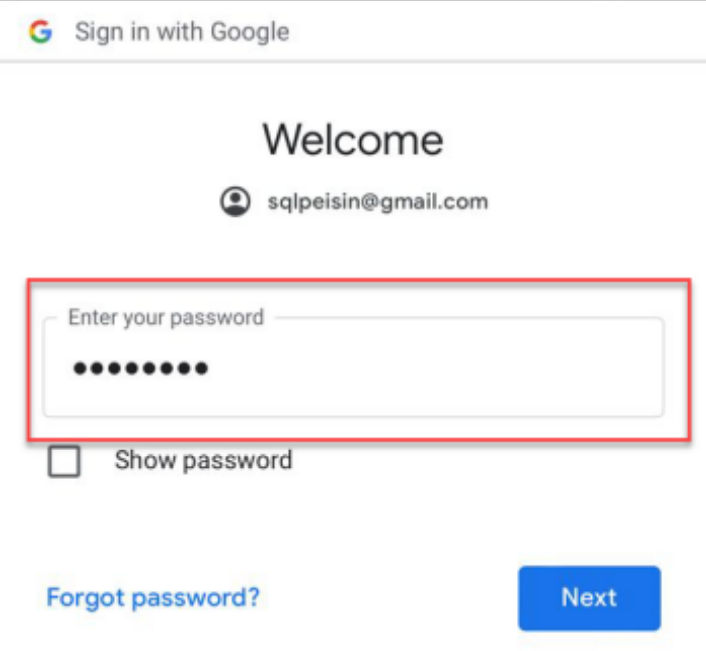
Enter your Gmail Password
-
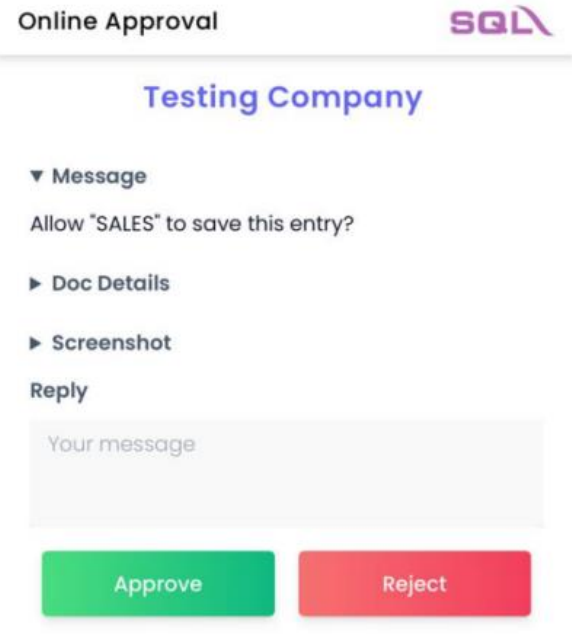
After Login Gmail you will see this window
-
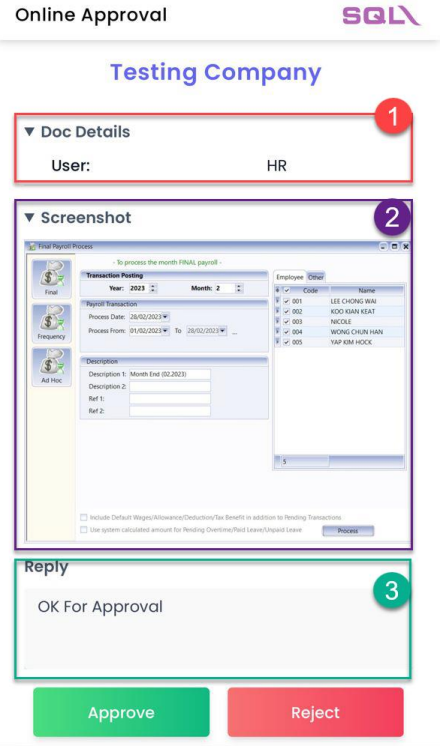
You can click on Doc Detail and ScreenShot to see the detail
-
Doc Detail : To show User Name
-
ScreenShot : To see the process screen
-
Reply : You can left a message and click Approve or Reject
noteAfter Approve or Reject you can go back SQL Payroll, you will see below screen
-
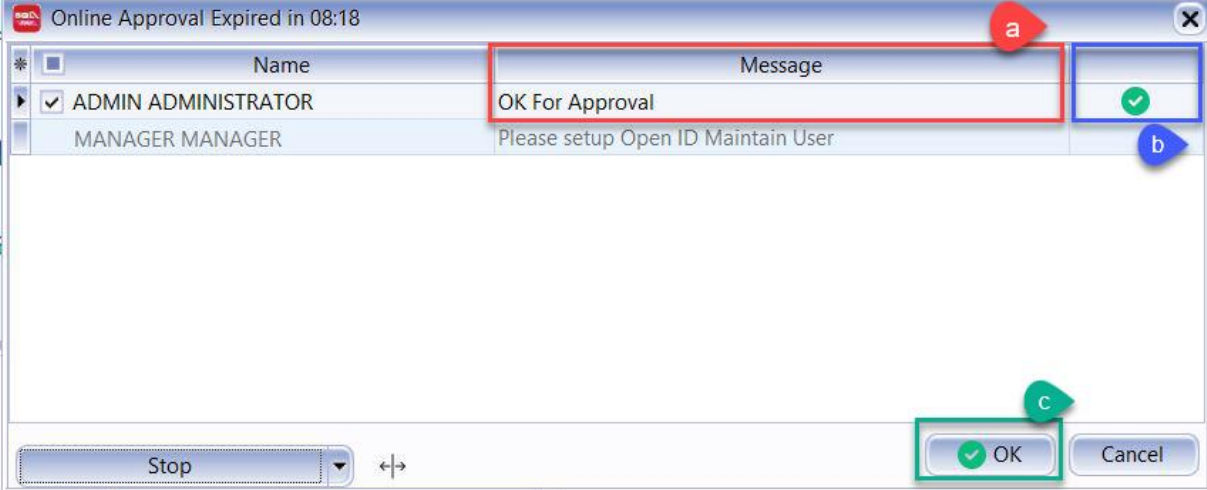
Scenario 1 : Approve Override
a. Message : Approve Message
b. The green tick will appear after approve
c. Click OK to save that transaction
-
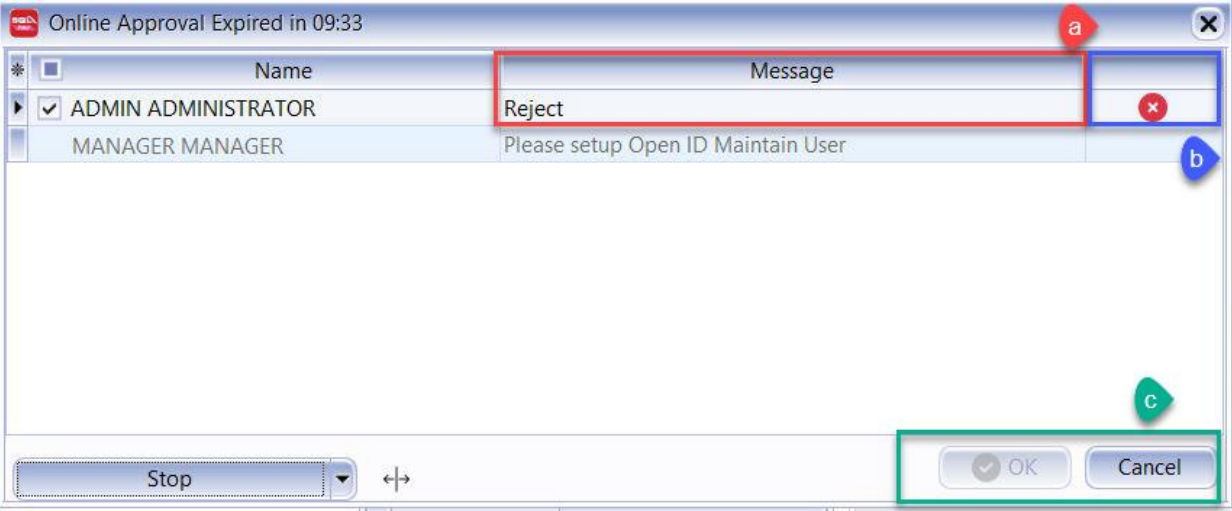
Senario 2 : Reject Override
a. Message : Reject Message
b. The cross will appear after reject
c. The OK button is disabled after reject, click Cancel
After Click Cancel System will Prompt back to this dialog box
-
Setup
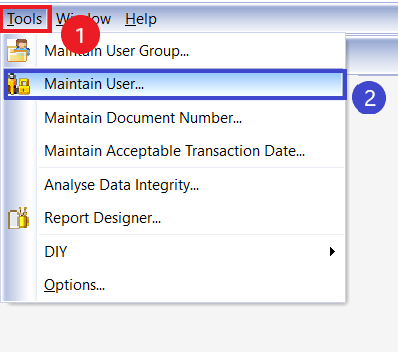
Step 1 : Navigate to Tools > Maintain User
Step 2 : Edit User
-
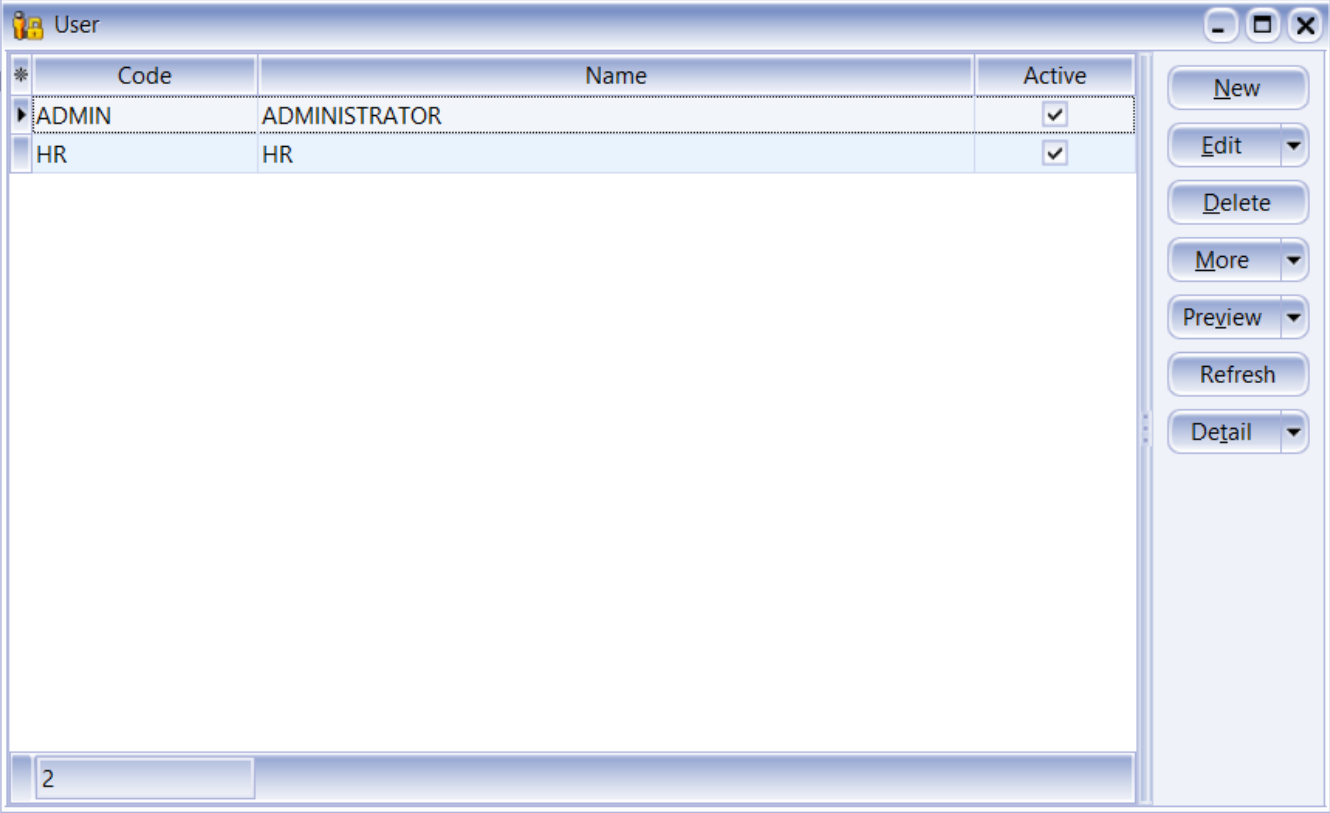
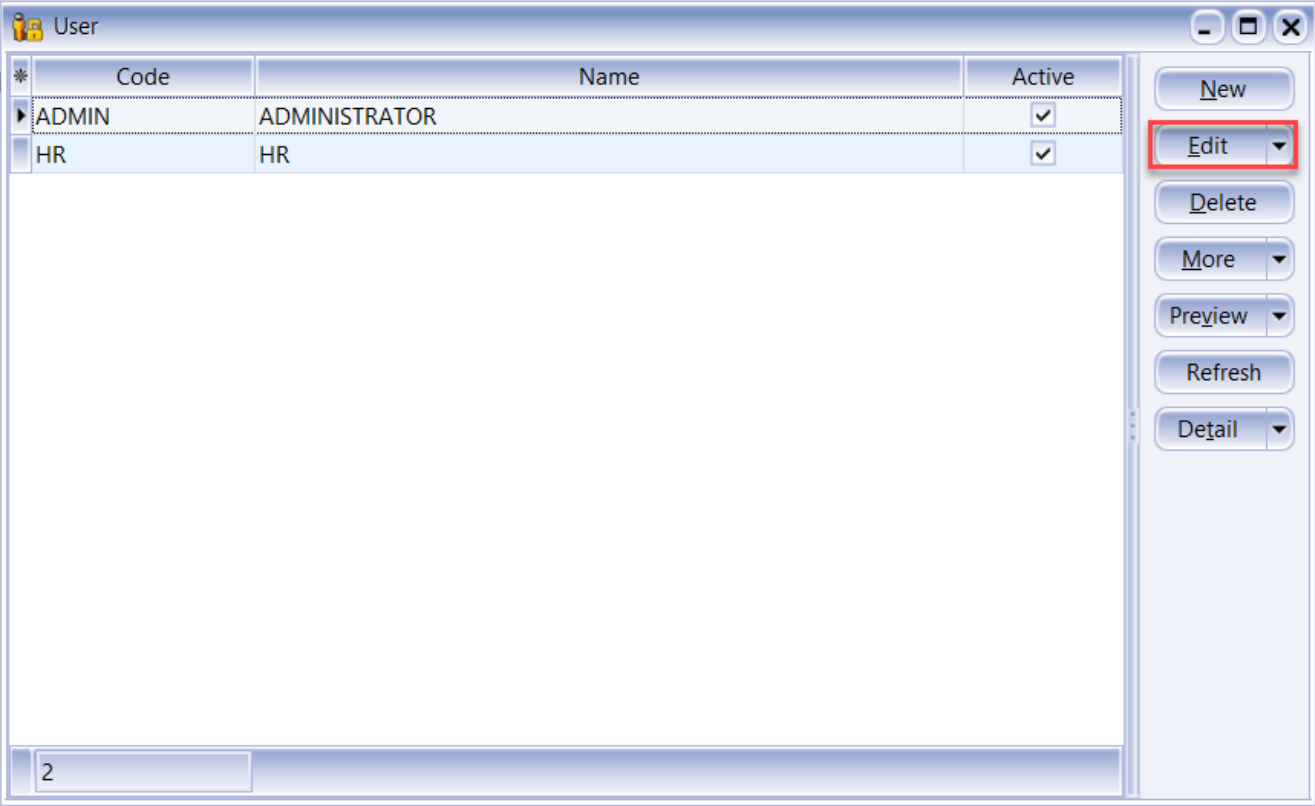
Double click the user will be set for Approval > Edit
Step 3 : Set Approval Person
-
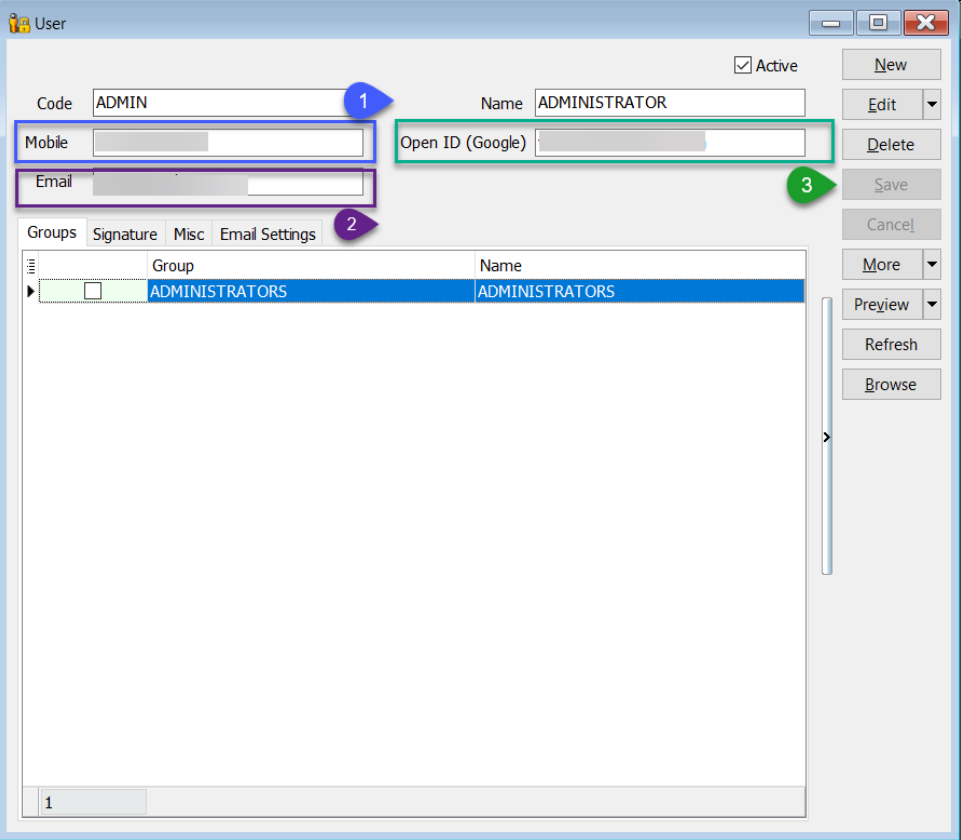
Setting The Detail For Approval Person (ONLY GMAIL CAN LOGIN TO APPROVE OR REJECT)
-
Mobile number - To which whatsapp number to get notification for approval only
-
Email - To which email address to get notification for approval only
-
Open ID (Google) - Gmail for approve or reject
noteIf receive notification email and approve email is Gmail, do setting only at 3. OPEN ID (Google) and leave 2.Email column blank
For Example :
-
Senario 1 : Use Same Gmail to Received Notification and Give Approval
Your Gmail address is :
XXXXXX@gmail.com- Open ID (Google) :
XXXXXX@gmail.com - Email : Left as blank
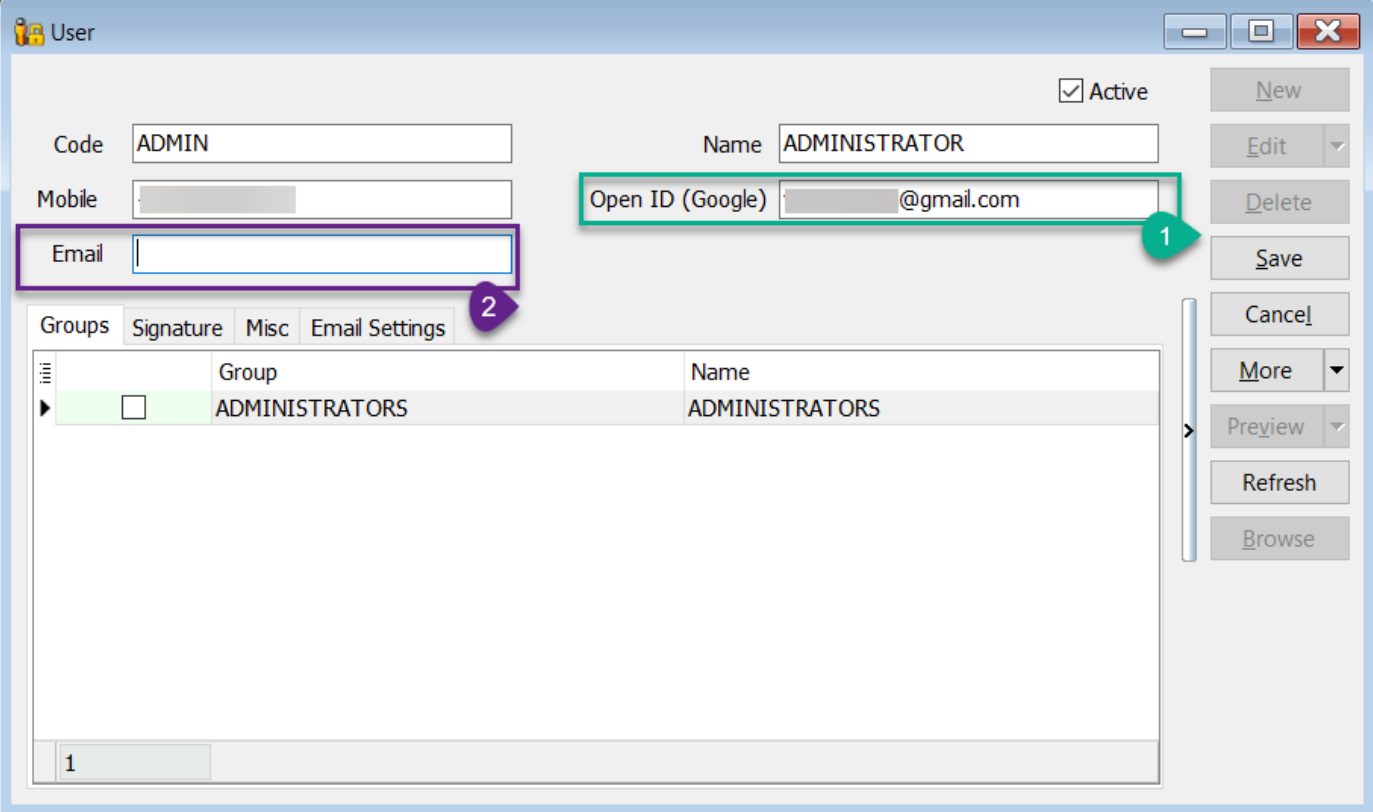
- Open ID (Google) :
-
Senario 2 : Use Different email to received notification and give approval
- To Give Approval Gmail Address is :
XXXXXX@gmail.com - To Received notification Address is :
XXXXXX@estream.com
- Open ID (Google) : Put your gmail address
XXXXXX@gmail.com - Email :
XXXXXX@estream.com
- To Give Approval Gmail Address is :
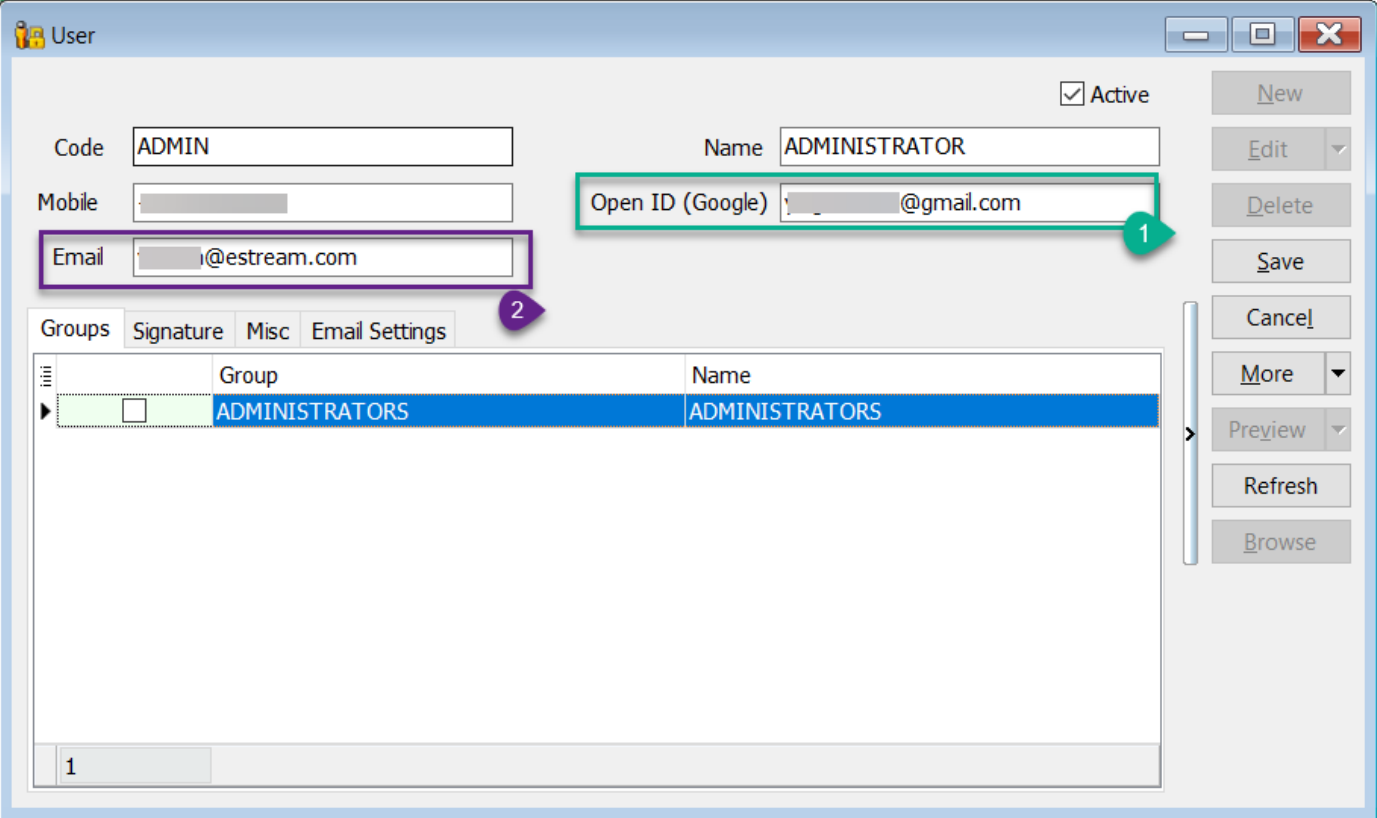
-
Step 4 : Setting SMTP
- This Setting is for user who want to use Email to send Notification
- If use whatsapp to send approval can skip this step
-
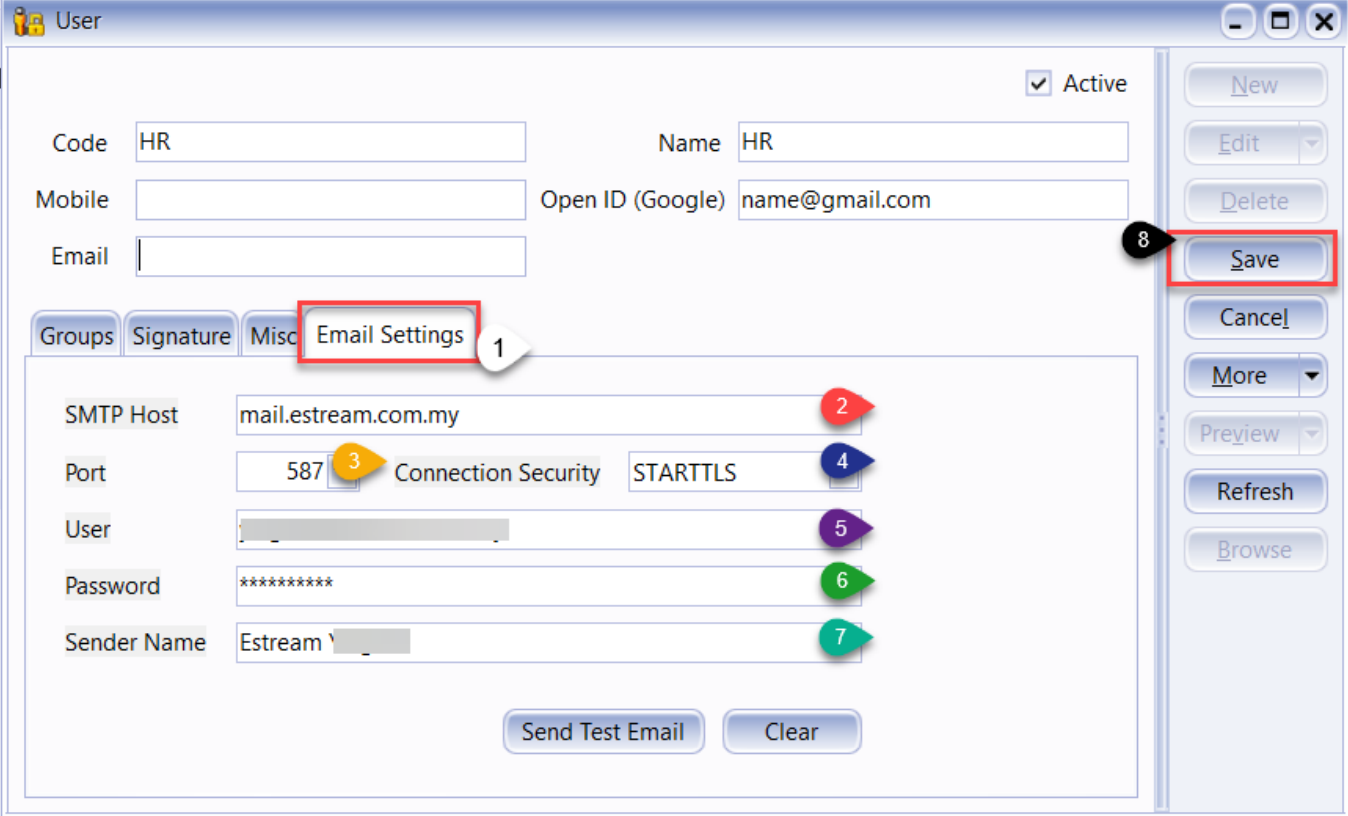
Make Sure you had create App Password
- If you’re using Gmail , you can CLICK HERE to follow the steps to create your App Password
- After get App Password, return to your SQL Payroll
-
Click on Email Setting
-
Your Email SMTP Host
-
Your Email SMTP Port
-
Your Email SMTP Connection Security
-
Your Email Address
-
Your Apps Password
-
Your Email Sender Name
-
After done setting click Save
