Settings
The Settings module consists of three main sections to help you manage your organization:
- Company - Manage your organization's profile and configuration
- Users - Control team member access and invitations
- Permissions - Define roles and access control
Company Settings
Overview
View and update your company's information, including business details and API configurations.
Check out our Setup Guide for detailed instructions on creating your company profile.

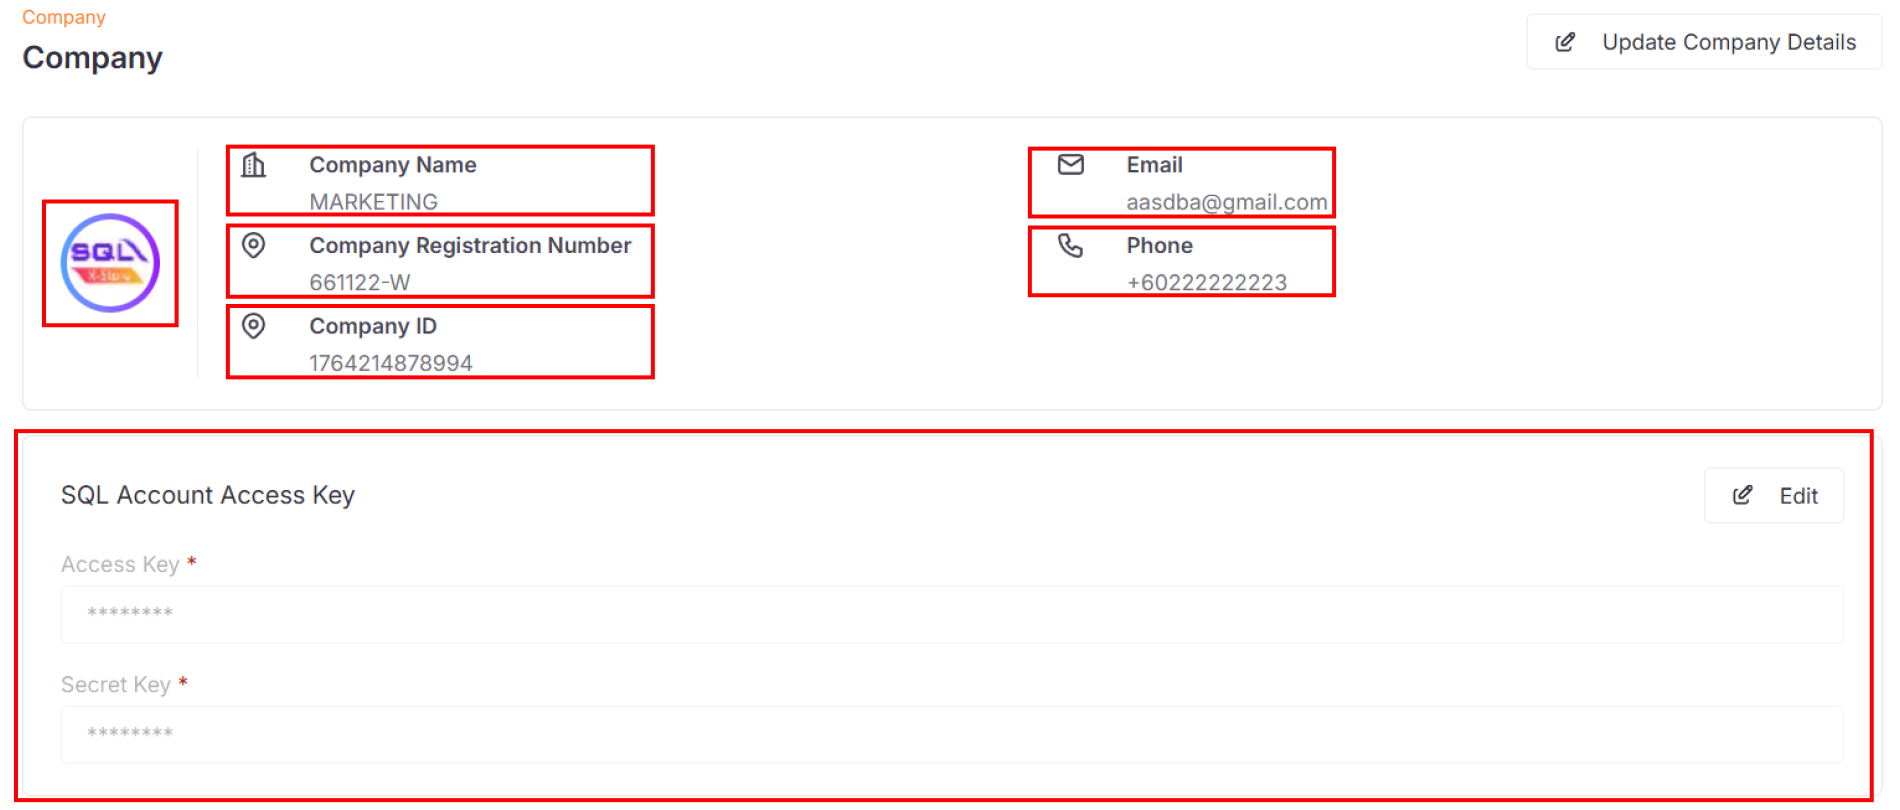
Company Information
Your company profile displays:
- Company ID
- Company name
- Logo
- Registration number
- Email address
- Phone number
SQL Account Integration
Configure your SQL Account API access by setting up:
- Access key
- Secret key
For more details on SQL Account configuration, see our Setup Guide.
Update Company Logo
Click on your current logo to upload a new one.
![]()
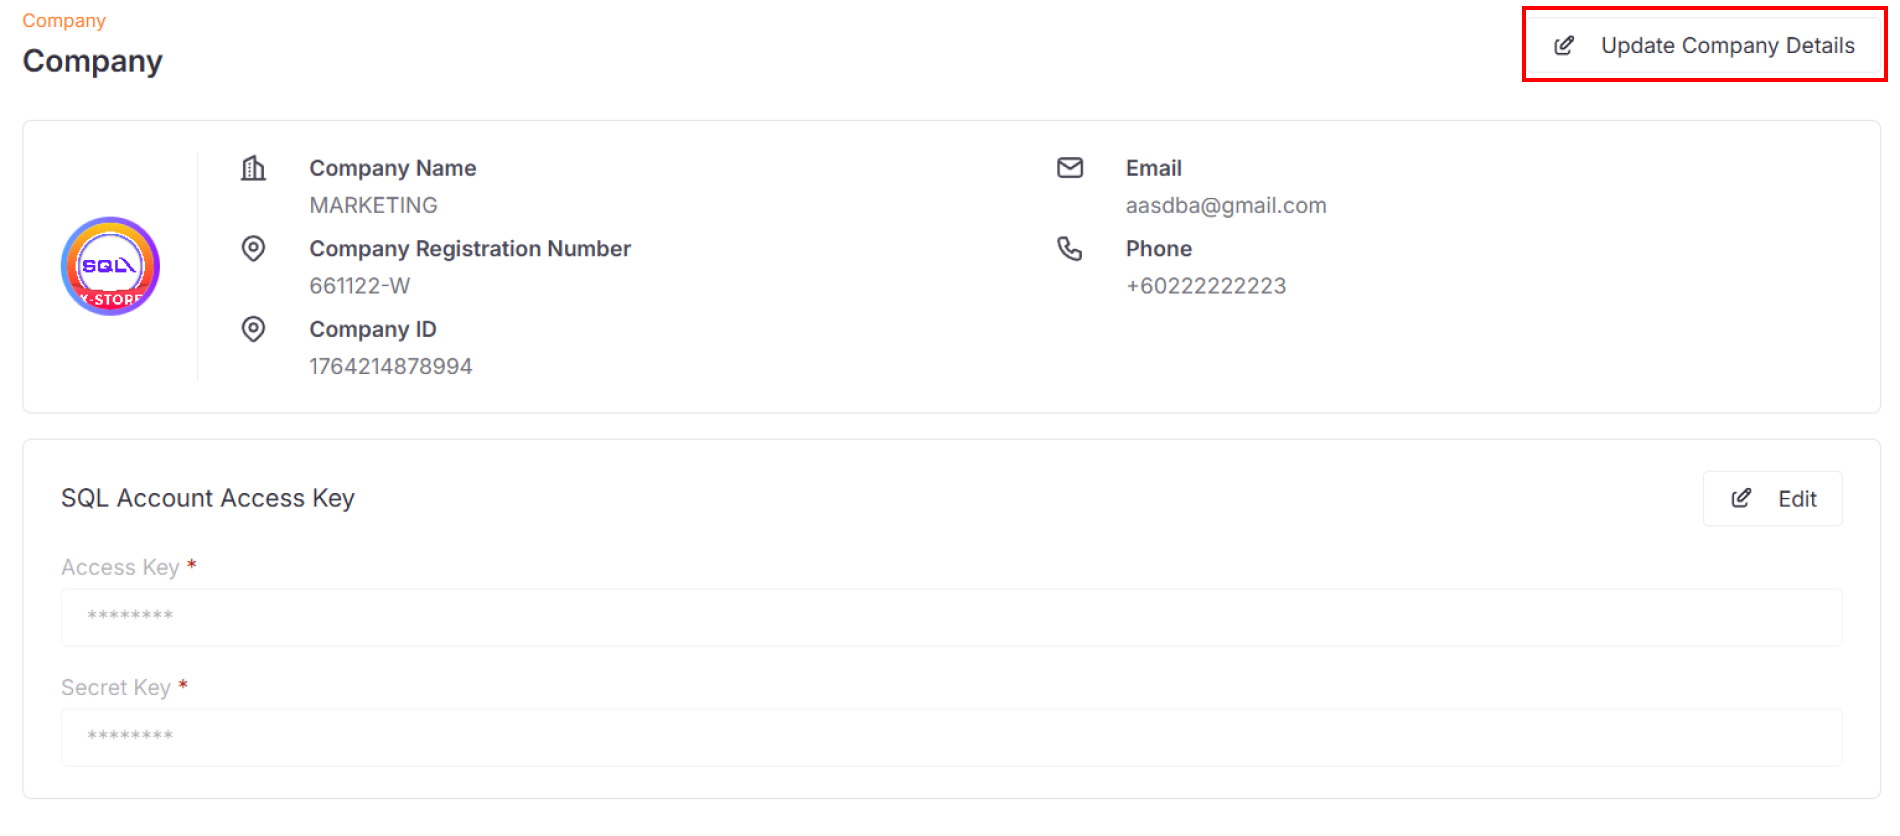
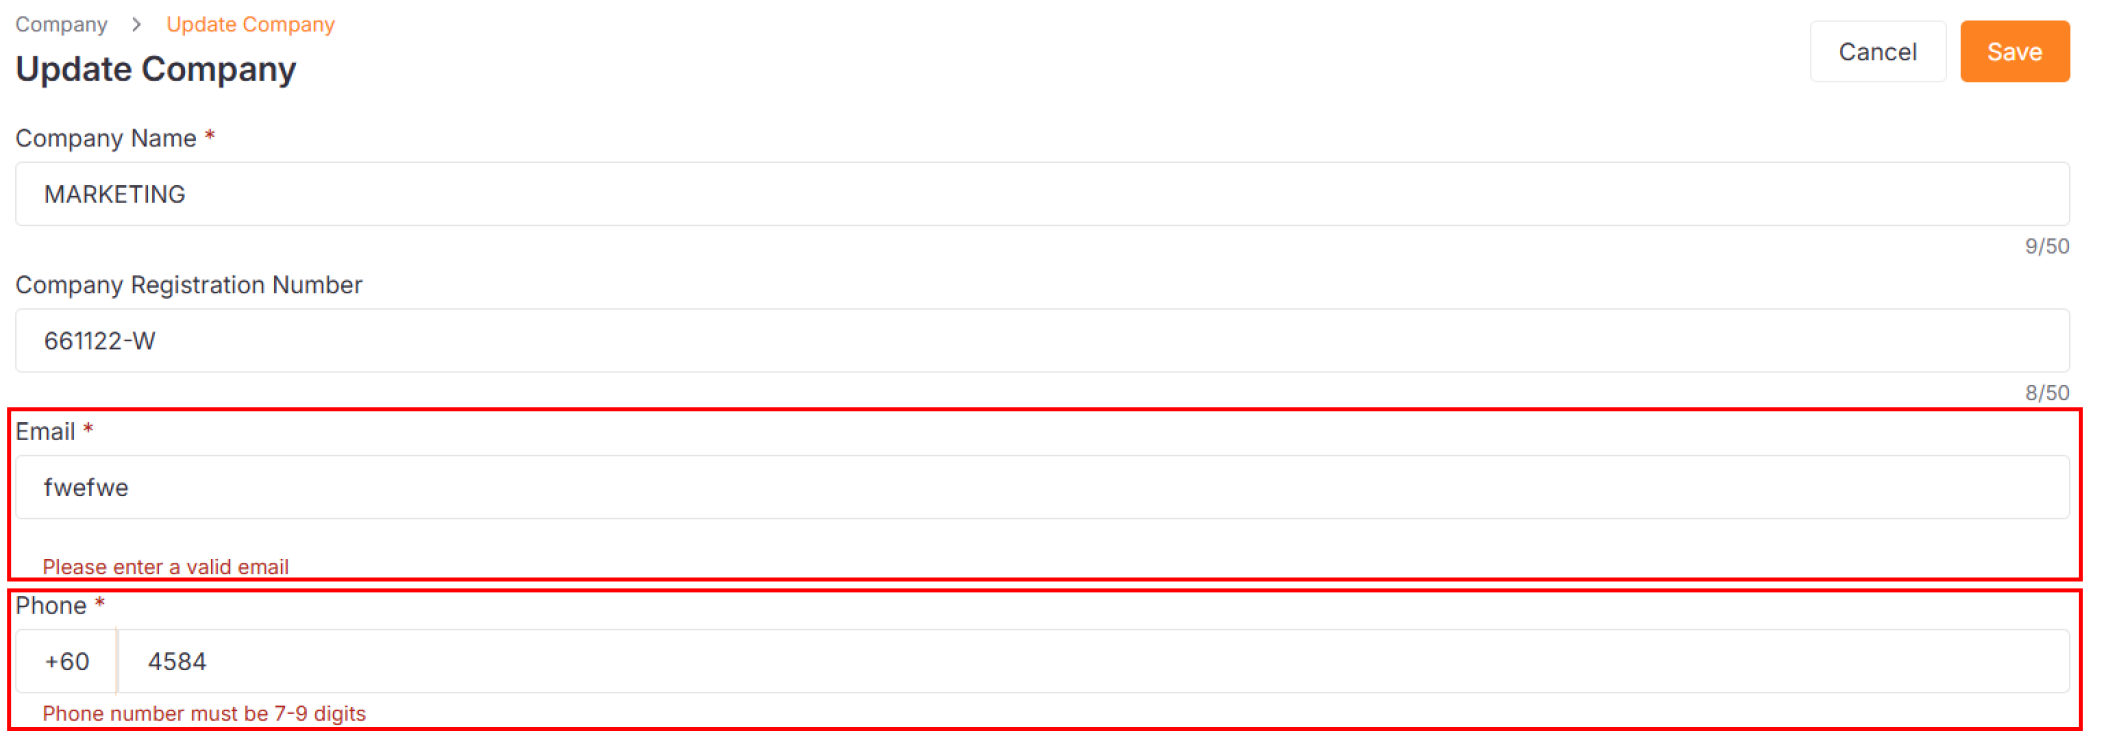
Editing Company Details
To update your company information:
-
Click the Update Company Details button
-
Modify any of the following fields:
- Company name
- Registration number
- Email address
- Phone number
-
Click Save to apply changes
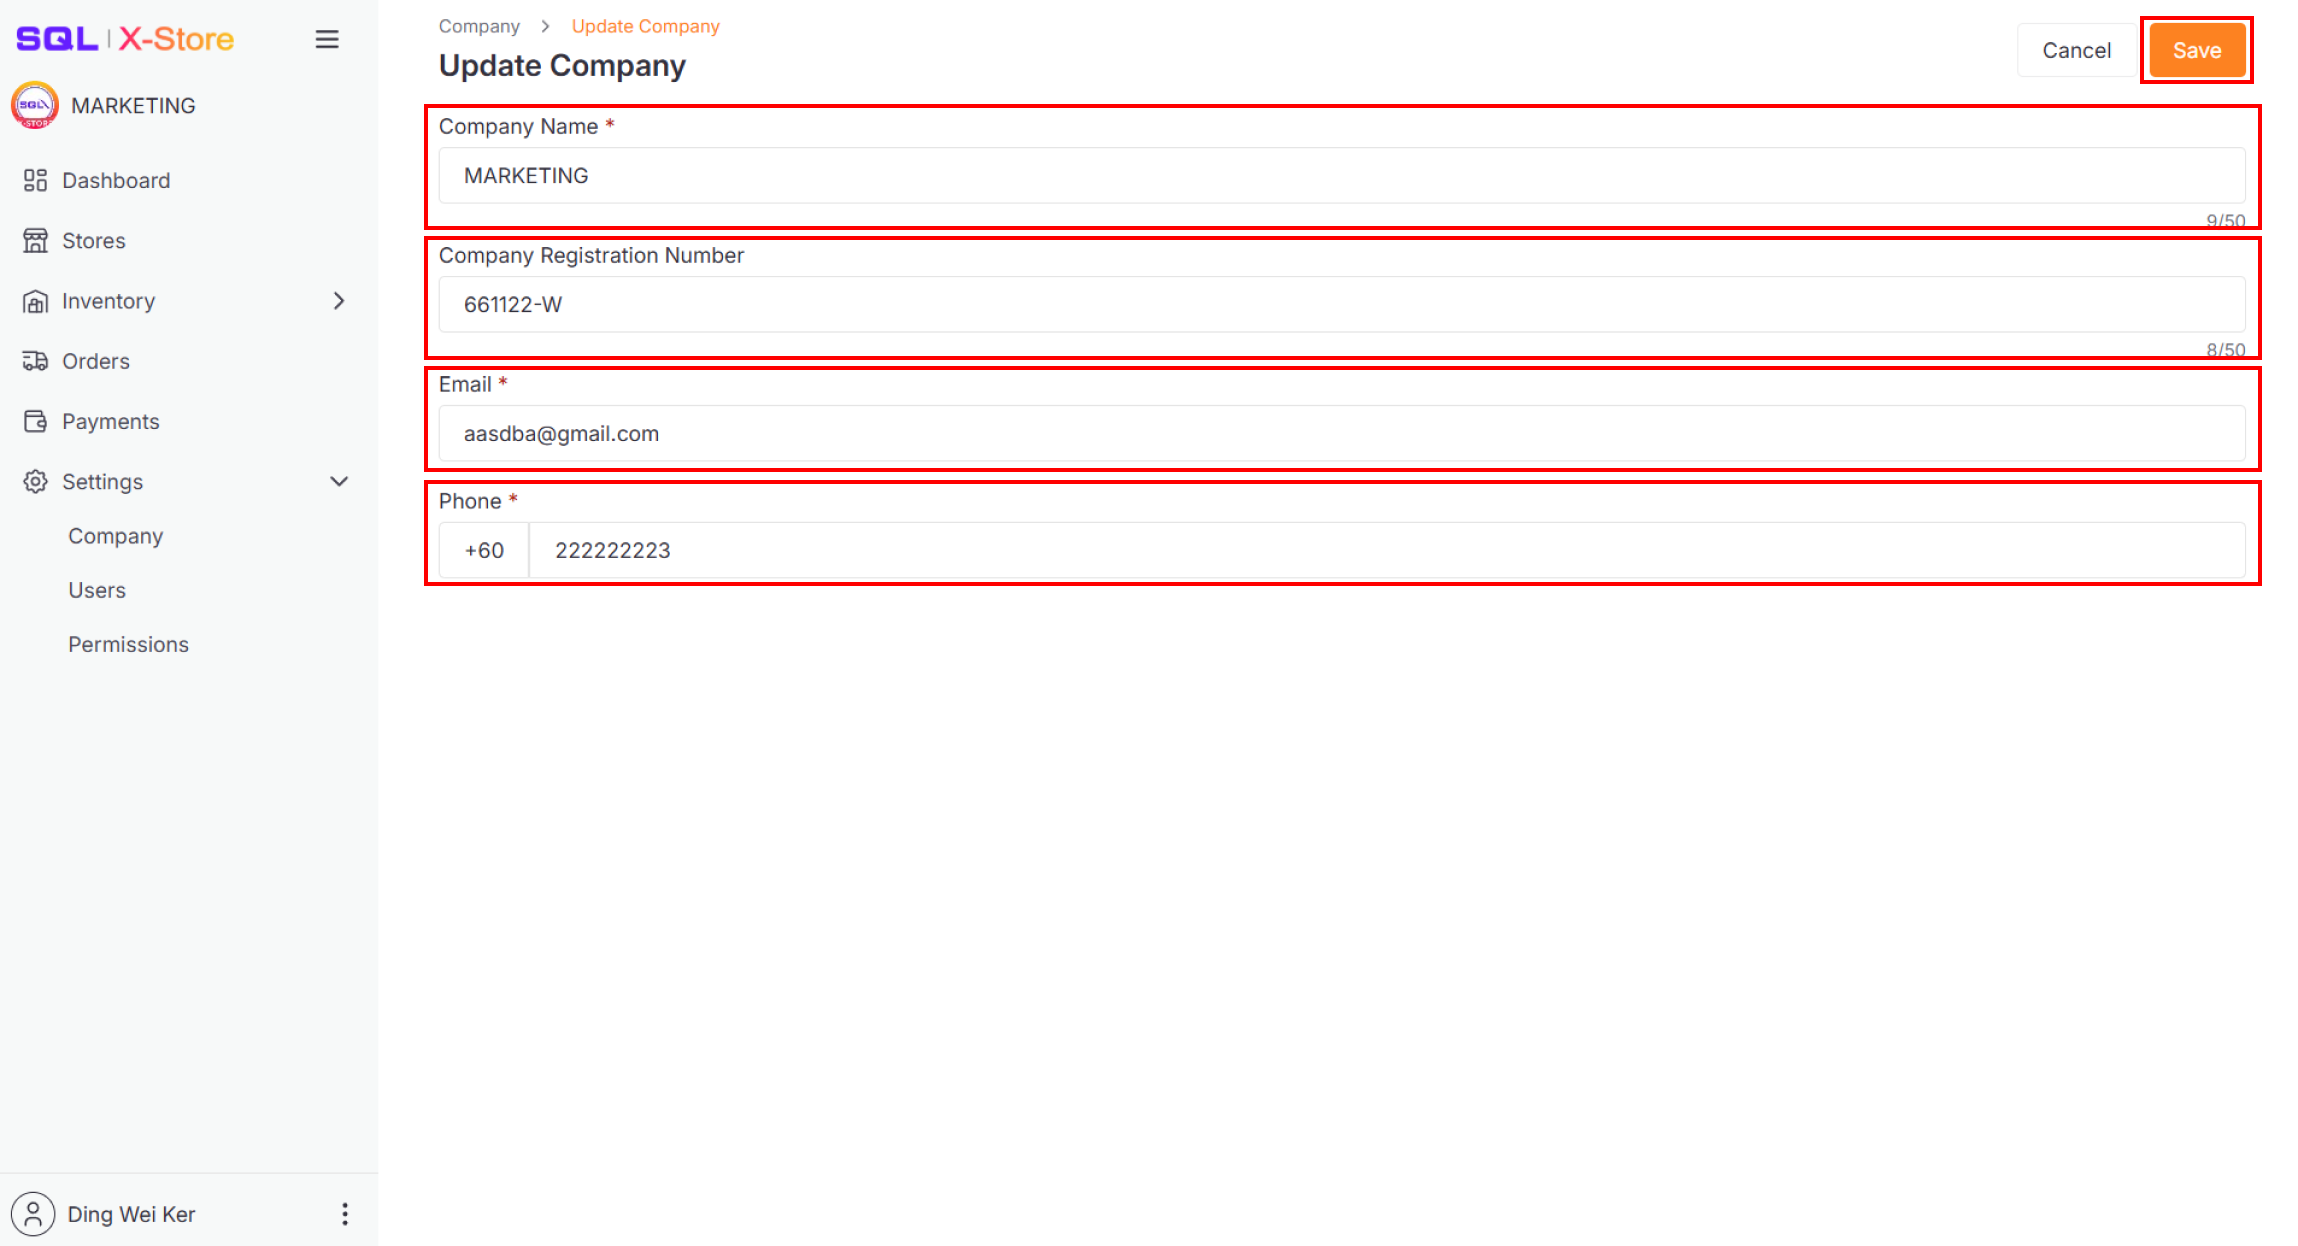
You must provide valid email and phone number formats. Invalid entries will trigger a warning message.
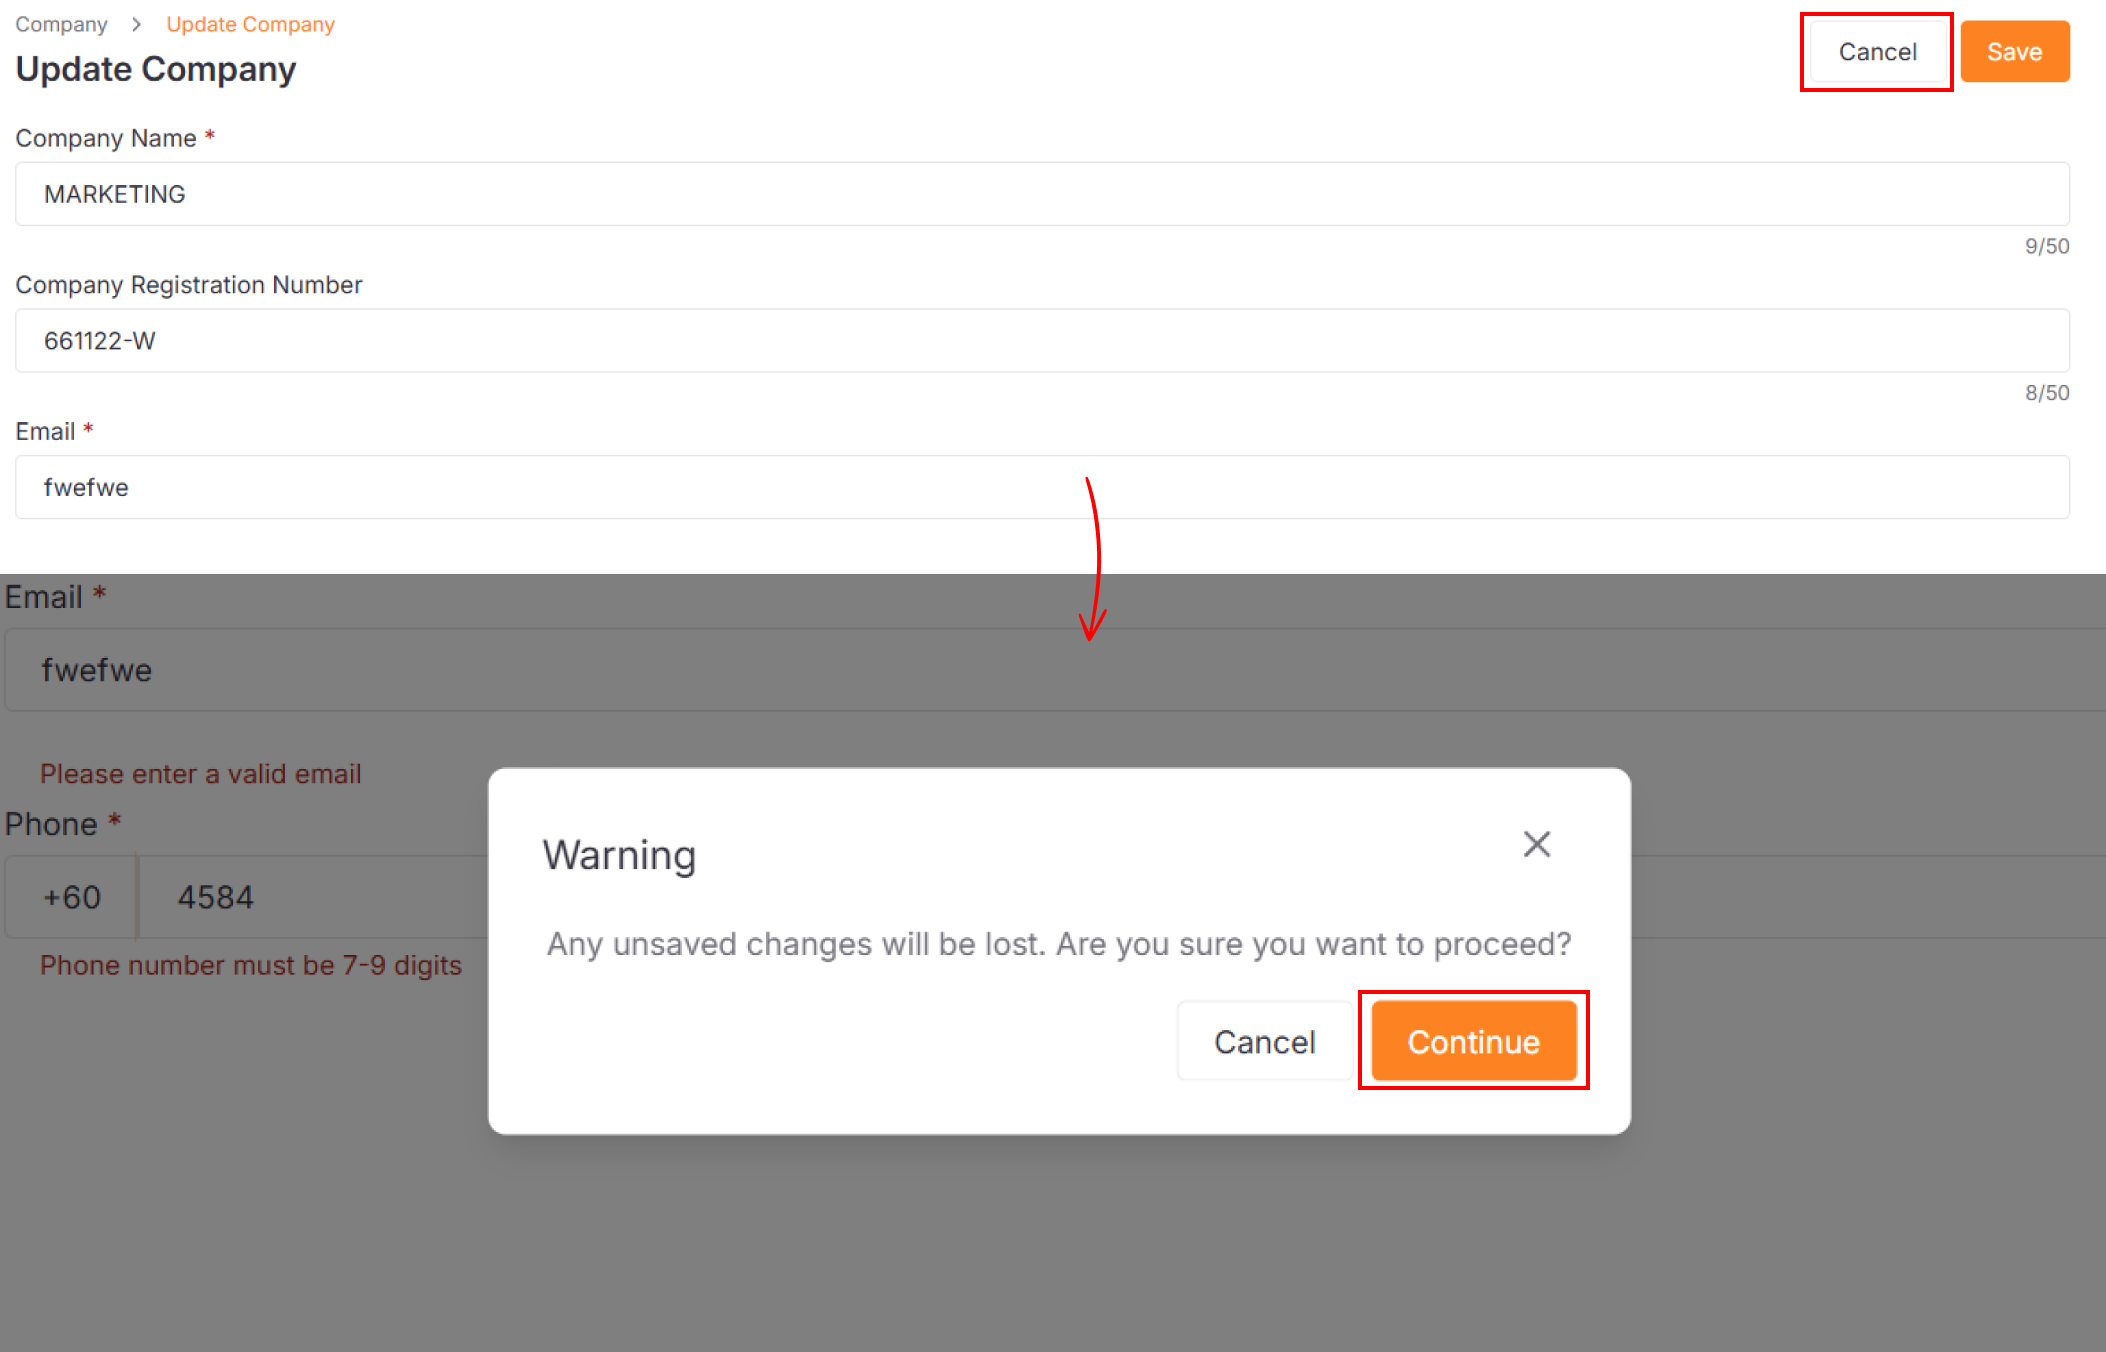
Canceling Changes
If you click Cancel after making edits, you'll see a confirmation dialog. Click Continue to discard your changes.
Users Settings
Overview
Manage your team members, including viewing, editing, inviting, and removing users.
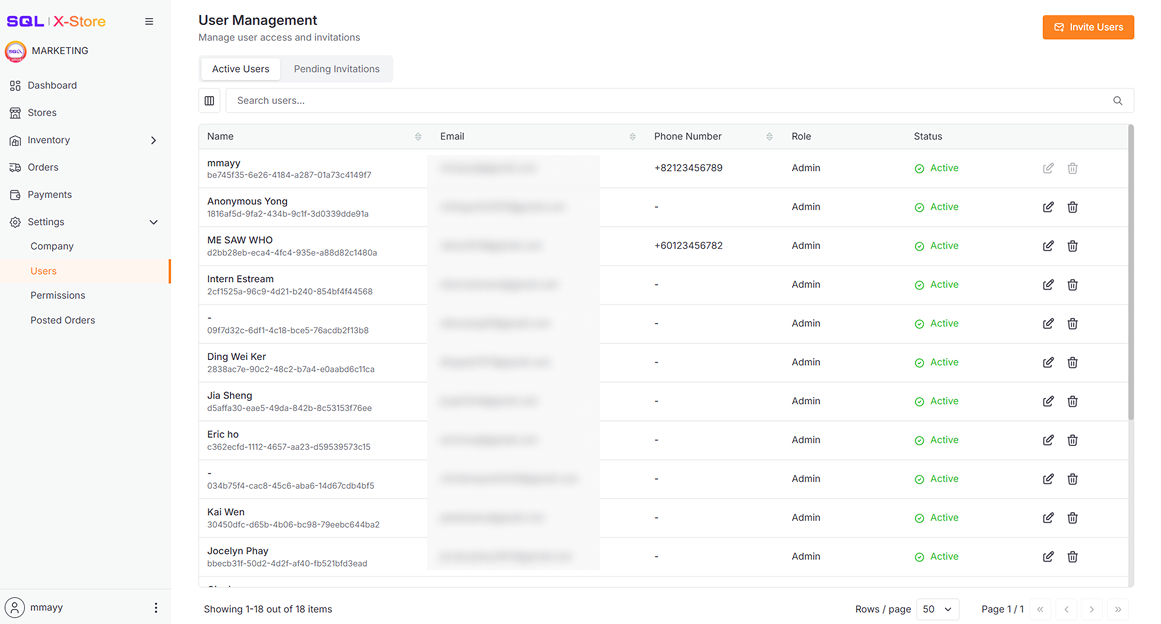
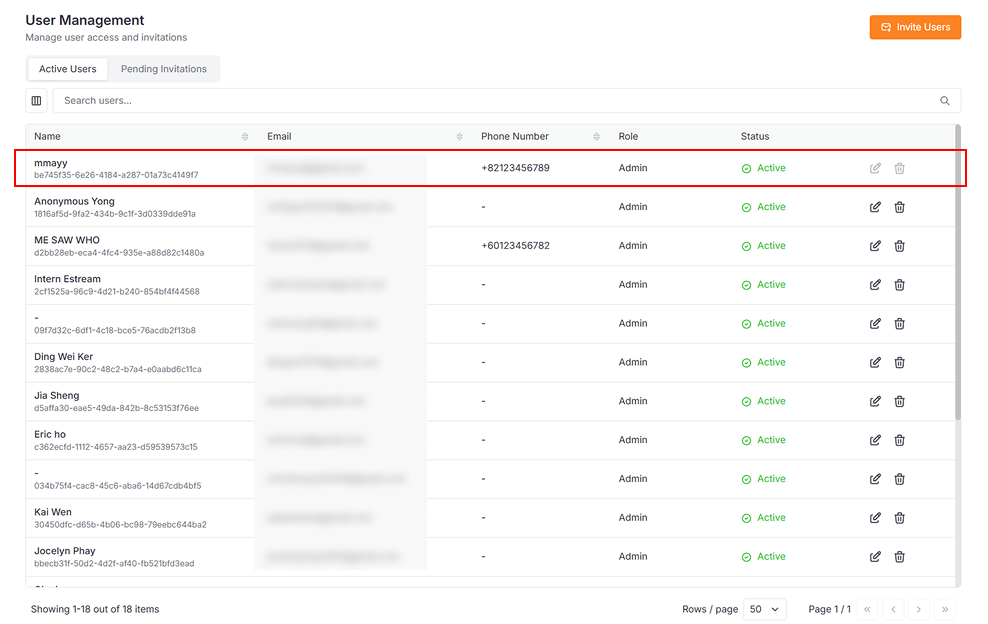
Active Users Table
The users table displays all team members with their name, ID (with copy function), email, phone number, assigned role, status, and actions. Use the search bar to filter users by name, ID, email, or phone number. Your account always appears in the first row.
| Column | Description |
|---|---|
| User Name & ID | Full name with copyable ID |
| Contact email address | |
| Phone Number | Contact phone number |
| Role | User role in company |
| Status | User status in company |
| Actions | Edit and Remove user |
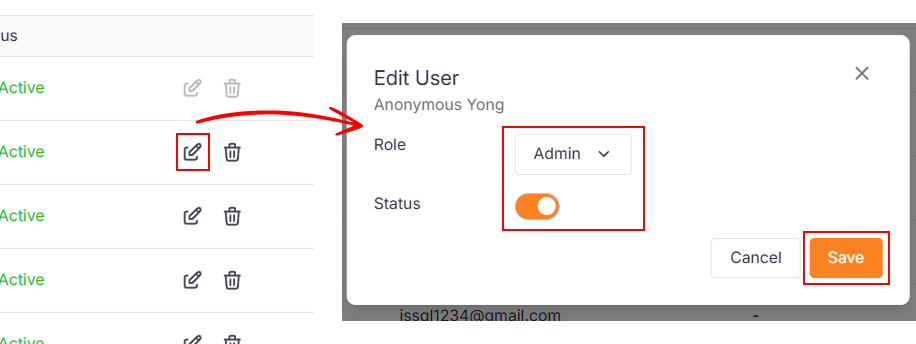
Editing User Details
You can modify a user's role and status directly in the table.
- Click the Edit icon in the user's row
- Update the desired fields.
- Click the Save button.
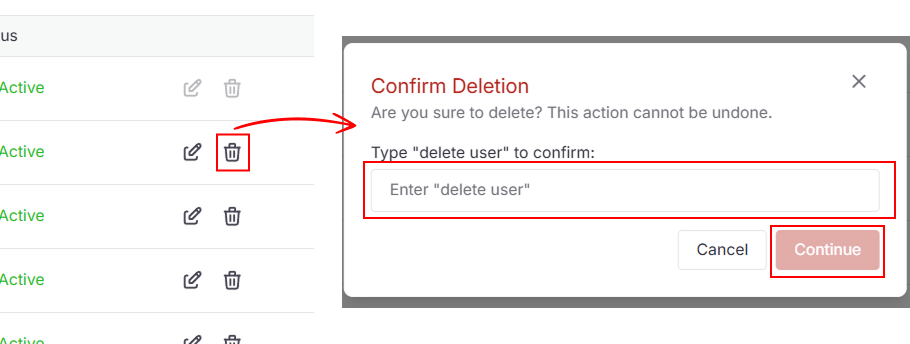
Removing Users
- Click the Delete icon in the user's row
- Type
delete userin the confirmation dialog - Click Continue to remove the user
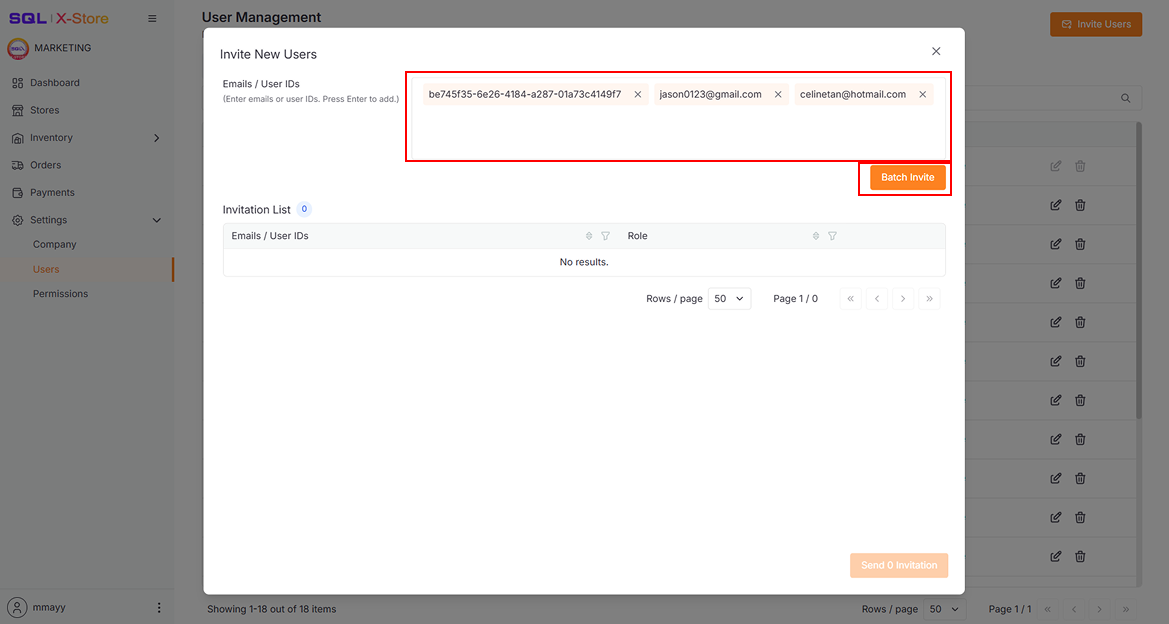
Inviting New Users
Step 1: Enter User Details
- Click the Invite Users button
- In the dialog, enter either:
- Email address (press Enter after each email)
- User ID
- Click Batch Invite to add users to the invitation list
User IDs appear in the users table. Ask the person you want to invite to copy their ID and send it to you.
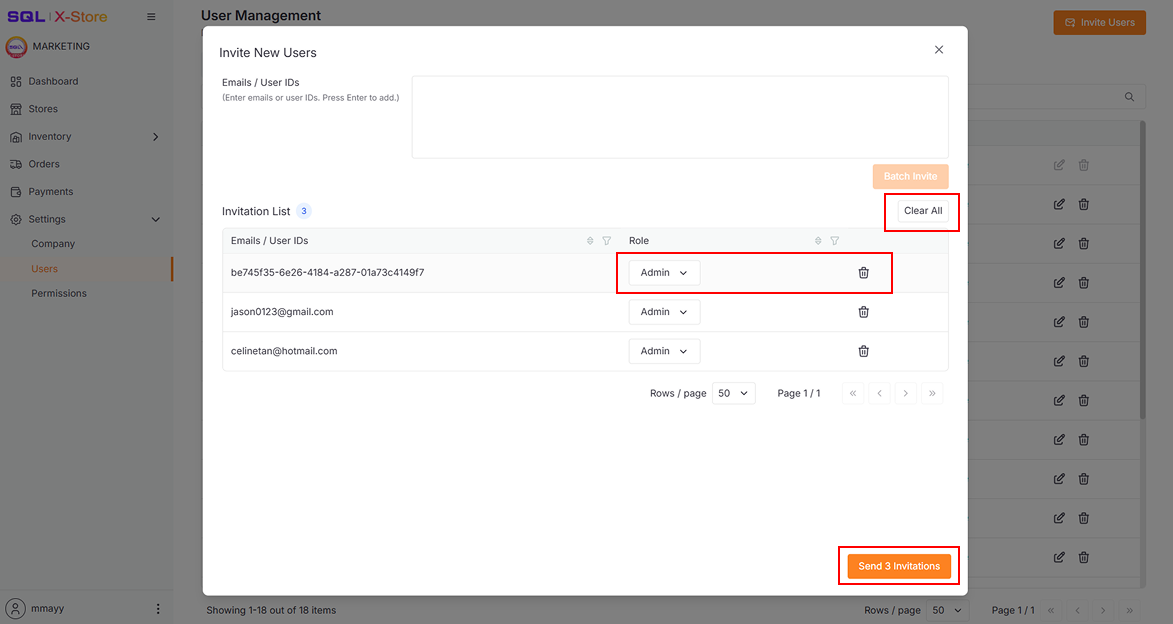
Step 2: Assign Roles and Send
- Select a role from the Role dropdown for each user
- Click Send Invitation to send all invitations
- Use Clear All to remove all pending invitations from the list
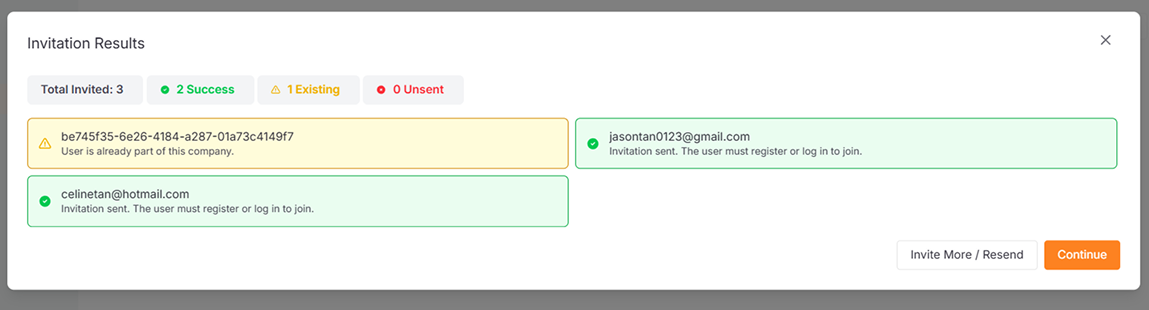
Step 3: Review Invitation Status
After sending, you'll see a status summary showing:
| Status | Meaning |
|---|---|
| ✅ Success | Invitation sent successfully |
| ℹ️ Exist | User already joined the company |
| ❌ Failed | Invitation could not be sent |
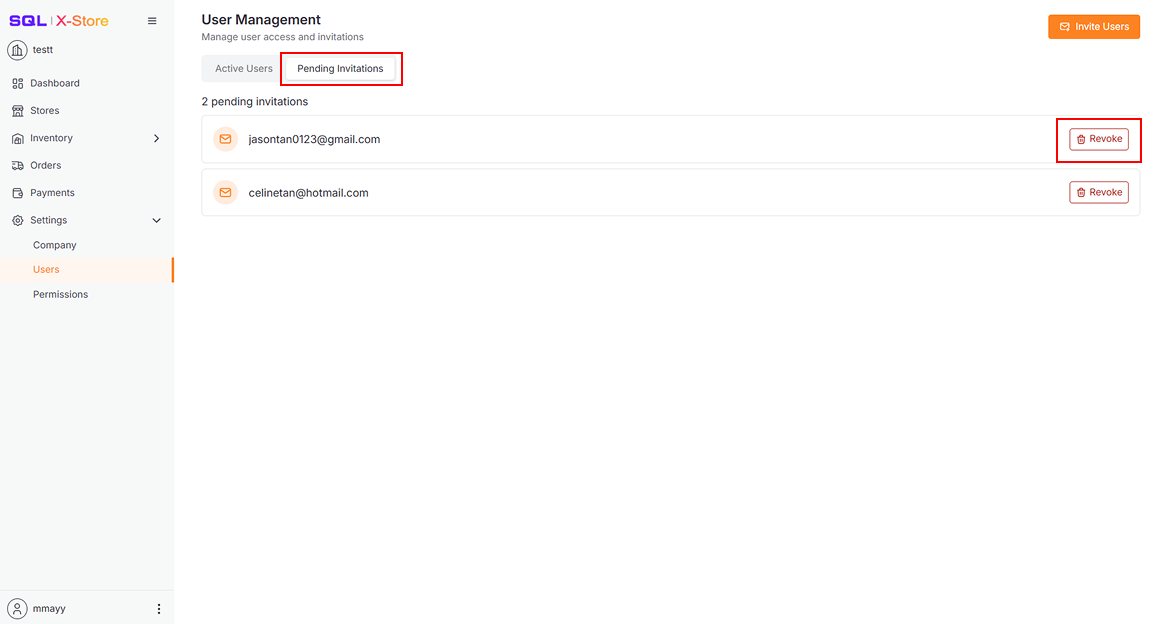
Managing Pending Invitations
Click Pending Invitations to switch to the pending list view.
- Shows invitations not yet accepted
- Includes a Revoke button for each invitation
- Invitations expire after 24 hours
- Expired invitations must be resent
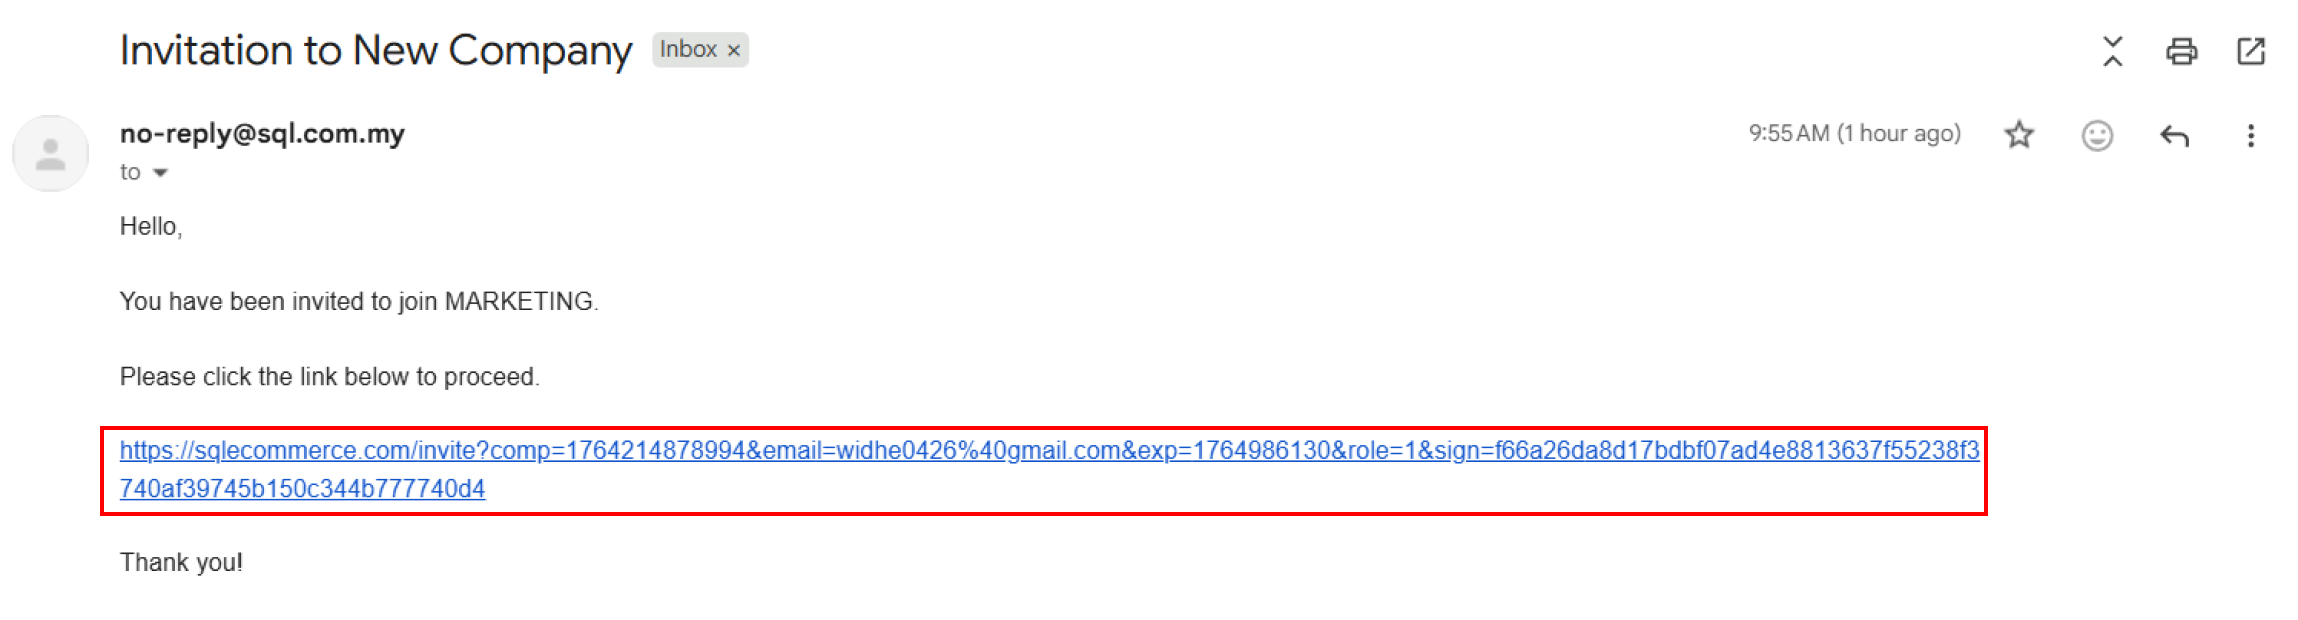
Accepting Invitations
Recipients receive an email with an invitation link.
Users invited by User ID join the company immediately without needing to accept an invitation.
Option 1: Sign in with Passkey
Log in using a Passkey and redirect to the Company List page.
You must register a user account with a passkey before using this method to accept the invitation.
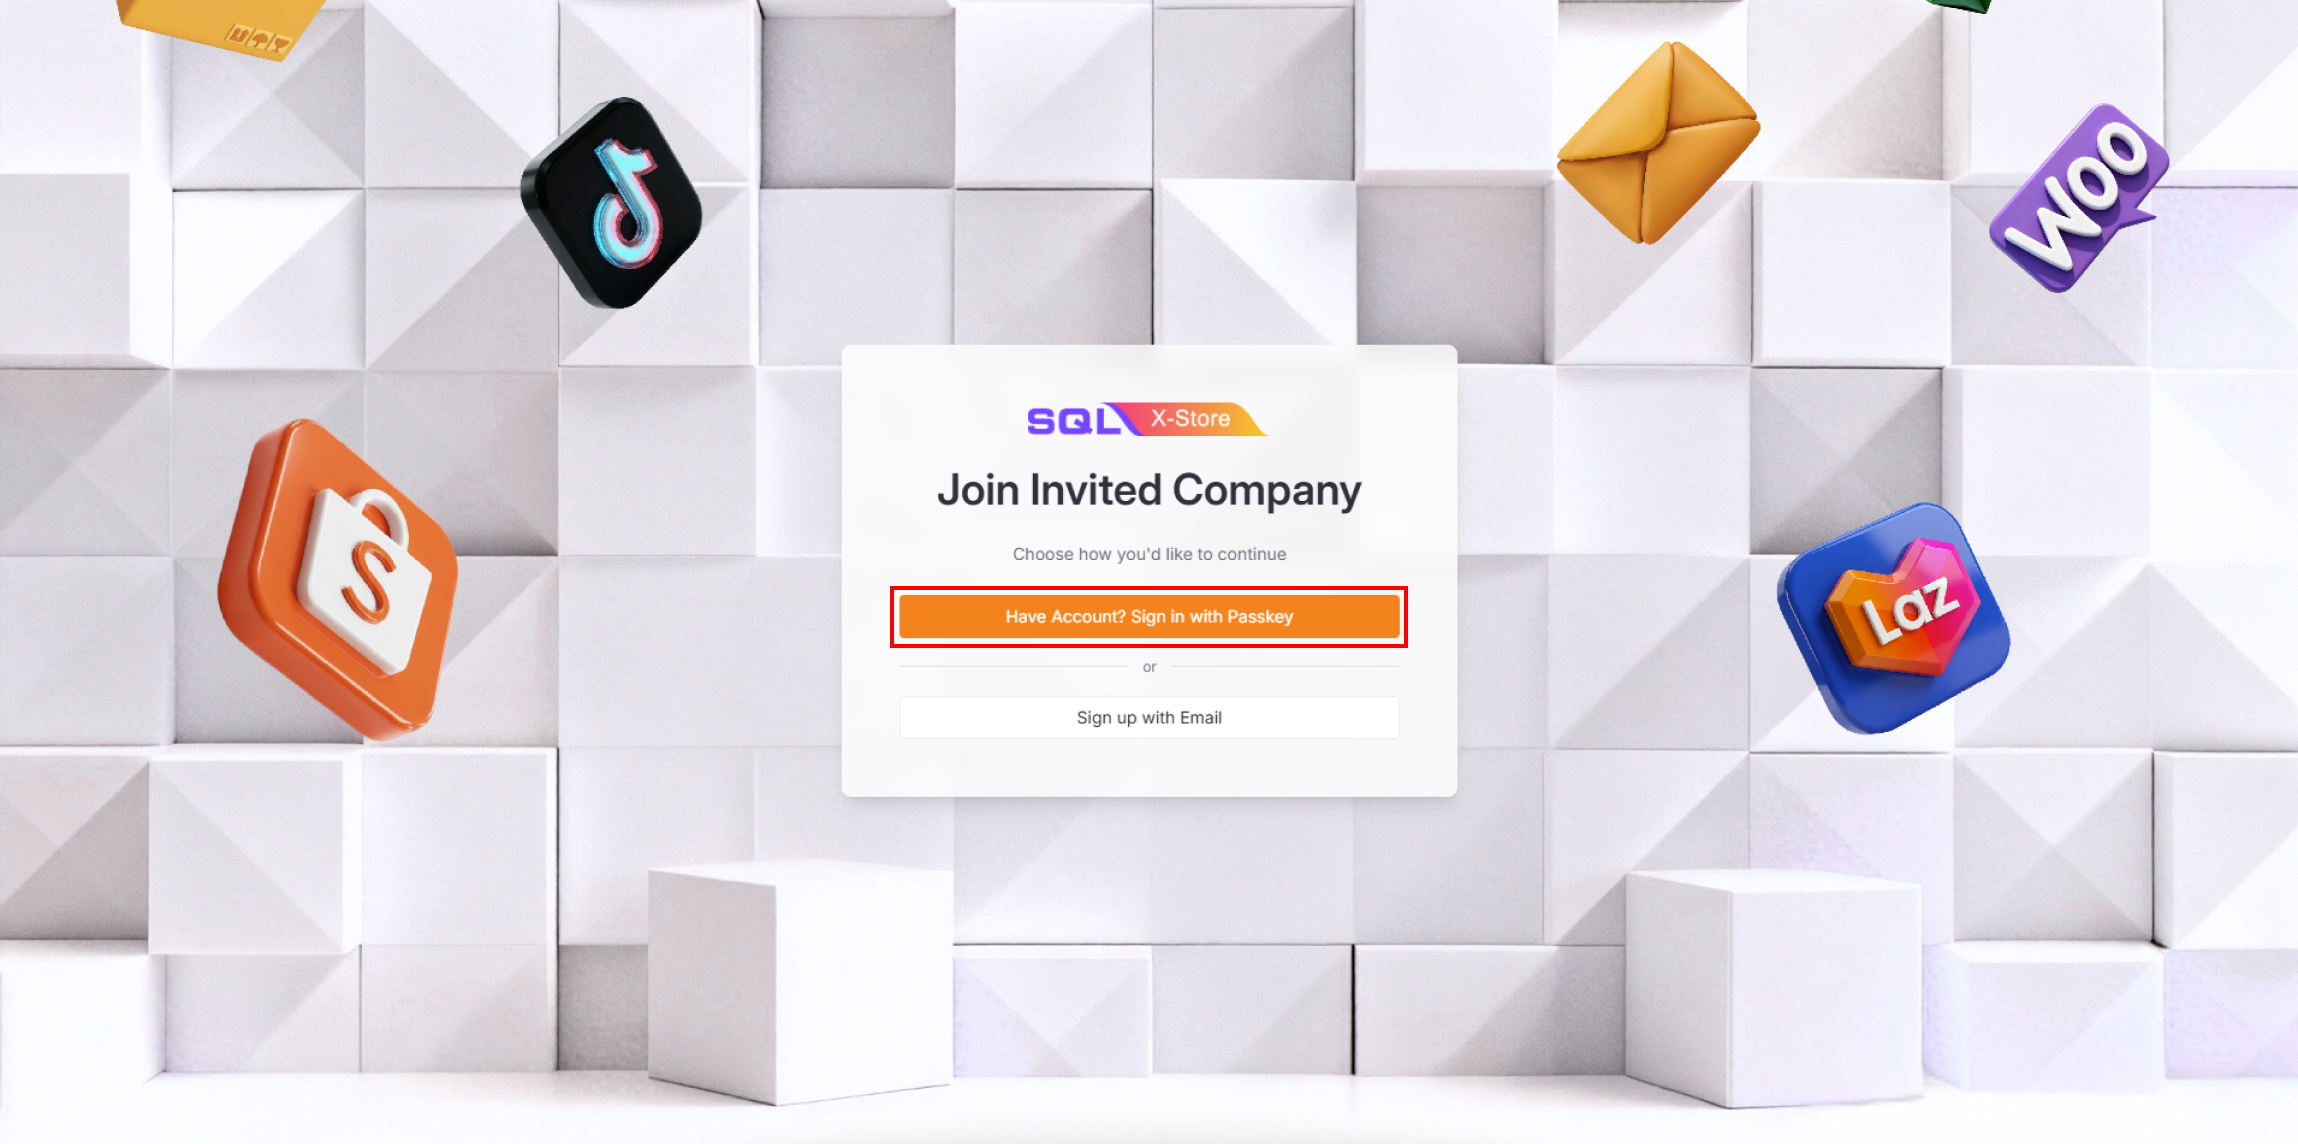
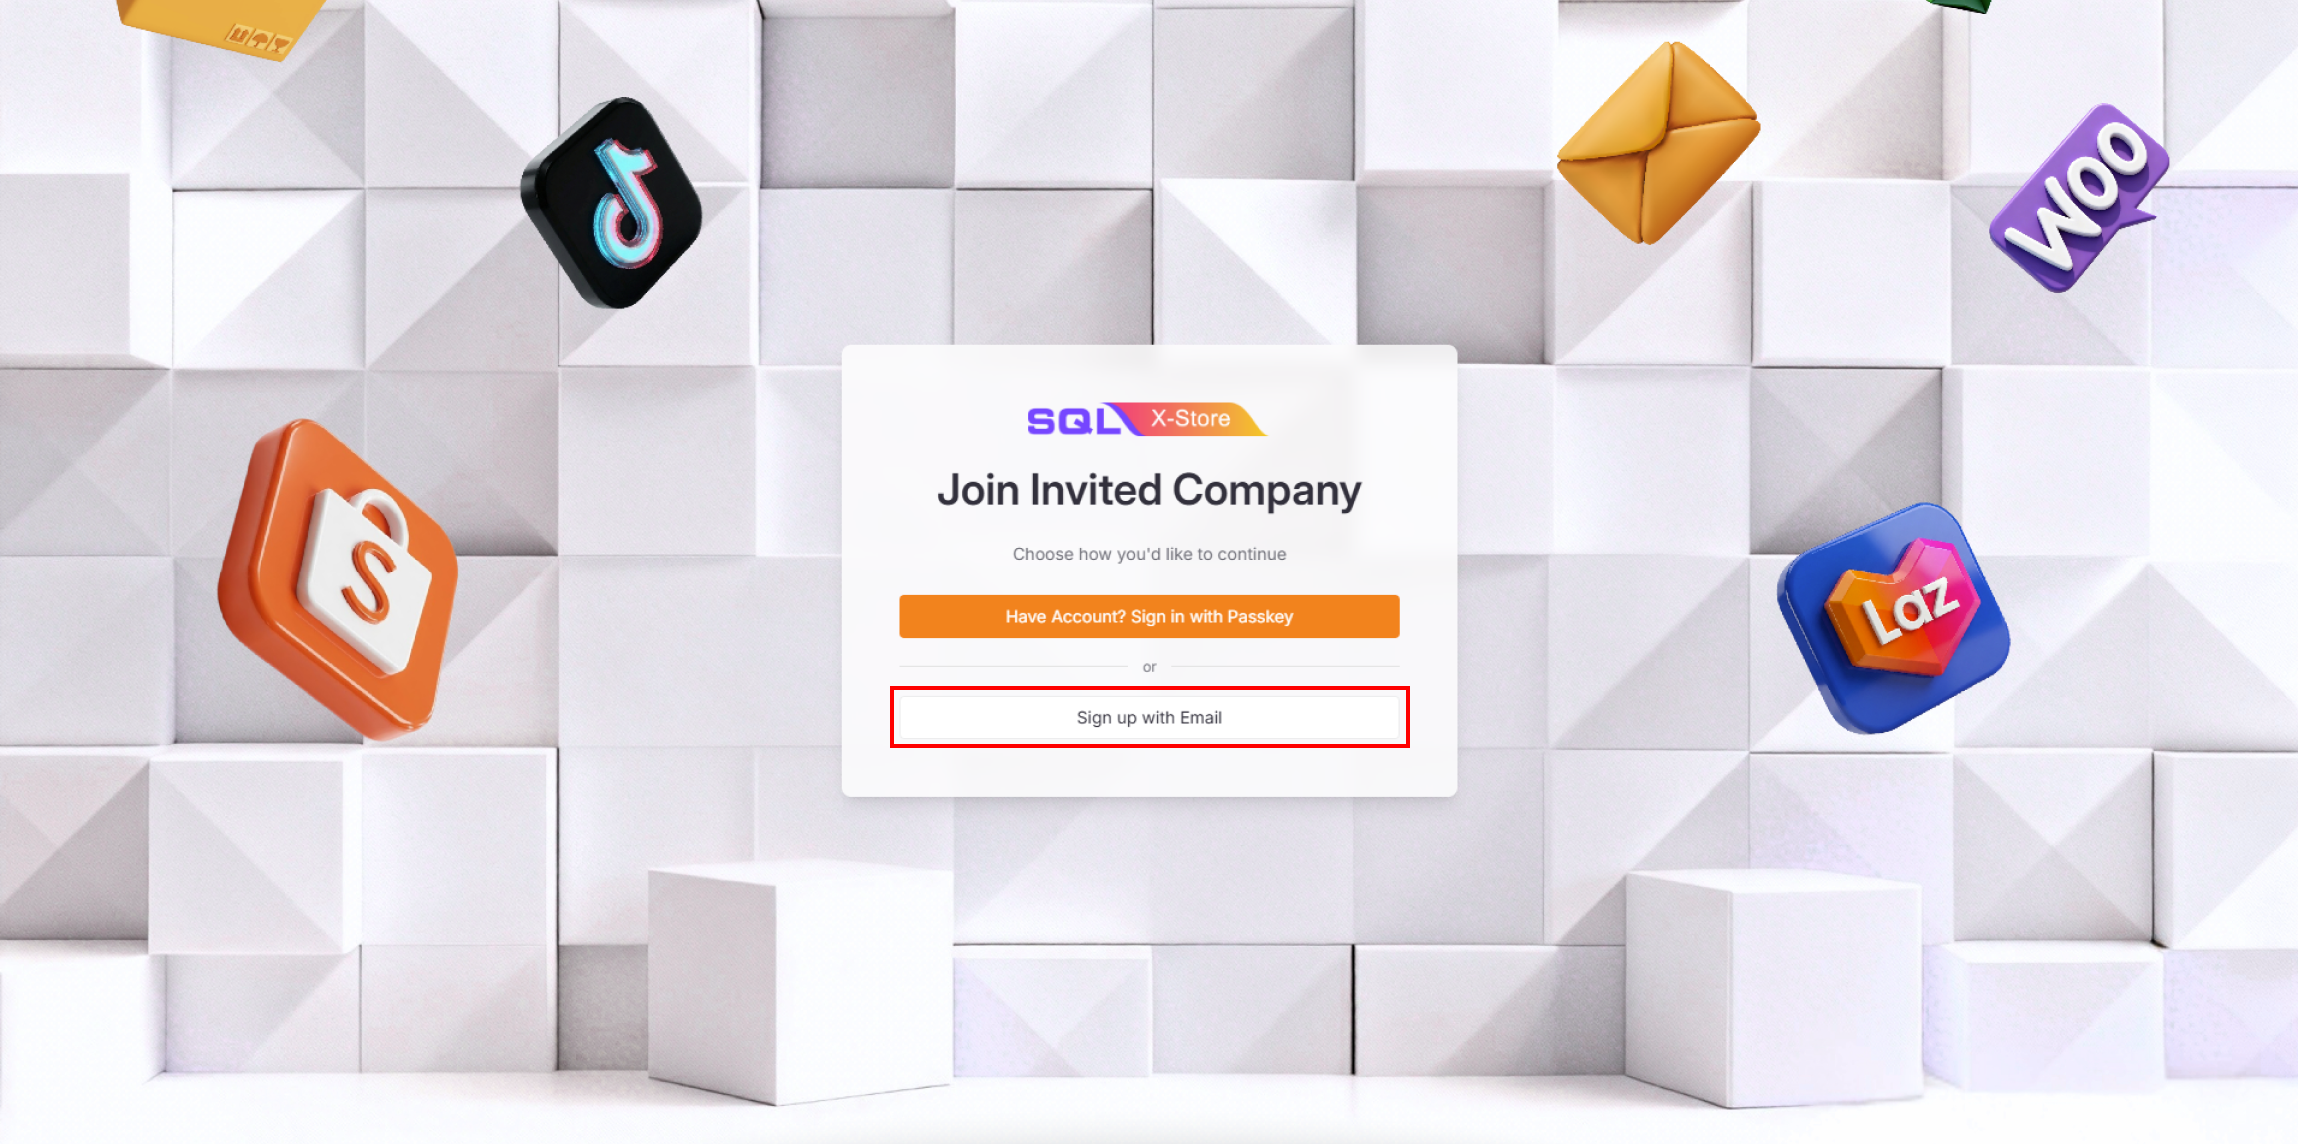
Option 2: Sign up with Email
Register a new account, log in automatically, and redirect to the Company List page.
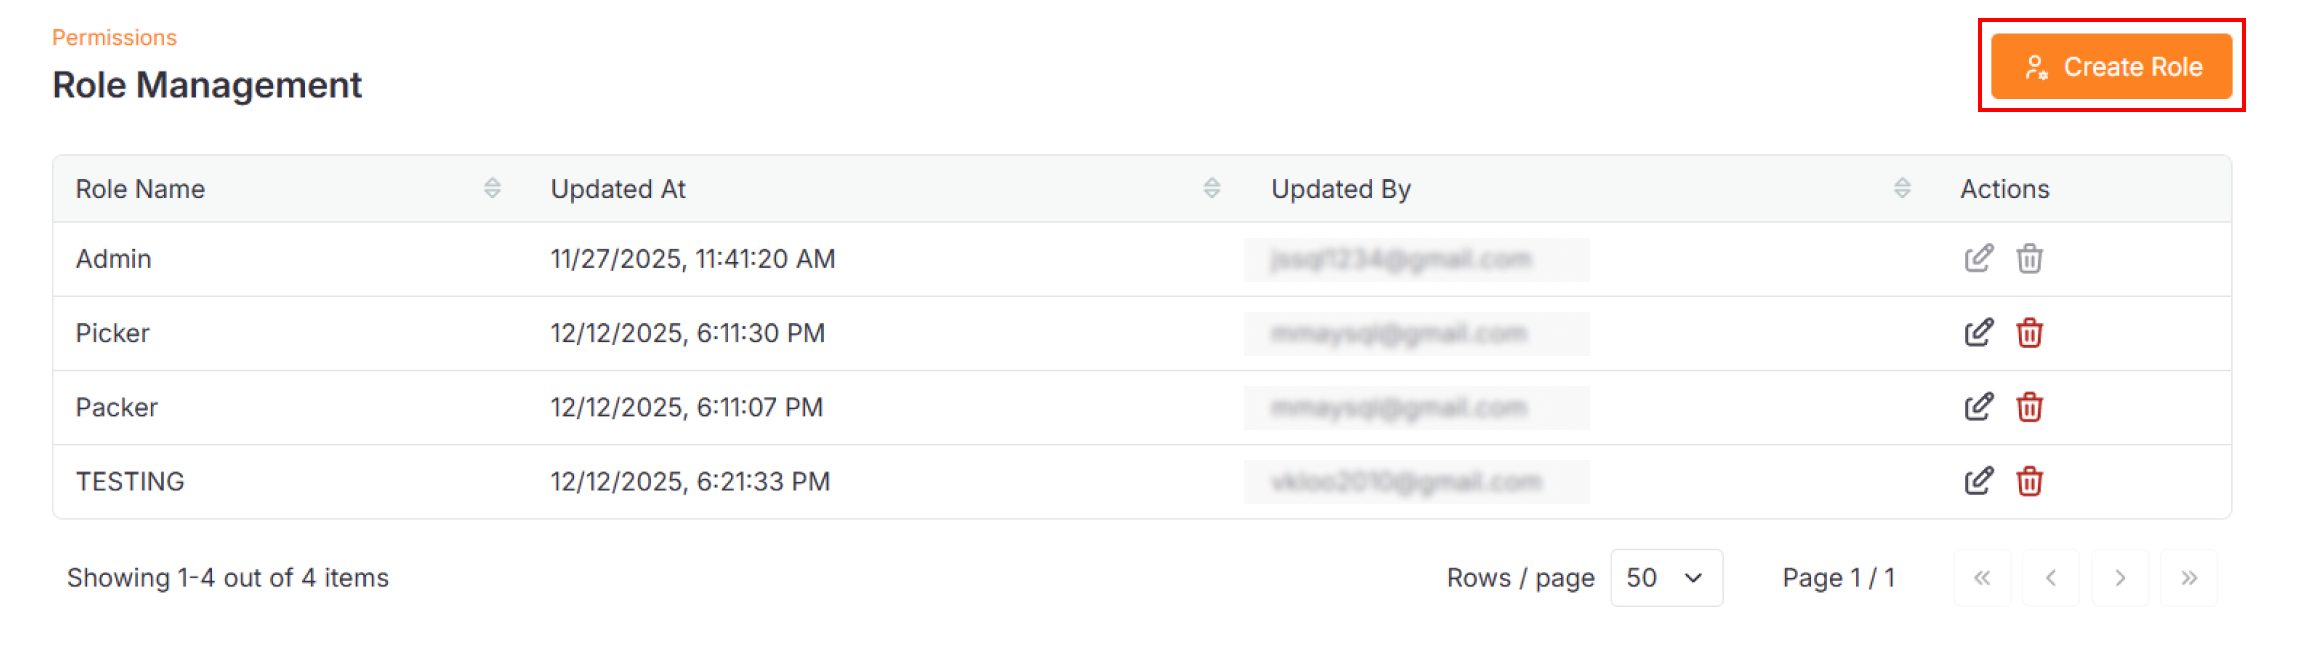
Permissions Settings
Currently, adding, editing, and deleting roles are not available.
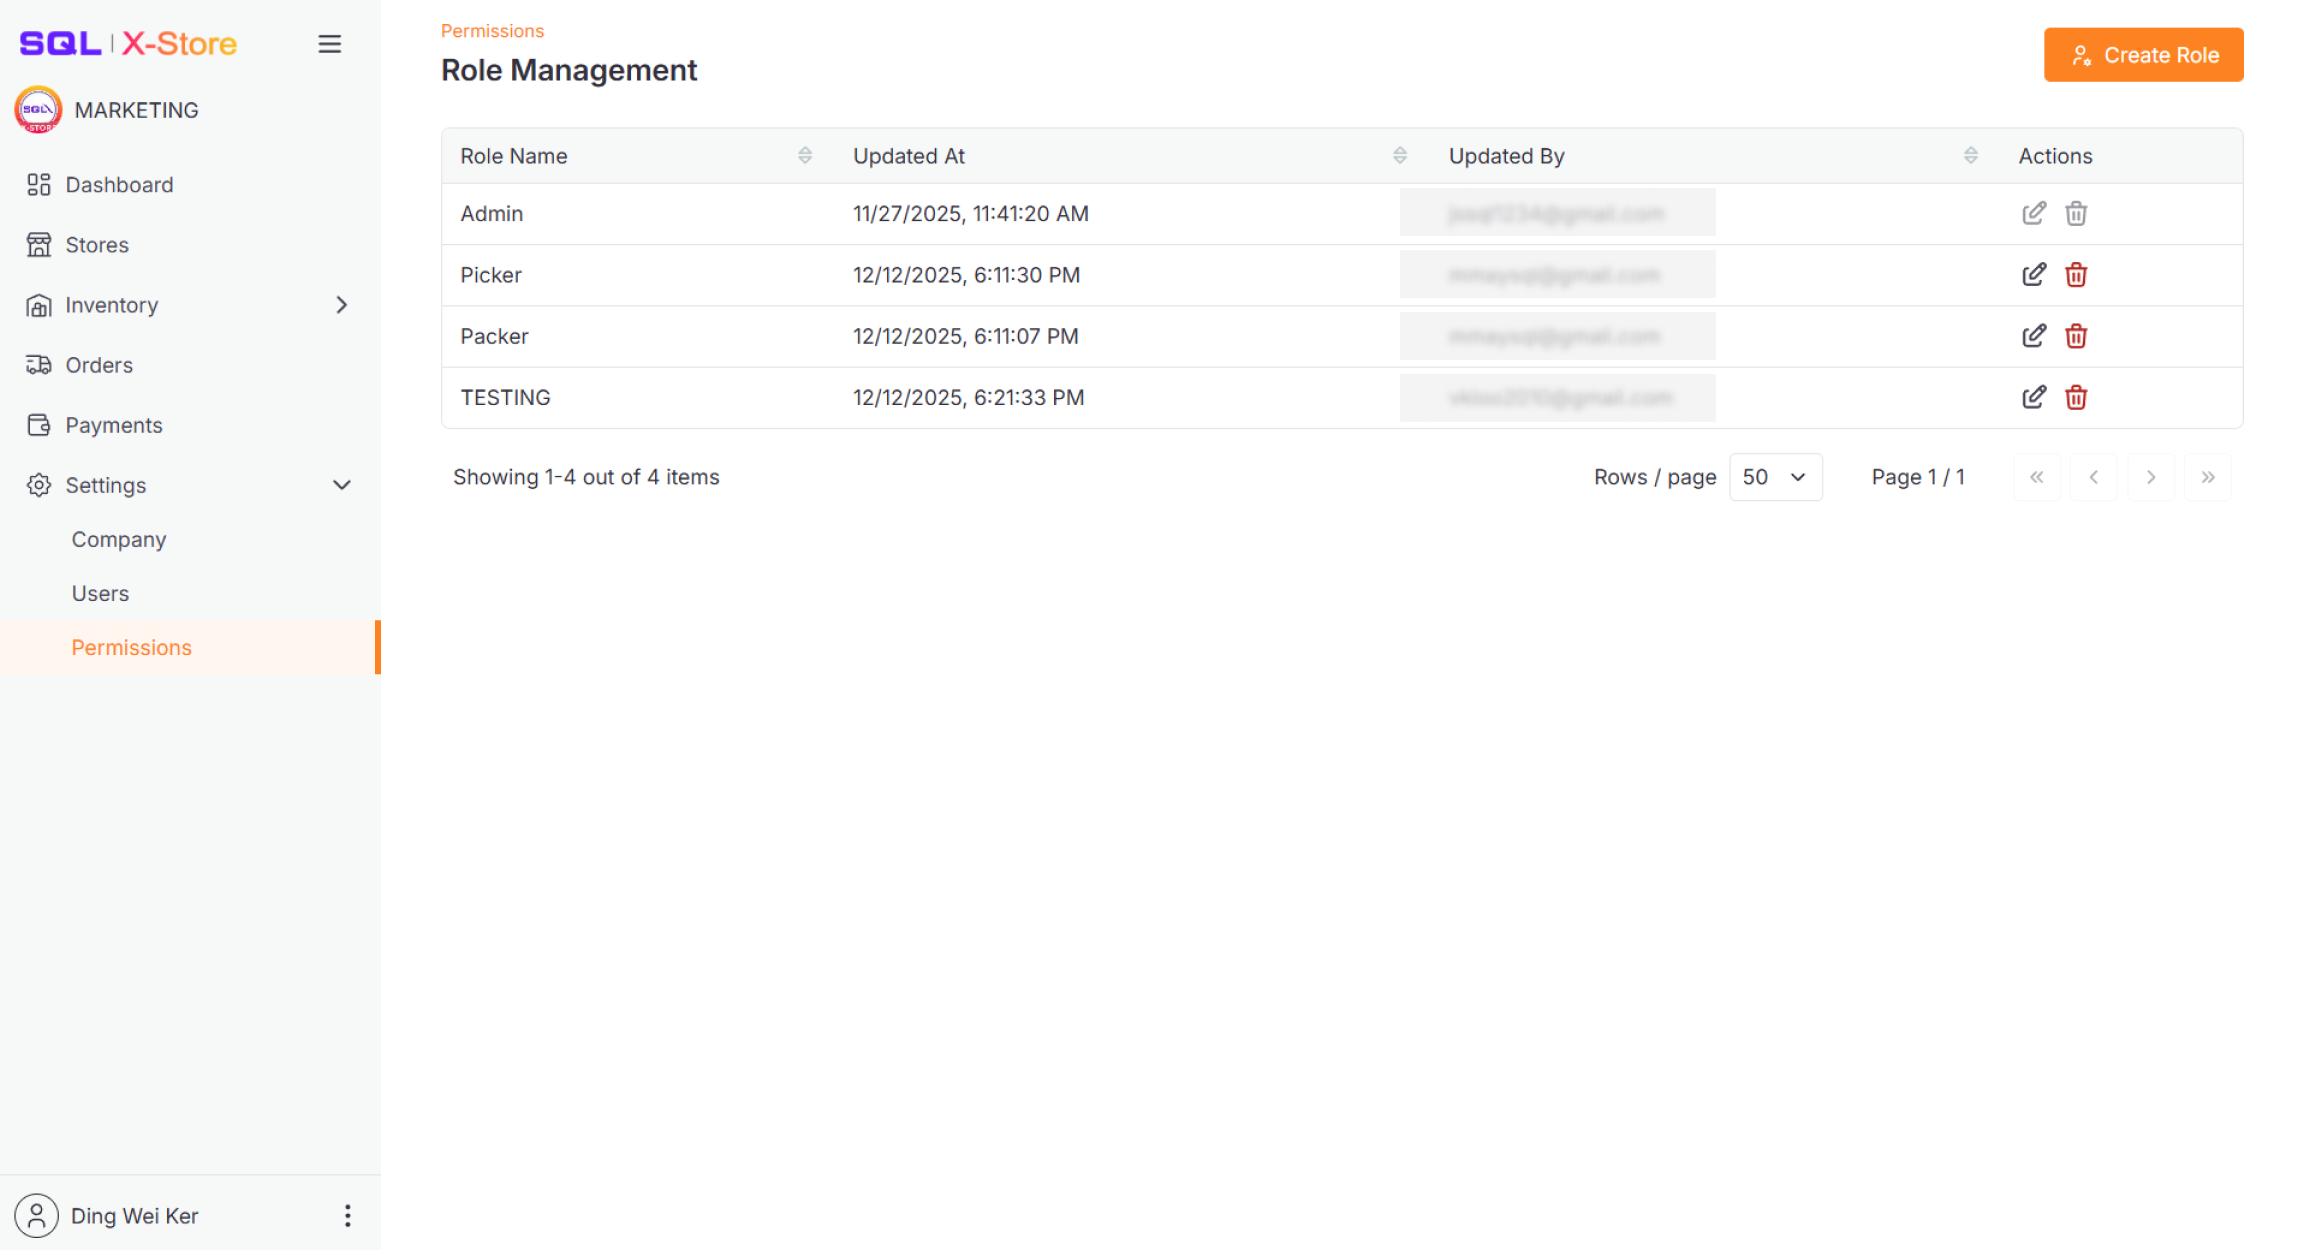
Overview
Define and manage roles with specific permissions to control what users can do in the system.
The roles table displays:
- Role name
- Last updated date
- Updated by (user name)
- Action buttons (Edit, Delete)
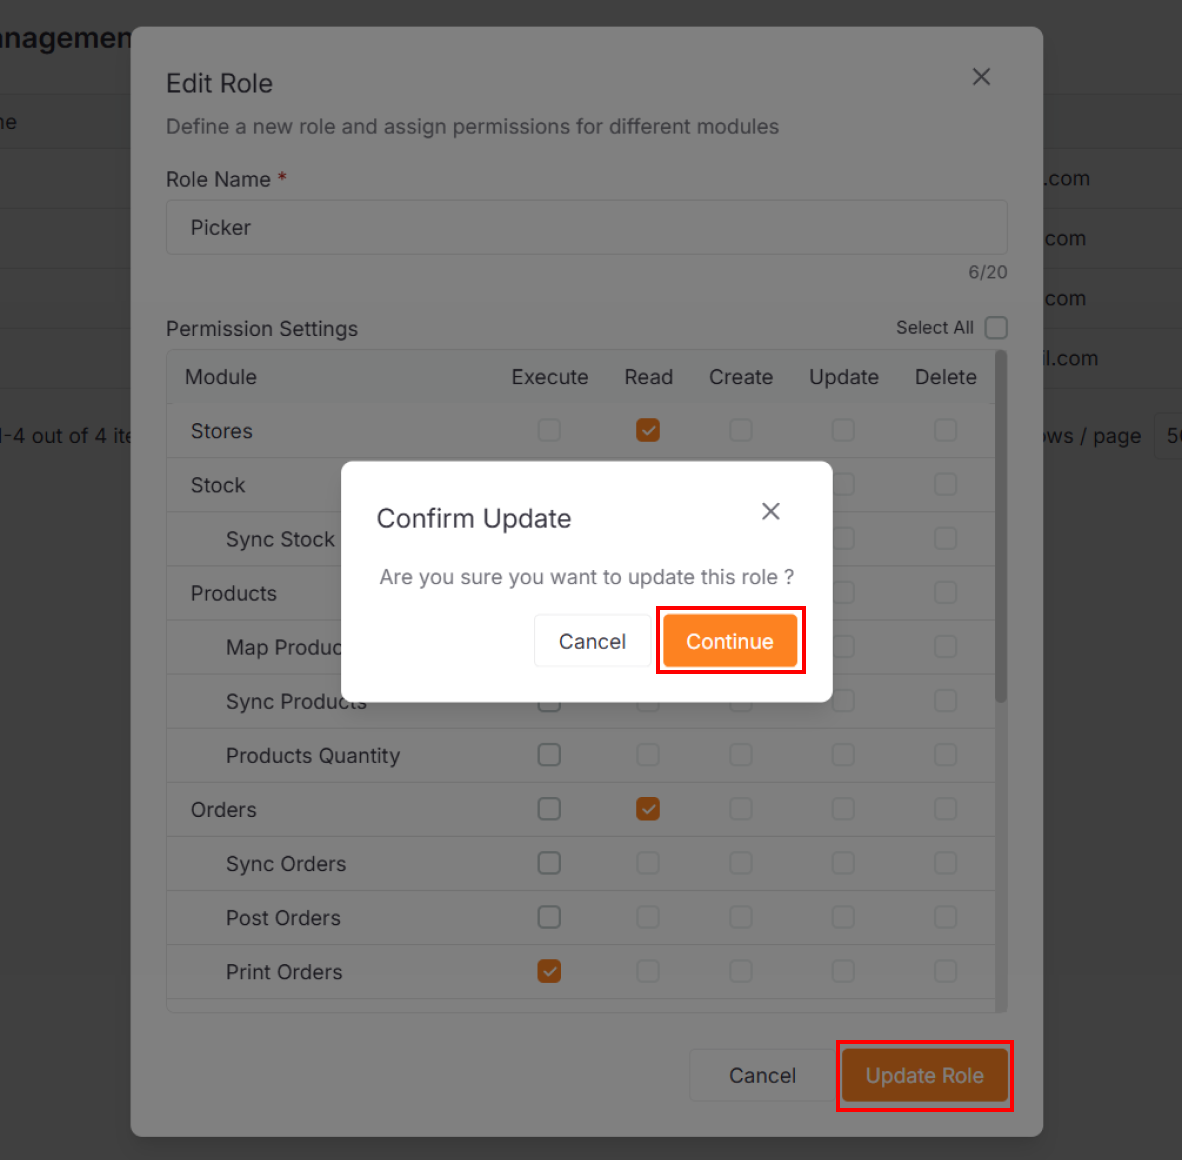
Editing Roles
- Click the Edit icon in the role's row
- Update the role name or adjust permissions
- Click Update Role
- Confirm your changes by clicking Continue
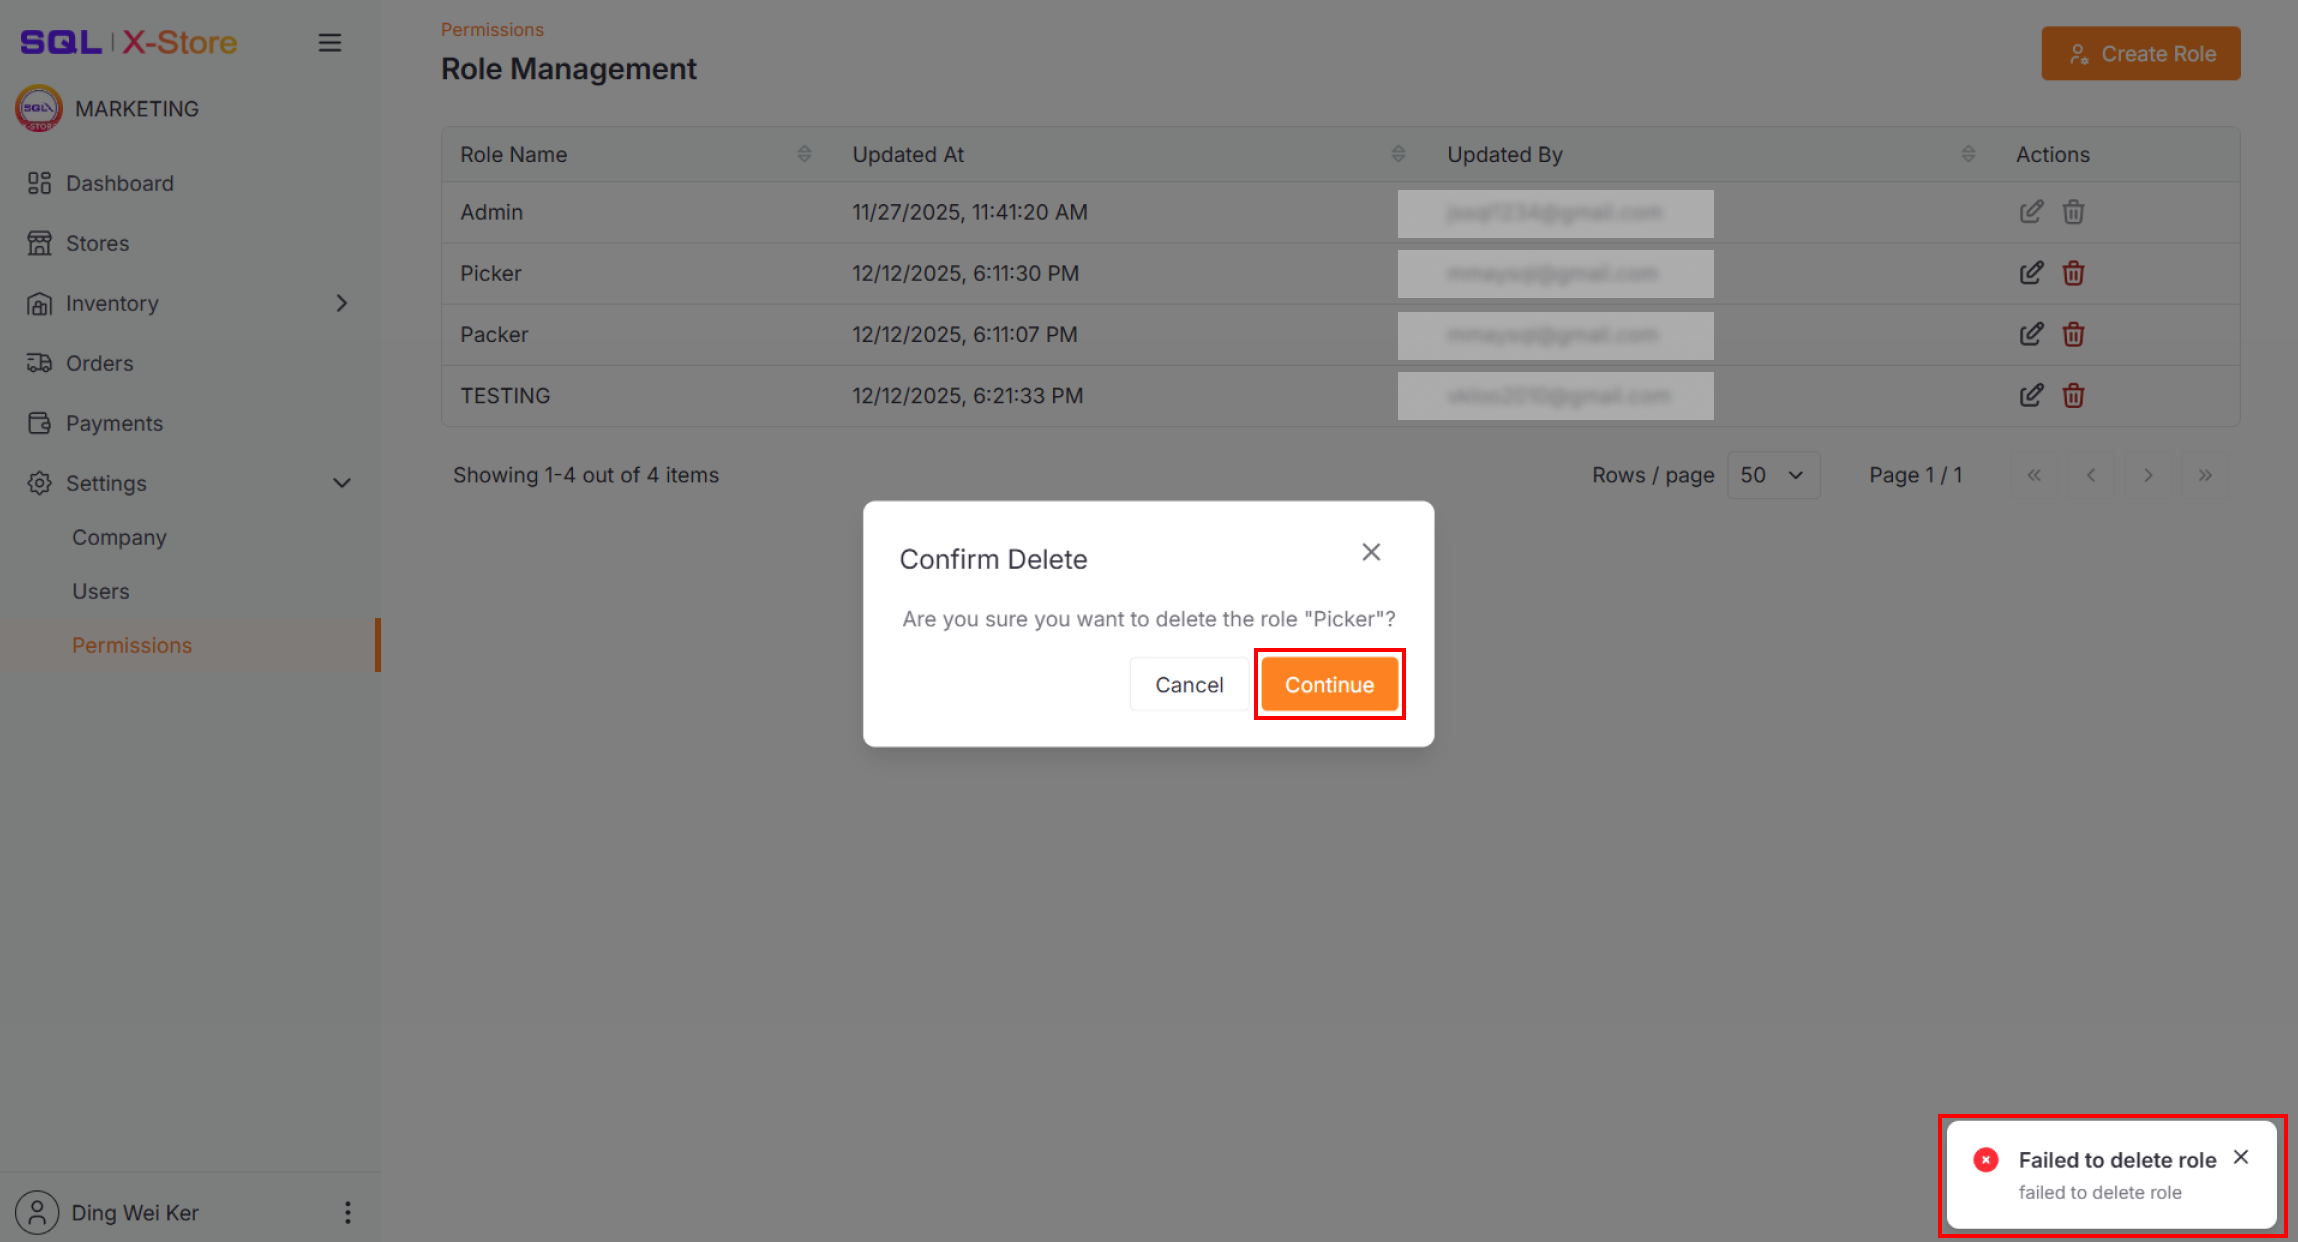
Deleting Roles
- Click the Delete icon
- Confirm the deletion in the dialog
Roles can only be deleted if they're not assigned to any users. If the role is in use, you'll see a warning message.
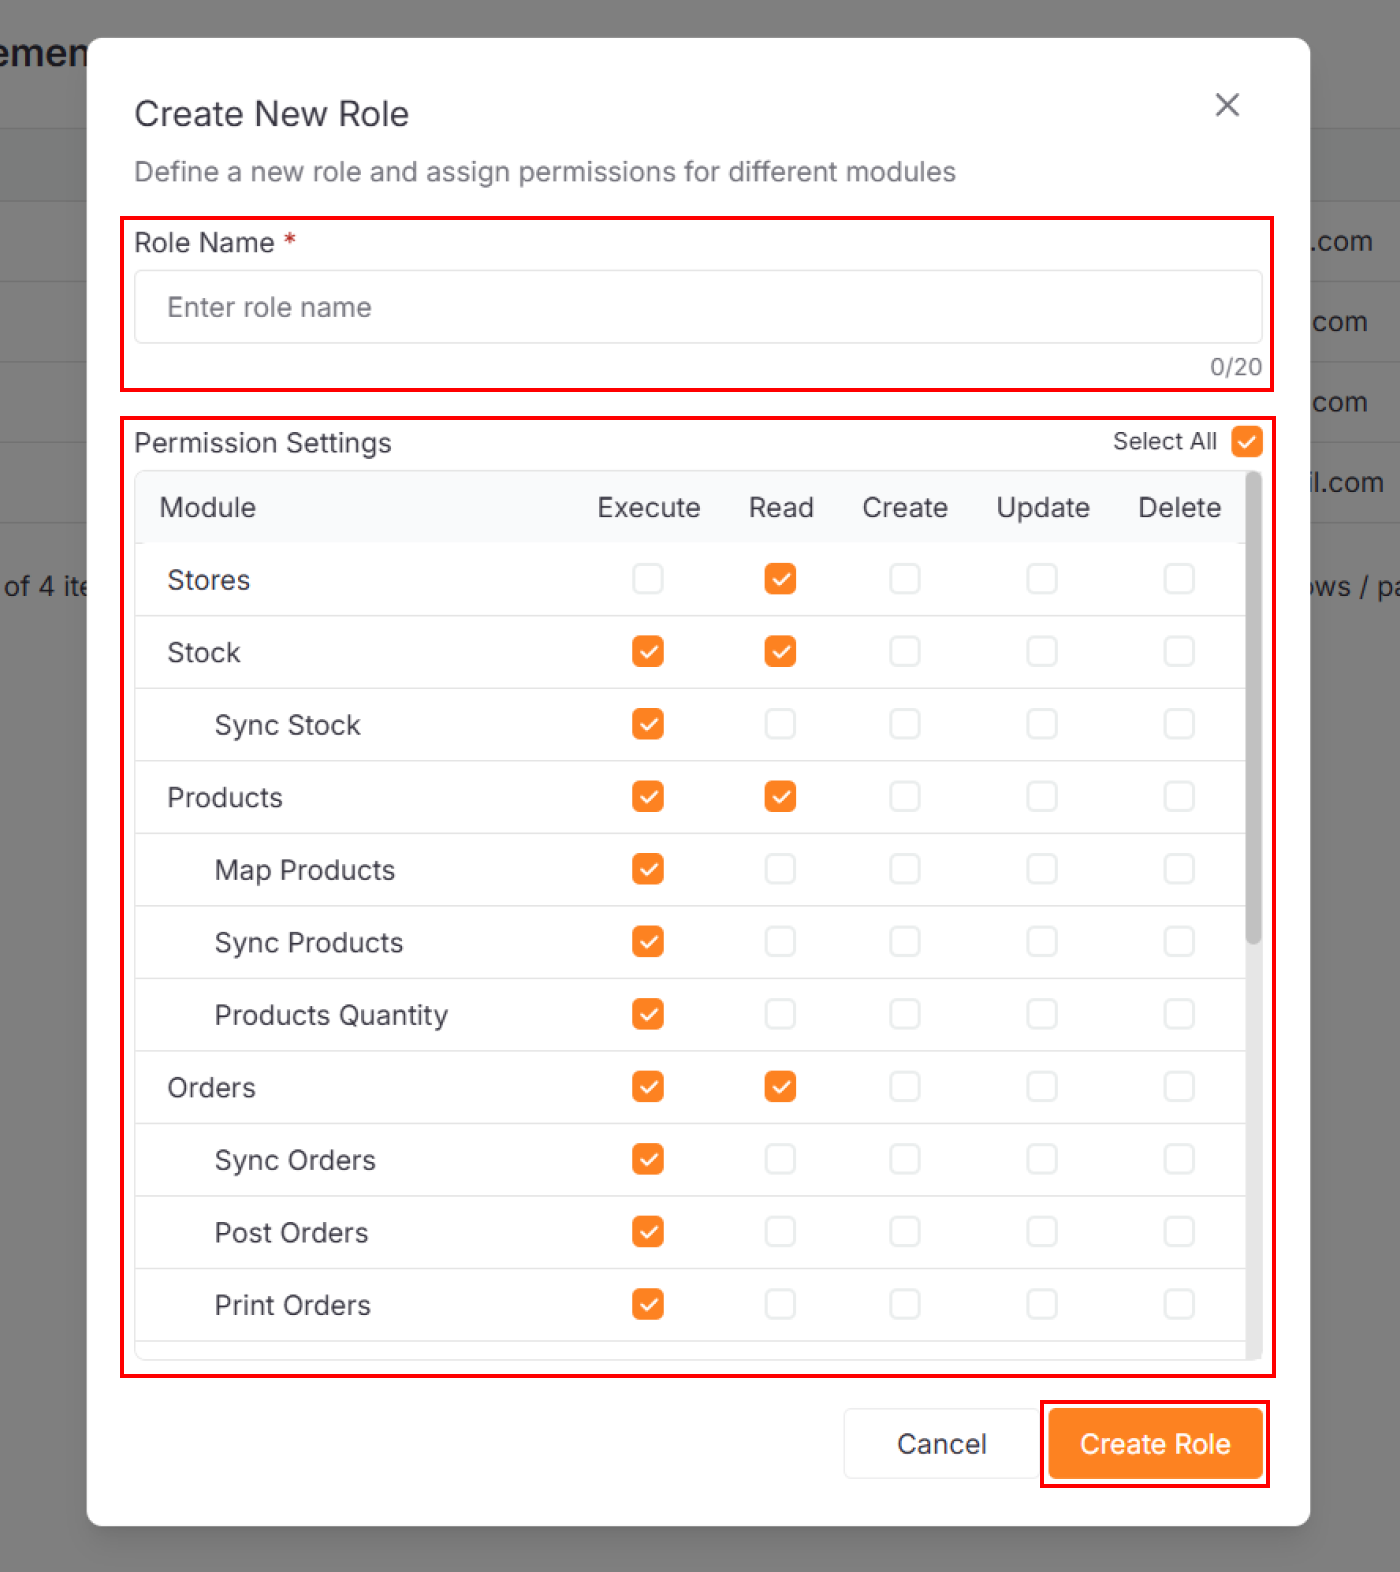
Creating New Roles
-
Click Create Role at the top right of the table
-
In the dialog:
- Enter a role name
- Select the permissions to assign
-
Click Create Role
-
Confirm by clicking Continue