AI EasyScan
SQL AI EasyScan enables users to manage transactions more efficiently by uploading invoices, bills, or receipts through WhatsApp. Using AI-powered data extraction, it automatically captures information from images, documents, and text, eliminating the need for manual data entry. Users can easily organize and attach the extracted information to the corresponding document types within SQL Account.
Pre-requisite
Setup User Mobile Number
-
Go to Menu Bar > Tools > Maintain User....
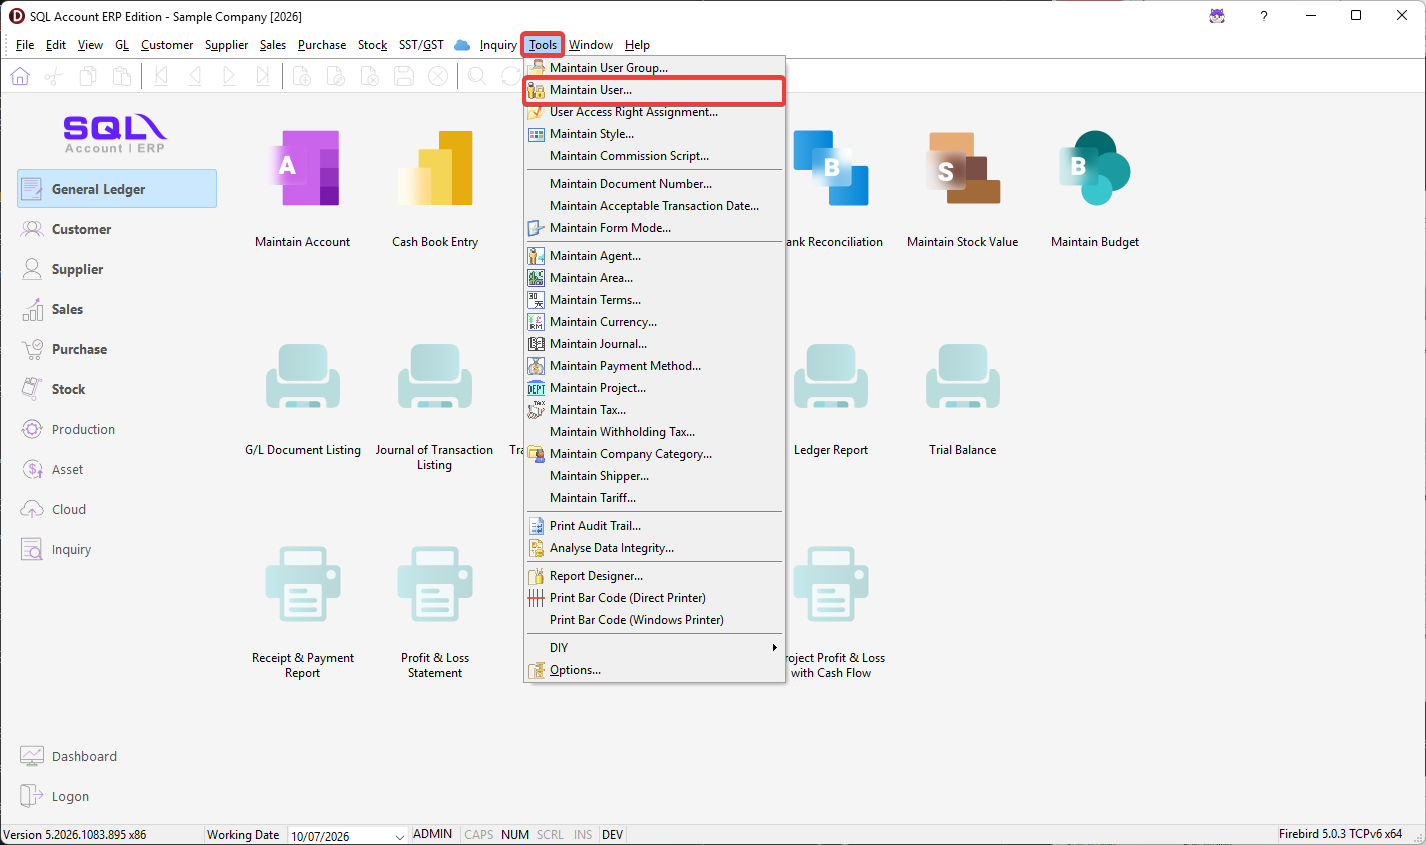
-
Create New or select the user who will be registered.
-
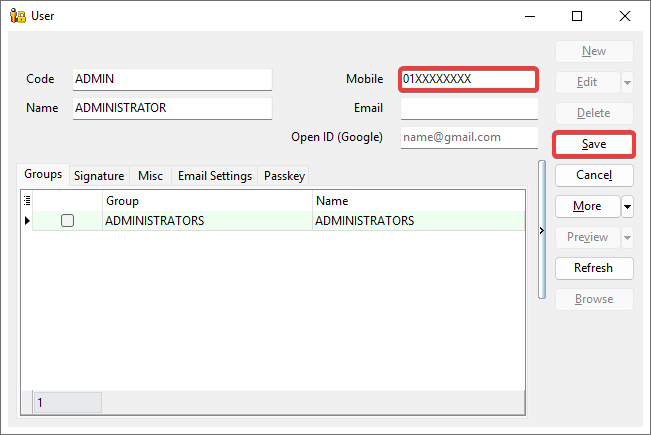
Enter mobile number registered with WhatsApp > Click Save.
Registration
-
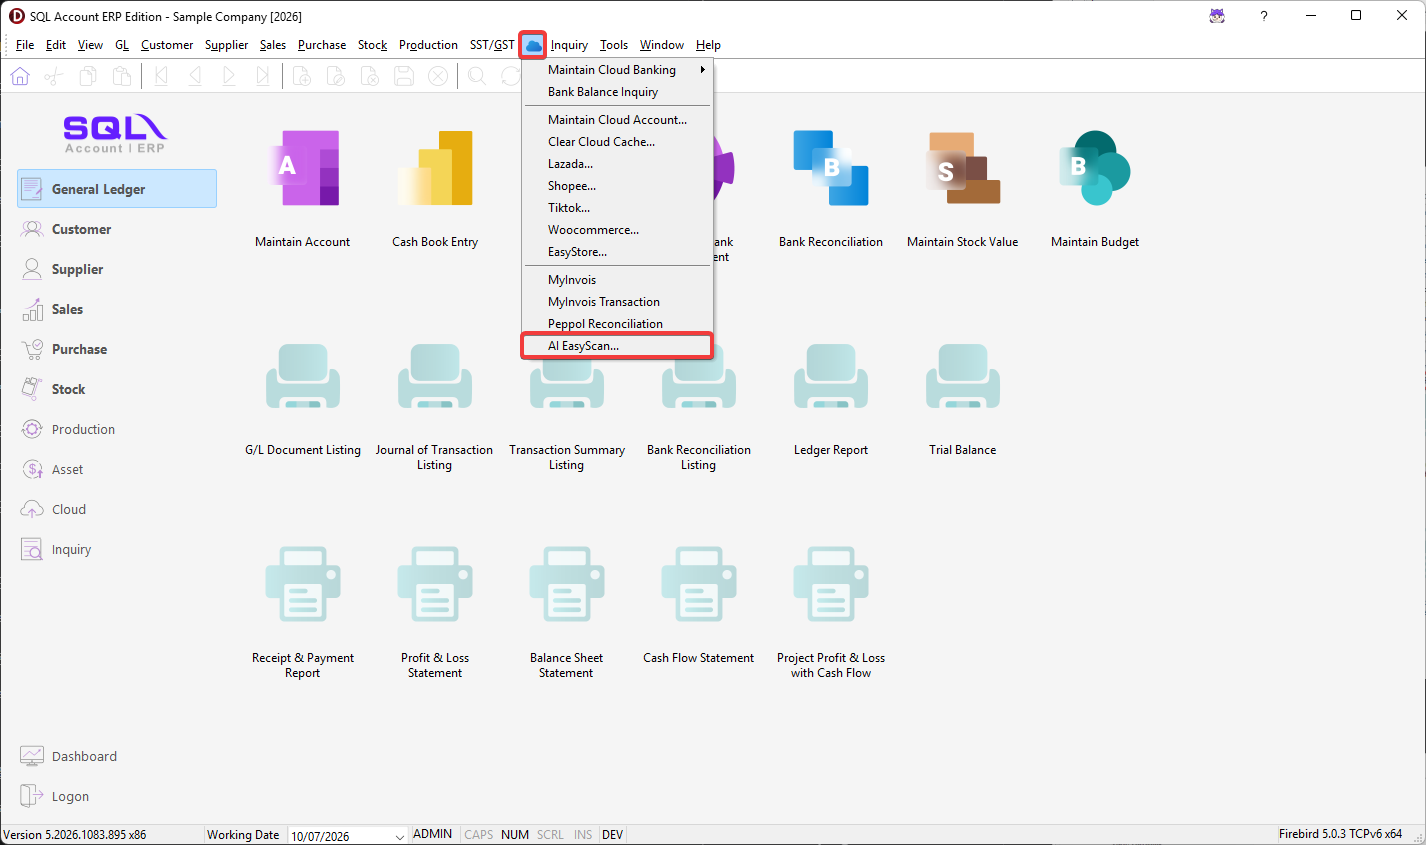
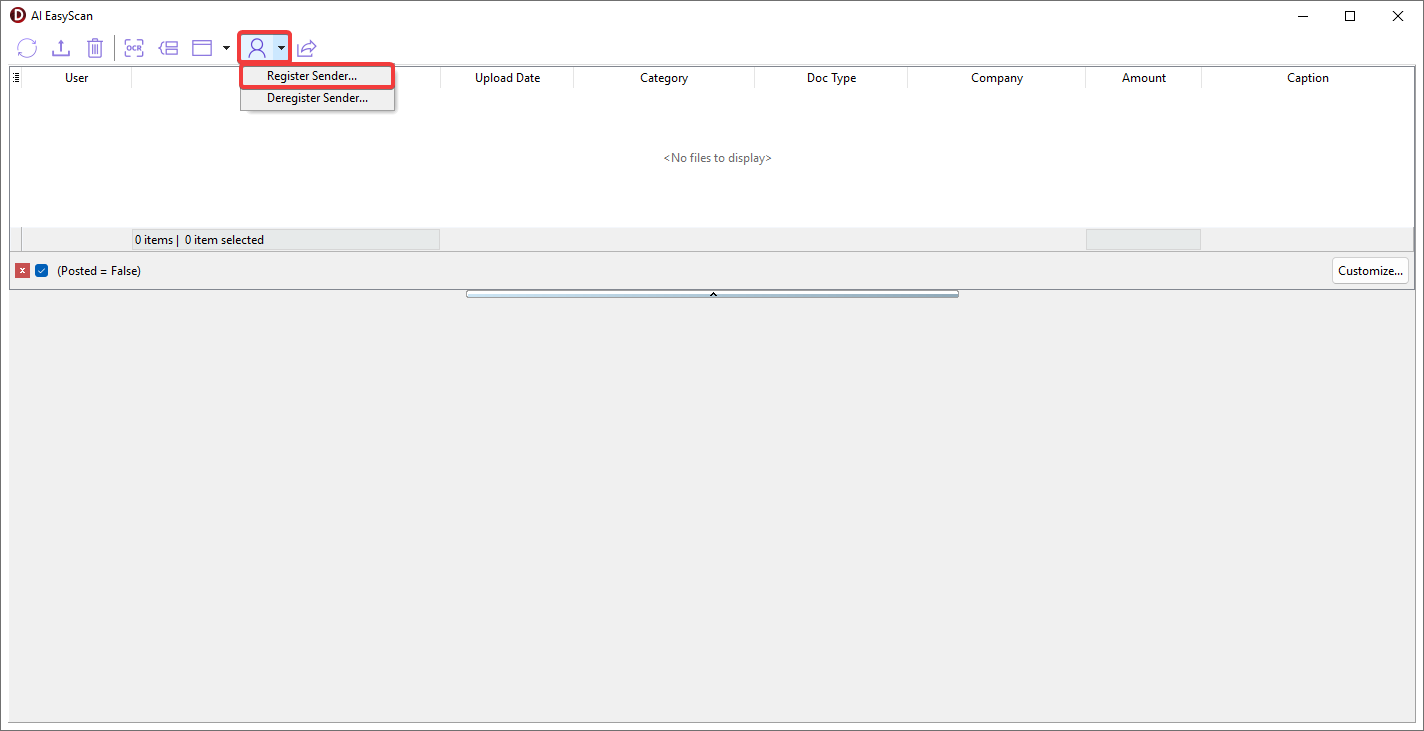
Go to Menu Bar > ☁️ > AI EasyScan....
-
Go to Toolbar > 👤 > Register Sender....
-
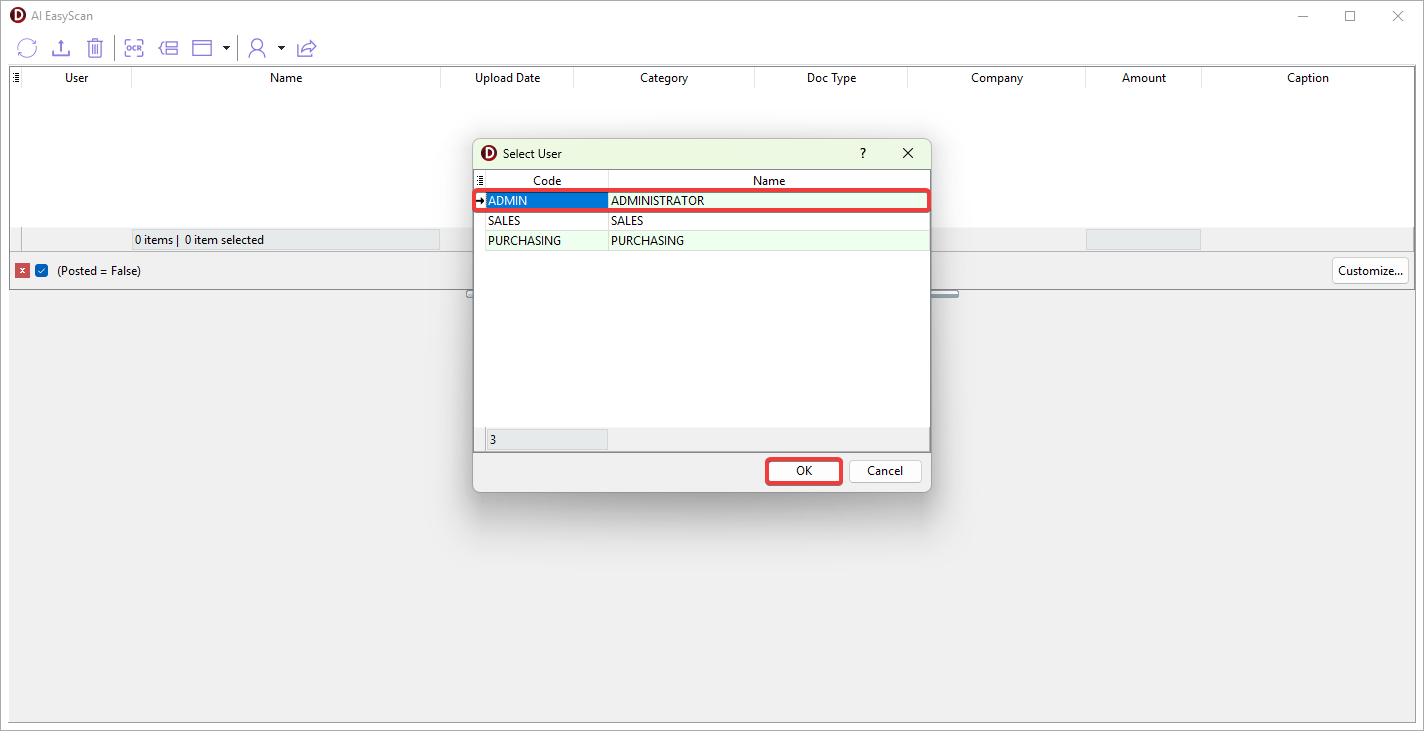
Select the user to be registered > Click OK.
-
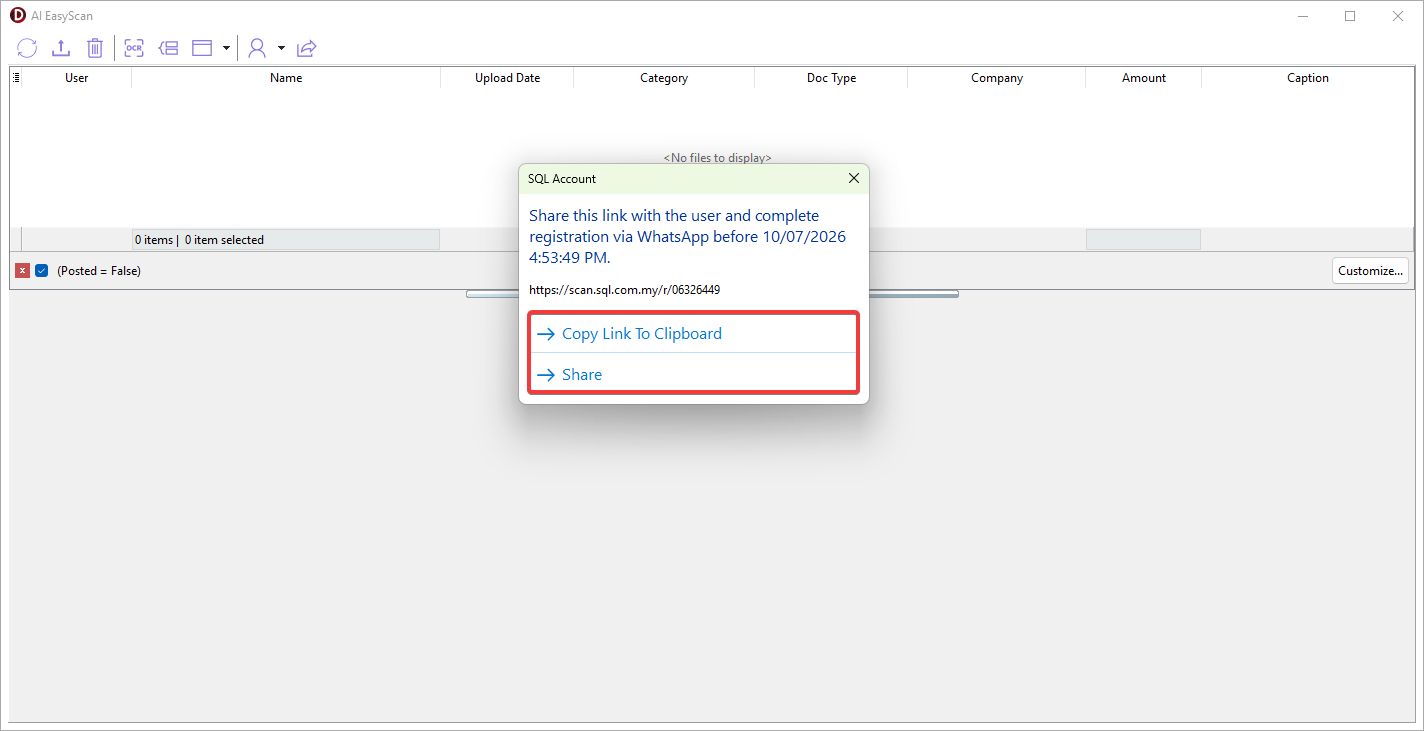
Copy Link To Clipboard or Share registration link to the user.
-
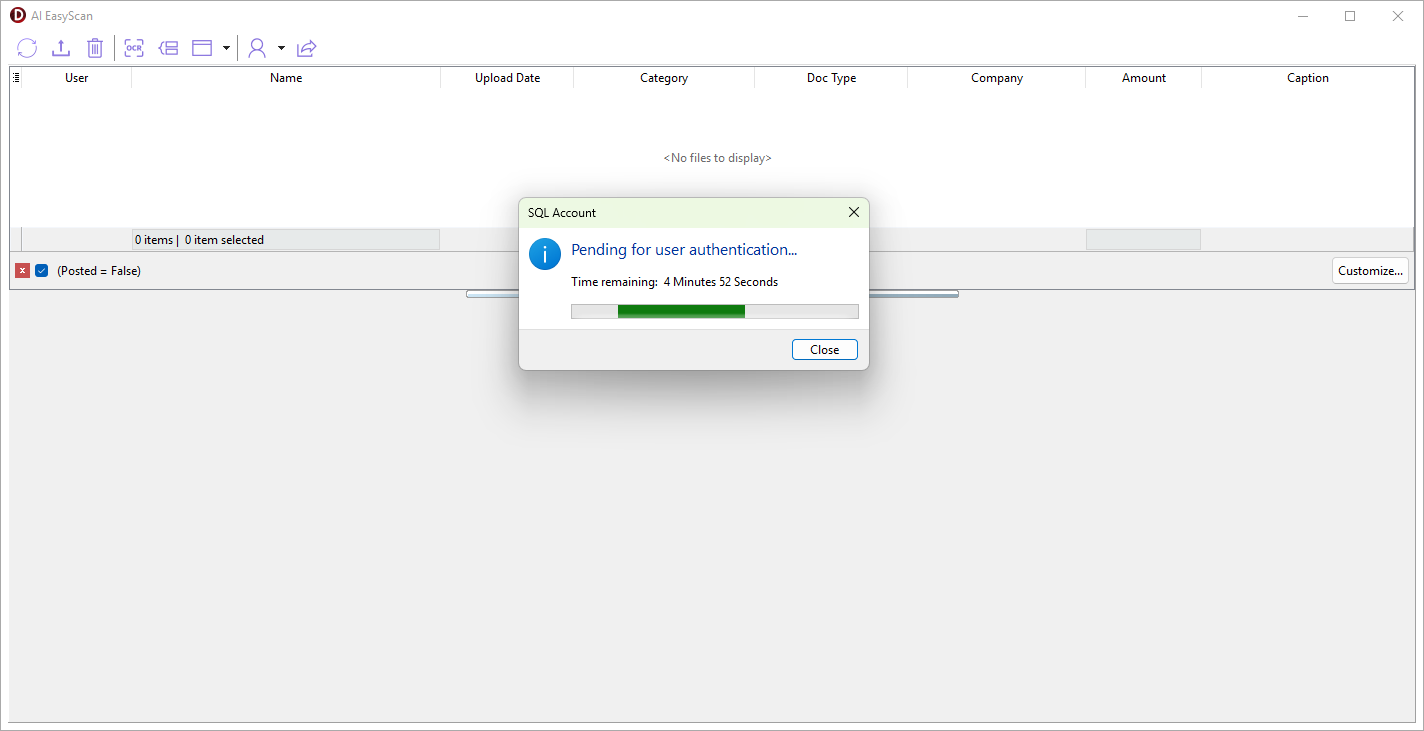
The user will have 5 minutes to complete the registration before it expires.
-
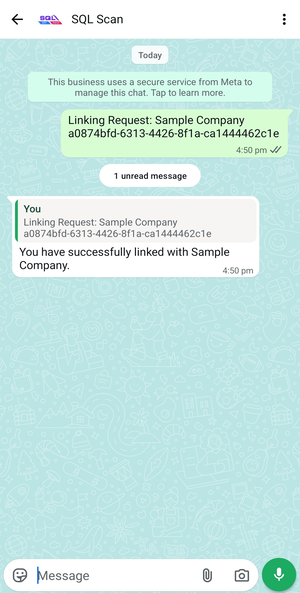
After the user receives the registration link, the user is required to:
-
Click the link.

-
Send the prefilled message with the mobile number registered.

-
WhatsApp replies with "You have successfully linked with COMPANY NAME" indicates that the registration has been completed.
-
-
Dialog shows "Registered Successful" indicates that the user has completed the registration.

Usage
- Upload File with WhatsApp
- Upload Local File
- Check OCR Status
- Group Files
- Assign Category and Doc Type to File or Folder
- Merge Item Details
- Save Document
- Attach File or Folder to Existing Document
- Check Posted File or Folder
Upload File with WhatsApp
-
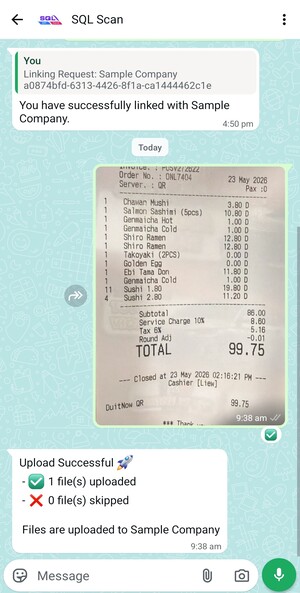
Take a photo or select a file to upload.
-
✅ reaction will appear on the uploaded file, followed by a confirmation message if the upload is successful.
-
Click Refresh button to view the uploaded file.
Upload Local File
-
Go to Toolbar > Click Upload Files button.
-
File Explorer window will appear, select the file want to upload, then click Open.
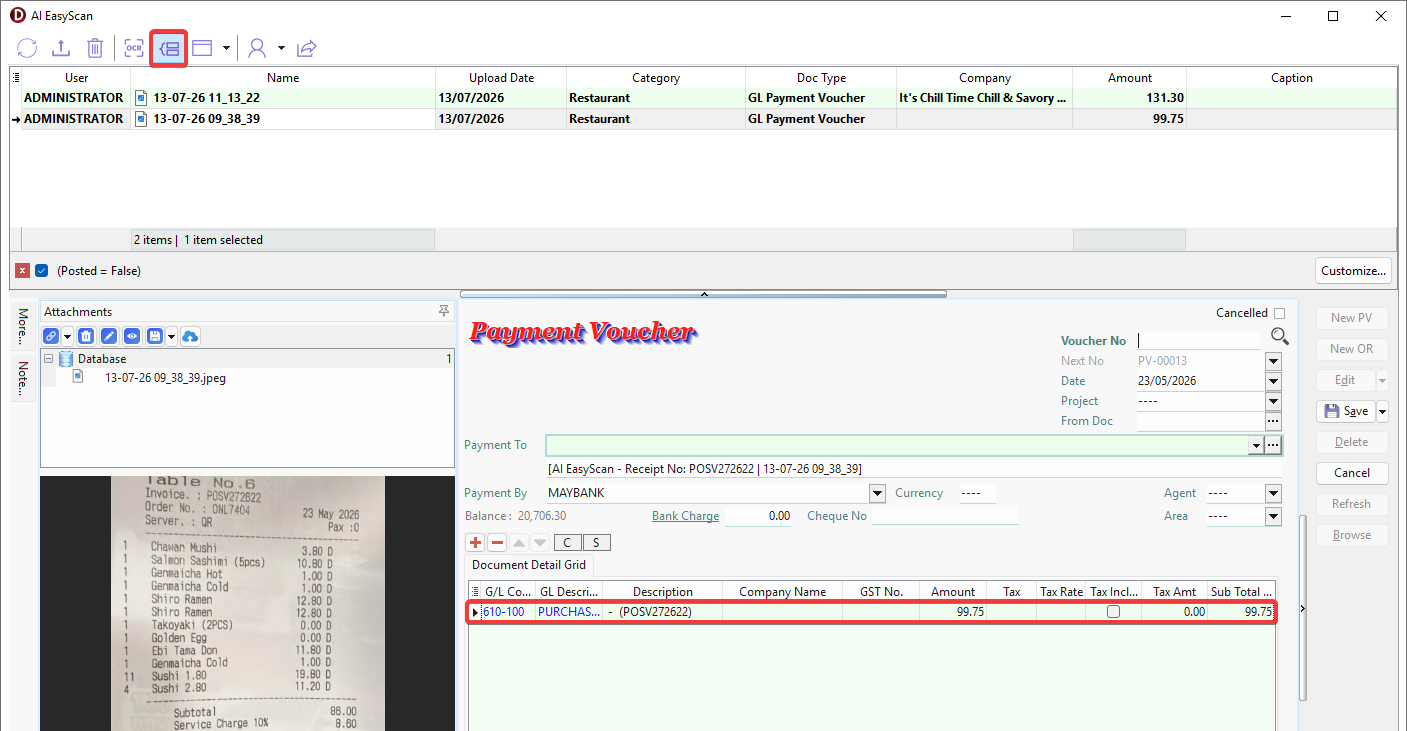
Check OCR Status
-
Grid row highlighted in grey indicates that the file is currently being processed by OCR.
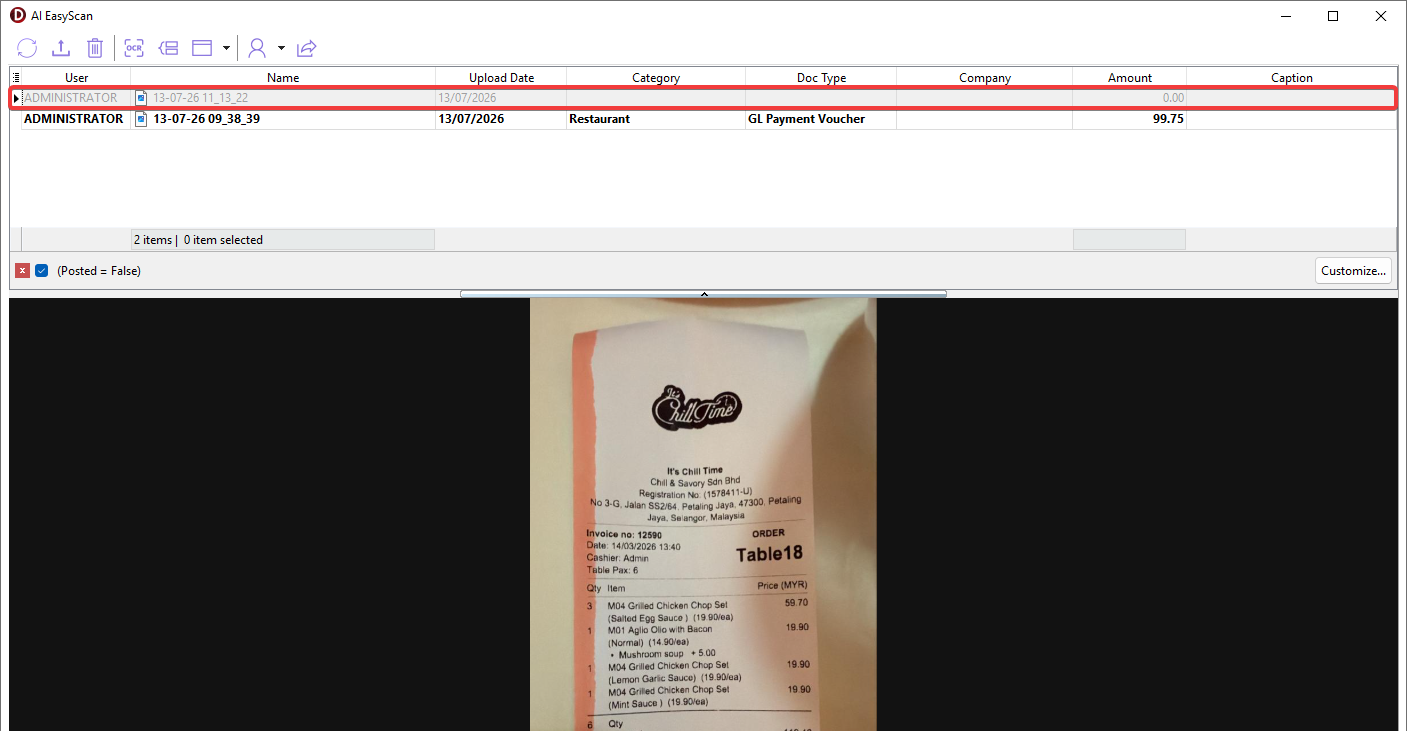
-
Grid row highlighted in green or white indicates that the file has successfully completed the OCR process.
-
If any information is incorrect or an error occurs, the user can choose to re-run OCR, either:
-
Go to Toolbar > Click Re-OCR button.
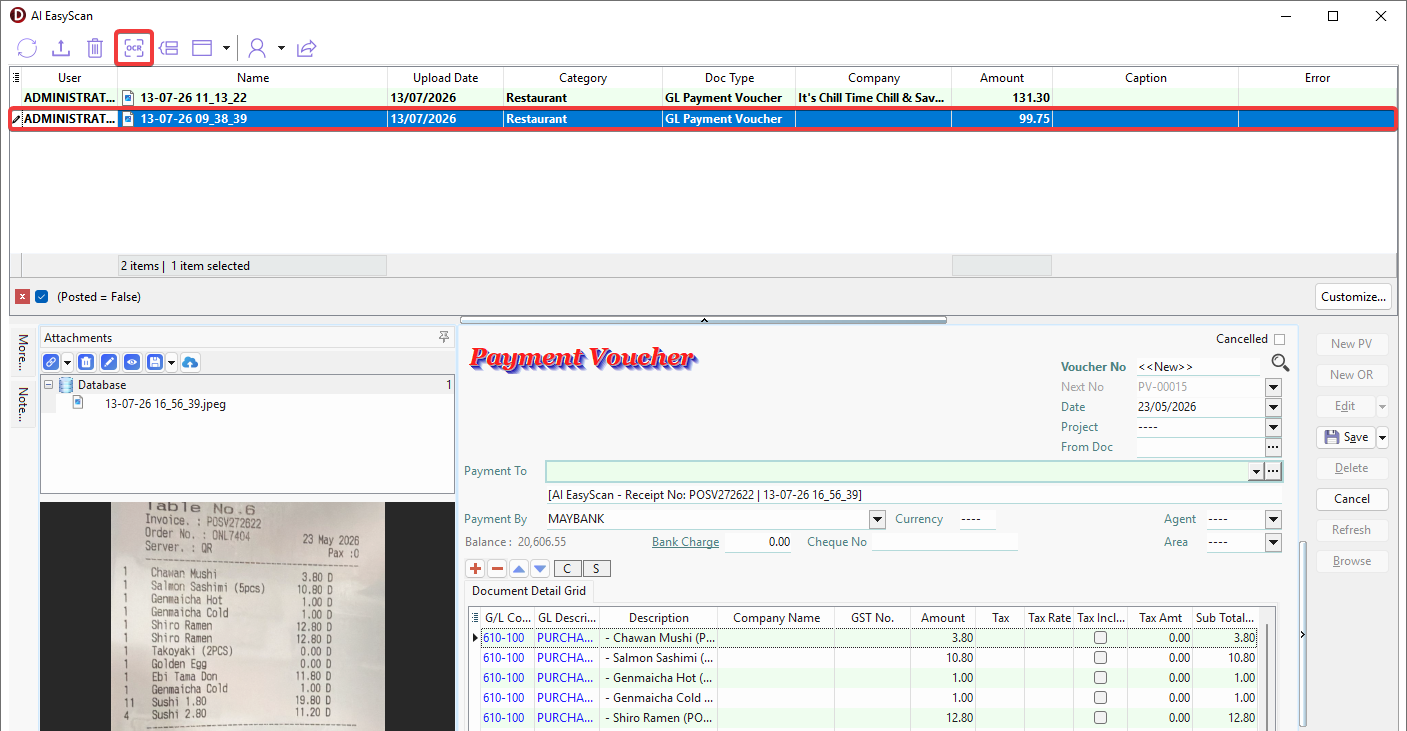
-
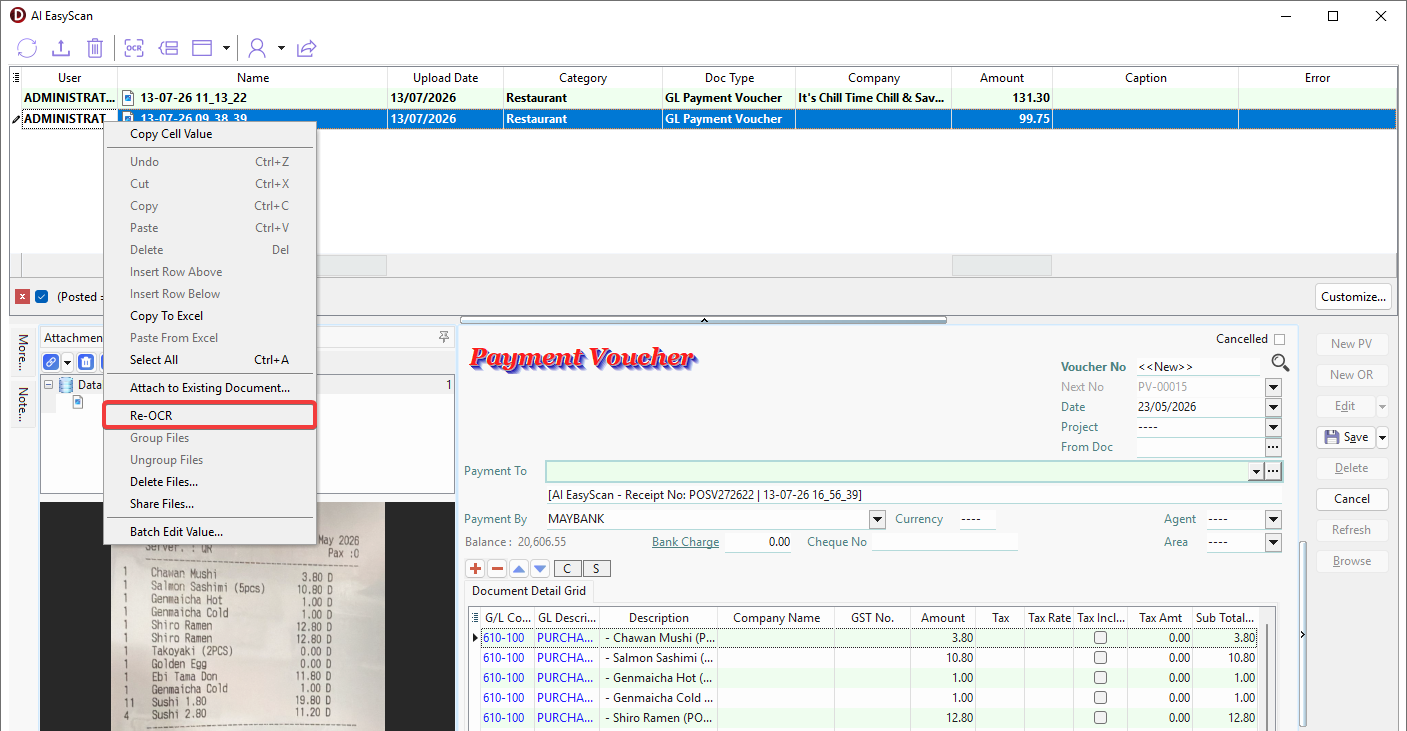
Select the file > Right Click > Re-OCR.
-
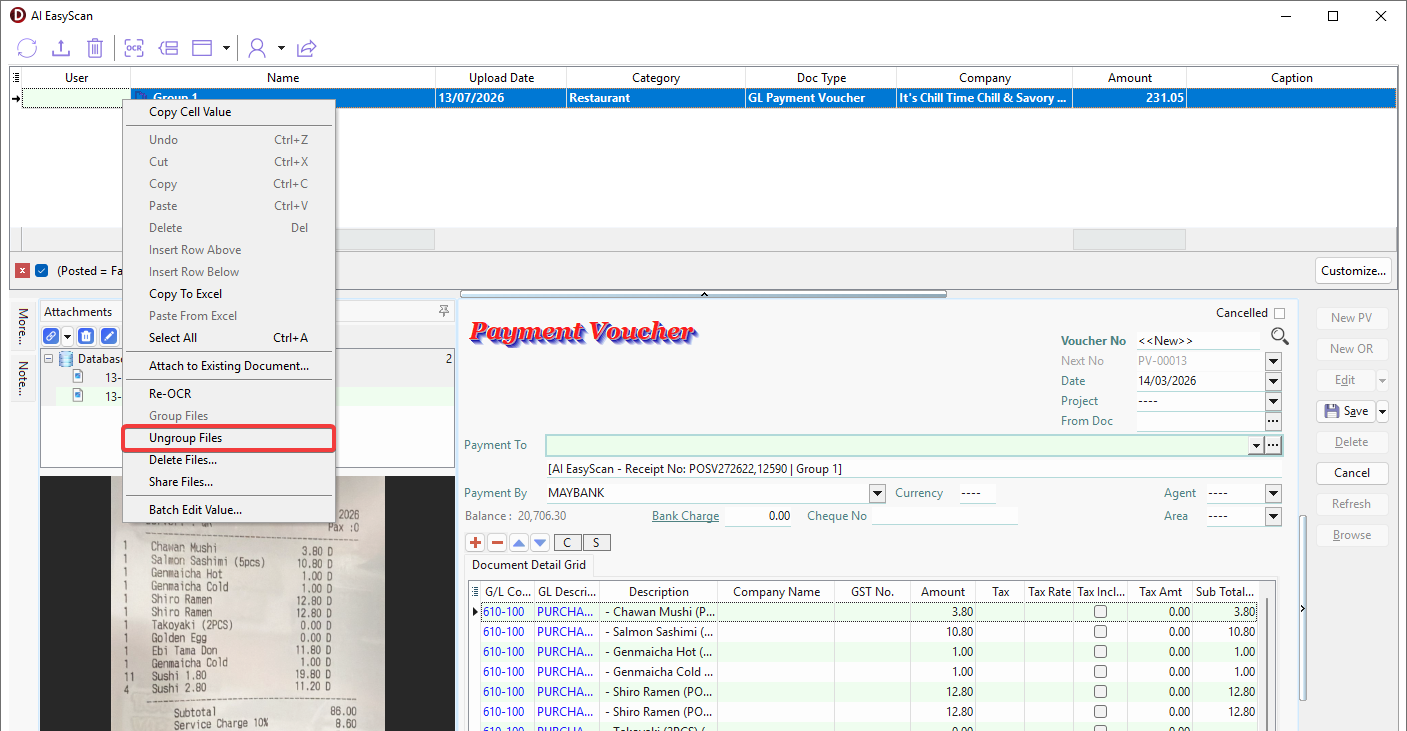
Group Files
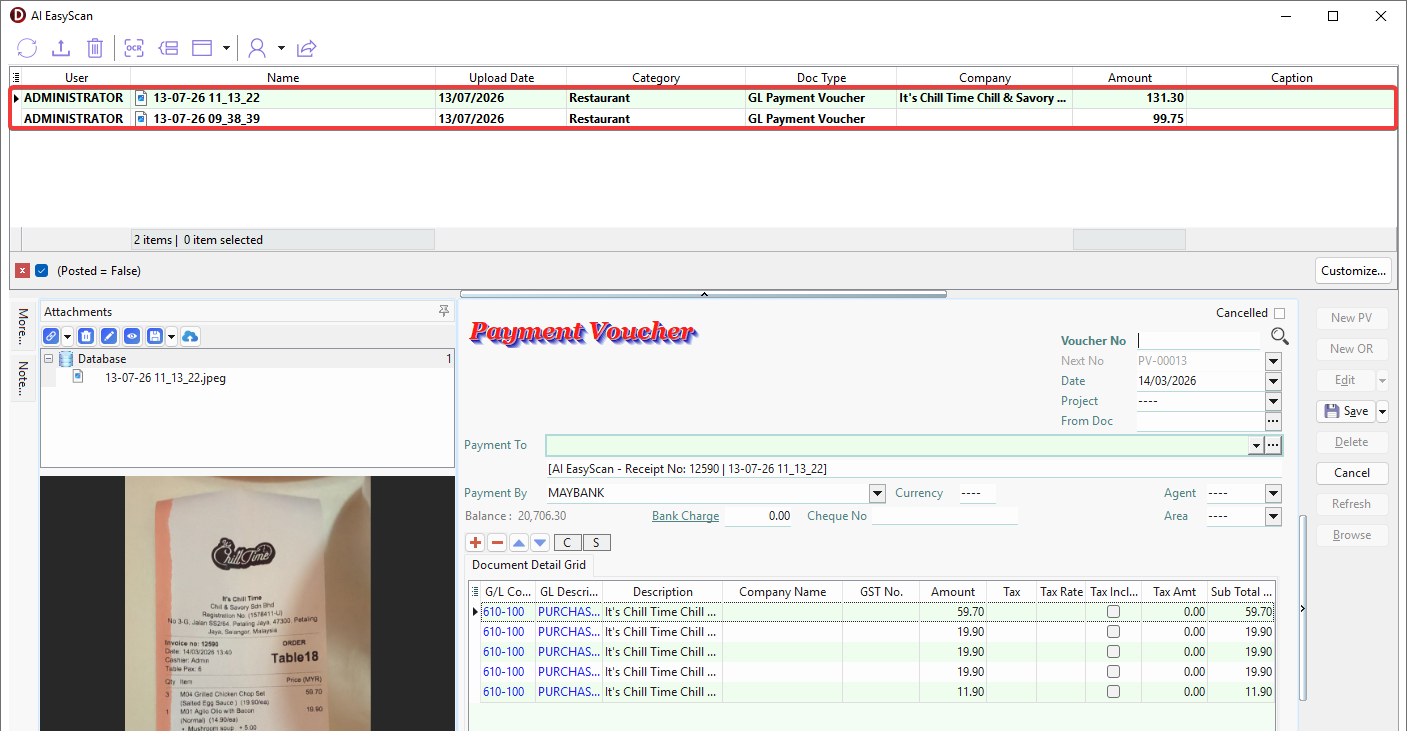
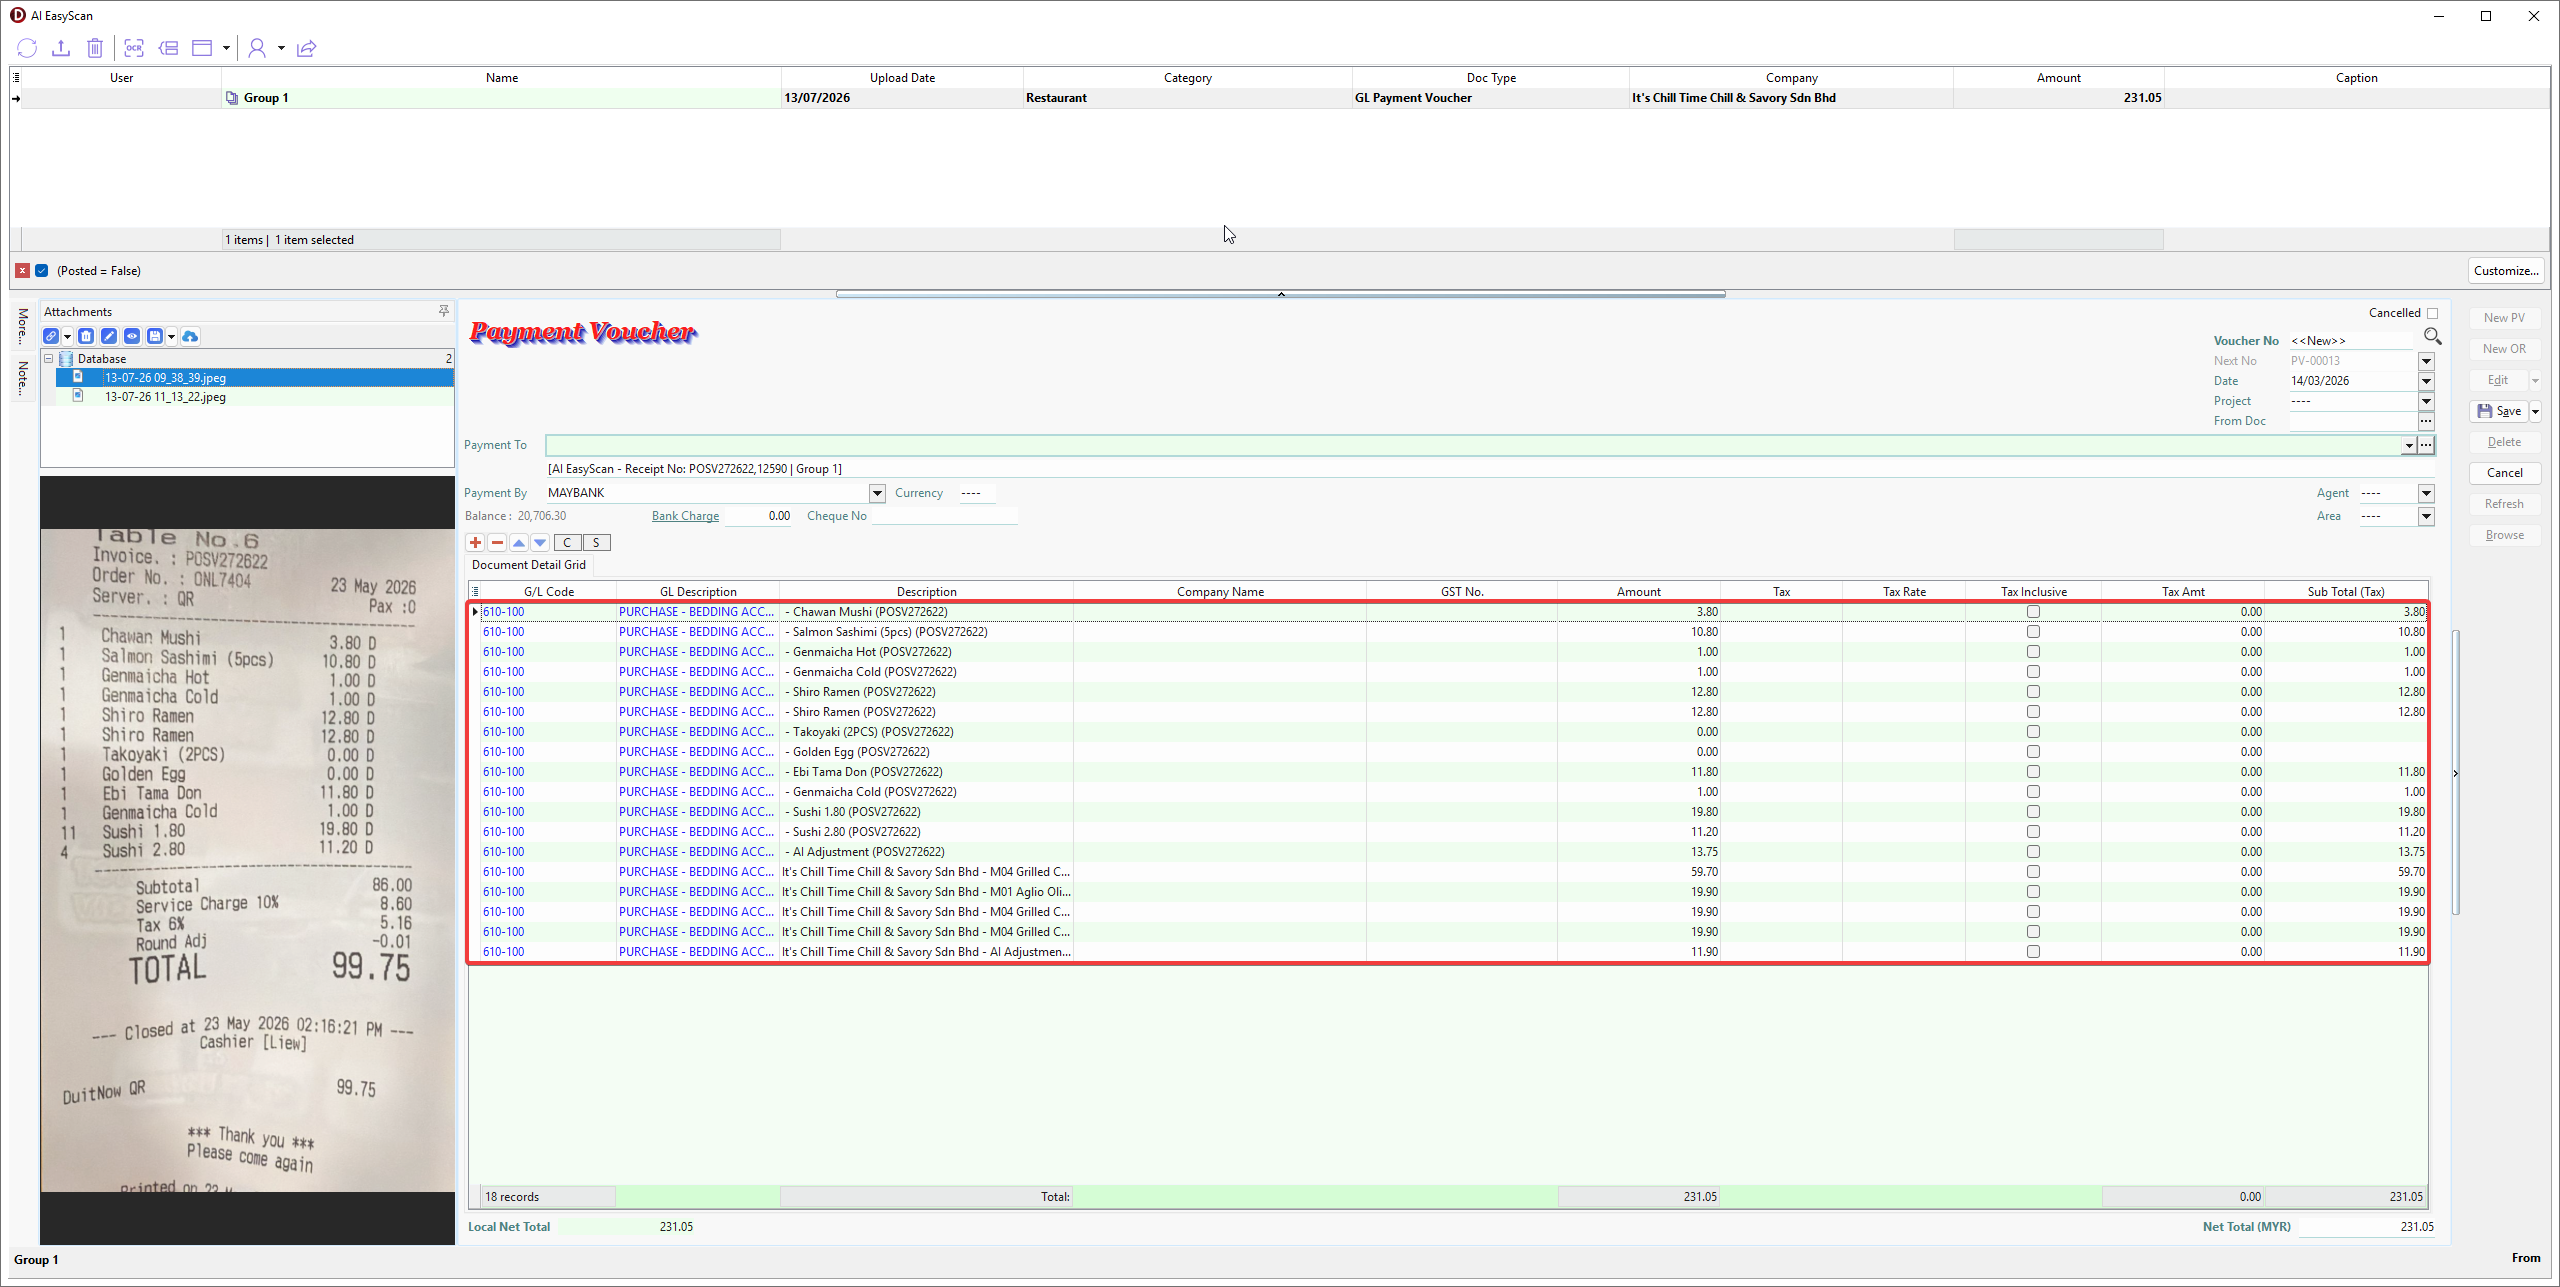
Grouping related files allows their information to be attached to the same document.
-
To Group, select multiple files (Ctrl + Left Click) > Right Click > Group Files....
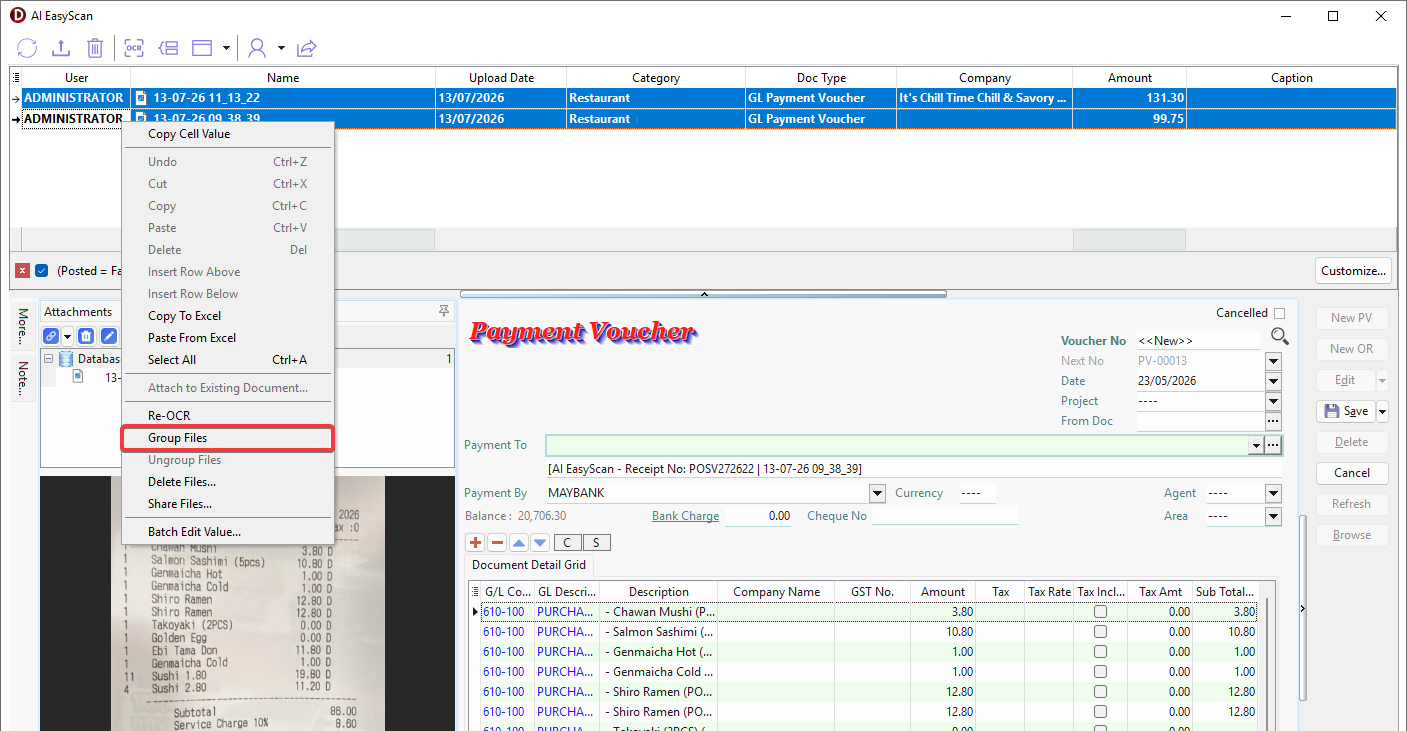
-
The details from multiple files will be merged into the selected document type.
-
To Ungroup, select the group folder > Right Click > Ungroup Files....
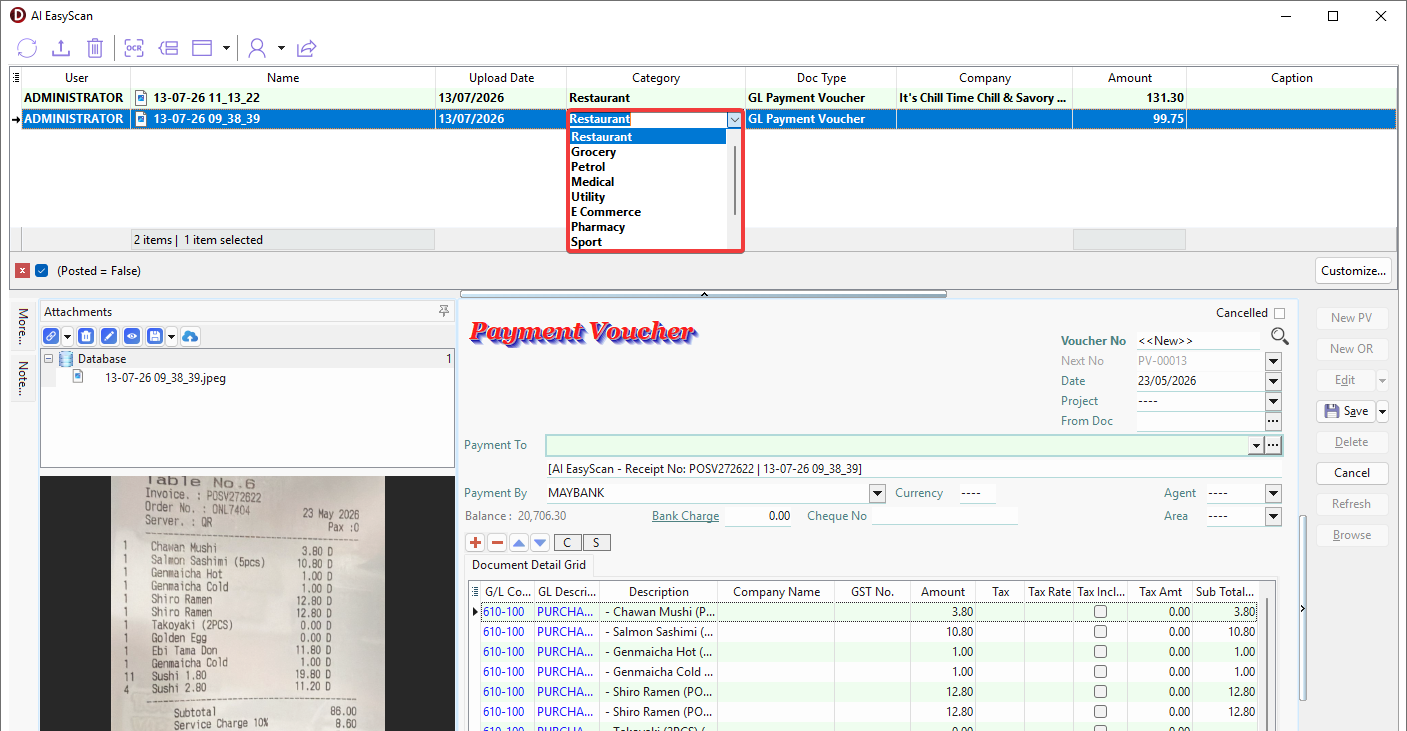
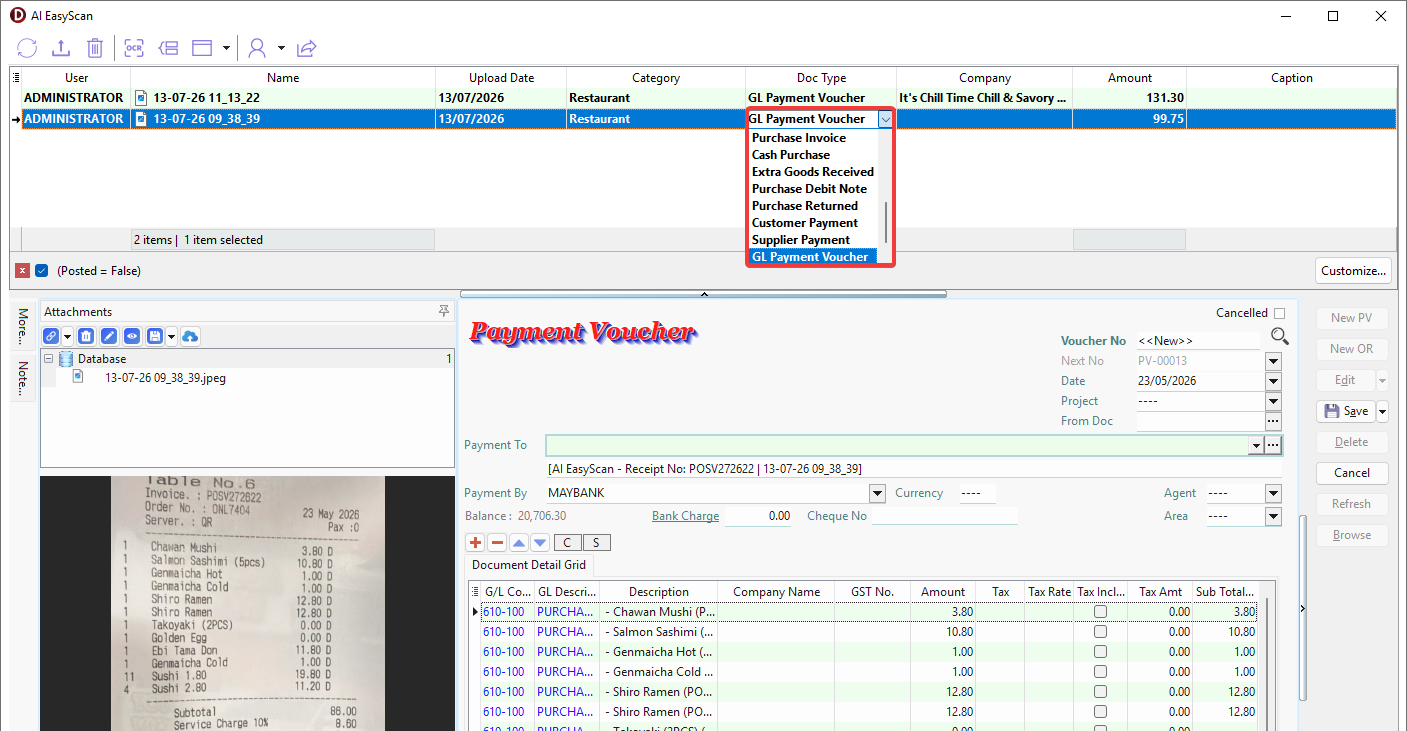
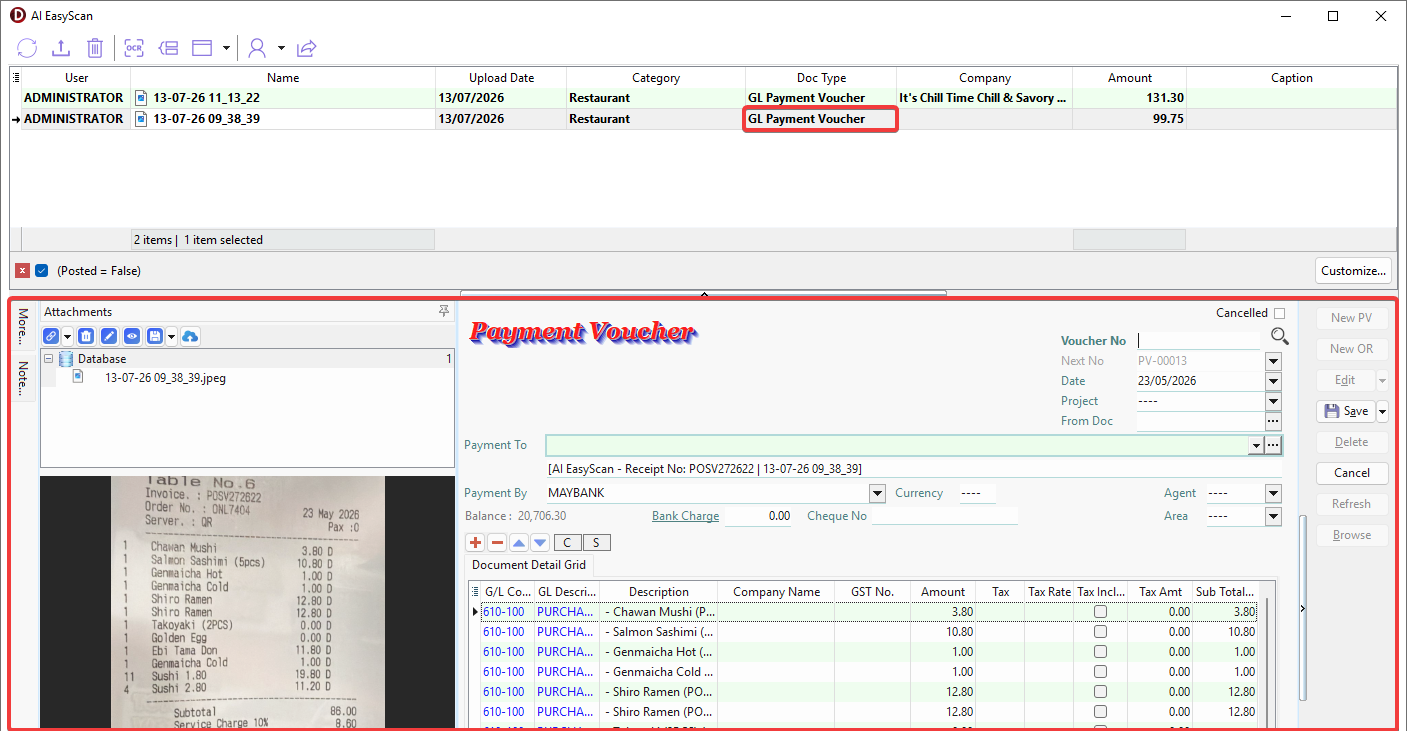
Assign Category and Doc Type to File or Folder
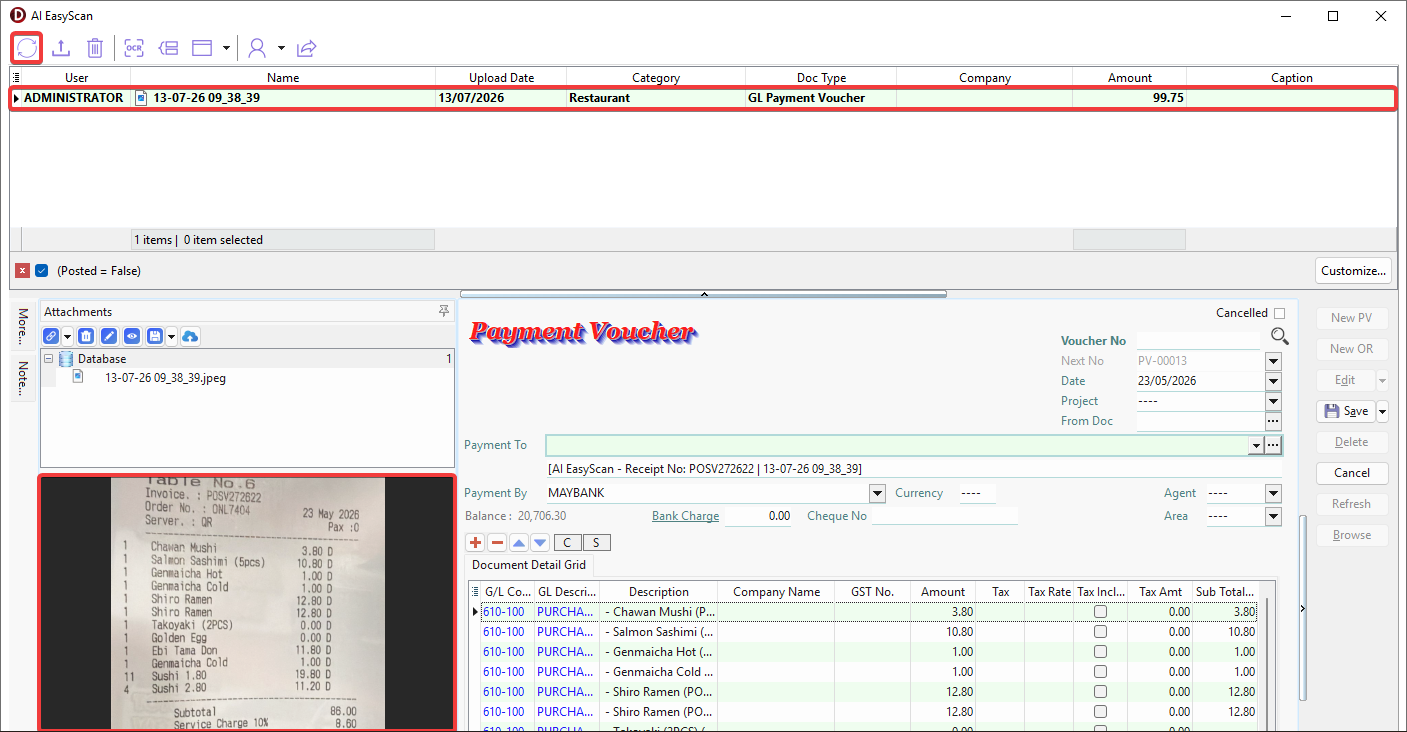
Based on Category and Doc Type, the corresponding document type will be created, and the item's G/L Code will be filled in according to the predefined account code of the selected category.
-
Select the file > Click ⬇️ button > Choose Category.
-
Select the file > Click ⬇️ button > Choose Doc Type.
Merge Item Details
Combine several items into a single item record.
-
Select the file > Go to Toolbar > Click Merge button.
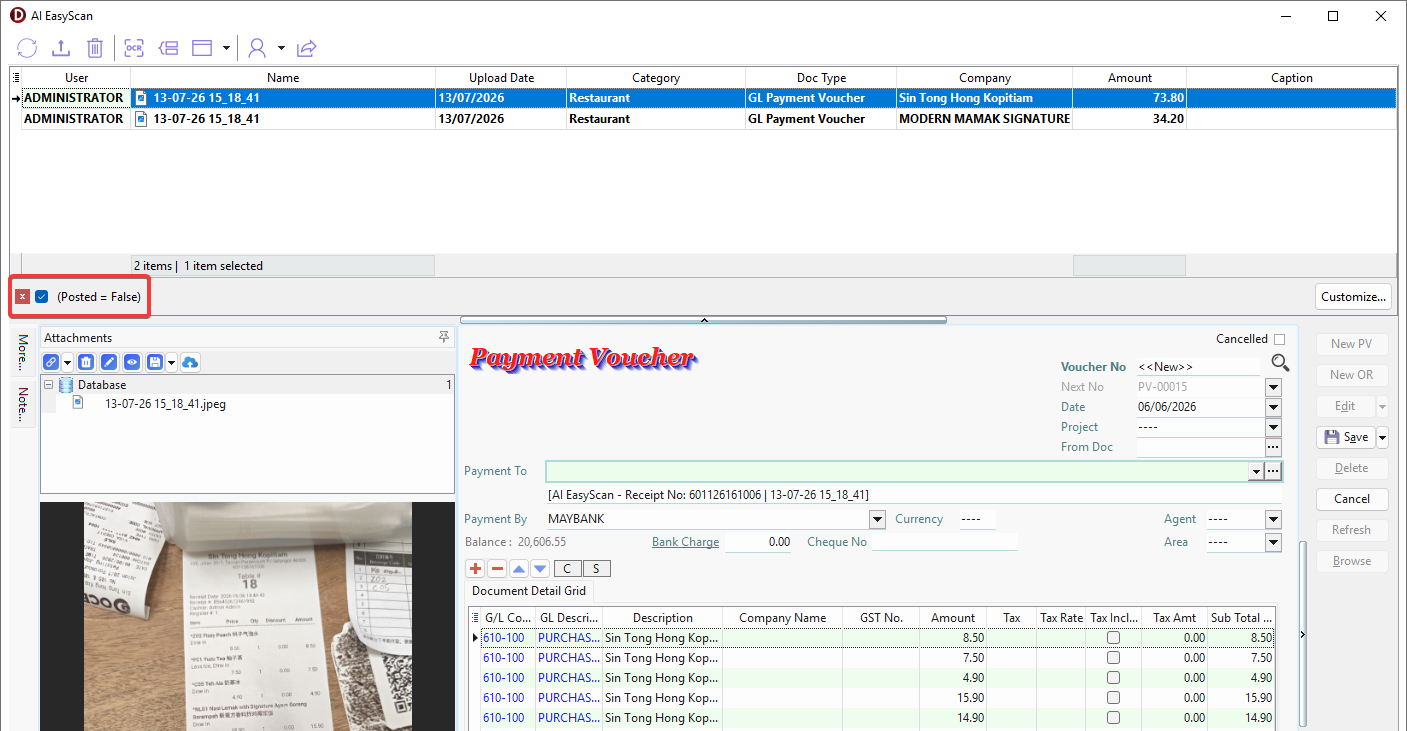
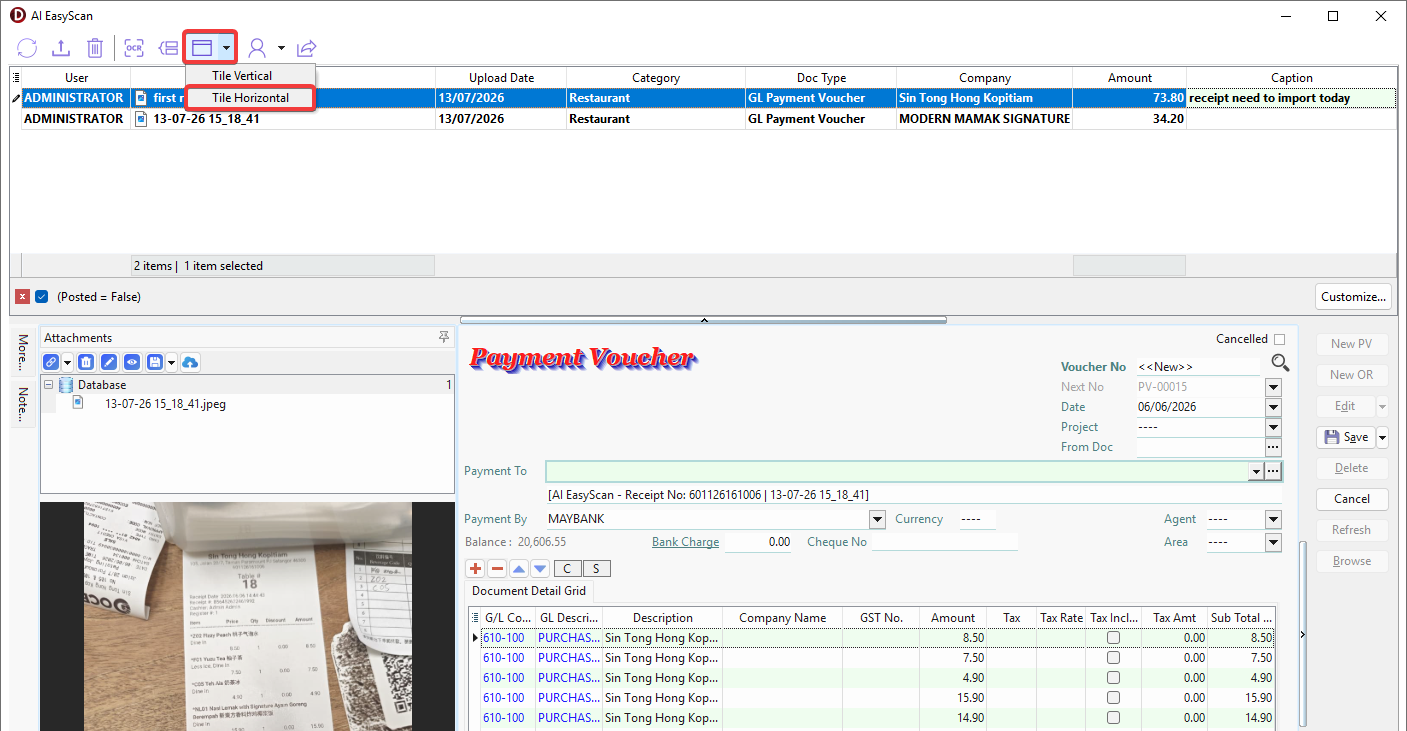
Save Document
-
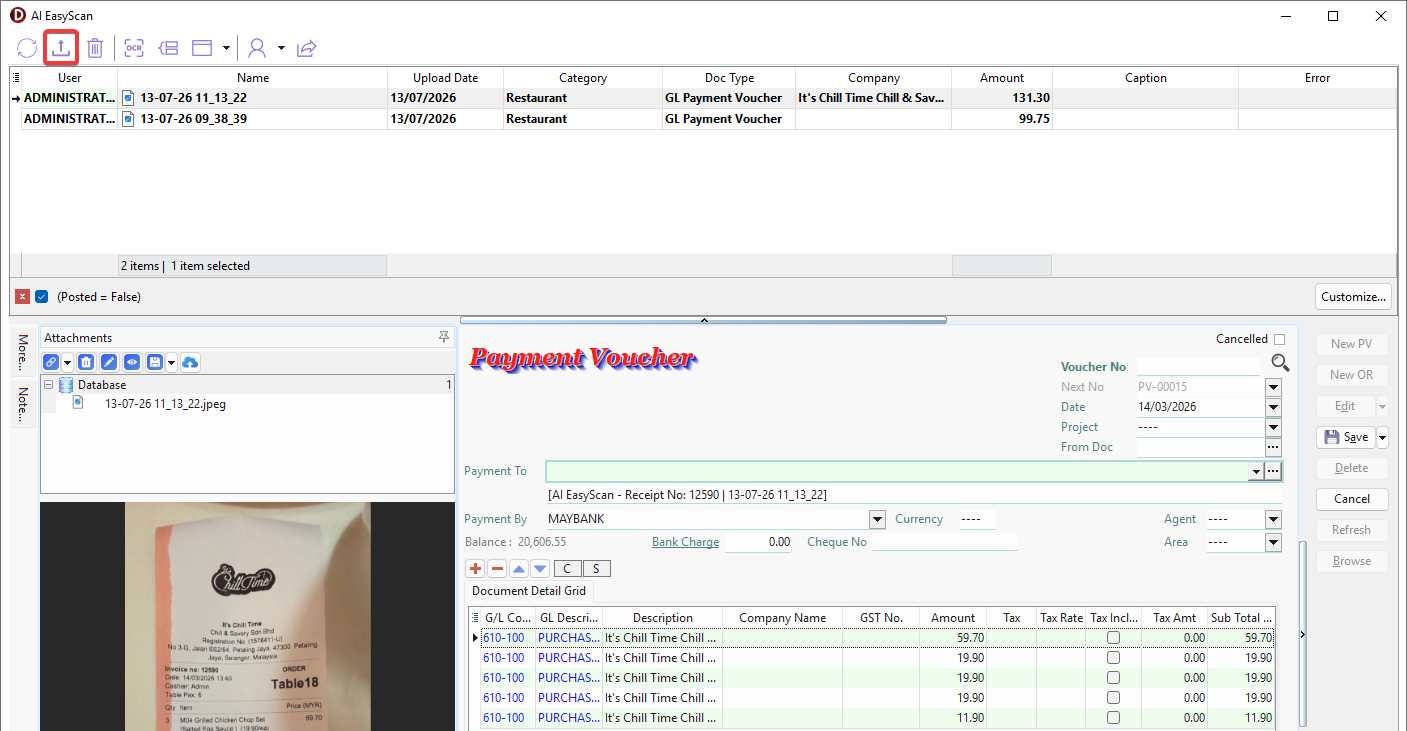
Select a file or folder that has successfully completed the OCR process. The file and its item details will automatically populate the selected document type.
-
Review and edit the document if any information needs to be corrected.
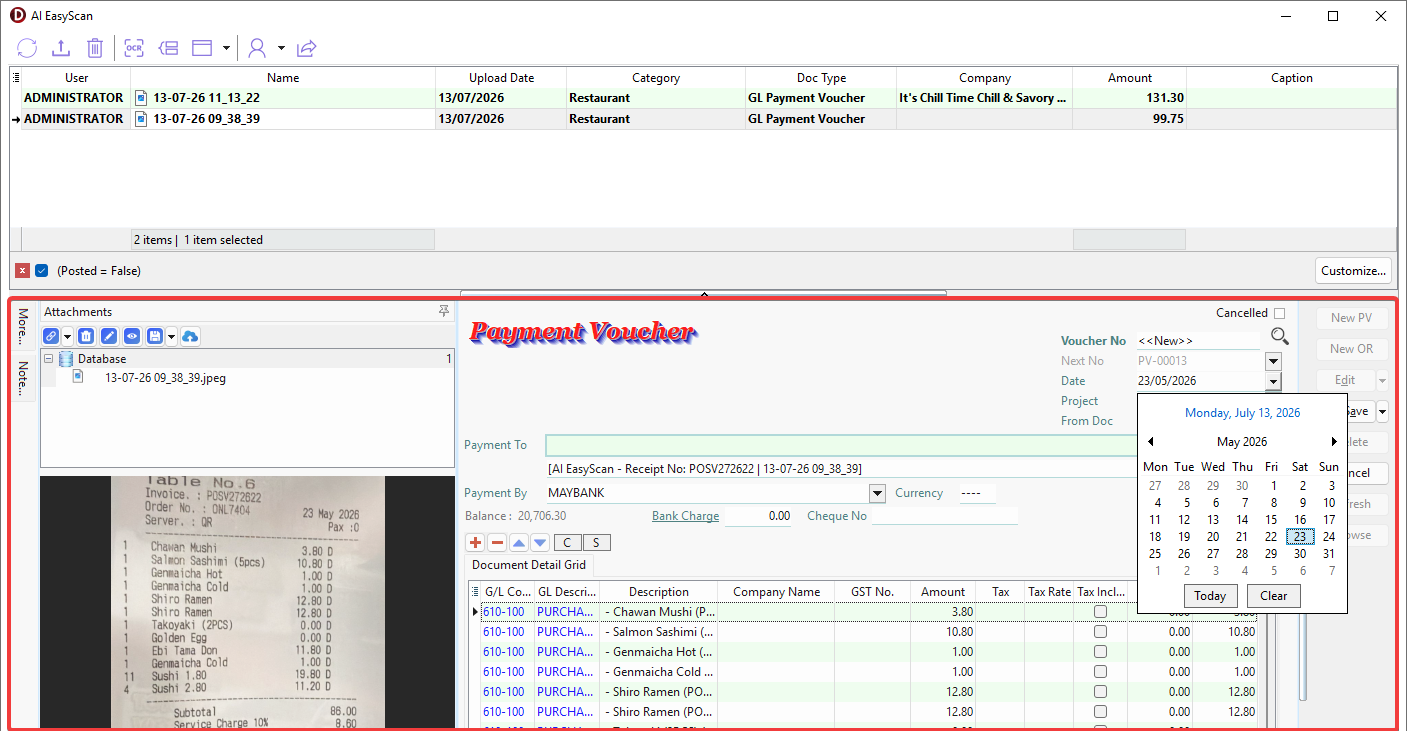
-
After completing the review, click Save.
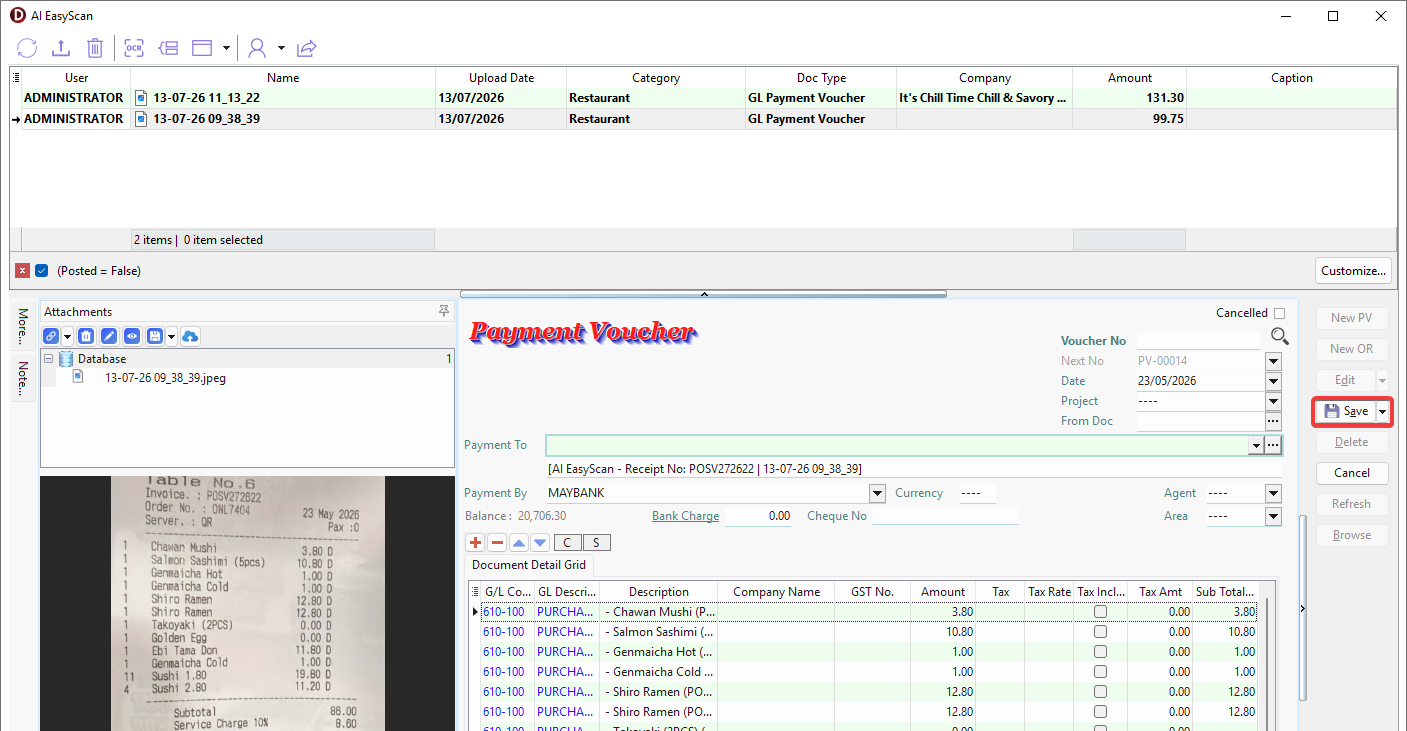
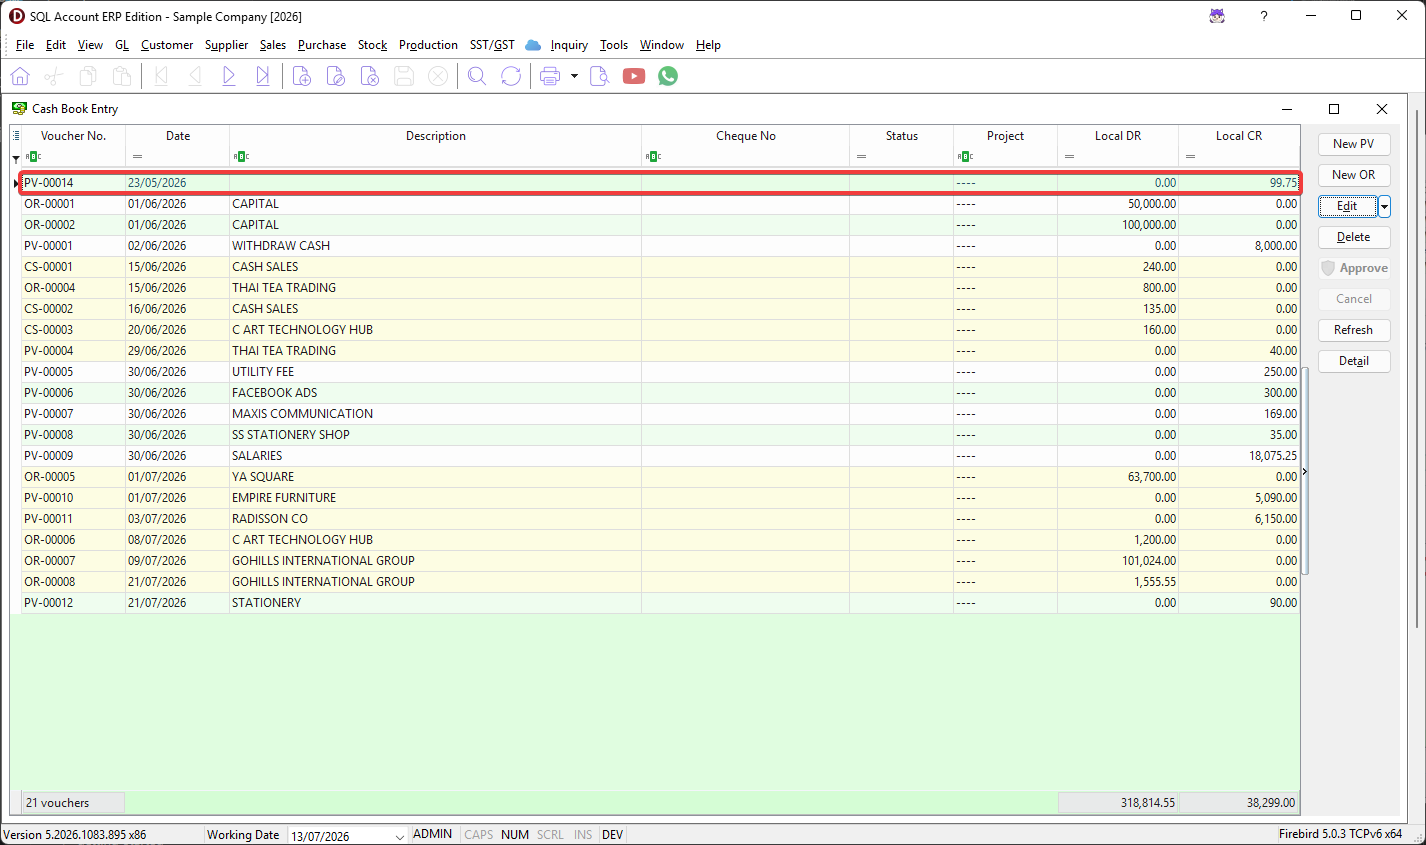
-
Review the saved document in SQL Account.
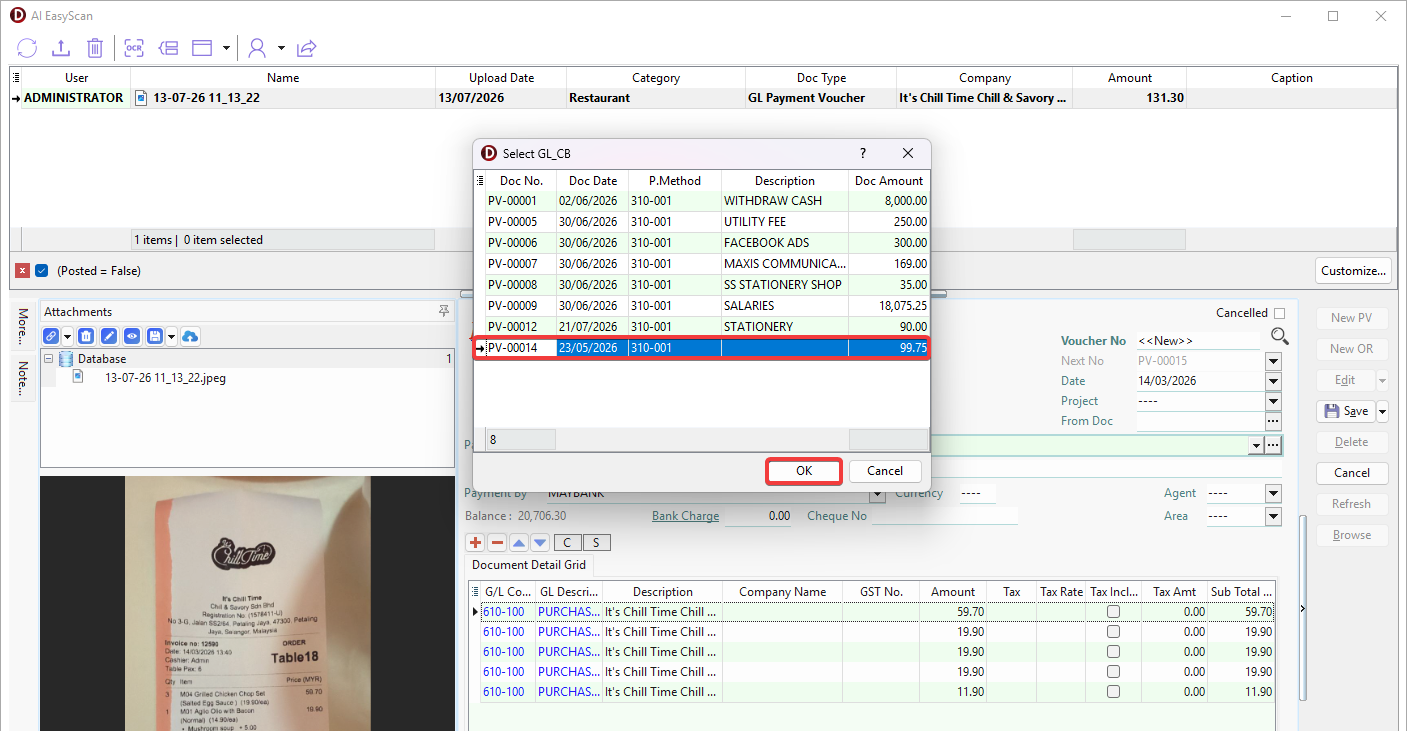
Attach File or Folder to Existing Document
-
Select file or folder > Right Click > Attach to Existing Document.
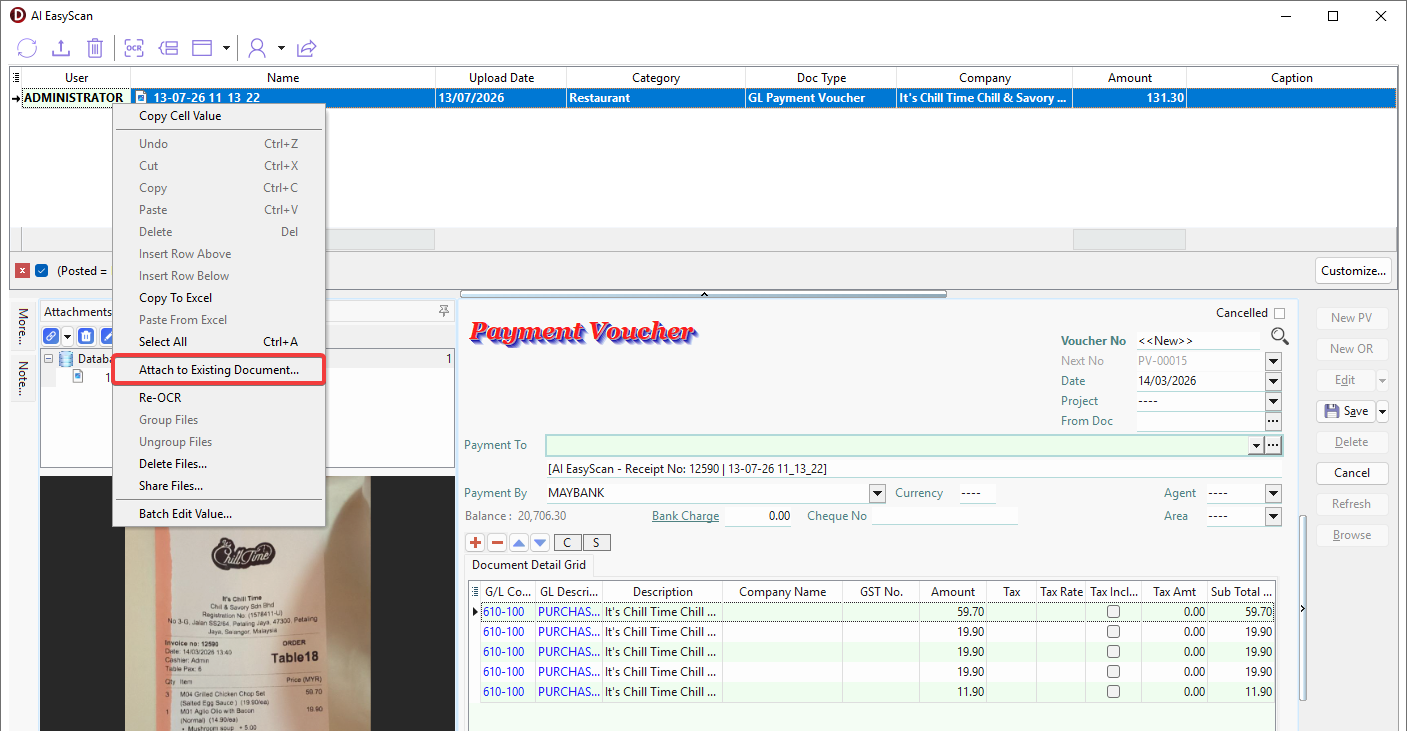
-
Select the target document > Click OK.
-
Review the attached file under the target document's Attachments.

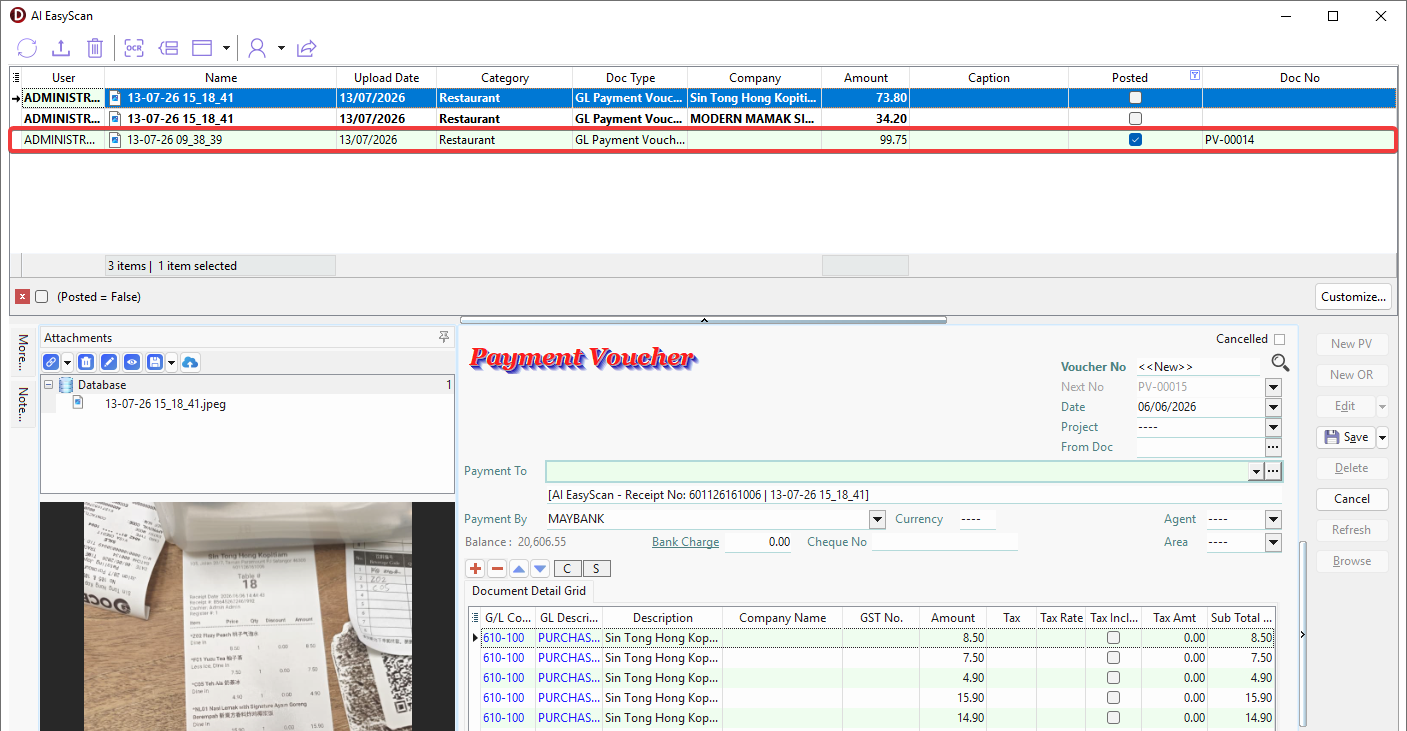
Check Posted File or Folder
-
Tick the checkbox in the grid footer.
-
Posted file and folder will be displayed without bold formatting.
-
Click the button at the top-left corner of the grid > Tick the Doc No and Posted.

-
The following status will be displayed under the column, Doc No will show the posted Document No..
-
Double click to open the posted document.
Additional Information
- Setup OCR Category
- Switch System Layout
- Edit Filename and Caption
- Batch Edit Doc Type and Caption
- Delete File
- Share File
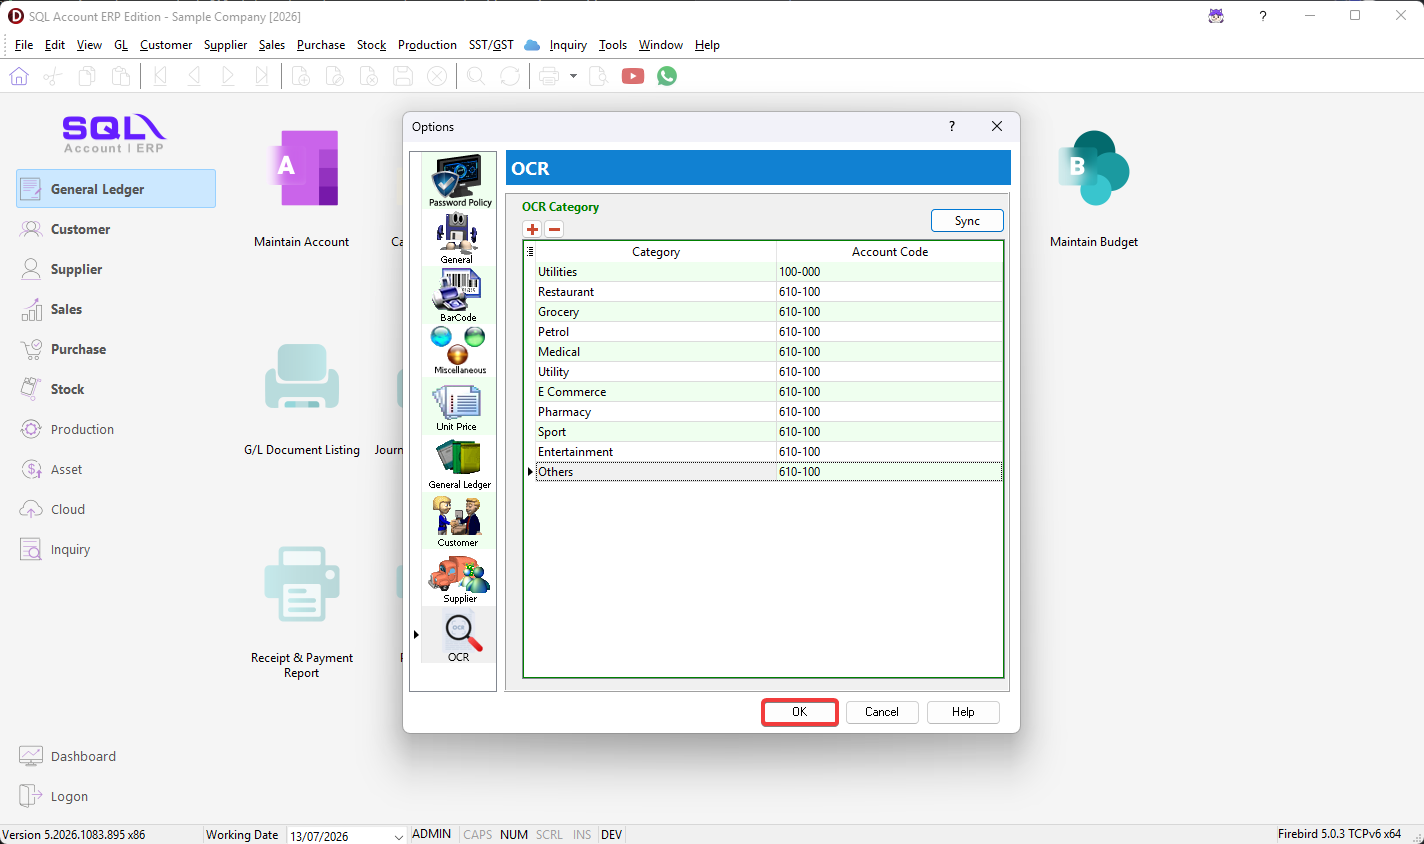
Setup OCR Category
AI automatically assigns a category to uploaded files based on their content. For files that belong to GL Payment Voucher, it assigns the items to the corresponding predefined account codes.
-
Go to Menu Bar > Tools > Options....
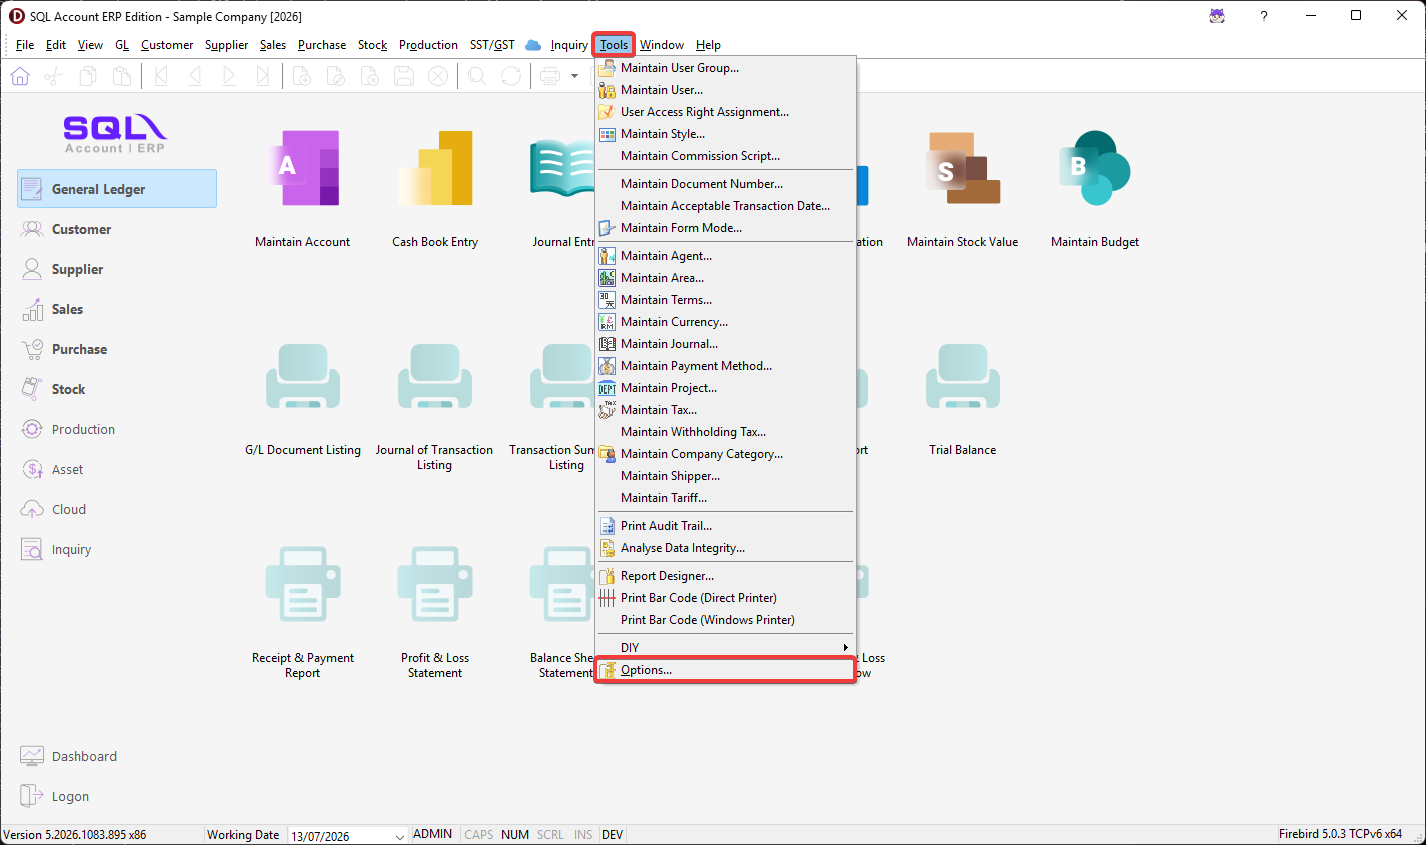
-
In Options, go to OCR to review the Categories.
-
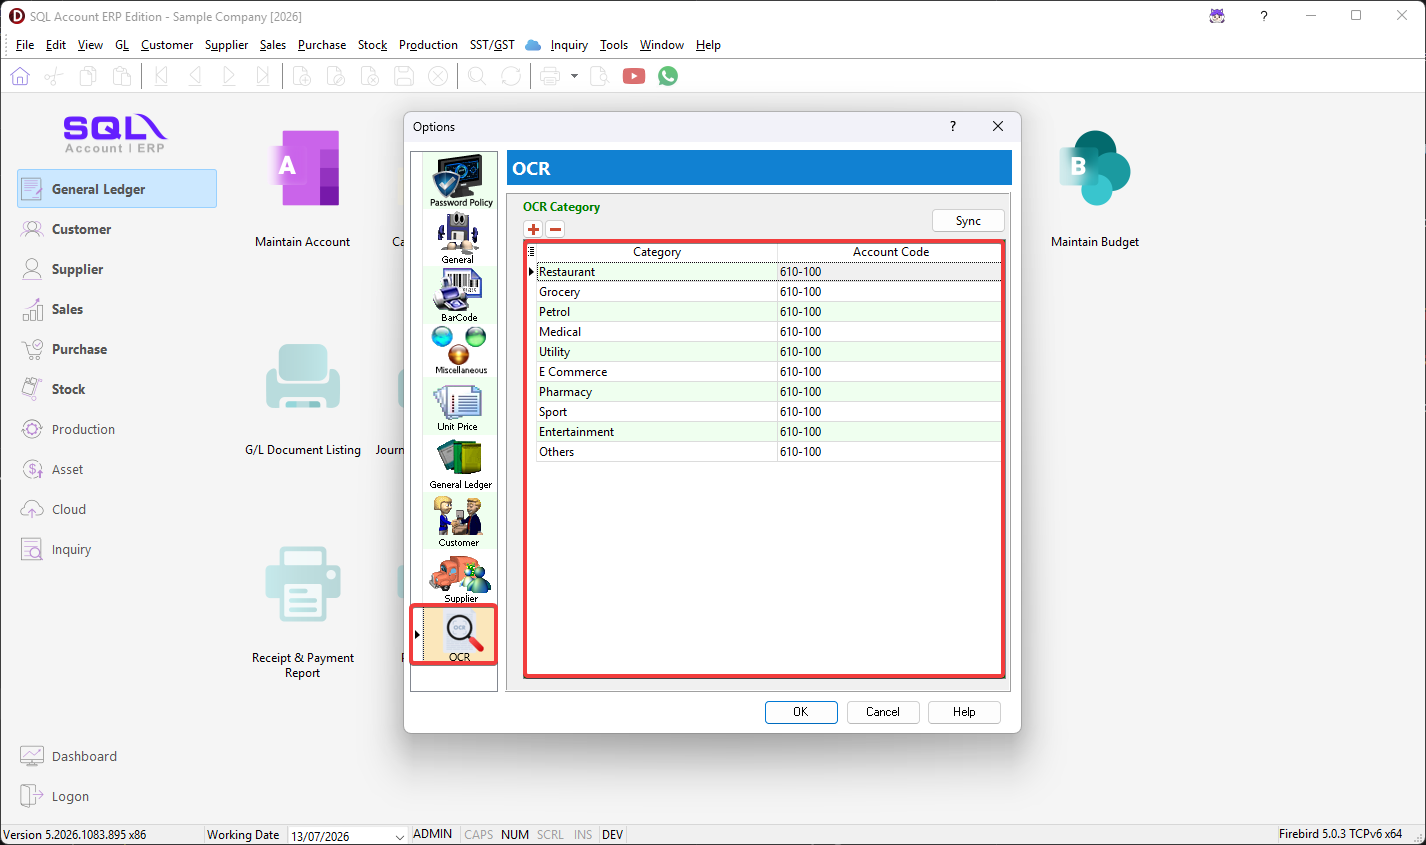
Click ➕ to add a new category or ➖ to remove an existing category. When adding a new category, define the category and assign the corresponding account code.
-
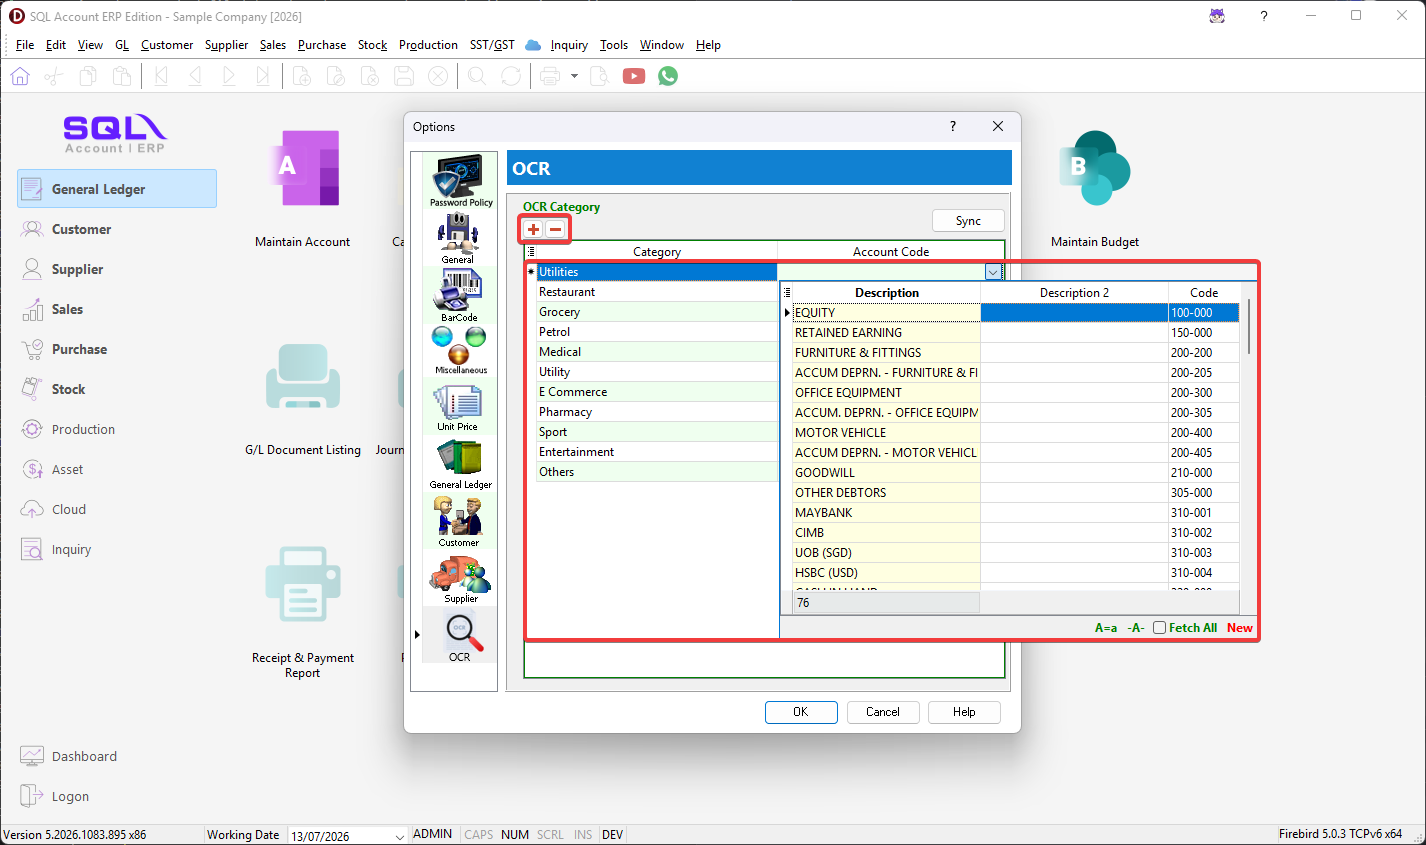
Click Sync > Yes to synchronize the categories with the AI.

-
Dialog shows "Synced successfully" indicates that the categories have been updated successfully.
-
Click OK to save the changes.
Switch System Layout
-
Go to Toolbar > Click Layout button > Choose a system layout.
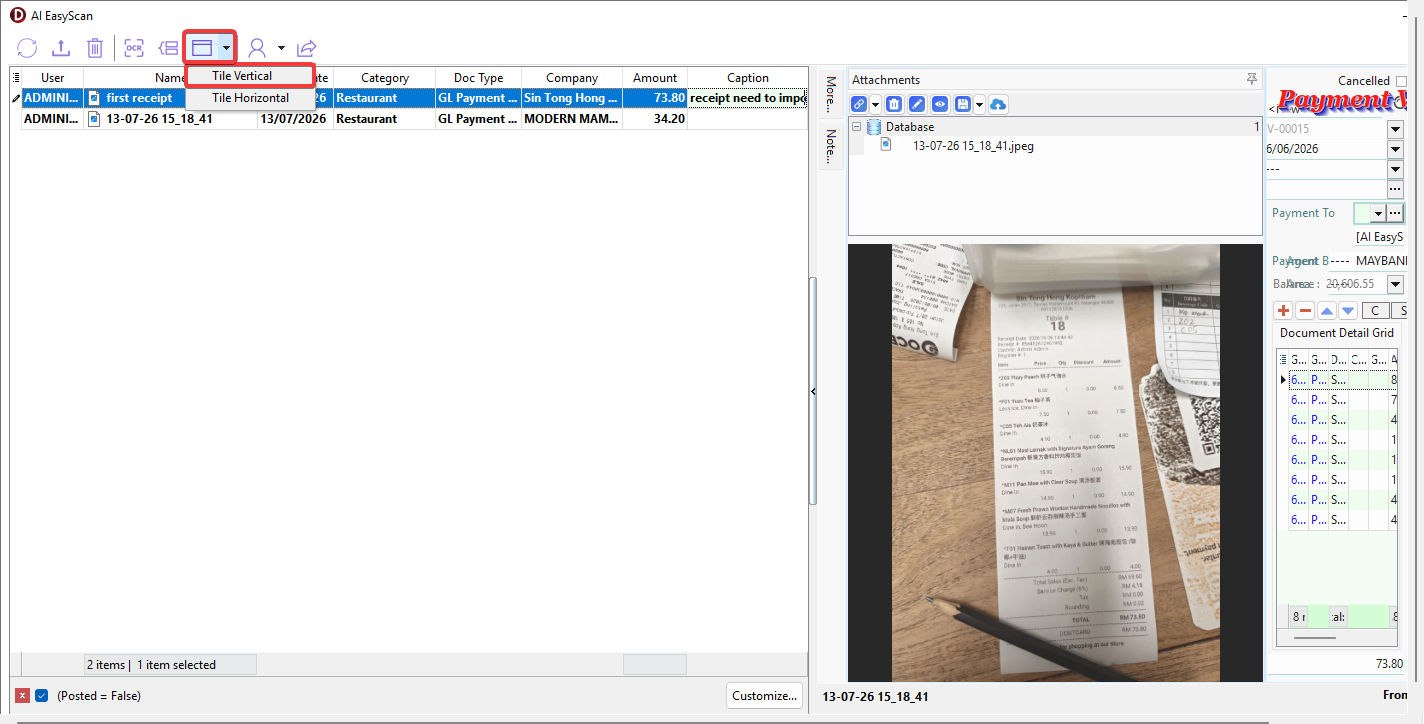
-
Switch to the system layout that suits your personal preference.
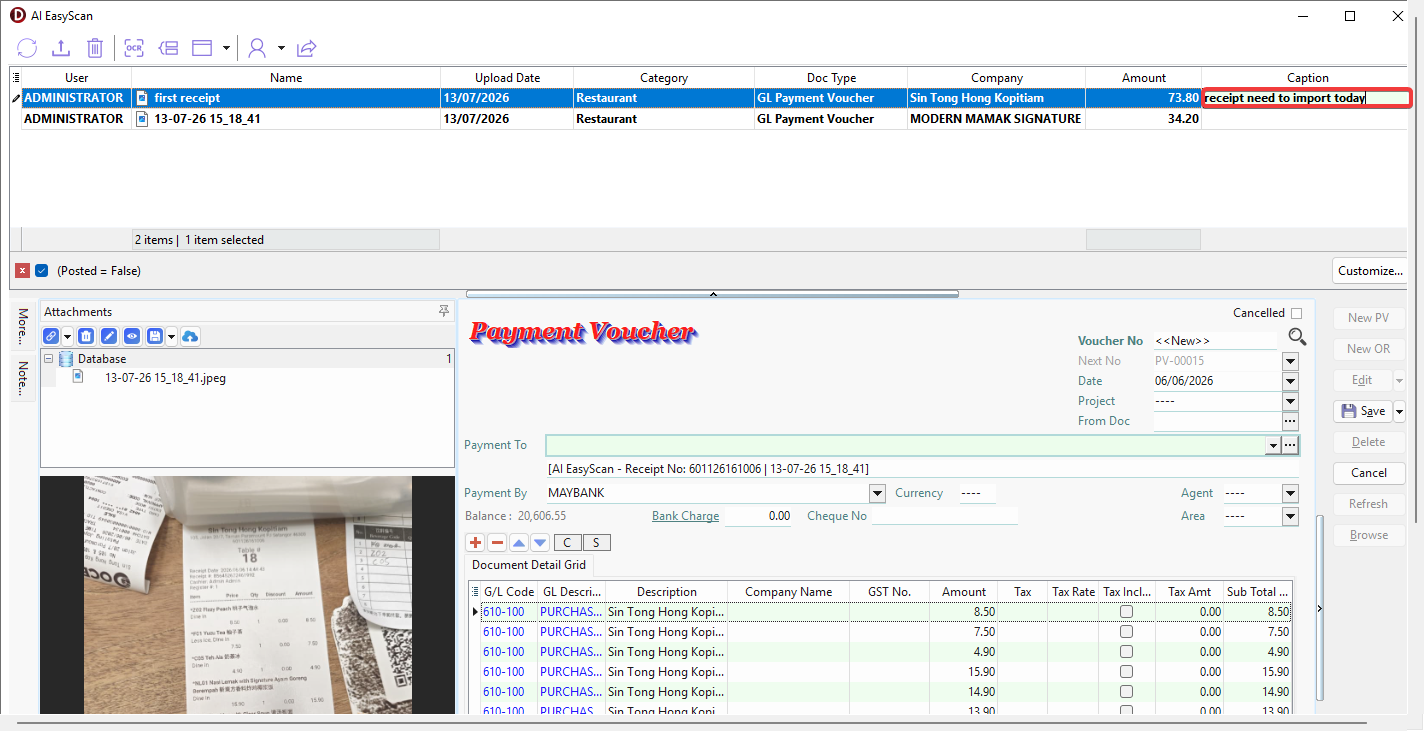
Edit Filename and Caption
-
Filename is editable by selecting the Name column in the grid.
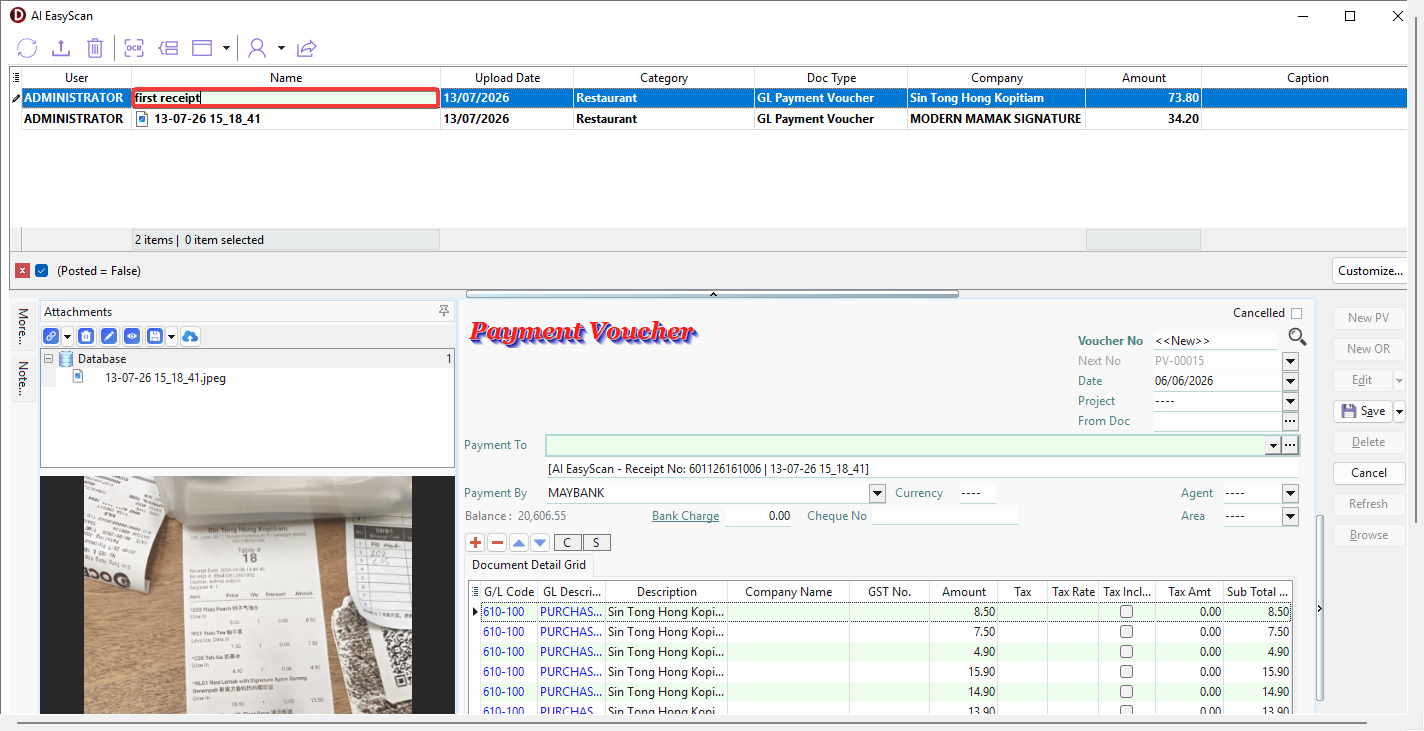
-
Caption is editable by selecting the Caption column in the grid.
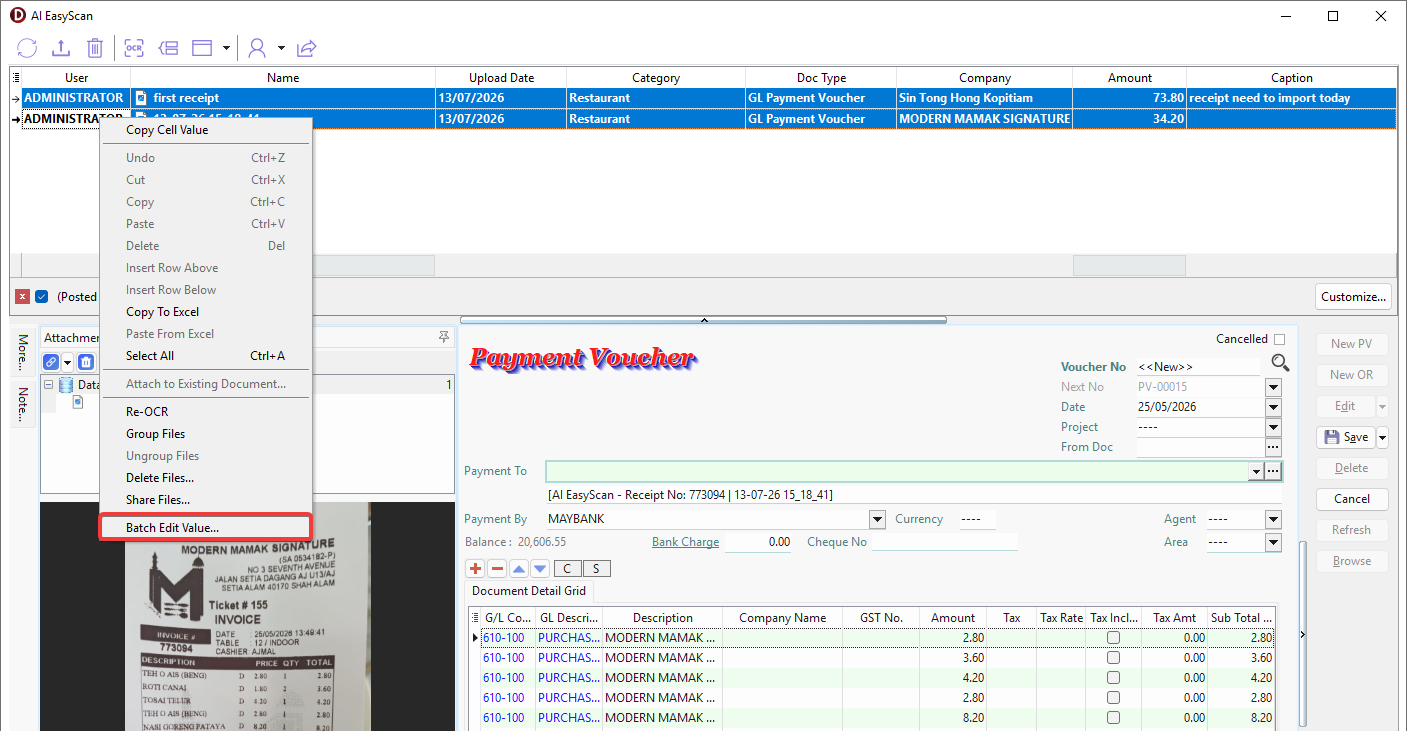
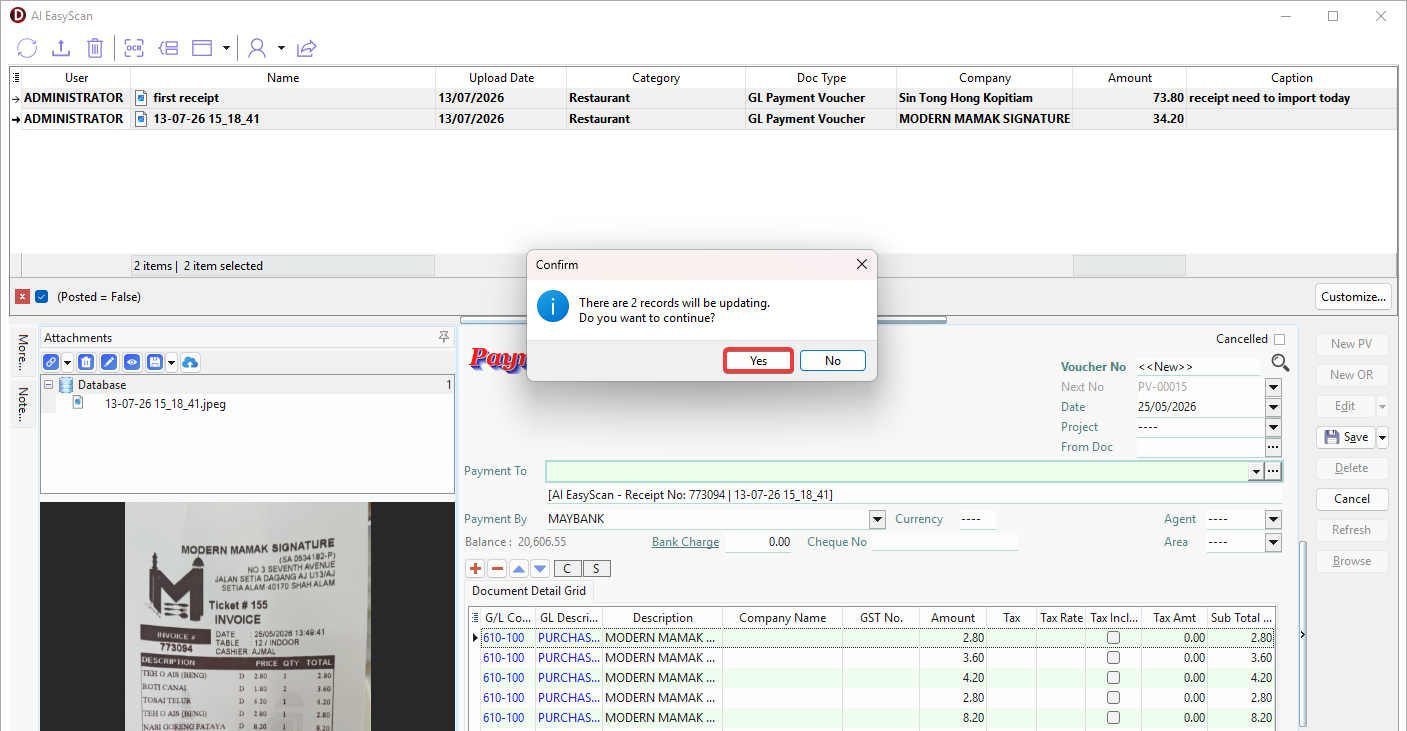
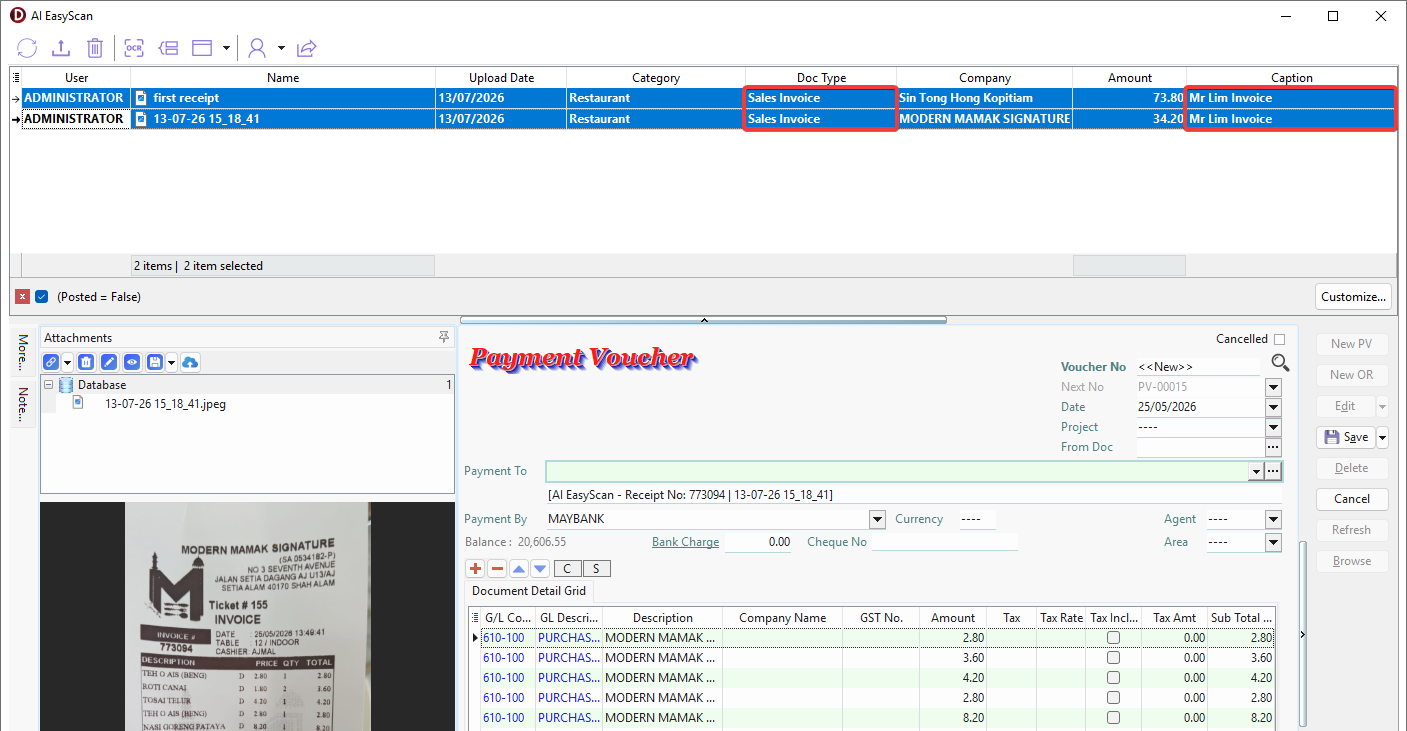
Batch Edit Doc Type and Caption
-
Select multiple files or folders (Ctrl + Left Click) > Right Click > Batch Edit Value.
-
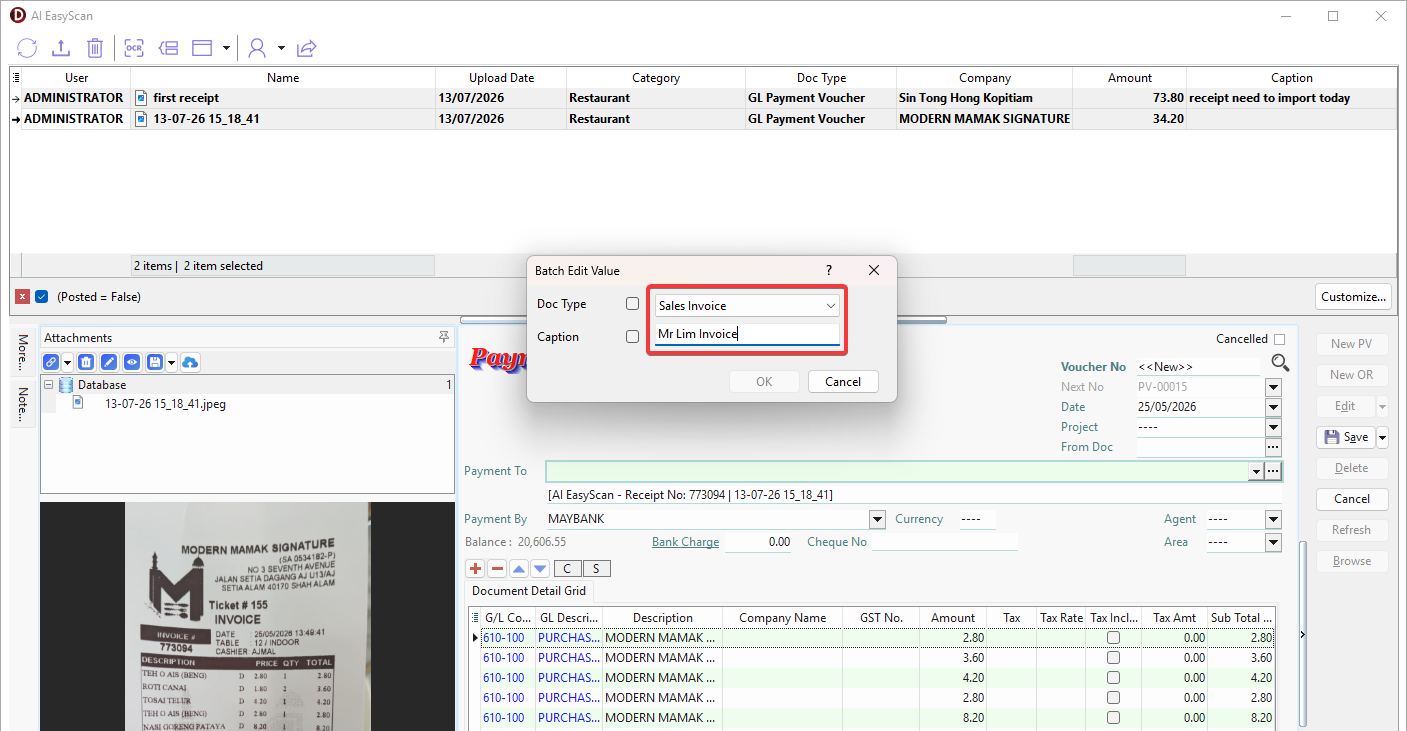
Select the value you want to change > Tick the checkbox to allow the changes to be applied.
-
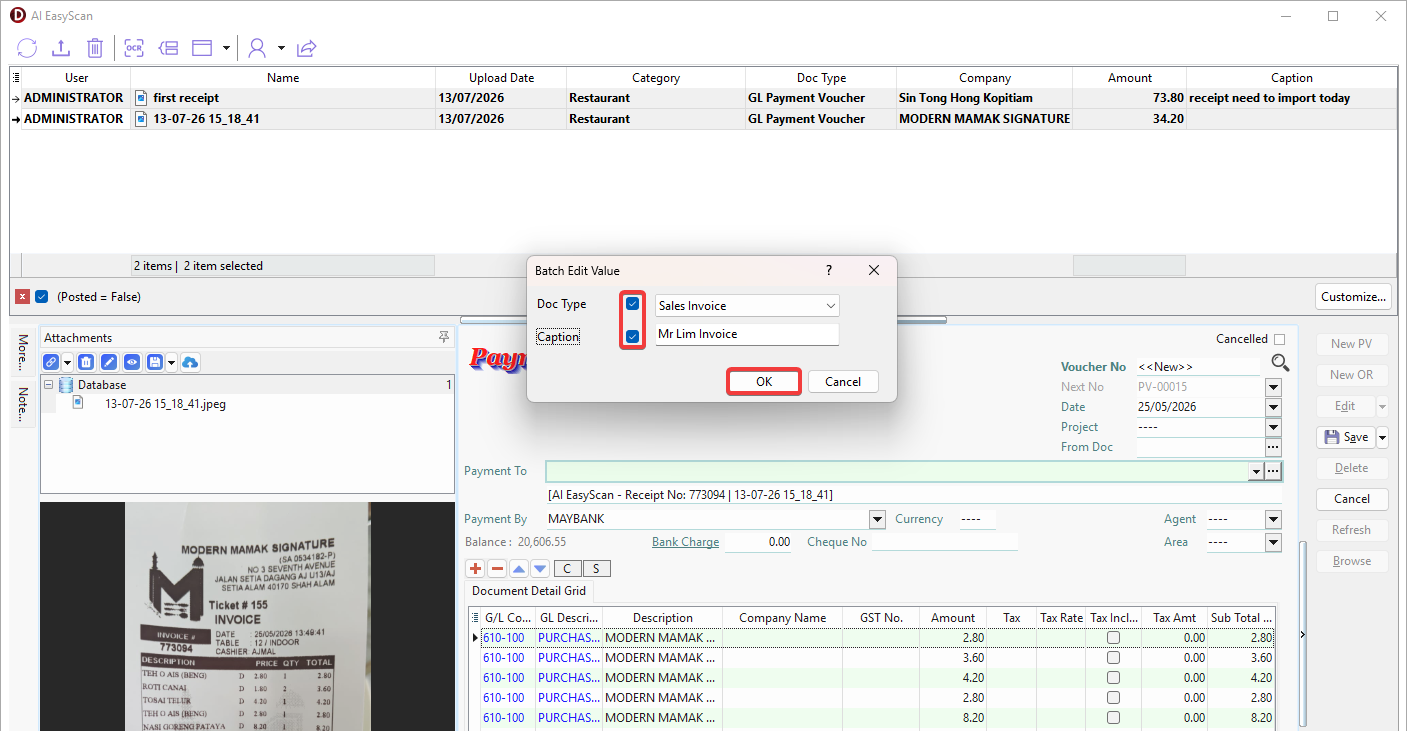
Make sure all the values you want to change are ticked in the checkboxes > Click OK.
-
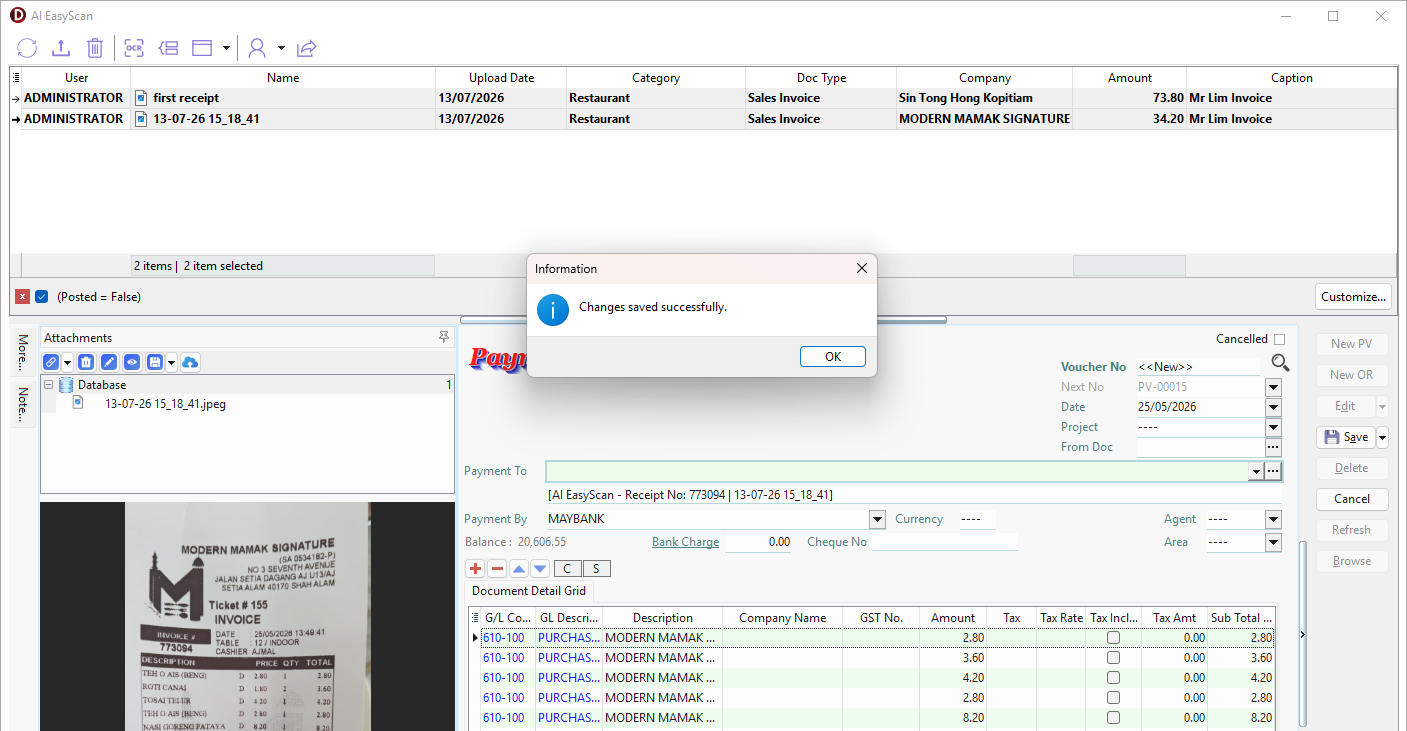
The system will display a message to show how many records will change > Click OK.
-
Click OK to proceed.
-
The selected records will be updated with the new values.
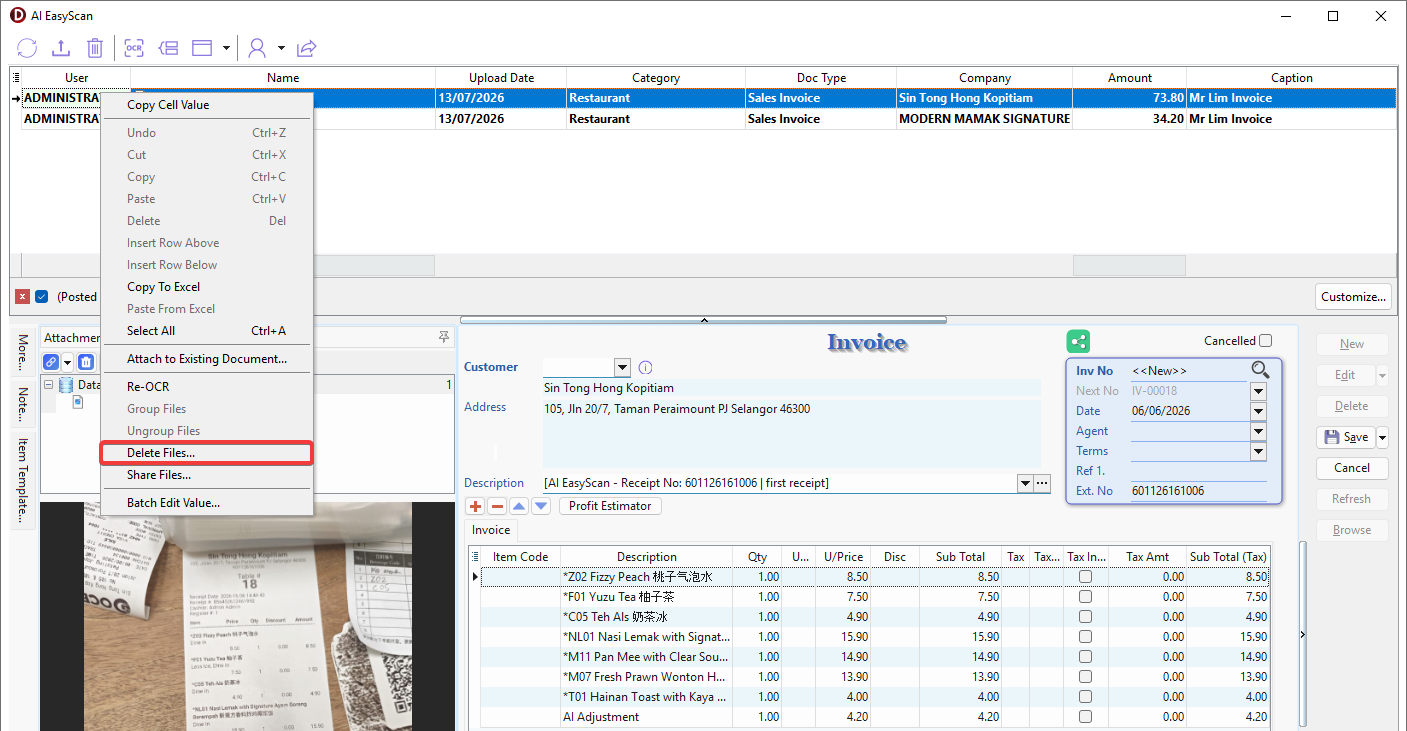
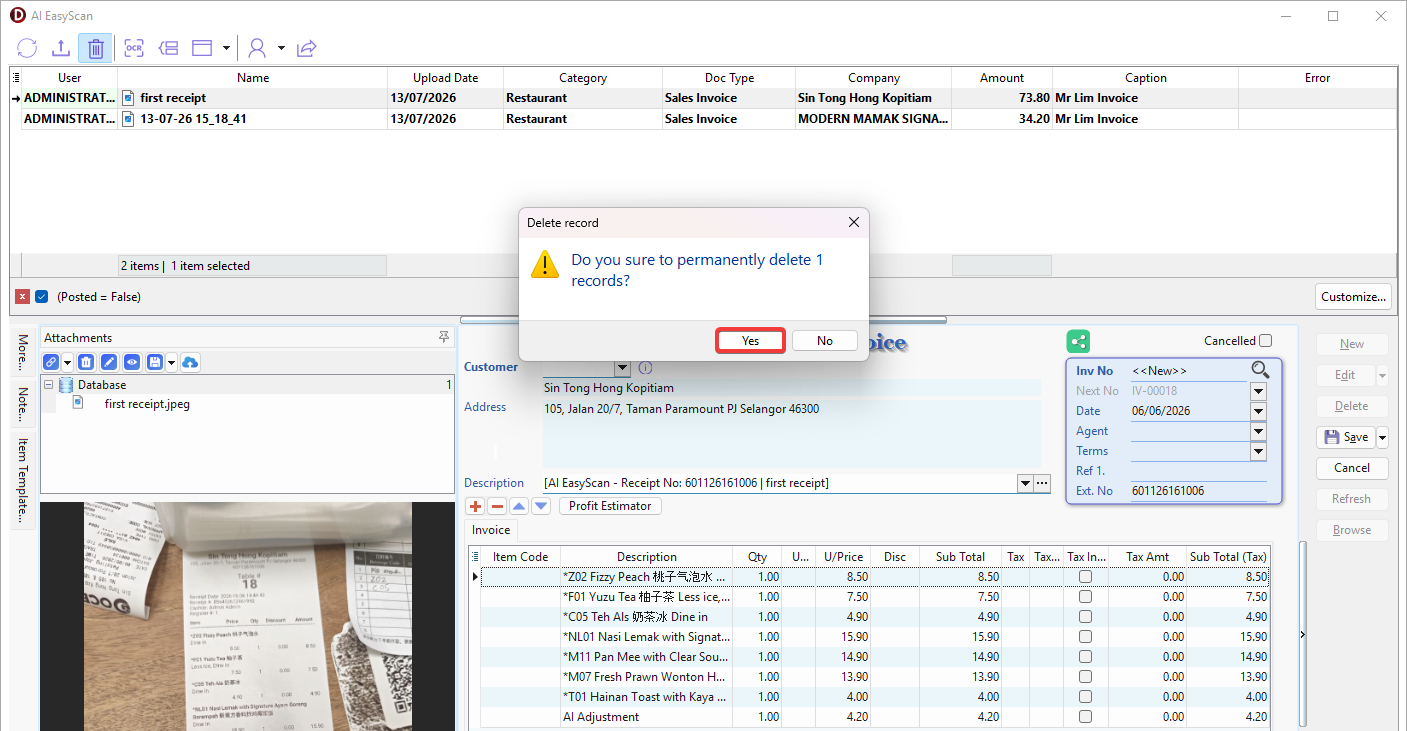
Delete File
-
To Delete, select the file or folder, then either:
-
Go to Toolbar > Click Delete button.

-
Right Click > Delete Files....
-
-
Click OK to confirm the deletion.
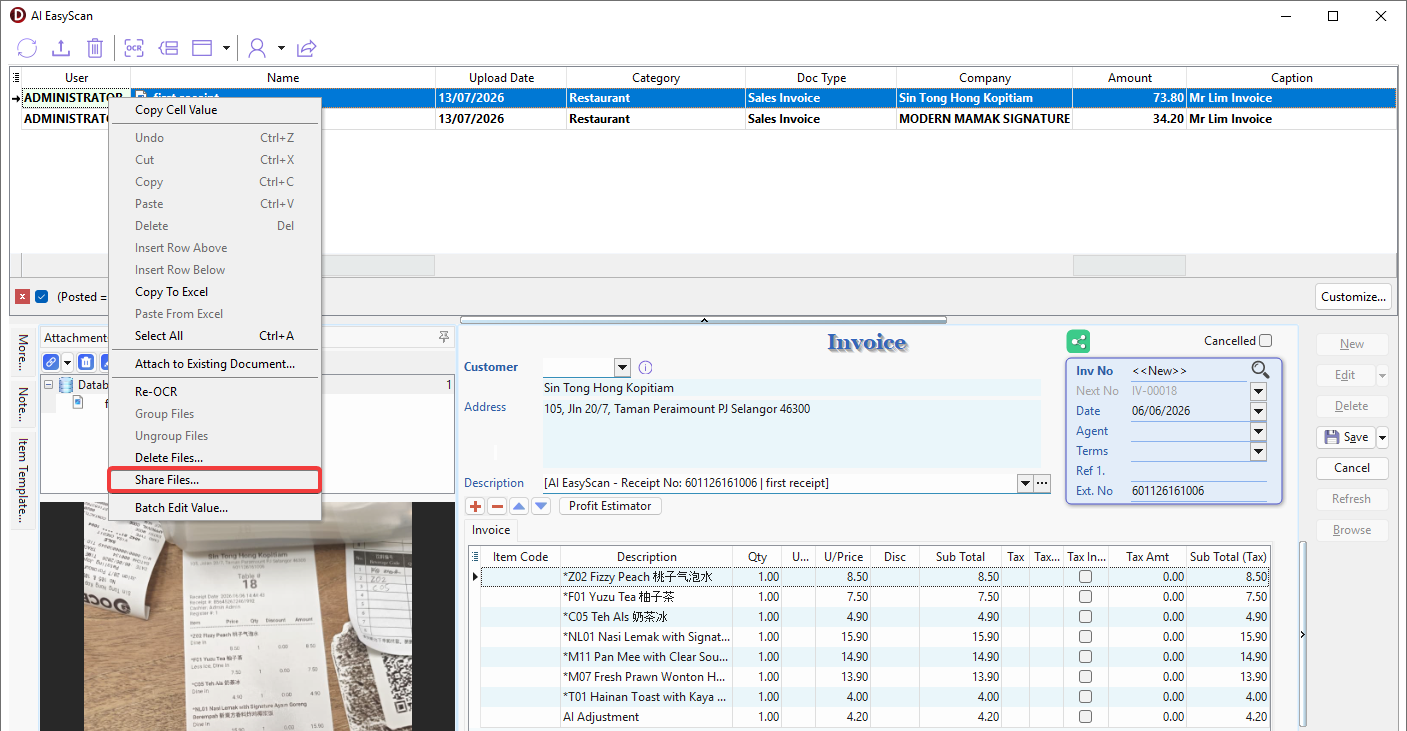
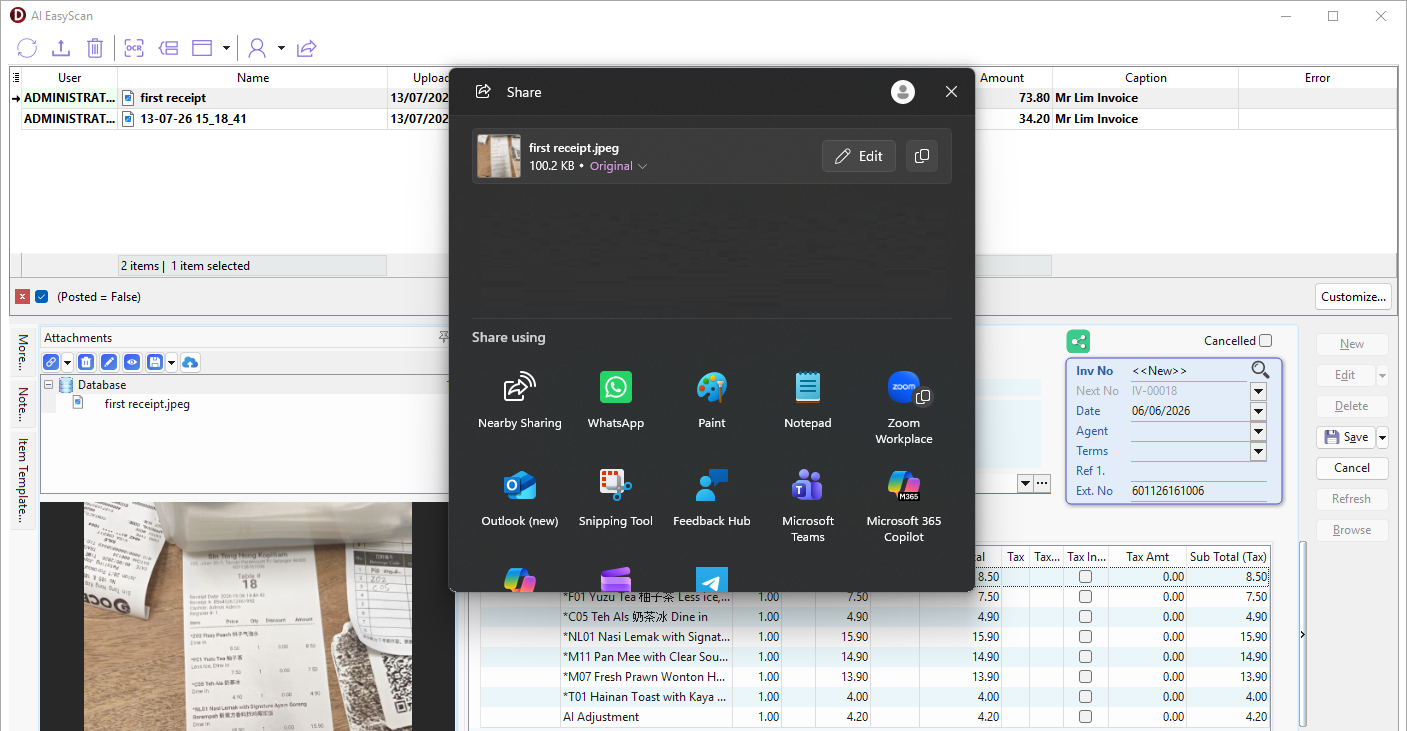
Share File
-
To Share, select the file(s) or folder(s), then either:
-
Go to Toolbar > Click Share button.
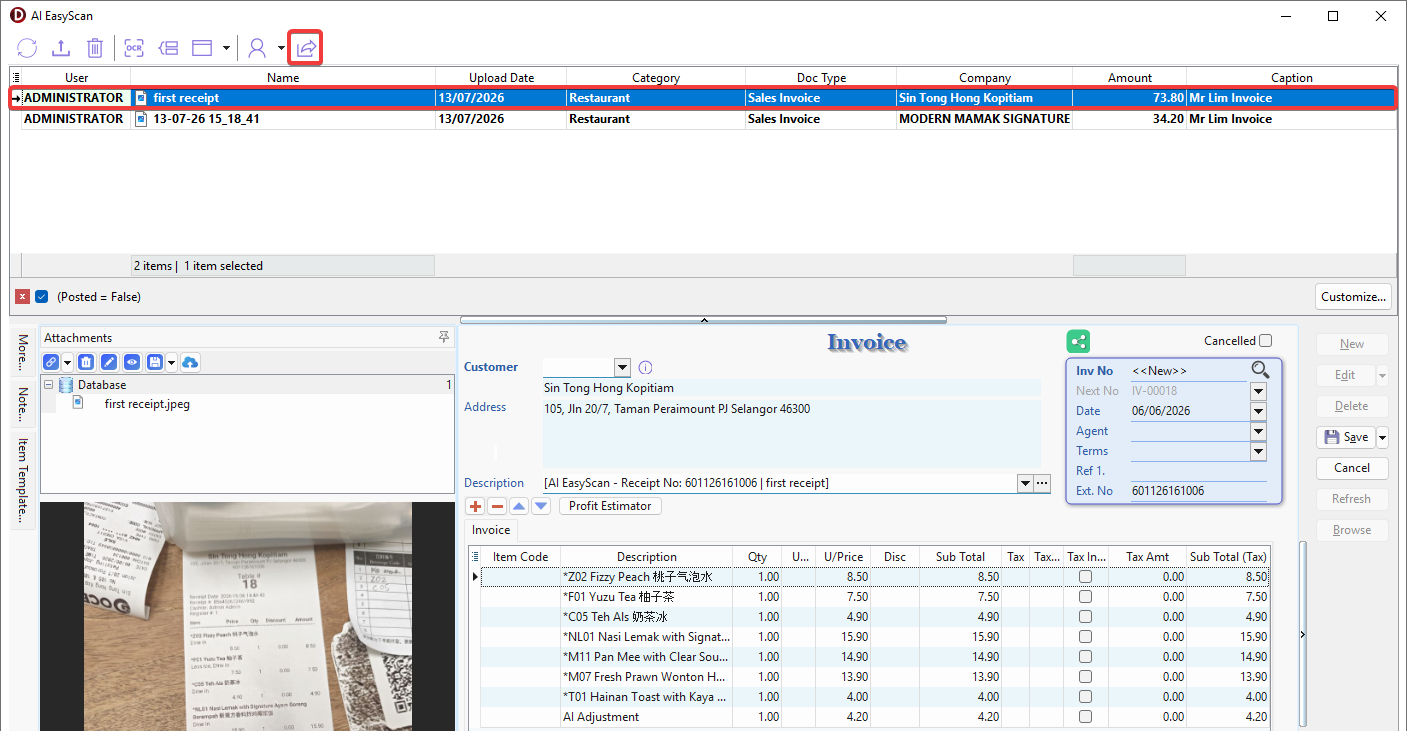
-
Right Click > Share Files....
-
-
Choose one of the following sharing methods to share the file.
WhatsApp Interactive List
-
Register multiple companies by following the steps in Pre-requisite: Registration.
-
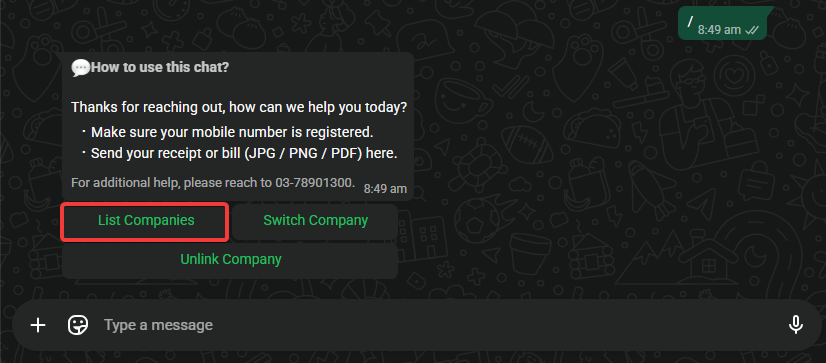
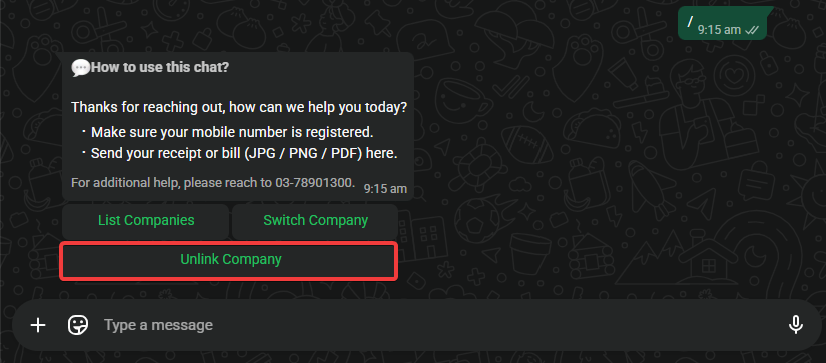
Type "/" to open the help menu.

-
List Companies - Lists all companies registered to this mobile number.
-
Click List Companies.
-
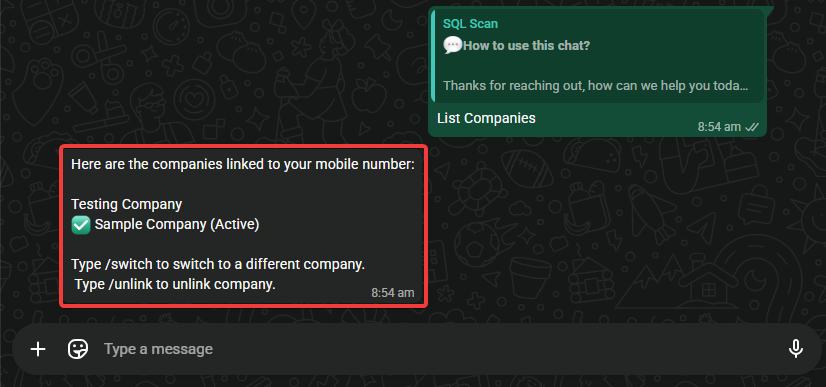
WhatsApp replies with all registered company names, and "✅ COMPANY NAME (Active)" indicates the currently active company.
-
-
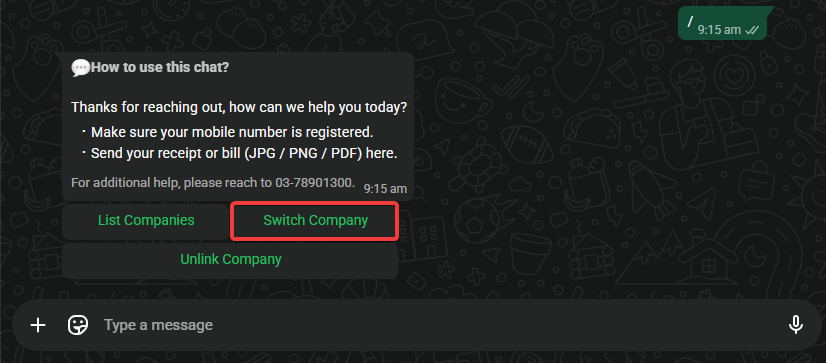
Switch Company - Switch to uploading files for a different company.
-
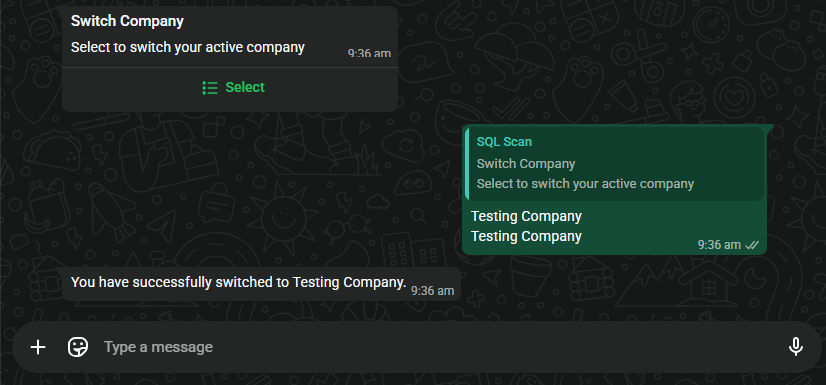
Click Switch Company.
-
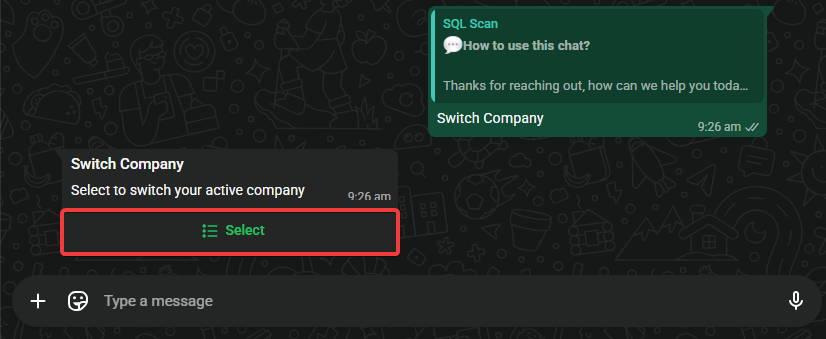
WhatsApp replies with an interactive dialog to switch company > Click Select.
-
Select another linked company > Click Send.
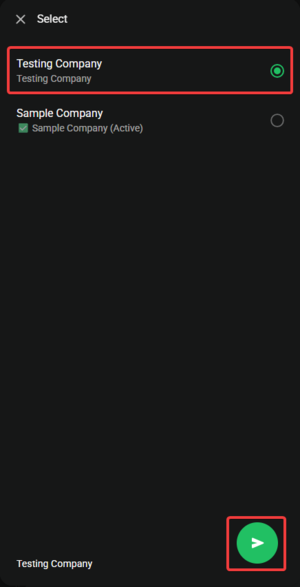
-
WhatsApp replies with "You have successfully switched to COMPANY NAME" indicates the active company successfully switched.
-
-
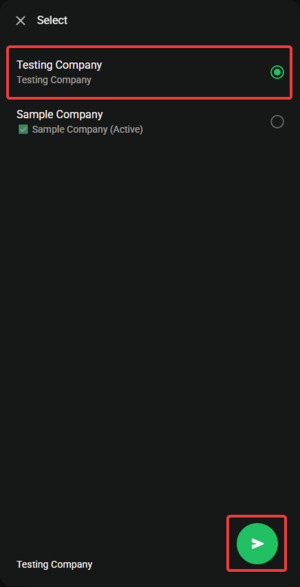
Unlink Company - Deregister a company.
-
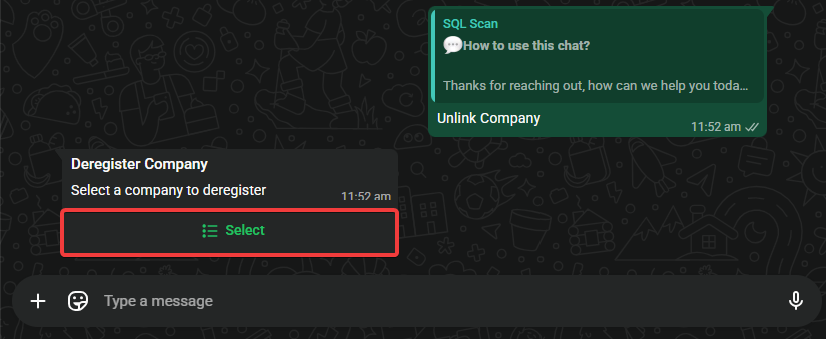
Click Unlink Company.
-
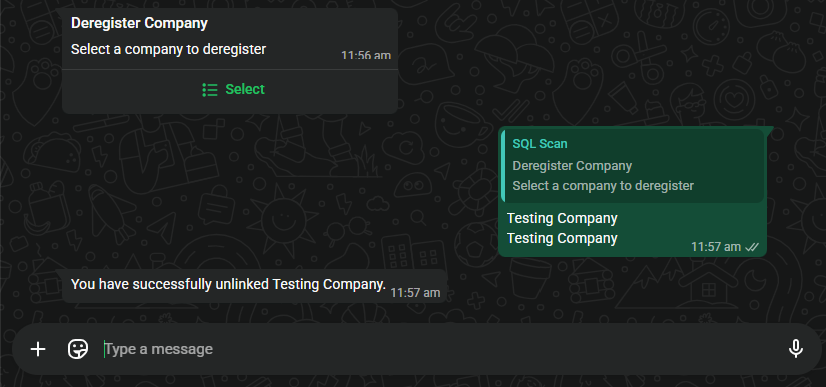
WhatsApp replies with an interactive dialog to deregister company > Click Select.
-
Select the target company to deregister > Click Send.
-
WhatsApp replies with "You have successfully unlinked COMPANY NAME" indicates that the company has been deregistered successfully.
-