Onboarding
To streamline e-invoice submission through SQL Account, you need to go through a simple onboarding process.
Company Profile Setup
-
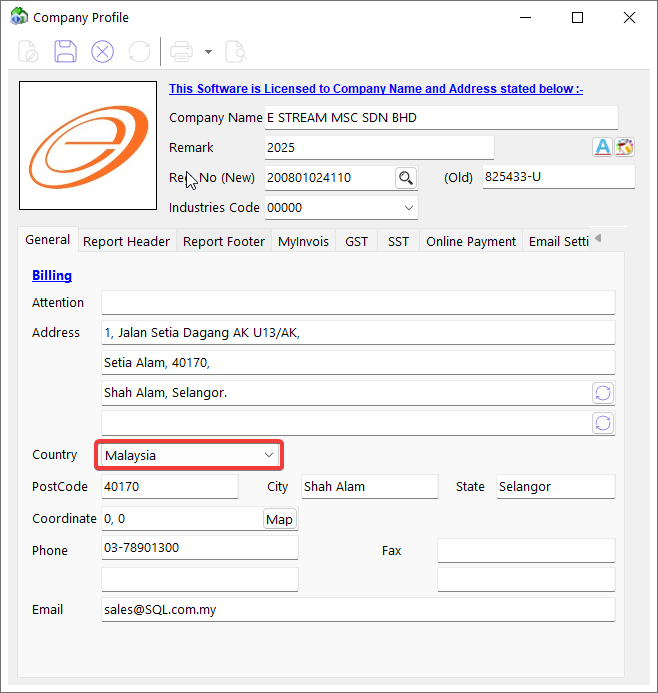
Go to File > Company Profile > General and make sure the country has been set to Malaysia to enable the E-Invoice feature.
-
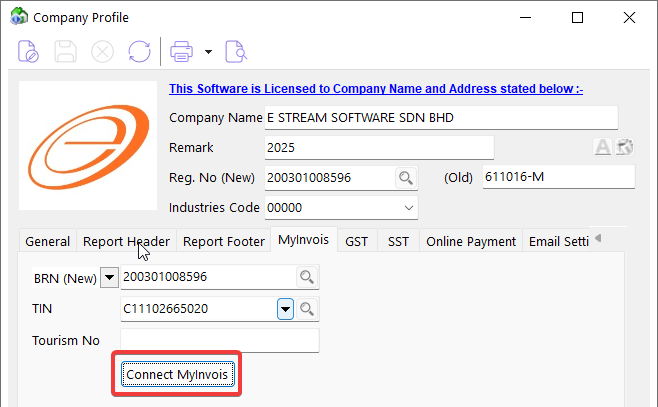
Go to File > Company Profile > MyInvois.
-
Make sure your company registration number (BRN) is filled in correctly. (Click on the magnifying glass to utilize our auto BRN lookup feature)
-
Make sure the TIN number has been filled in correctly.
-
Click on 💾 Save.

-
-
Click on Connect MyInvois to setup your LHDN MyInvois credential.
MyInvois Integration
- The onboarding process consists of 3 steps:
You can skip 1 & 2 entirely and setup Sandbox credentials & Intermediary alone for Testing/Training purposes.

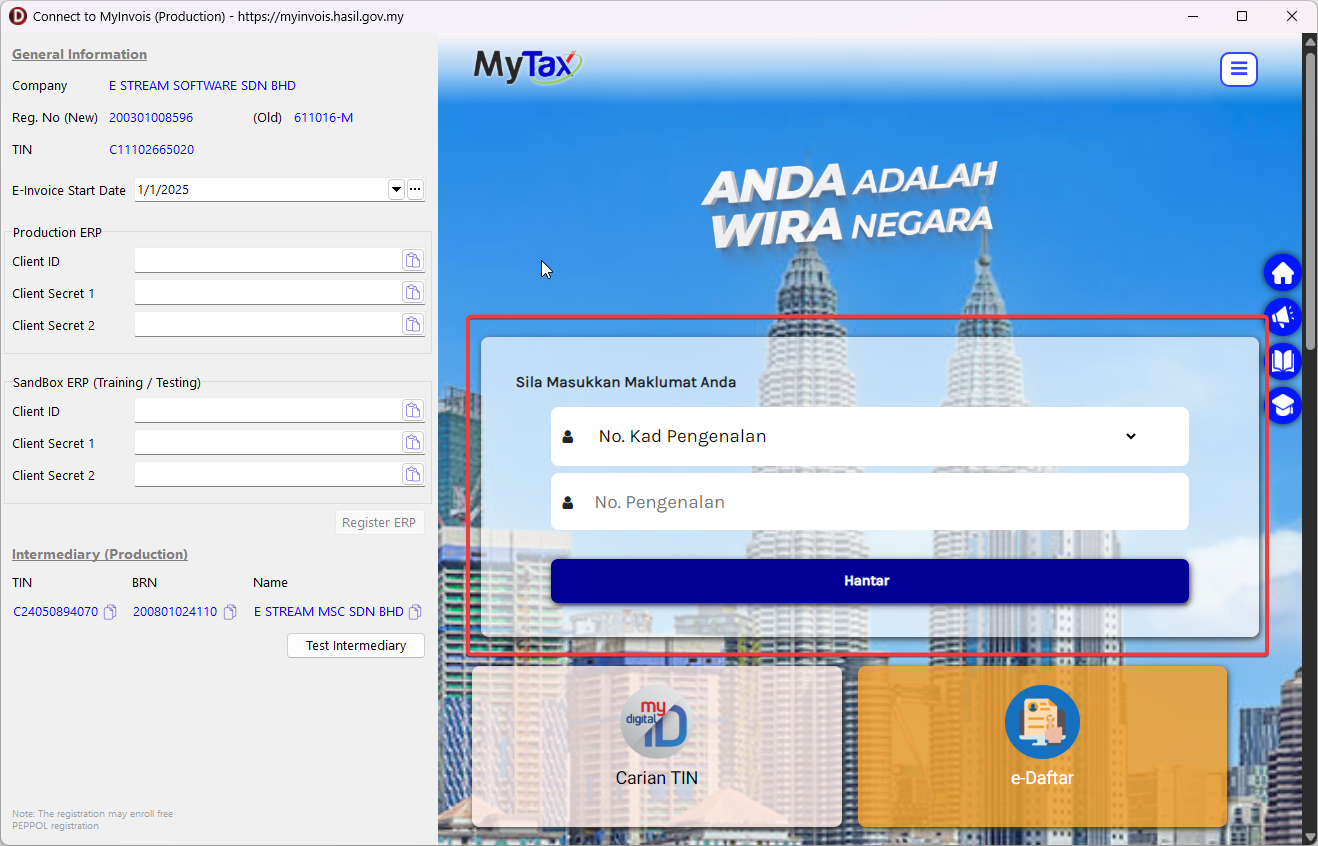
MyInvois Environment (Production/Sandbox)
Production: All your submitted E-Invoices will be acknowledged by LHDN directly.
Sandbox: Information sent to the Sandbox (testing environment) will be solely for testing purposes and no penalty will be imposed.
Follow the table below to setup your desired Environment:
| Start Date | Production Credentials | Sandbox Credentials | Your Environment |
|---|---|---|---|
| Current Date (e.g. Today) | ❌ | ✅ | Sandbox |
| Future Date (e.g. 1/7/2025) | ❌ | ✅ | Sandbox |
| Current Date (e.g. Today) | ✅ | ❌ | Production |
| Future Date (e.g. 1/7/2025) | ✅ | ❌ | Production after 1/7/2025 |
| Current Date (e.g. Today) | ✅ | ✅ | Production with Test Validation enabled |
| Future Date (e.g. 1/7/2025) | ✅ | ✅ | Sandbox first, Production after 1/7/2025 |
E-Invoice Start Date
Purpose of the E-Invoice Start Date:
-
Manage the ability to submit e-invoices in the Production environment. (You will only be able to start submitting e-invoices after the selected start date.)
-
If you begin with the Sandbox (Testing) environment and have completed setting up your Production credentials, you will be prompted to activate your Production environment 7 days before the chosen start date.

The E-Invoice Start Date is not limited to the three provided options. You can set it to any date, such as 1/6/2025, as per your preference.
Production Credentials & Intermediary
You may skip this part if you only intend to try out e-invoice features using a demo database.
-
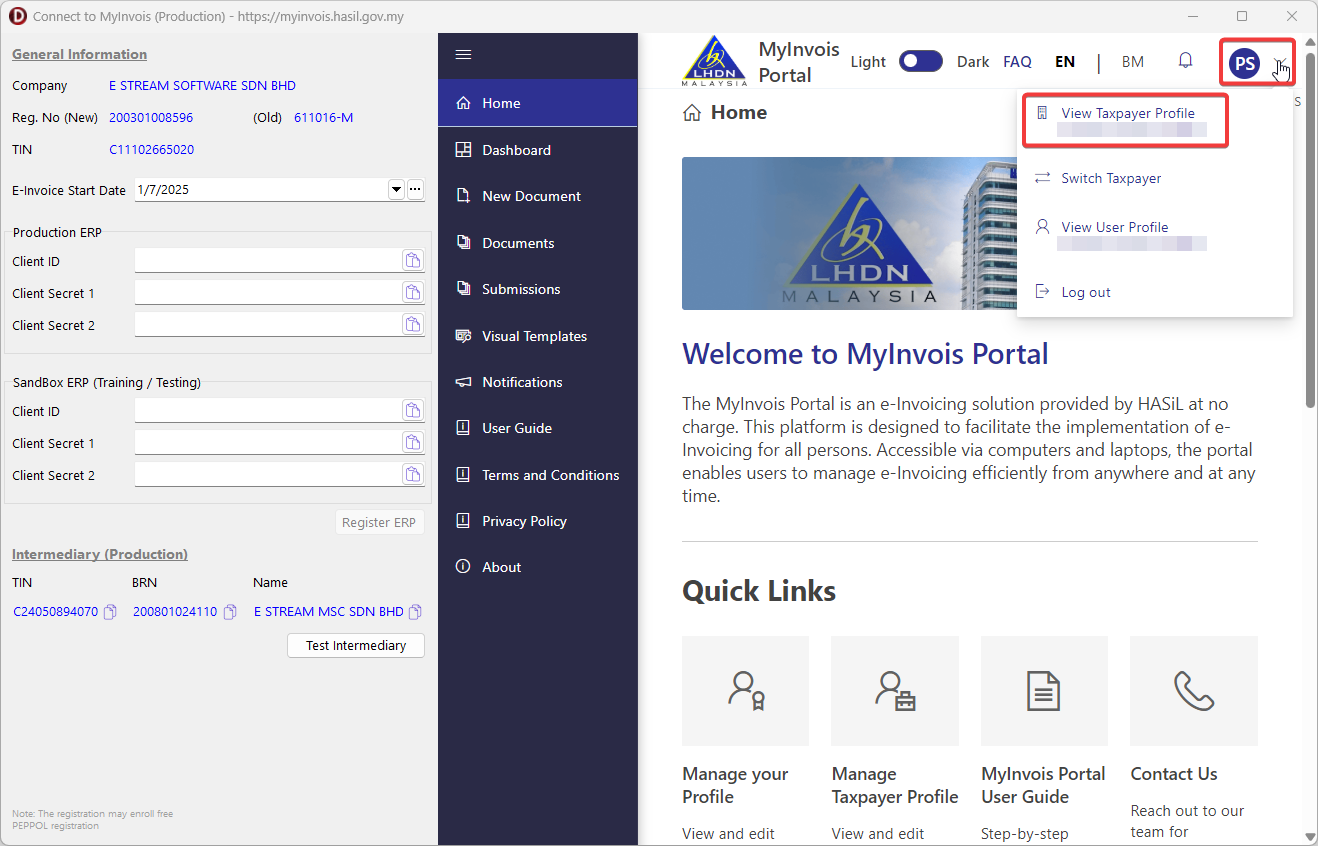
Login to MyInvois Portal on the right side.
-
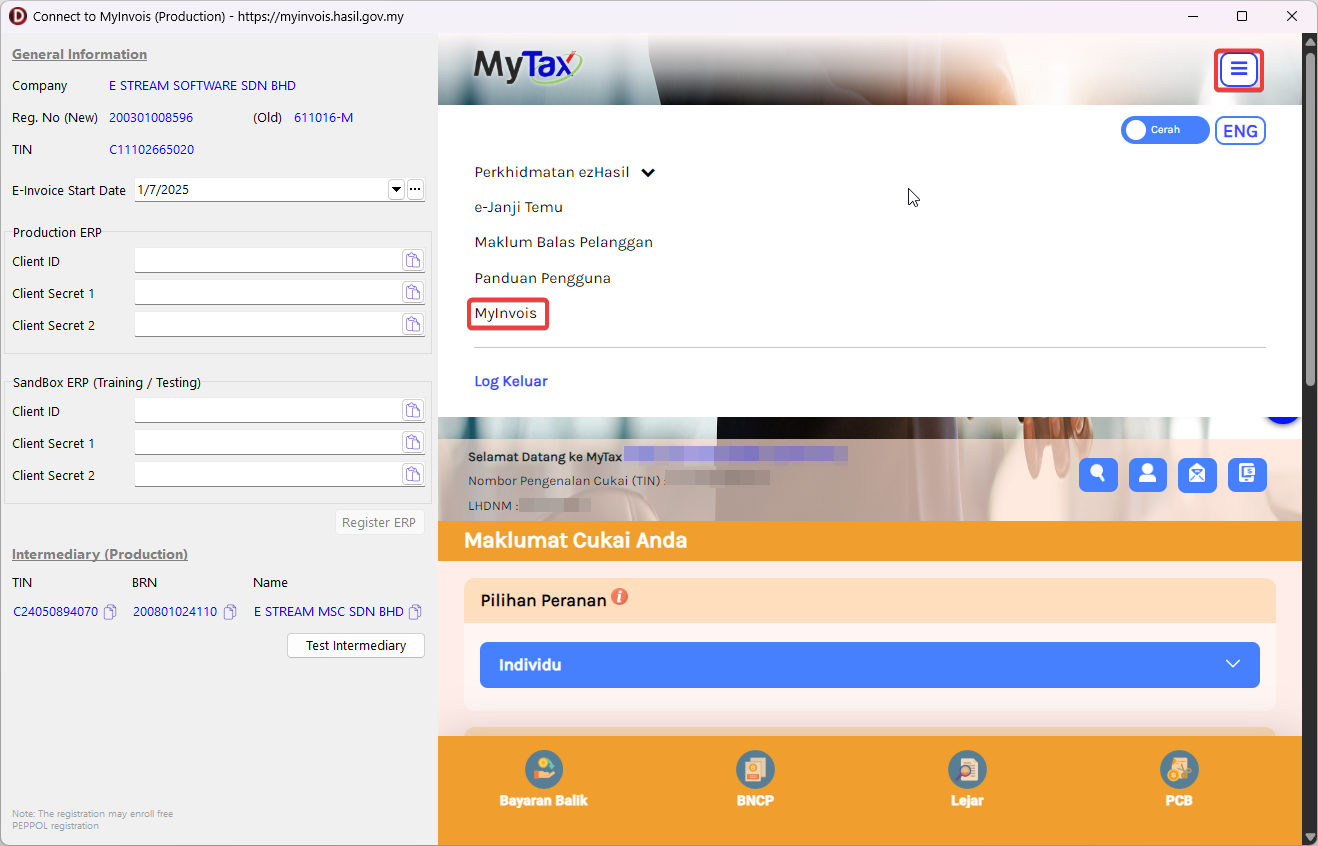
Click on MyInvois.
-
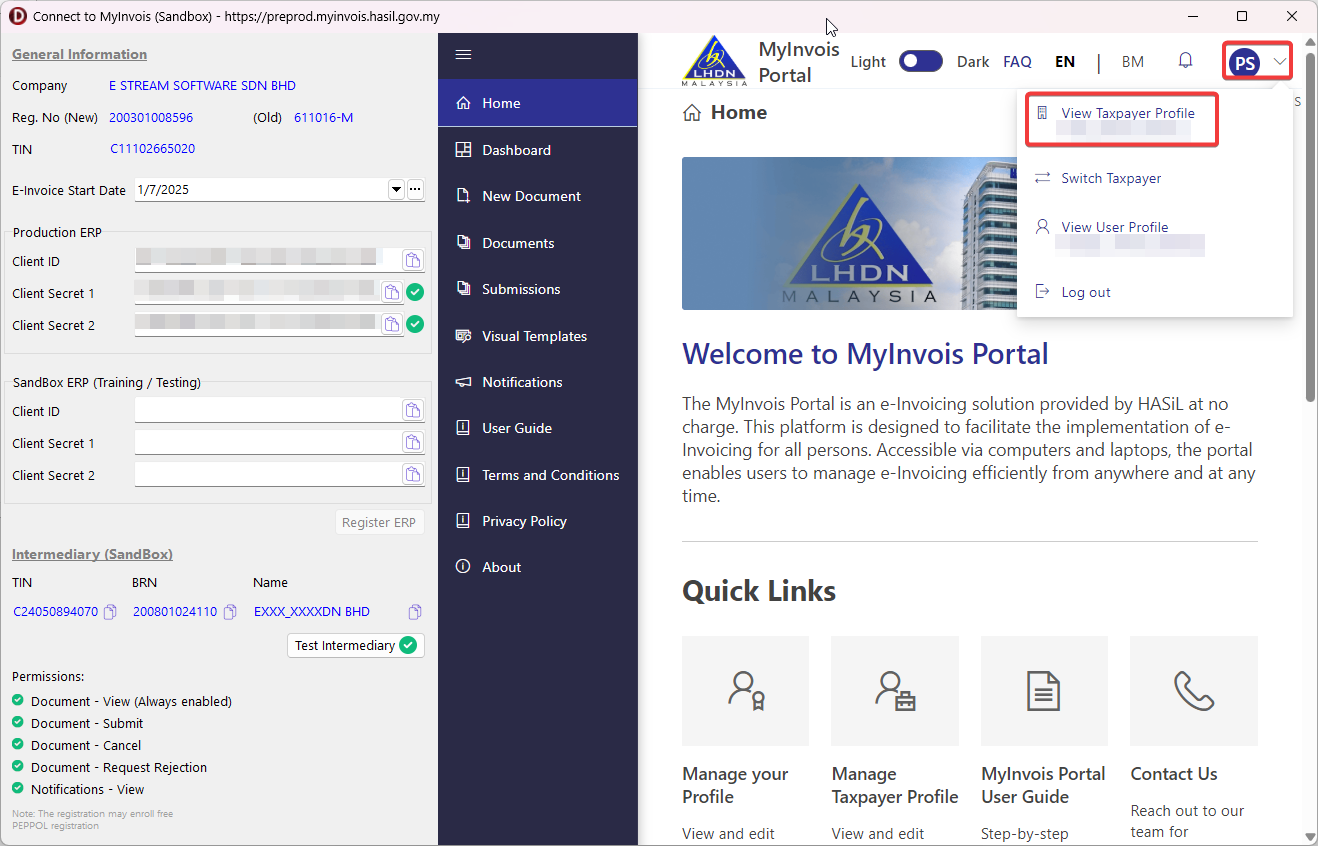
Click on top right, and click on View Taxpayer Profile.
-
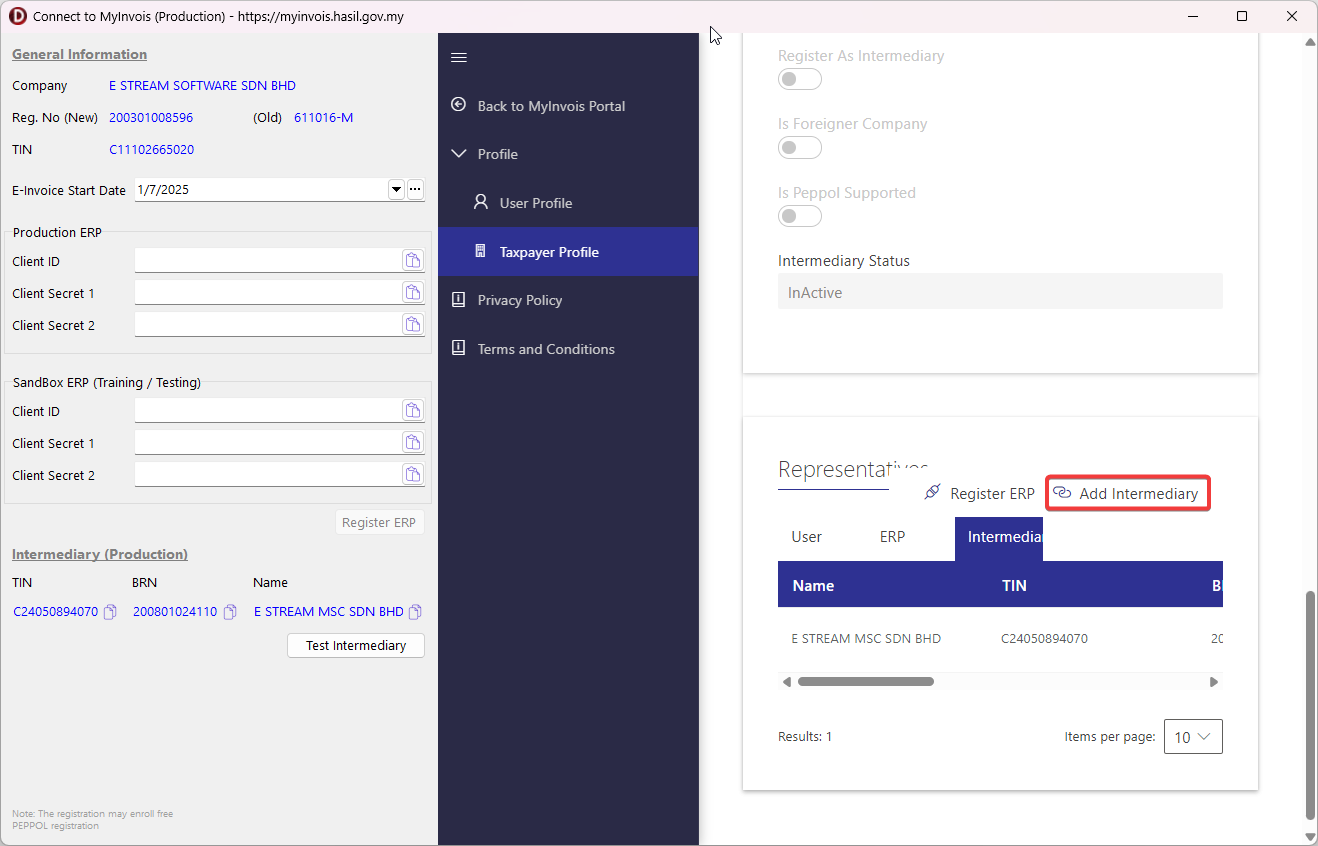
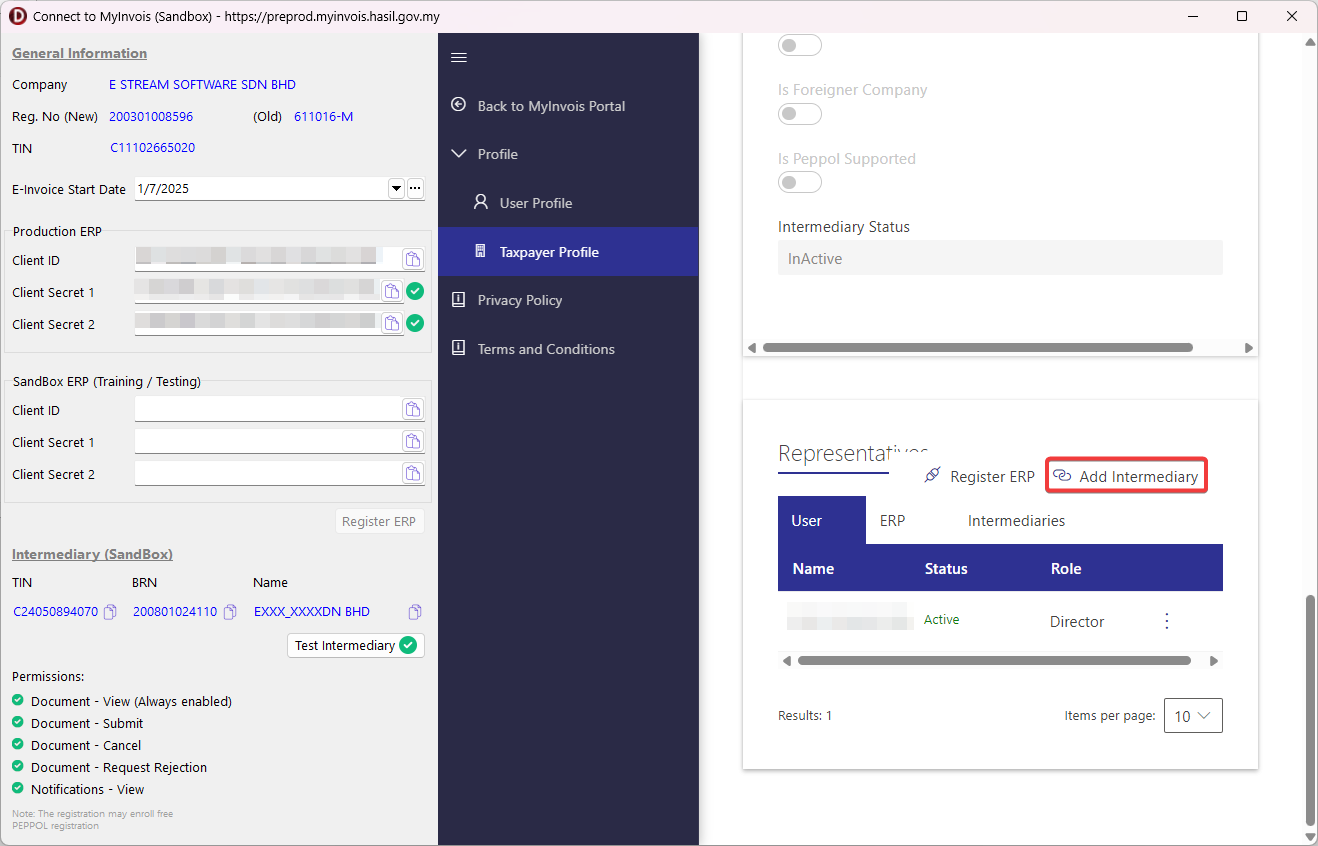
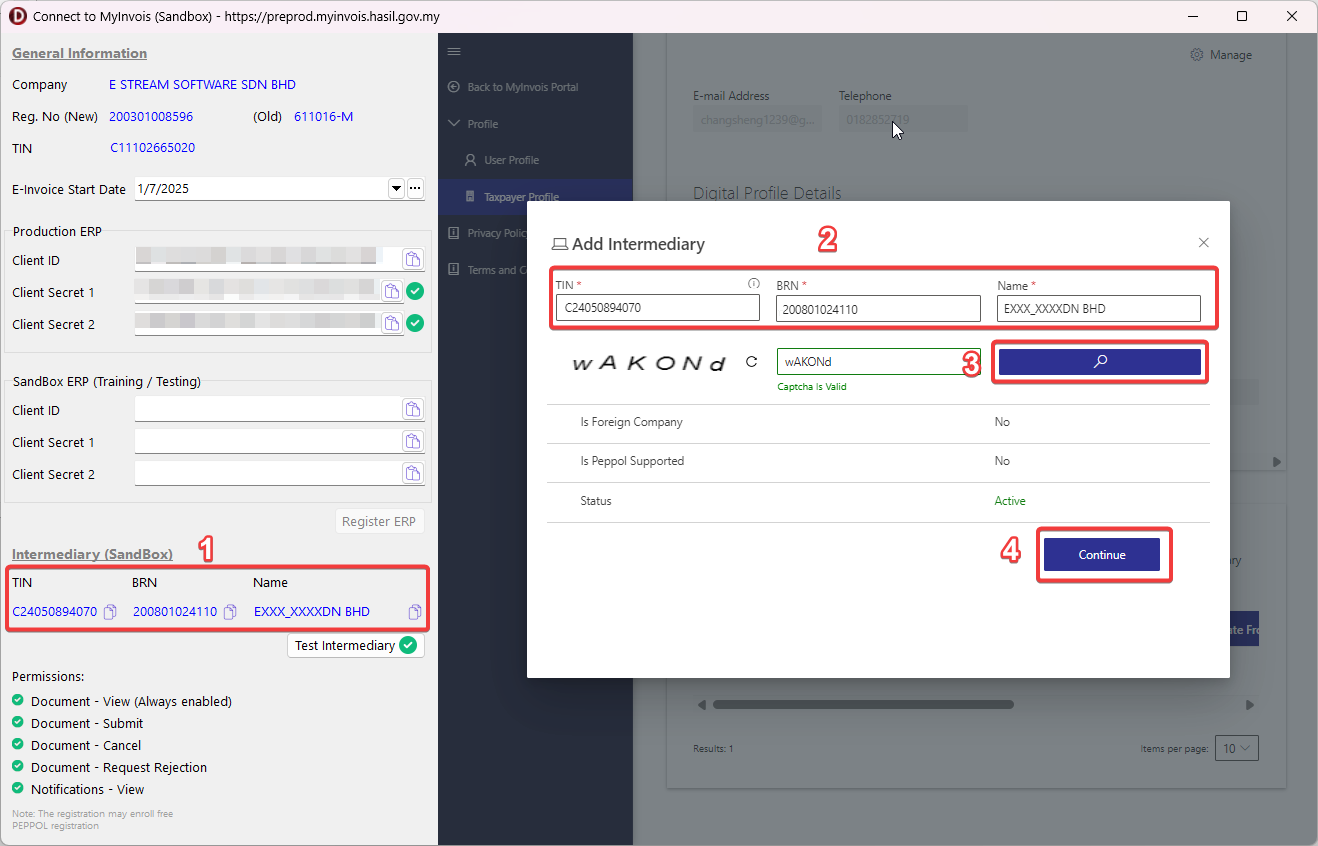
Scroll to the bottom and click on Add Intermediary.
-
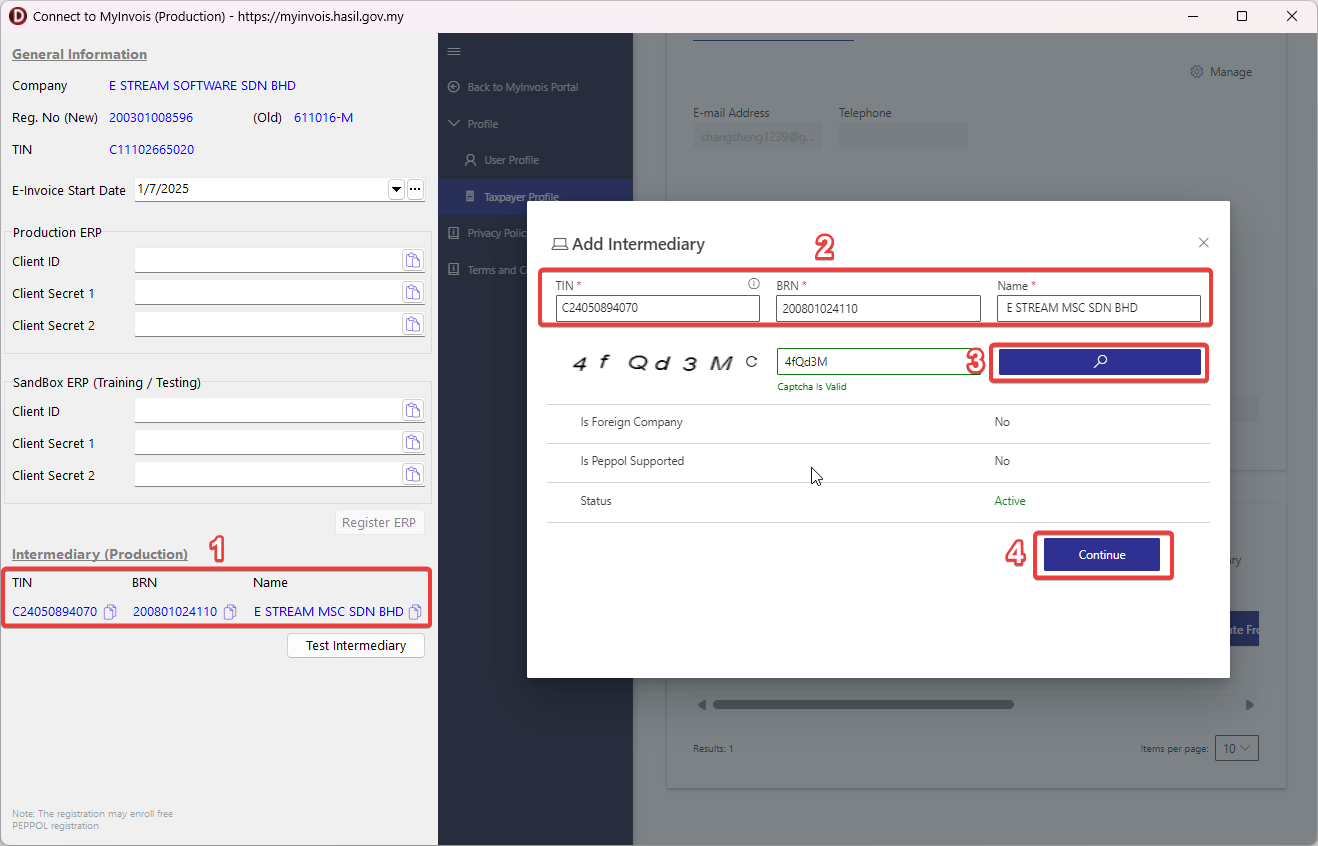
Fill in the TIN, BRN, and Name using the provided info on the left. Enter the captcha and click on Search then Continue.
HelpIf you are unable to see the Continue button, try either one of these:
- hold CTRL then hit "-" (minus) key multiple times to zoom out
- hold CTRL then scroll down to zoom out
- maximize the onboarding window
-
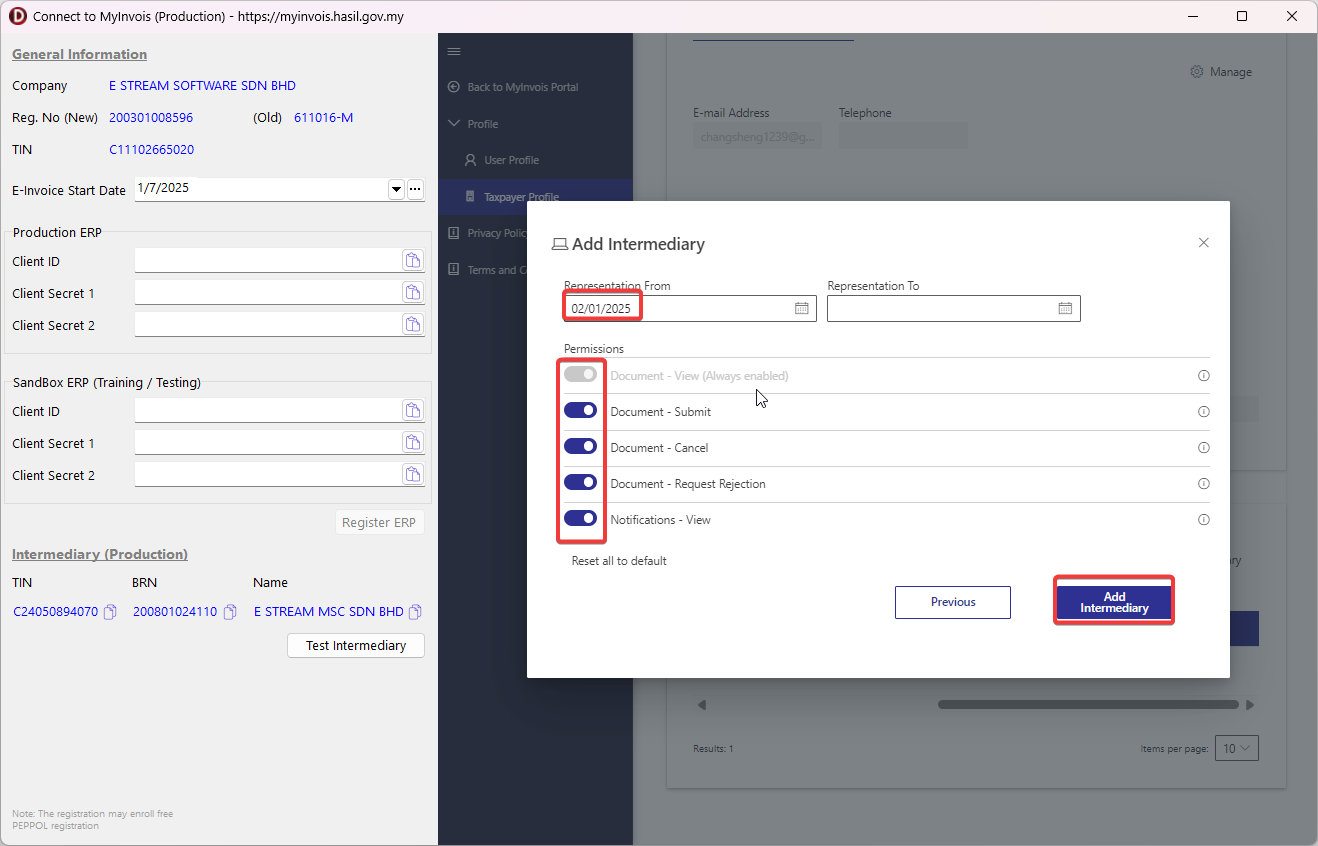
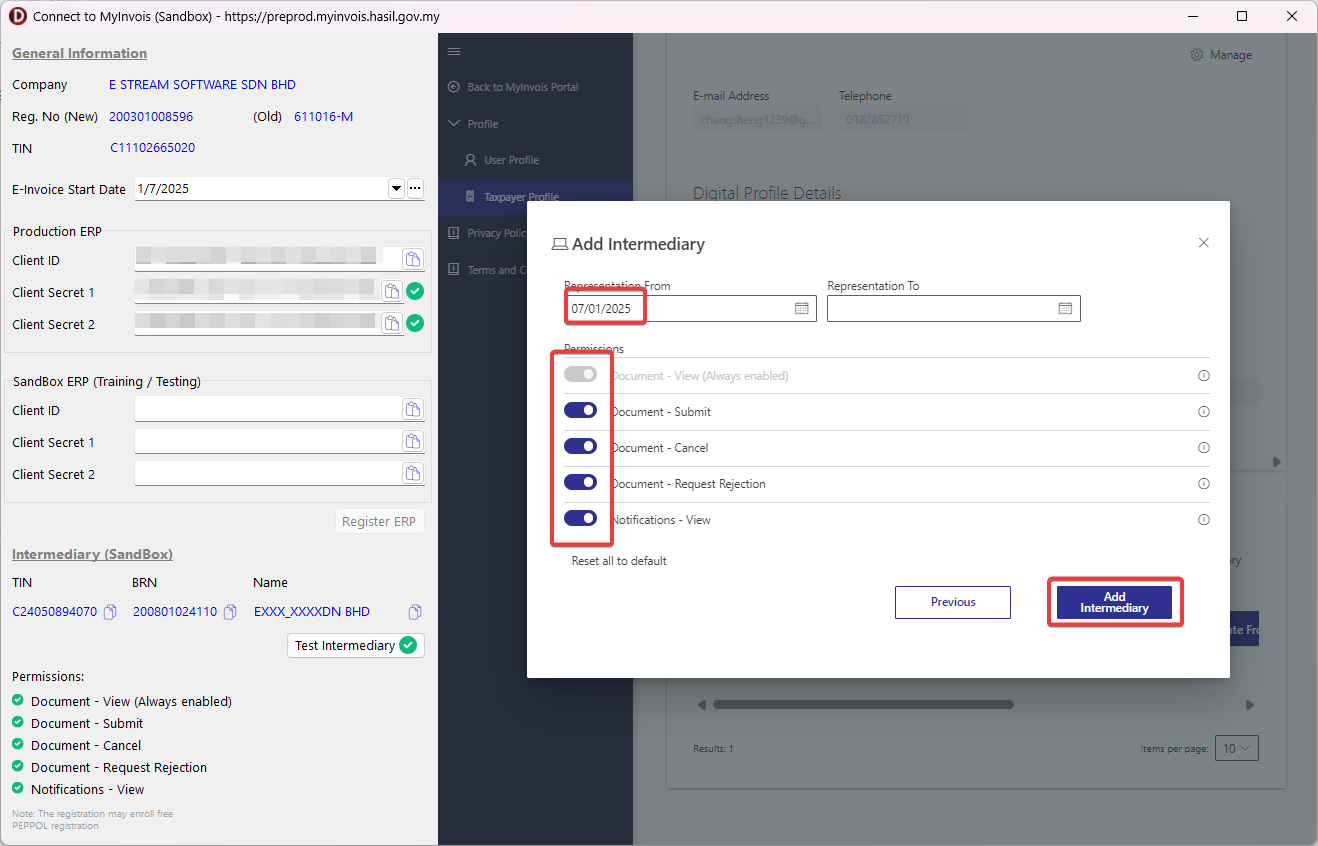
Setup the Representation From, Representantion To (leave empty to avoid expiry), and make sure all permissions have been enabled. Click on Add Intermediary to finish.
-
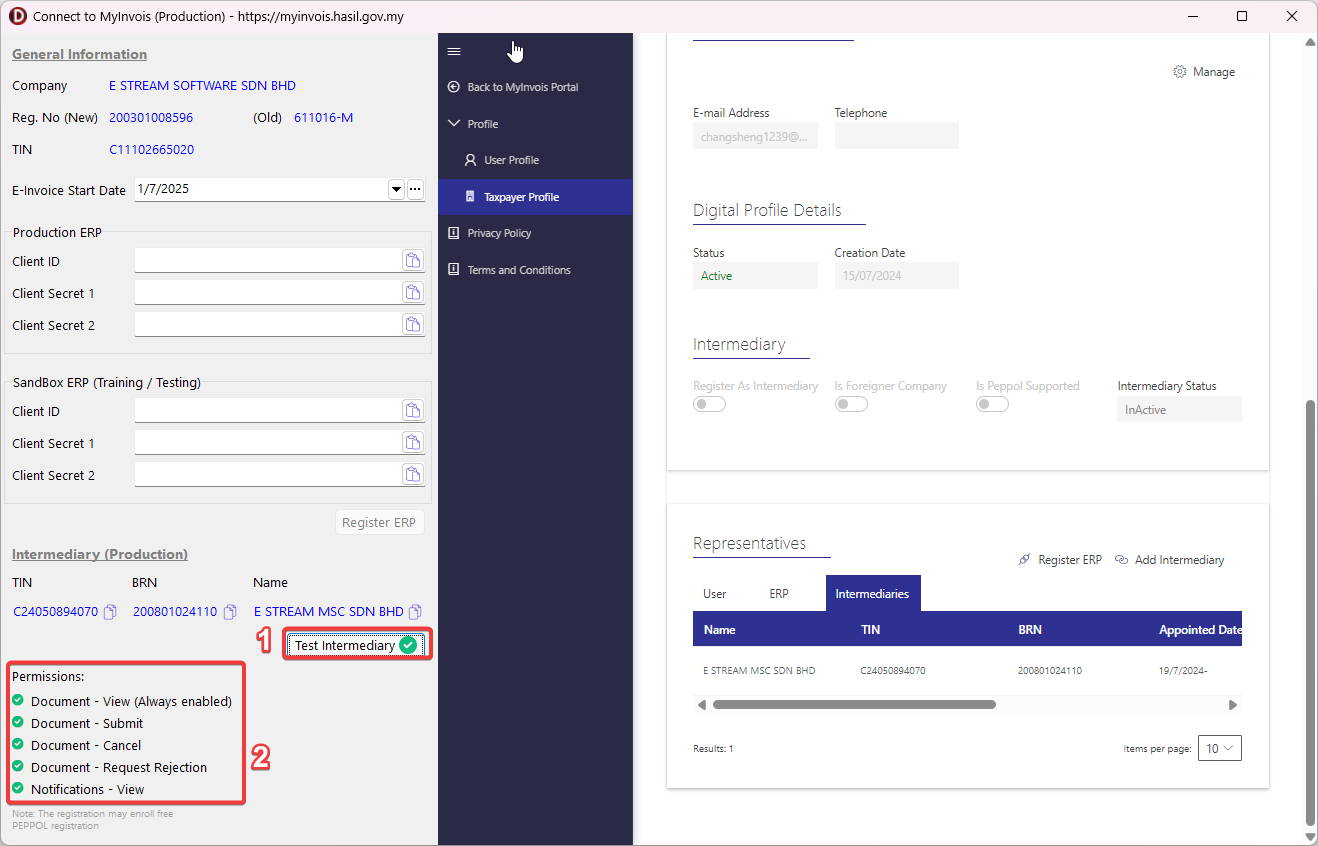
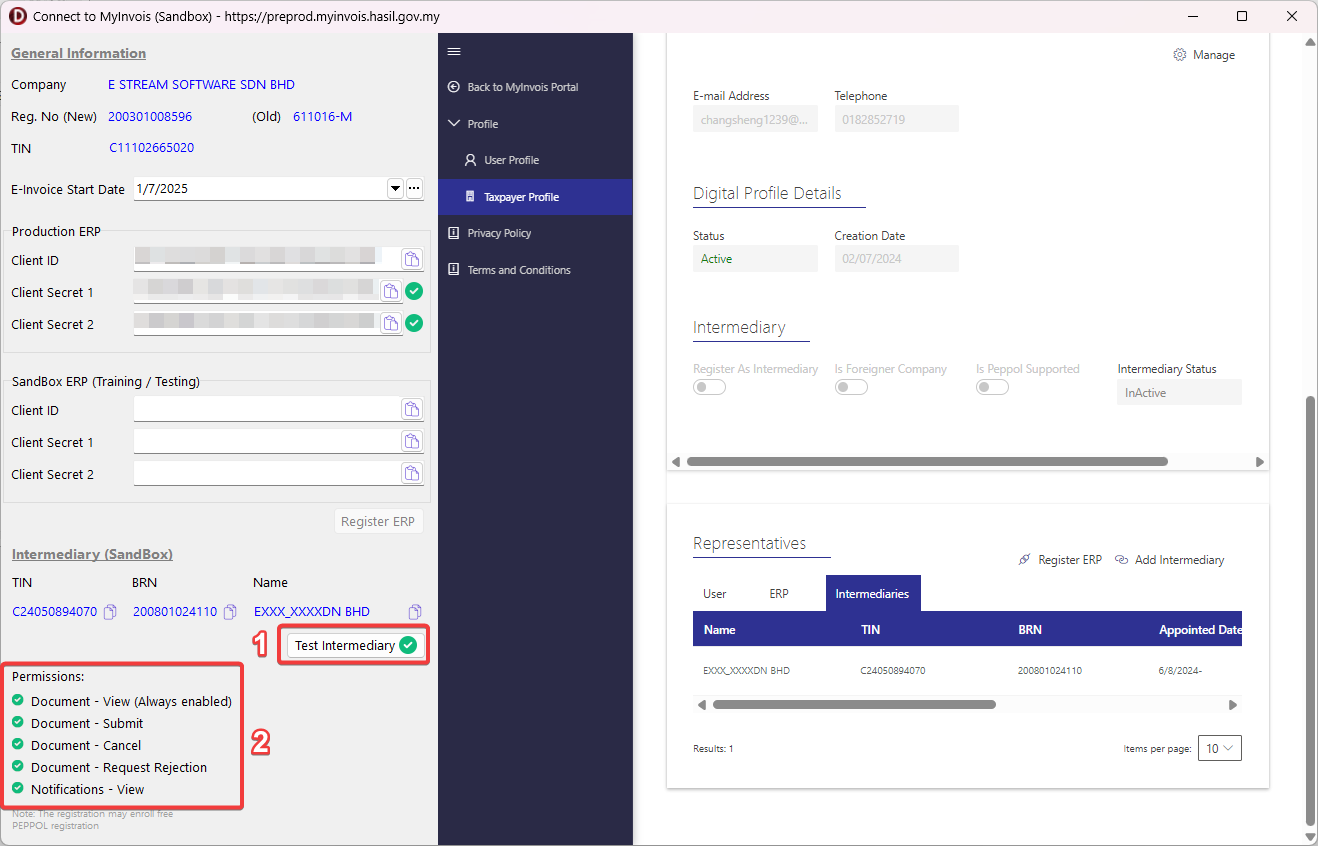
Click on Test Intermediary and you should see that all permissions can be retrieved successfully.
-
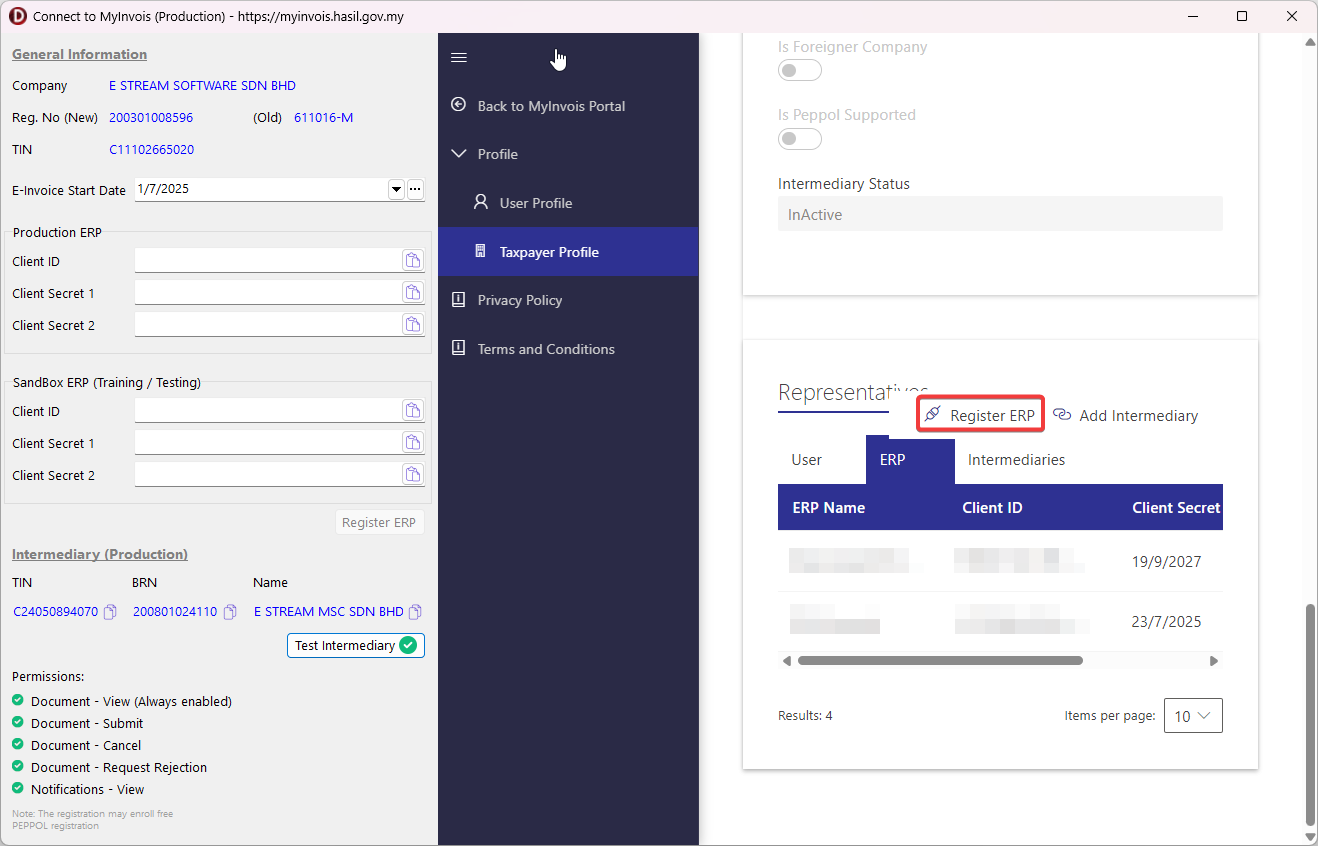
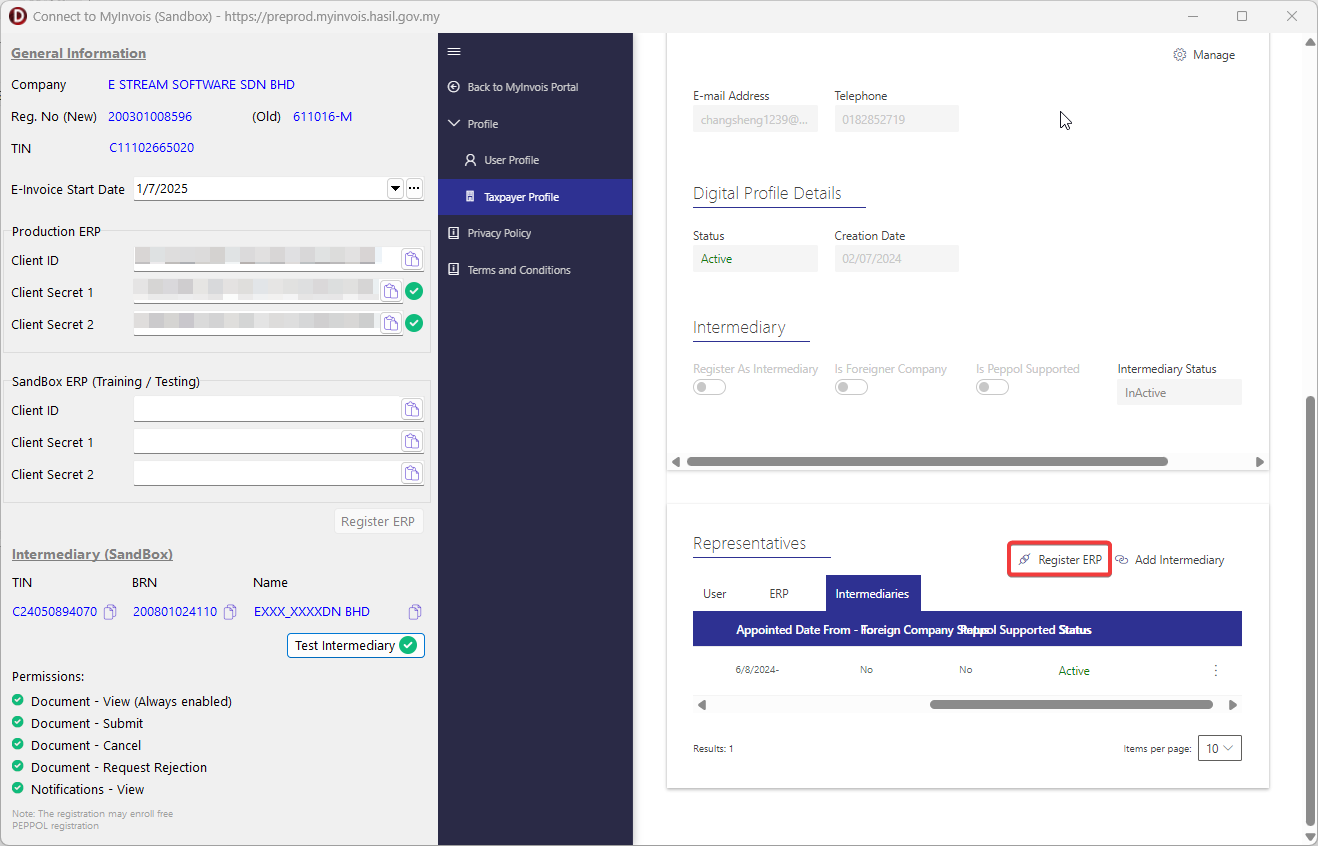
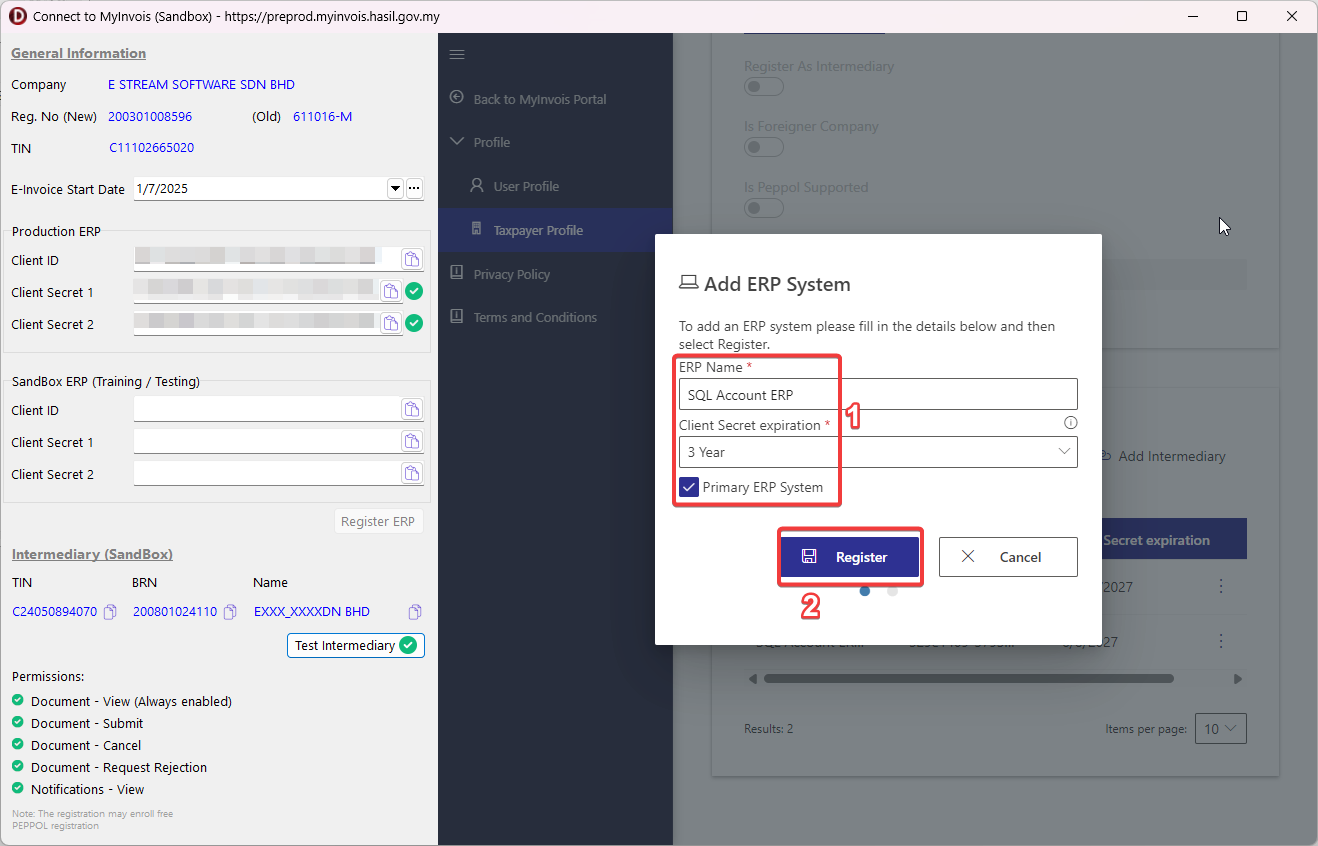
Click on Register ERP.
-
Fill in the ERP Name & Client Secret expiration as below:
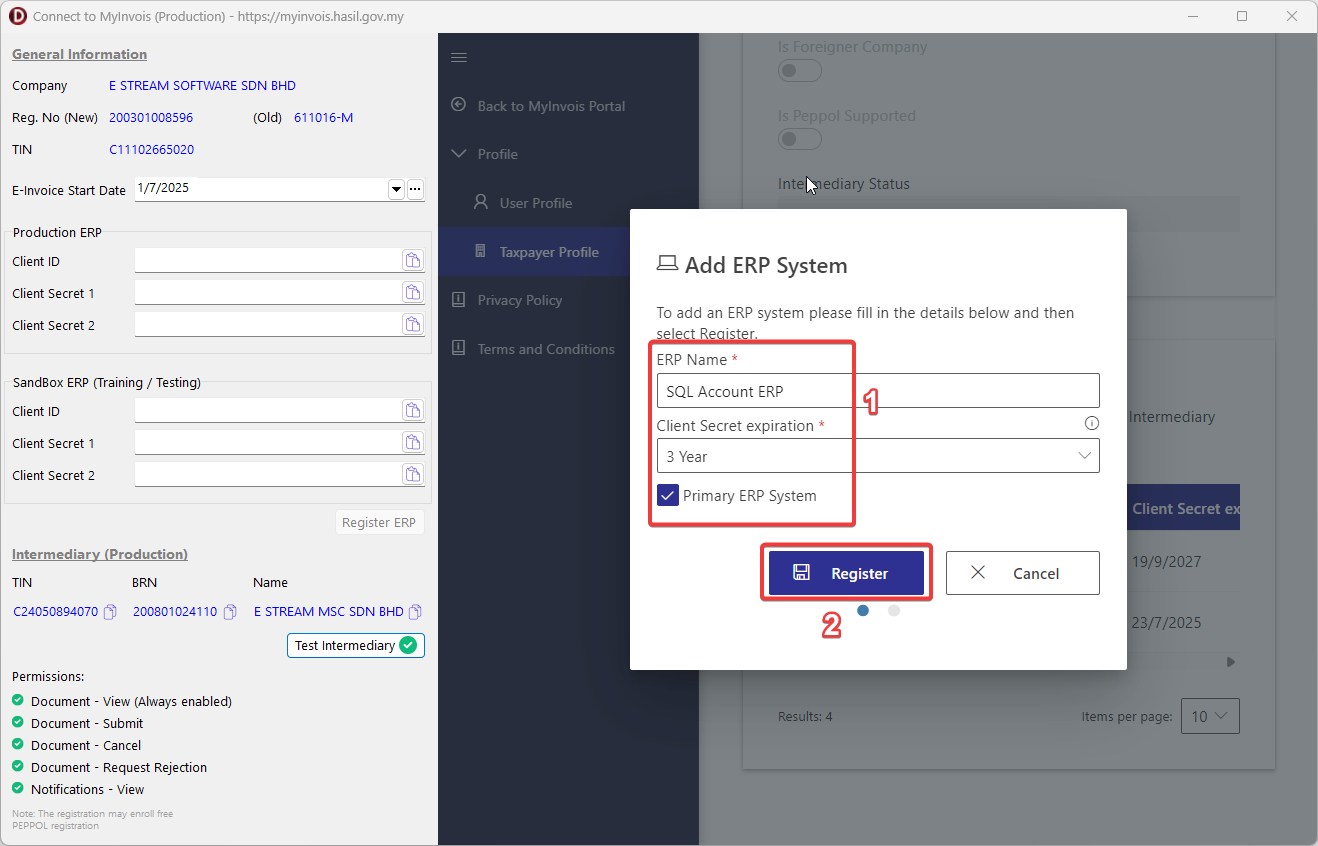
-
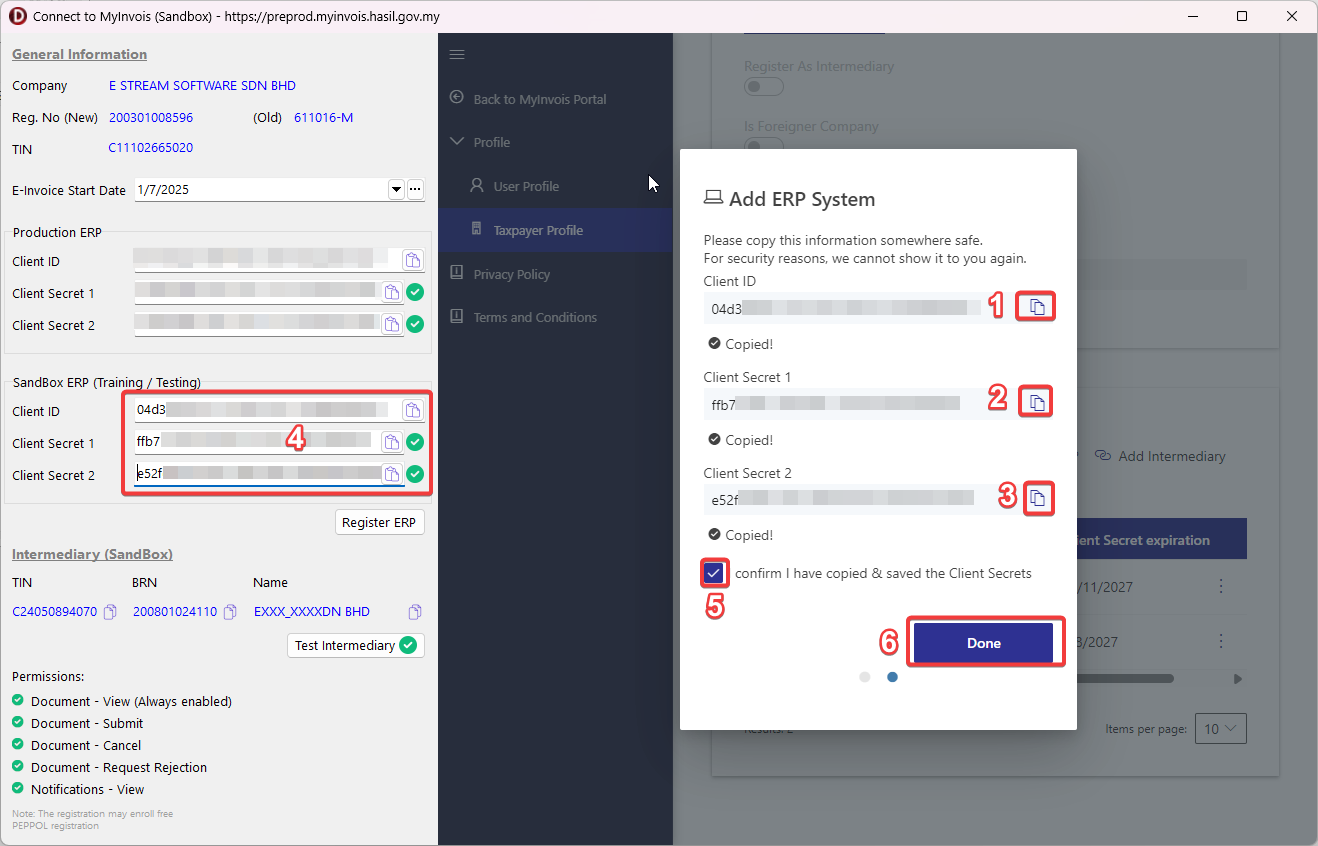
Click on the copy button in sequence as shown below and you should see the client id & secrets are automatically filled on the left. Tick the checkbox & click on Done.
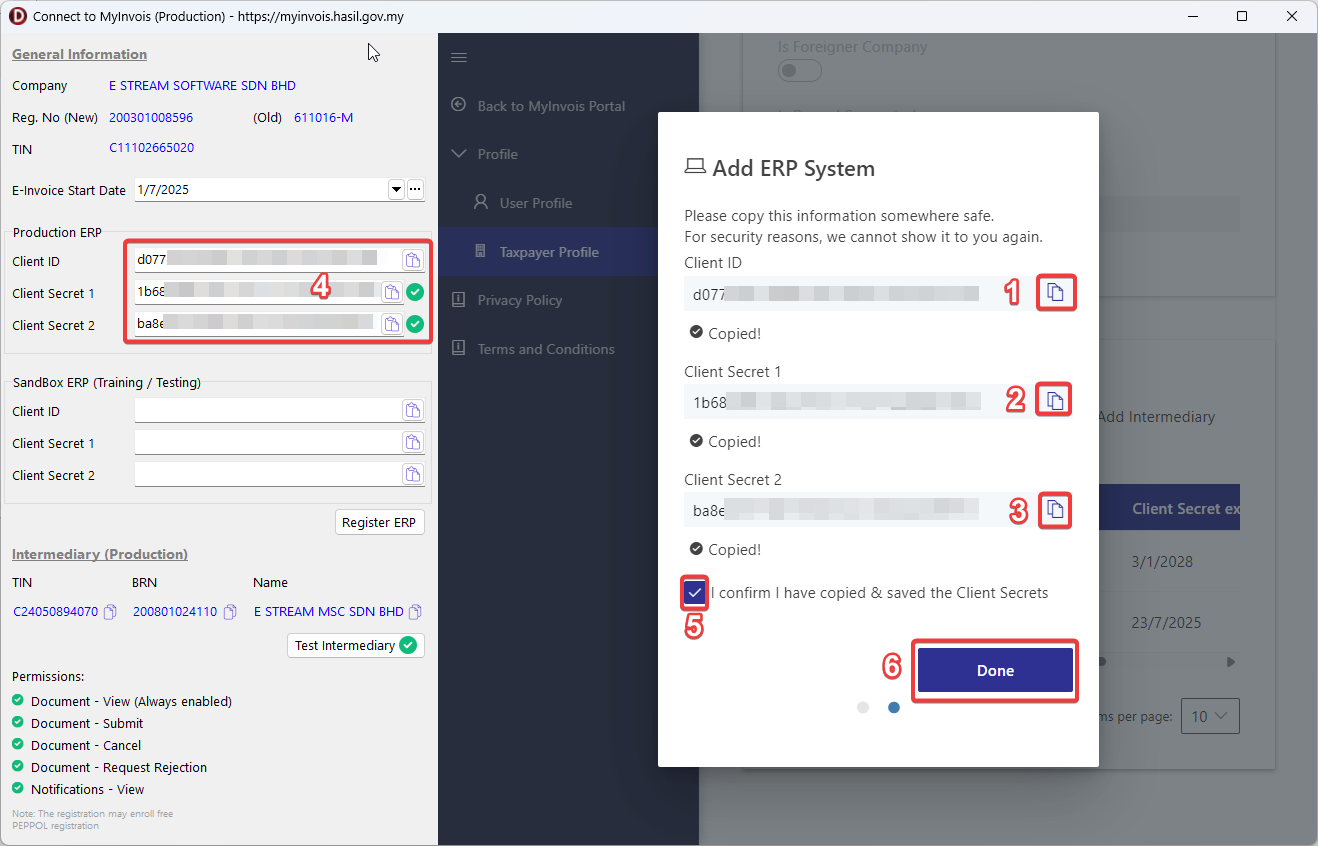
-
If you do not wish to utilize the Test Validation using sandbox feature, click on Register ERP and you're done! You can now start submitting E-Invoice in Production mode.
Sandbox Credentials & Intermediary
You will need to setup Sandbox Credentials if you wish to:
- Utilize Test E-Invoice Validation Feature.
- Training / Testing.
Follow this guide to register for Preprod (Sandbox) MyInvois Portal.
-
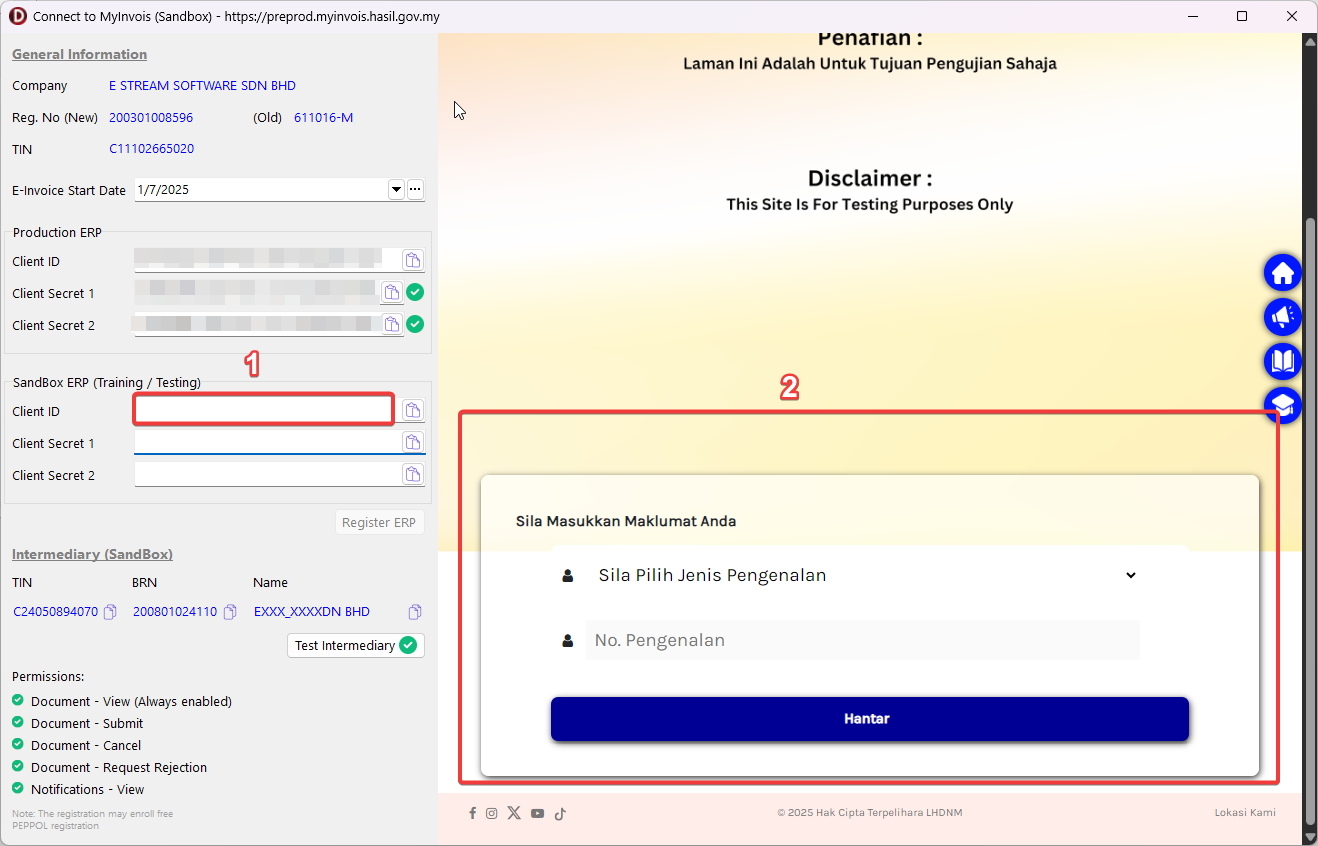
Click on the empty Client ID input and you will see that the right panel now switched to Sandbox MyInvois Portal. Proceed to login.
-
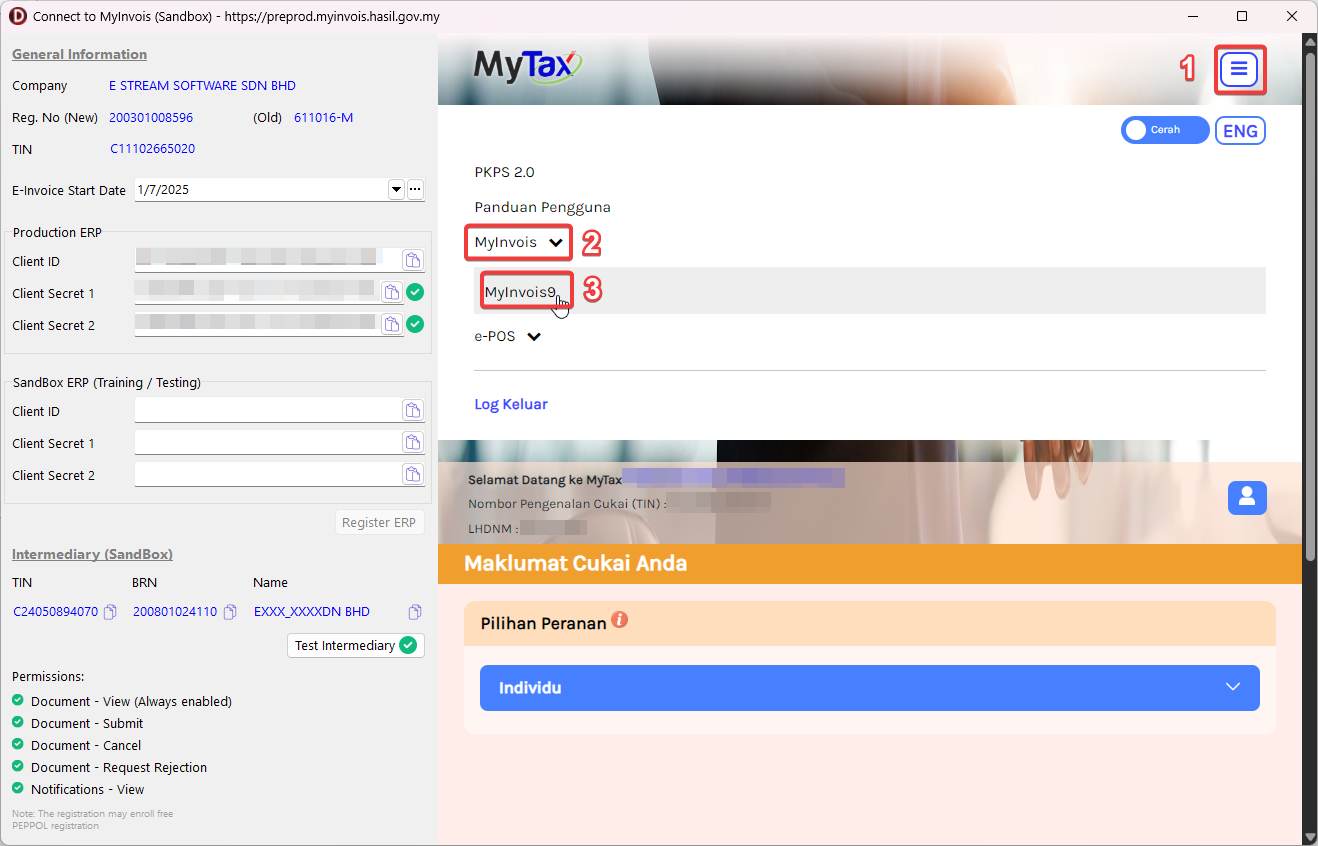
Click on MyInvois9.
-
Click on top right, and click on View Taxpayer Profile.
-
Scroll to the bottom and click on Add Intermediary.
-
Fill in the TIN, BRN, and Name using the provided info on the left. Enter the captcha and click on Search then Continue.
HelpIf you are unable to see the Continue button, try either one of these:
- hold CTRL then hit "-" (minus) key multiple times to zoom out
- hold CTRL then scroll down to zoom out
- maximize the onboarding window
-
Setup the Representation From, Representantion To (leave empty to avoid expiry), and make sure all permissions have been enabled. Click on Add Intermediary to finish.
-
Click on Test Intermediary and you should see that all permissions can be retrieved successfully and remained valid (green).
-
Click on Register ERP.
-
Fill in the ERP Name & Client Secret expiration as below:
-
Click on the copy button in sequence as shown below and you should see the client id & secrets are automatically filled on the left. Tick the checkbox & click on Done.
-
Click on Register ERP and you're done.